As some of you may recall I put on an egg hatching display for my county fair last year.
2011 Egg Hatching Display
It was the first time I'd done anything like that and some of you kindly helped me out with advice.
Last week was the 2012 county fair and another hatching display. With some experience under my belt and somewhat more cooperative weather things came off rather well.
Early to mid-April in North Florida is a variable time of year. We might get lows into the upper thirties or highs to over ninety. It's often foggy in the late night to early morning hours but it can also be quite hot and dry in the afternoons. Trying to keep a Hovabator incubator stable in an outdoor tent in such conditions can be a struggle. But if you're willing to babysit the thing it can be done.
This year I decided to serve two purposes with the hatch. The first being the display of course, but also get started on my Production Easter Egger breeding project. It seems like no matter where I order them from the average flock of Easter Eggers are highly variable in their output. For every one that lays a large size or better nicely colored egg with good shell qualities I'll get one that never sizes up to larger than a medium, or the color is poor, or the shell quality isn't good. Since I sell eggs and try to include at least one nicely colored blue or green egg in every dozen of a size large enough not to rattle around in the carton this meant keeping a larger flock of Easter Eggers than I really wanted. What was needed was a more productive, better quality bird. Can't order them so I'll have to see if I can't produce them myself.
To accomplish this I put a white EE rooster in a layer tractor of ISA Brown red sex-link hens. Another white EE rooster in a different tractor containing White Leghorns. And in my EE tractor I put a White Leghorn rooster. Three tractors, three separate flocks, three different roosters. Selected the best looking eggs over several days and had my starting point.
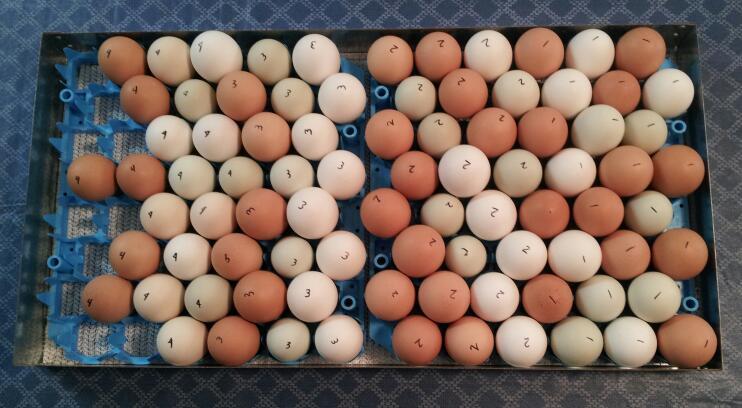
Here are the eggs we started with:

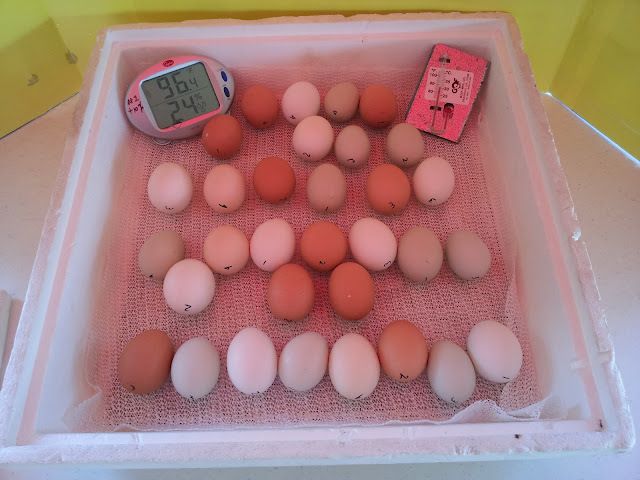
We set 86 eggs. A lot more than will be needed for the fair, but I want to be sure to have enough viable, about-to-hatch, eggs come fair open along with extras in case something goes wrong at the fairgrounds and I have to rush more over. Ordinarily I try to have my hatches finished in 48 hours from start to finish, but the fair runs over the span of four days and it would be nice to have eggs hatching all the while. To accomplish this we divided the eggs into four groups then set each one twelve hours apart so that they would be more likely to span the four days (thanks rebelcowboysnb!).
Here they are at the end of the forty eight hour period when they have all been set.
And another of them in the incubator. The humidity was still coming up so what you see in the picture is not the range I normally keep it at.
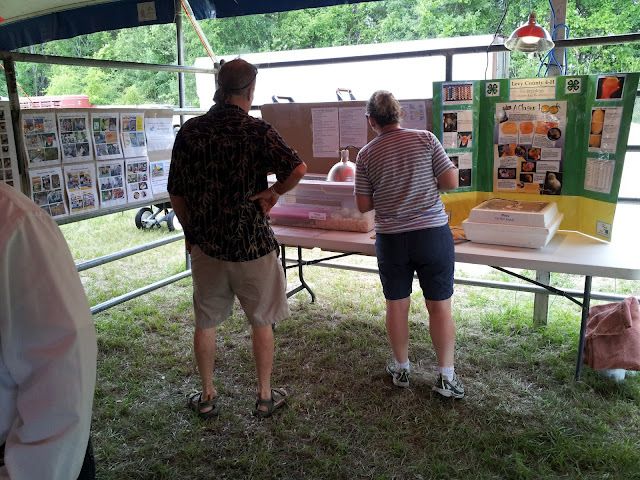
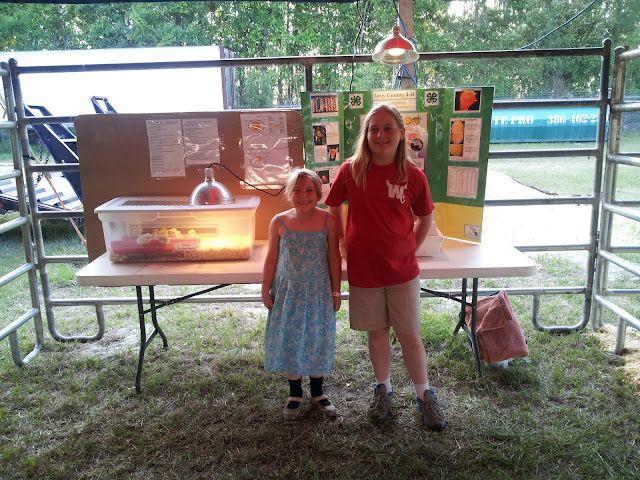
Nothing left to do now but wait for the first candling at day ten and build the displays. I've been looking for stuff to use ever since last year so I had a good bit to get ready. Some stuff I could only get as .pdfs so had to have them printed myself while others I could buy ready made, but did not come laminated which is a good idea if you want to use them year after year. Fortunately the copy shop in Gainesville can print color up to thirty six inches wide and can laminate the same. It's not cheap, but it can be done.
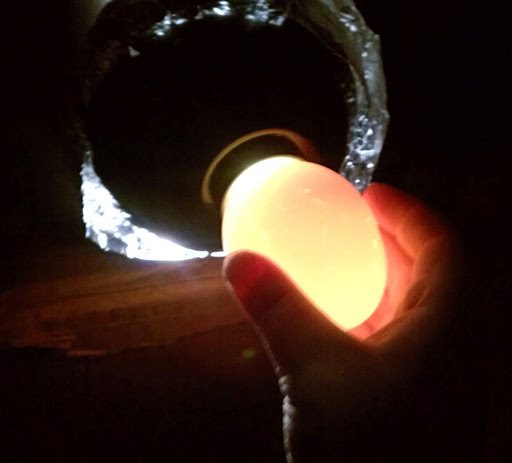
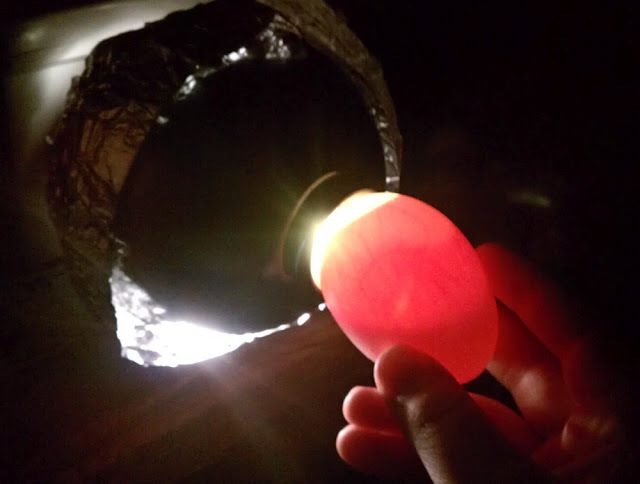
The ten day candle:
My oldest daughter does all the candling with me and my youngest has been wanting to learn as well so this year she sat in too. We jovially bicker about what we see and everyone has fun.
We set 86 eggs and found 26 "clears" or eggs that were not fertile. All of them were brown or white so it seems like the EE boys I had in with the the ISA Browns and White Leghorns were slow coming off the mark. None of the green/blue eggs were clear so Slick the White Leghorn rooster had been getting his job done. If you've ever had a Leghorn you'll know they are too full of themselves not to take their work seriously!
We're still getting the hang of taking candling photos, but considering we had too much light leakage and were only using a phone camera we were happy.
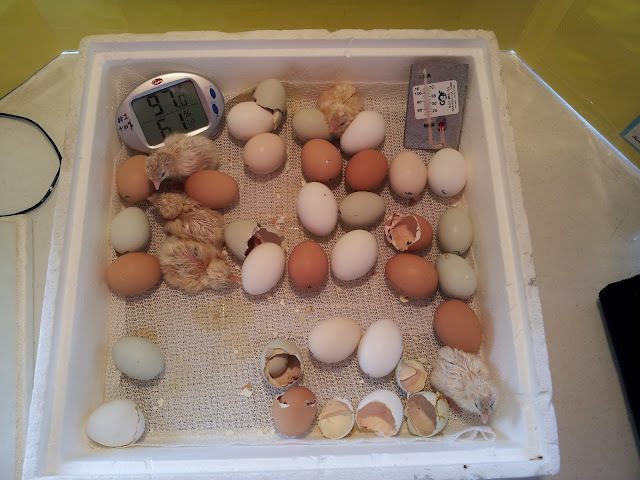
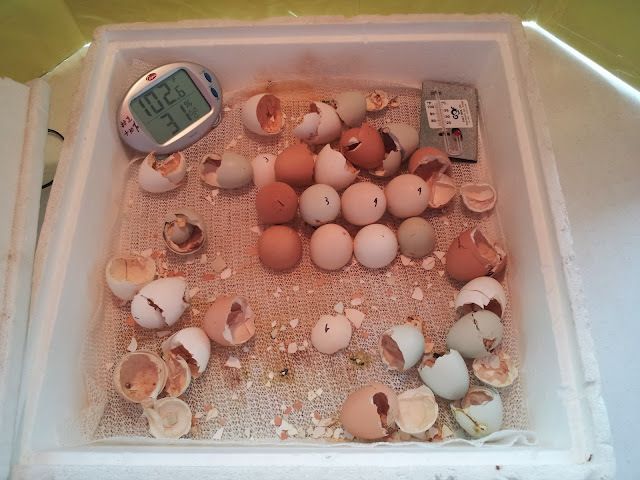
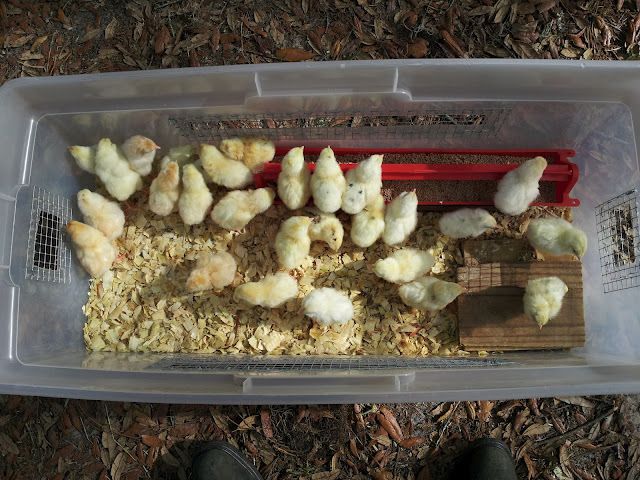
Ten days in we had sixty developing eggs and there was nothing left to do but allow Mr. Dickey to finish doing the thing he does so well. Back to working on the display until day eighteen. We took no photos of the day eighteen candle as a properly developed egg is only going to show a large dark blob pretty well filling the shell but for the air cell at top. We found only two "quitters" or eggs that had died in development. Fifty eight eggs ready to hatch.
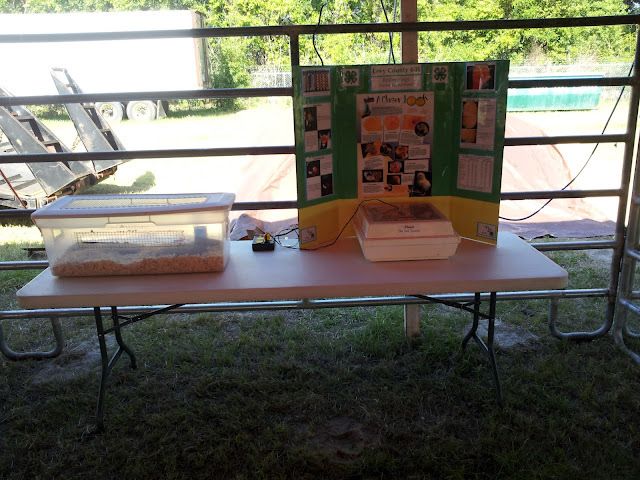
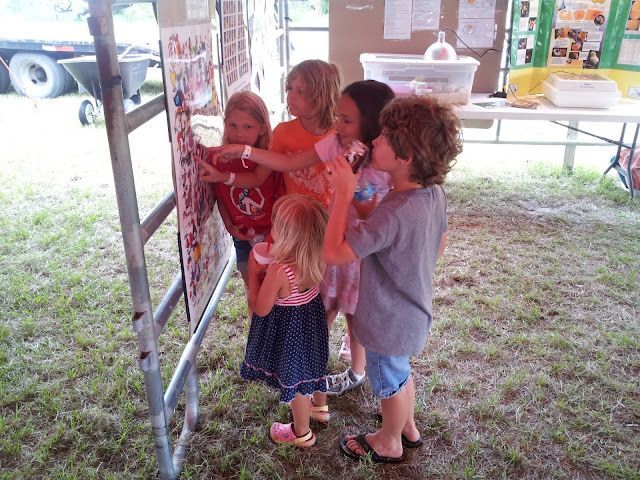
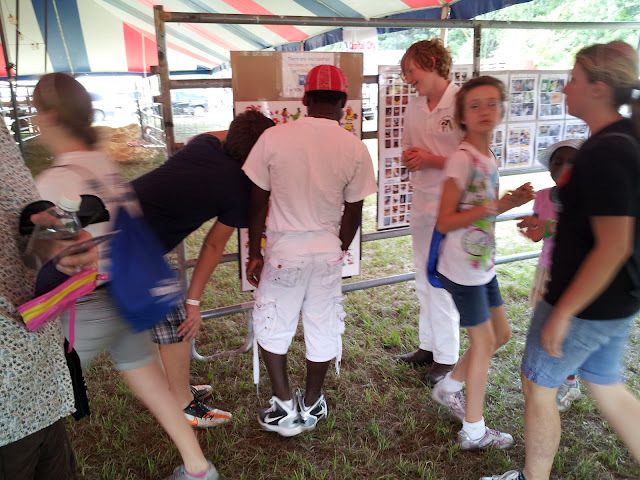
On to the Fair!
2011 Egg Hatching Display
It was the first time I'd done anything like that and some of you kindly helped me out with advice.
Last week was the 2012 county fair and another hatching display. With some experience under my belt and somewhat more cooperative weather things came off rather well.
Early to mid-April in North Florida is a variable time of year. We might get lows into the upper thirties or highs to over ninety. It's often foggy in the late night to early morning hours but it can also be quite hot and dry in the afternoons. Trying to keep a Hovabator incubator stable in an outdoor tent in such conditions can be a struggle. But if you're willing to babysit the thing it can be done.
This year I decided to serve two purposes with the hatch. The first being the display of course, but also get started on my Production Easter Egger breeding project. It seems like no matter where I order them from the average flock of Easter Eggers are highly variable in their output. For every one that lays a large size or better nicely colored egg with good shell qualities I'll get one that never sizes up to larger than a medium, or the color is poor, or the shell quality isn't good. Since I sell eggs and try to include at least one nicely colored blue or green egg in every dozen of a size large enough not to rattle around in the carton this meant keeping a larger flock of Easter Eggers than I really wanted. What was needed was a more productive, better quality bird. Can't order them so I'll have to see if I can't produce them myself.
To accomplish this I put a white EE rooster in a layer tractor of ISA Brown red sex-link hens. Another white EE rooster in a different tractor containing White Leghorns. And in my EE tractor I put a White Leghorn rooster. Three tractors, three separate flocks, three different roosters. Selected the best looking eggs over several days and had my starting point.
Here are the eggs we started with:

We set 86 eggs. A lot more than will be needed for the fair, but I want to be sure to have enough viable, about-to-hatch, eggs come fair open along with extras in case something goes wrong at the fairgrounds and I have to rush more over. Ordinarily I try to have my hatches finished in 48 hours from start to finish, but the fair runs over the span of four days and it would be nice to have eggs hatching all the while. To accomplish this we divided the eggs into four groups then set each one twelve hours apart so that they would be more likely to span the four days (thanks rebelcowboysnb!).
Here they are at the end of the forty eight hour period when they have all been set.
And another of them in the incubator. The humidity was still coming up so what you see in the picture is not the range I normally keep it at.

Nothing left to do now but wait for the first candling at day ten and build the displays. I've been looking for stuff to use ever since last year so I had a good bit to get ready. Some stuff I could only get as .pdfs so had to have them printed myself while others I could buy ready made, but did not come laminated which is a good idea if you want to use them year after year. Fortunately the copy shop in Gainesville can print color up to thirty six inches wide and can laminate the same. It's not cheap, but it can be done.
The ten day candle:

My oldest daughter does all the candling with me and my youngest has been wanting to learn as well so this year she sat in too. We jovially bicker about what we see and everyone has fun.
We set 86 eggs and found 26 "clears" or eggs that were not fertile. All of them were brown or white so it seems like the EE boys I had in with the the ISA Browns and White Leghorns were slow coming off the mark. None of the green/blue eggs were clear so Slick the White Leghorn rooster had been getting his job done. If you've ever had a Leghorn you'll know they are too full of themselves not to take their work seriously!

We're still getting the hang of taking candling photos, but considering we had too much light leakage and were only using a phone camera we were happy.
Ten days in we had sixty developing eggs and there was nothing left to do but allow Mr. Dickey to finish doing the thing he does so well. Back to working on the display until day eighteen. We took no photos of the day eighteen candle as a properly developed egg is only going to show a large dark blob pretty well filling the shell but for the air cell at top. We found only two "quitters" or eggs that had died in development. Fifty eight eggs ready to hatch.
On to the Fair!
Last edited: