Hi everybody,
My DH has been working hard to get this coop finished for our girls, who are 5 weeks old and pretty tired of the basement (and I'm tired of cleaning out their waterer 27 times a day...sigh).
So here they are, pics from the last two weekends. We only have a few odds and ends to tie up, and obviously we have to paint.
This is a close-up of the coop turned on its side so that my DH could add these wheels; it will be too heavy to push around the yard, but he says he'll be able to tow it back there because of these. I told him they're "wheelie" cool.


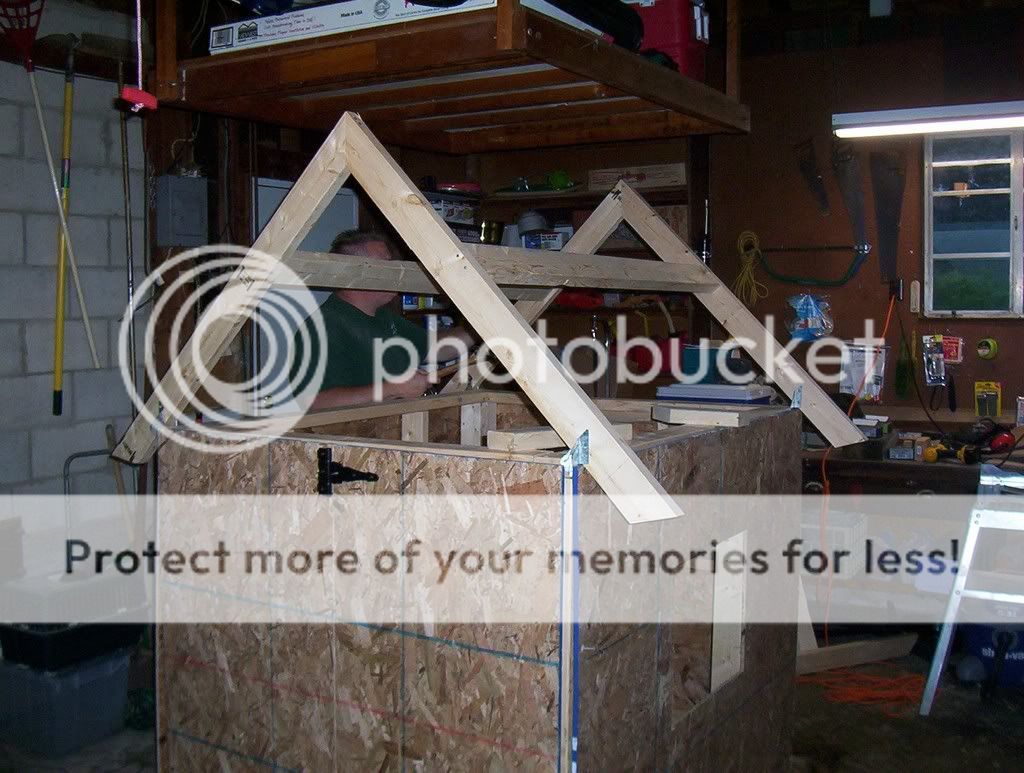
This is a picture of the roof framing.
This is a picture of the shingles going up. You can also see one of the windows, and the back door is open.

This is a picture of the front.

The roof is now complete, the ends are on, and this is a shot of the back. You can see the little egg door, which DH got carried away with on the trim.
 And, please note the GIGANTIC hinges. I hate them, but he's the one putting in all the hours, sooo...

This is a view in from the back door, with the roost cutting across the center. The roost is removable, thanks to everything I've learned here, and DH installed a bracket on one side to stabilize it so the girls can't just knock it off. You can't see the bracket next to the window.

The nest box.

And one of the windows from the inside; it was framed on both sides, and the hardware cloth (which is 1/4") is screwed in, then framed in. I think we're going to put up another layer because I'm worried about raccoons being able to chew through this.

And a pic of my girls Ruby the BO and Daisy the Dominique, outside today in a dog crate:

And that's it! Please let me know what you think! The only thing I'm sad about in regards to this coop is that I should have made it bigger. Ah well, next time...
Amy
My DH has been working hard to get this coop finished for our girls, who are 5 weeks old and pretty tired of the basement (and I'm tired of cleaning out their waterer 27 times a day...sigh).
So here they are, pics from the last two weekends. We only have a few odds and ends to tie up, and obviously we have to paint.
This is a close-up of the coop turned on its side so that my DH could add these wheels; it will be too heavy to push around the yard, but he says he'll be able to tow it back there because of these. I told him they're "wheelie" cool.
This is a picture of the roof framing.
This is a picture of the shingles going up. You can also see one of the windows, and the back door is open.
This is a picture of the front.
The roof is now complete, the ends are on, and this is a shot of the back. You can see the little egg door, which DH got carried away with on the trim.
This is a view in from the back door, with the roost cutting across the center. The roost is removable, thanks to everything I've learned here, and DH installed a bracket on one side to stabilize it so the girls can't just knock it off. You can't see the bracket next to the window.
The nest box.
And one of the windows from the inside; it was framed on both sides, and the hardware cloth (which is 1/4") is screwed in, then framed in. I think we're going to put up another layer because I'm worried about raccoons being able to chew through this.
And a pic of my girls Ruby the BO and Daisy the Dominique, outside today in a dog crate:
And that's it! Please let me know what you think! The only thing I'm sad about in regards to this coop is that I should have made it bigger. Ah well, next time...
Amy
Last edited:


