Hi all. I am brand new to chickens. In December I became infatuated with the idea of raising urban chickens once I found out that it was ok to have up to four hens in the city of Madison. I found byc in January and have been reading a ton since then. I love this site, and one of my favorite parts is checking out everyone's coops. I hope that you find my post resourceful, especially for those city folks who plan to have only a few chickens in their backyard. If you have any questions please post them and I'll be happy to answer them.
We designed and built our coop ourselves, but many of the design concepts were from coops I saw posted on BYC over the past few months. It's our first coop, and we used almost all found/reclaimed materials, but we were lucky because much of the lumber was in our basement from the previous owners of our house. We found most of our stuff on the side of the road: lots of lumber (mostly posts, some 2x4s), a great glass window which we used for the front of the coop, and a wood screened windowframe which we turned on its side and used as a door to the outside run. We ended up buying some at Home depot: Some 1x2s (~$5), galvanized wire fencing 3' high and 50' long (about $30), and smaller mesh galvanized wire ($15). Plus a staple gun ($20) and nails ($3), which were super helpful. We also had to buy the hinges and clasps, which add up fast.
We used what was already in our backyard to help us with our coop and run. The previous owners of our house had built a 5'x5' square sandbox with a shingled roof. We took these dimensions into consideration and built the coop on stilts taking up half of the box, this way the chickens would have an inside covered run. About 3 feet away from the sandbox is an old foundation. We decided to use this area for the outside run.
Our coop currently holds three chickens, but could probably hold a couple more if needed. We put in a lot of ventilation around the top edges of the coop. From what we've read and heard this is key to a happy and clean coop. In the winter we'll board up some of these areas to keep the coop warmer.
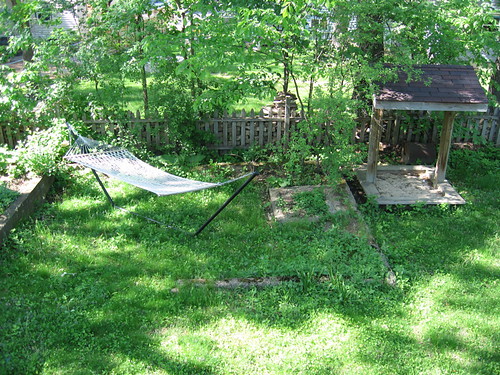
The Before Photo:

This is our backyard before anything was done. To the right is a covered sandbox, to the left is an old foundation.
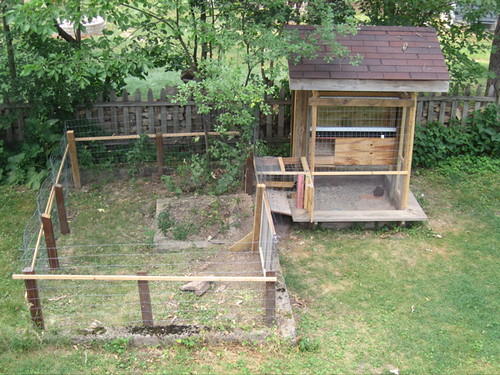
The After Photo:
This is it! It's finally done and the chickens love it. To the left is the 9'x11' outside run which they have access to in the daytime, to the right is the covered sandbox that we turned into a chicken coop and inside 4.5'x4.5' run which they have access to 24/7. This picture was taken from our back deck, where we can hang out and watch over the chickens.
Coop Side Profile:
To the left is an access door to the inside run, to the right is the coop with the egg door propped open.
The string on the back of the coop is there so we can prop the back access door open. The string is tied to the top of the sandbox roof and a loop on it can be put around a hook on the inside of the door when it's open.
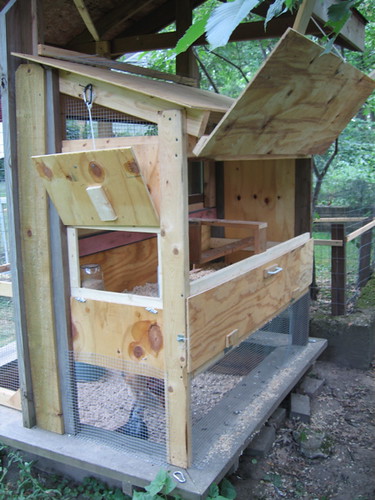
Open Coop:
There are three access doors to the coop:
1.) The egg door, it's the smallest.
2.) The top back door, which I can open when I need to check on the chickens, scrape the roosts, check their feed/water, etc.
3.) The bottom back door. It is not open in this photo, but you can see it with the white handle. This access door hinges down, and is very handy for cleaning out the coop because it is at coop ground level. The bedding can easily be brushed/scooped out into a wheelbarrow.
Looking in through the Back:
This is looking in through the back when it is open. As you can see there are two different levels of perchs. So far the chicks just cuddle together on the floor at night, but I hope that they'll start sleeping on the perch soon. You can see them underneath the coop in the sandbox part.
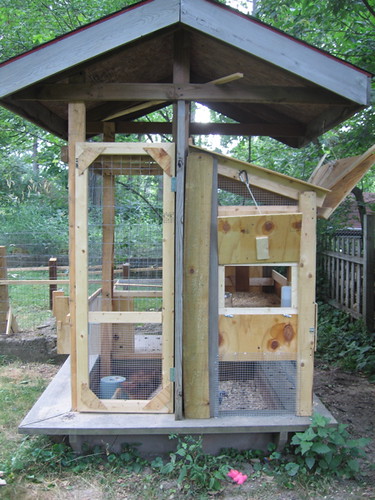
Coop Front View:
This is a straight on view of the coop. You can see directly through the window out the back because I had the back access door open at the time. We found this window, which fit almost perfectly, on the side of the road. One of the perches is level with the bottom of the window, so sooner or later when they're older we'll be able to see them when they're sleeping. Since the chicks are laying yet and are still small we haven't put in the nest box. It will go on the inside where currently the chick feeder and waterer is and a larger feeder and larger waterer will eventually be hung outside in the front.
The chicken door is the only aspect of the coop that I wish we had thought through a little more before we started to build. I wish we had put a lip on the bottom of the door to keep in the bedding (right now I just laid a board there) because I am hoping to do the deep litter method, also I think in the long run we might need it a bit taller so we may have to cut into that pink board. We put a little perch just outside the door to make it easier for the chicks to jump in/out of the coop easier.
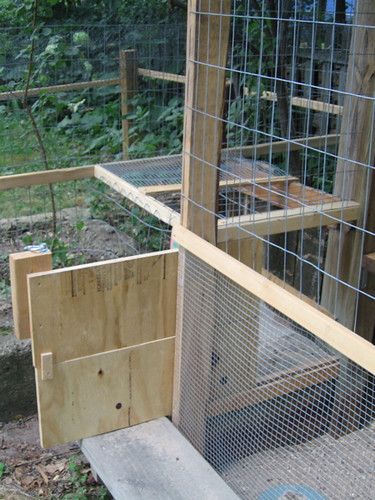
Door to the Outside Run:
This door slides open and closes on a track. We have a hinge with a lock and we close it in the evenings.
Since our outdoor run was inside an old foundation, we had about 3 feet where we need to make a chute to connect the inside run/coop to the outside. This was the tricky. It was the last thing we did and we were running out of materials so it was all hodgepodge.
To the right is the coop and inside run (where they have access 24/7), to the left is the outside run which is about 9'x12' and what the chickens have access to only in the day. In the middle is the sliding chicken access door, and you can see the hinge/carribeaner lock that we use to shut it.
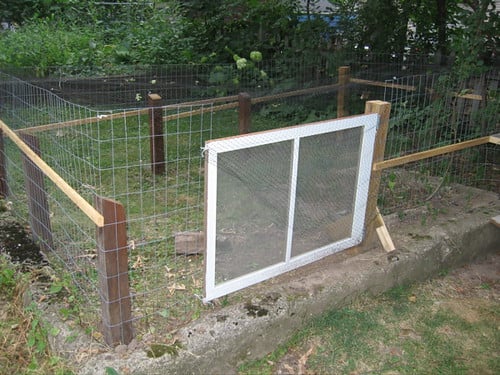
Outside Run:
The outside run is about 9'x12' and three side of it are and old concrete foundation. All of the posts we had as extra lumber or found on the side of the road and cut to size. For a door, we used a window (with screen) turned sideways on hinges that we also found on the side of the road. The side walls are 3' high and it's just one long piece of galvanized metal fencing that we bent around the wood frame. We used a staple gun to secure it. Over the top is bird netting which we have secured with twisty-ties.
This outside run is not super sturdy or super predator proof, but it's good enough for daytime use. The post are just 1-2" into the ground with no other support except the 1x2 screwed into it along with the wire.
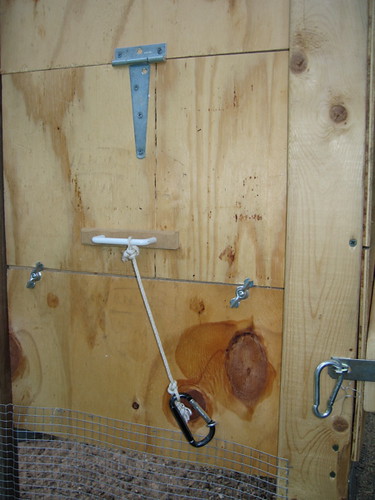
Latches:
Here are the three different latches we used:
1.) A hinge with metal carribeaner. We have 4 of these on the coop. There's no need for locks, so we though the carribeaner would work great.
2.) Twisting holders. I don't know the real term for them, but they're in the picture. We only have them on the egg door.
3.) A carribeaner on a rope. We have this here as extra protection against raccoons and also because we can prop the door open by hooking the carribeaner up on a nail above.
ps. All of these photos and more can be found as public photos on my flickr site with comments, plus with lots of chick pix! I have one Rhode Island Red (Penny), one Silver Laced Wyandotte (Sterling), and one Buff Brahma (St. Helen). I lost my Light Brahma at 10 days old...she had problems since birth.
We designed and built our coop ourselves, but many of the design concepts were from coops I saw posted on BYC over the past few months. It's our first coop, and we used almost all found/reclaimed materials, but we were lucky because much of the lumber was in our basement from the previous owners of our house. We found most of our stuff on the side of the road: lots of lumber (mostly posts, some 2x4s), a great glass window which we used for the front of the coop, and a wood screened windowframe which we turned on its side and used as a door to the outside run. We ended up buying some at Home depot: Some 1x2s (~$5), galvanized wire fencing 3' high and 50' long (about $30), and smaller mesh galvanized wire ($15). Plus a staple gun ($20) and nails ($3), which were super helpful. We also had to buy the hinges and clasps, which add up fast.
We used what was already in our backyard to help us with our coop and run. The previous owners of our house had built a 5'x5' square sandbox with a shingled roof. We took these dimensions into consideration and built the coop on stilts taking up half of the box, this way the chickens would have an inside covered run. About 3 feet away from the sandbox is an old foundation. We decided to use this area for the outside run.
Our coop currently holds three chickens, but could probably hold a couple more if needed. We put in a lot of ventilation around the top edges of the coop. From what we've read and heard this is key to a happy and clean coop. In the winter we'll board up some of these areas to keep the coop warmer.
The Before Photo:
This is our backyard before anything was done. To the right is a covered sandbox, to the left is an old foundation.
The After Photo:
This is it! It's finally done and the chickens love it. To the left is the 9'x11' outside run which they have access to in the daytime, to the right is the covered sandbox that we turned into a chicken coop and inside 4.5'x4.5' run which they have access to 24/7. This picture was taken from our back deck, where we can hang out and watch over the chickens.
Coop Side Profile:
To the left is an access door to the inside run, to the right is the coop with the egg door propped open.
The string on the back of the coop is there so we can prop the back access door open. The string is tied to the top of the sandbox roof and a loop on it can be put around a hook on the inside of the door when it's open.
Open Coop:
There are three access doors to the coop:
1.) The egg door, it's the smallest.
2.) The top back door, which I can open when I need to check on the chickens, scrape the roosts, check their feed/water, etc.
3.) The bottom back door. It is not open in this photo, but you can see it with the white handle. This access door hinges down, and is very handy for cleaning out the coop because it is at coop ground level. The bedding can easily be brushed/scooped out into a wheelbarrow.
Looking in through the Back:
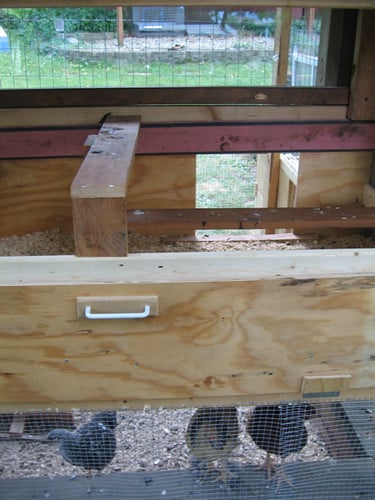
This is looking in through the back when it is open. As you can see there are two different levels of perchs. So far the chicks just cuddle together on the floor at night, but I hope that they'll start sleeping on the perch soon. You can see them underneath the coop in the sandbox part.
Coop Front View:
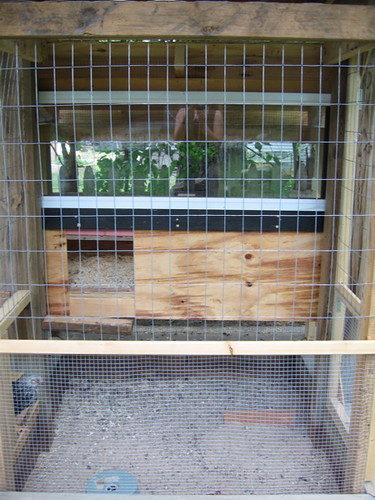
This is a straight on view of the coop. You can see directly through the window out the back because I had the back access door open at the time. We found this window, which fit almost perfectly, on the side of the road. One of the perches is level with the bottom of the window, so sooner or later when they're older we'll be able to see them when they're sleeping. Since the chicks are laying yet and are still small we haven't put in the nest box. It will go on the inside where currently the chick feeder and waterer is and a larger feeder and larger waterer will eventually be hung outside in the front.
The chicken door is the only aspect of the coop that I wish we had thought through a little more before we started to build. I wish we had put a lip on the bottom of the door to keep in the bedding (right now I just laid a board there) because I am hoping to do the deep litter method, also I think in the long run we might need it a bit taller so we may have to cut into that pink board. We put a little perch just outside the door to make it easier for the chicks to jump in/out of the coop easier.
Door to the Outside Run:
This door slides open and closes on a track. We have a hinge with a lock and we close it in the evenings.
Since our outdoor run was inside an old foundation, we had about 3 feet where we need to make a chute to connect the inside run/coop to the outside. This was the tricky. It was the last thing we did and we were running out of materials so it was all hodgepodge.
To the right is the coop and inside run (where they have access 24/7), to the left is the outside run which is about 9'x12' and what the chickens have access to only in the day. In the middle is the sliding chicken access door, and you can see the hinge/carribeaner lock that we use to shut it.
Outside Run:
The outside run is about 9'x12' and three side of it are and old concrete foundation. All of the posts we had as extra lumber or found on the side of the road and cut to size. For a door, we used a window (with screen) turned sideways on hinges that we also found on the side of the road. The side walls are 3' high and it's just one long piece of galvanized metal fencing that we bent around the wood frame. We used a staple gun to secure it. Over the top is bird netting which we have secured with twisty-ties.
This outside run is not super sturdy or super predator proof, but it's good enough for daytime use. The post are just 1-2" into the ground with no other support except the 1x2 screwed into it along with the wire.
Latches:
Here are the three different latches we used:
1.) A hinge with metal carribeaner. We have 4 of these on the coop. There's no need for locks, so we though the carribeaner would work great.
2.) Twisting holders. I don't know the real term for them, but they're in the picture. We only have them on the egg door.
3.) A carribeaner on a rope. We have this here as extra protection against raccoons and also because we can prop the door open by hooking the carribeaner up on a nail above.
ps. All of these photos and more can be found as public photos on my flickr site with comments, plus with lots of chick pix! I have one Rhode Island Red (Penny), one Silver Laced Wyandotte (Sterling), and one Buff Brahma (St. Helen). I lost my Light Brahma at 10 days old...she had problems since birth.
Last edited:


