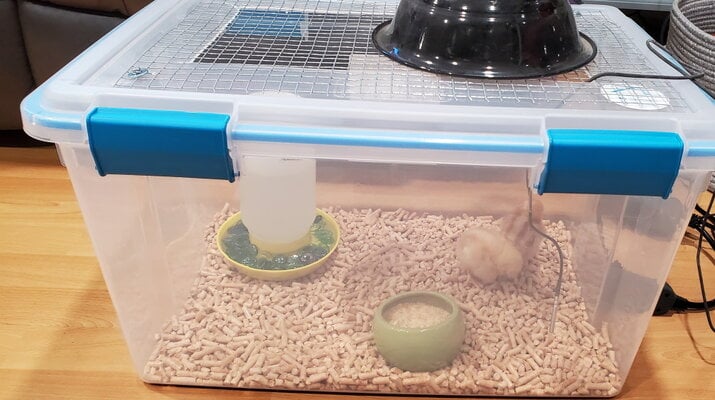
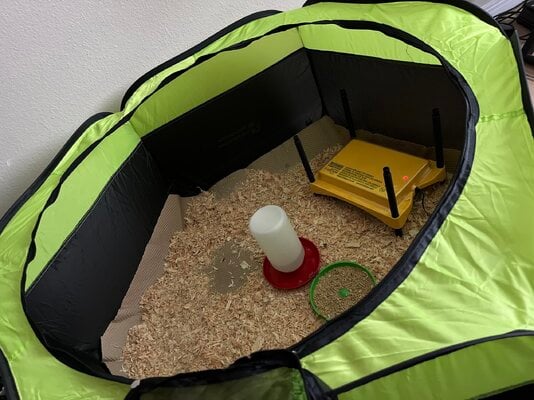
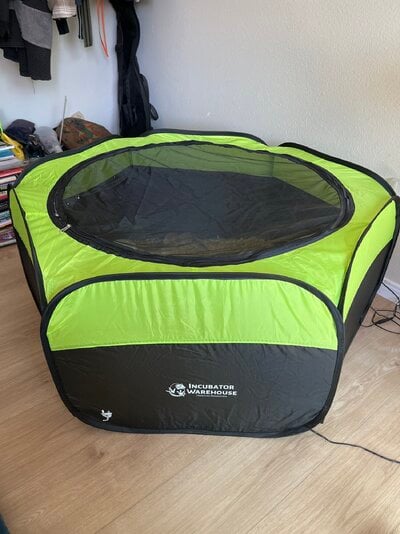
BROODER thread! Post pics of your brooders!

I’ve been using things I have on hand… a large appliance box, a tack trunk with top replaced with screening, and now a tent. Tents are cheap, much larger than totes and well ventilated. I’m very happy with this one! It’s a pop up model so very sturdy even though it isn’t staked down.

The box would have worked great and longer if I still had part to make a secure lid but it was missing a side.

View attachment 3432327
How old are the chicks in your photo above? I just got a couple chicks and trying to gauge how quickly they grow.
 
Last edited:
Here's my brooder for my 2 new chicks. The heat lamp is a no-light, heat on a thermostat (why there is wire hanging down inside to take temp).
 

Attachments

  • brooder day 1.jpg
    brooder day 1.jpg
    226.1 KB · Views: 32
This is our favorite setup. Brooder from incubator warehouse, nice and large with room to play and a mesh zipper closing top for safety and great airflow. The outside is a tent material, and comes with removable/replaceable bottom inserts for easy cleaning. Also collapses for easy storage during the off season. Heat plate is Brisnea EcoGlow, absolutely love it, and no learning curve for the little chicks, they go right under like momma hen and get cozy warm. Adjustable legs to increase height as they grow and need less heat. The brooder has a small opening to allow heat plate cord to go through.
 

Attachments

  • 44CCC40D-4CB1-4CF7-9576-35AF64BDFA25.jpeg
    44CCC40D-4CB1-4CF7-9576-35AF64BDFA25.jpeg
    523.8 KB · Views: 25
  • F0F0EF86-46F9-49FF-9832-D9544D52BD33.jpeg
    F0F0EF86-46F9-49FF-9832-D9544D52BD33.jpeg
    471.2 KB · Views: 19
  • DDECAD3C-E2FE-4491-AC4D-CA6EB7A11199.jpeg
    DDECAD3C-E2FE-4491-AC4D-CA6EB7A11199.jpeg
    562.9 KB · Views: 17
  • image.jpg
    image.jpg
    483.4 KB · Views: 32
We start with a large bin and use shelf liner to reduce the risk play leg. This is my first time trying a brooder plate so I kept the light as a back up. When the chicks were a couple weeks old we moved them over to a one man tent. This gives them plenty of room for roosting bars, flying, and lets me be close to them. Here is my son laying on a towel.
 

Attachments

  • 88406DE8-5C42-42EE-86A3-EB0EC67E16D9.jpeg
    88406DE8-5C42-42EE-86A3-EB0EC67E16D9.jpeg
    686.8 KB · Views: 31
  • 367D3E2D-8CF2-4045-ADBE-944412D254F2.jpeg
    367D3E2D-8CF2-4045-ADBE-944412D254F2.jpeg
    994.4 KB · Views: 24
Here is my week 1 brooder. I don't know yet what my hatch rate will be but they are due to hatch early next week. (The candling is nearly impossible because the eggs are a darker brown so I am just watching for seeping and smell checking to vent hole.) Anyway, I think this should be good for about 12 little ones. Any more than that I will pull out the big dog kennel for more room. I couldn't find a box the right size so I took a cheap old coffee table and walled it with cardboard pieces. I wrapped the heating pad (no auto shut off) with contact paper to make it easier to clean and put it over a cooling rack with paper towel on top to catch poo and make it easier to walk on. I added a feather duster for fun and additional warmer in case its too crowded under the heating pad for everyone at once and the little file holder for them to try perching.
 

Attachments

  • Brooder 1.jpg
    Brooder 1.jpg
    526.5 KB · Views: 25


Here is my set up in a large plastic tub. I have a Brines heater that I adjust as the chicks get older. For feeders, I rigged up 2-inch PVC with a 90 degree elbow and short section of pipe to which I have attached an end cap that I cut at a 90-degree angle to form a little feeding trough. I cut holes in the tub to insert the feeders so I can mount them to the outside with zip ties and save room in the brooder. For water, I have a 4-nipple waterer on a short section of PVC with a hose connection. The hose is connected to an elevated 5-gallon bucket to which I have attached a garden hose fitting. I elevate the bucket enough that there is enough water pressure to supply the nipple waterers. Last year I used a rubber mesh mat cut to fit the bottom of the brooder and put pine shavings on top. This year, I did not even bother and just put the pine shavings in with no problems. I've tried various solutions to make the cleanup of poop on top of the heater easier (because the chicks love to get up there and poop), but I think contact paper is the best bet - just peel it off and throw it away when messy, then replace with a new piece. It sure beats scraping and scrubbing every few days. Lastly, I do have a simple screened top that can go over this because it is amazing how quickly the chicks figure out how to get out. Of course, the first thing they when they get out is to poop on the floor, so the top goes on after about a week or so.
Can you send me instructions for how you made your water and feeder please?
 

New posts New threads Active threads

Back
Top Bottom