Homemade Yogurt **Updated** Cheese and Buttermilk

I have my own Dairy Goats & have made yogurt from them Many, Many times with my own goats unpasteurized Milk. I'm not a fan of powdered milk, so I do not add any into my yogurt at all.....I prefer it Natural. The finished product does have the water (whey) but I strain it into a flour cloth...... thin cotton fabric for dough wrapping. My local Dollar Tree carries it. One cloth for a $1.00 is Worth it.
wink.png
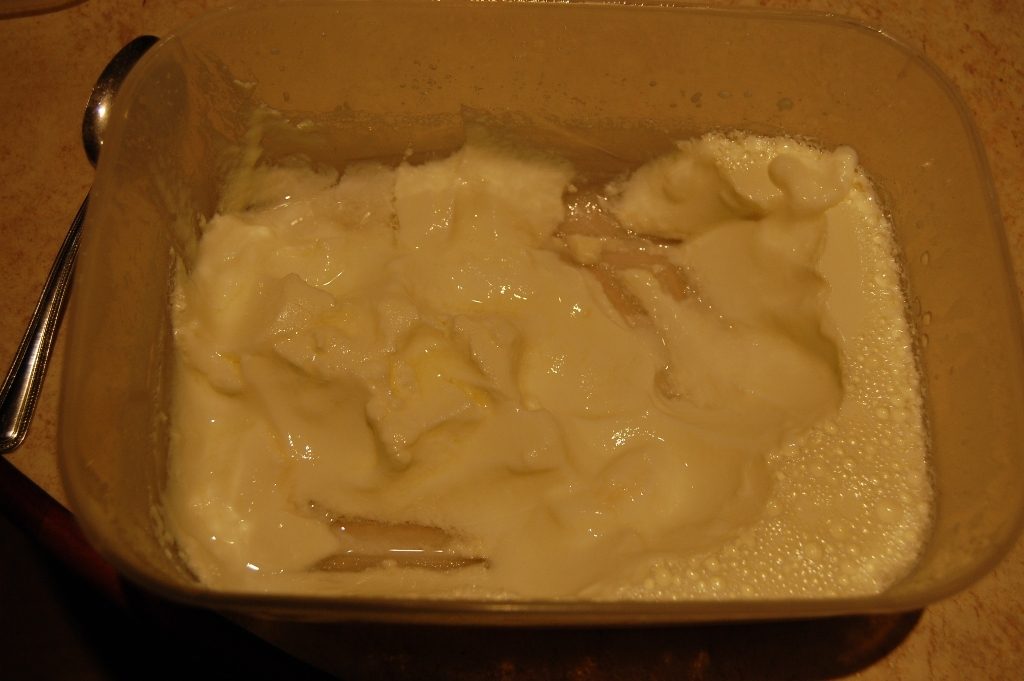
Cheesecloth is too airy & your yogurt will get stuck All into it. Anyway when done fermenting (incubating) I take each quart & empty the yogurt into my strainer lined with the flour cloth, I sit the strainer over a bowl to catch the whey that will slowly drip out. I cover it with a pan lid so it can stay sterile (I don't want a stray gnat finding it's way into my draining yogurt). Some people tie a string around the gathered top of the cloth & let it hand to dry in their frig over a bowl to drain. But I find it drains the whey faster at room temperature. I usually check on the draining yogurt each hour or so & sometimes empty the whey bowl...then I check on the thickness of the yogurt. If yours has drained too much & is it is too thick to your liking, you can just add back some whey stirring in a tsp at a time back into the yogurt to where you'd like the consistency to be. I find making cultured yogurt to fill a quart jar, that after drained each quart jar is reduced by nearly half. I put the cultured milk to ferment into glass canning jars with a plastic canning jar screw on one piece lid (usually found where canning jars are or online). I put my finished drained yogurt into recycled glass marshmallow fluff jars. They're the perfect size for my finished yogurt.
big_smile.png
& the Perfect container to give yogurt away in....my family LOVES my Homemade Yogurt!
wink.png
My FAVORITE is to put some of my Homemade yogurt into my Magic Bullet Blender with a handful of unsweetened frozen fruit pieces & blend it....DELICIOUS Smoothie! & since made Naturally there are no extra calories or added flavors.
big_smile.png


Some people make yogurt in their crock pot too. I have not tried that (yet). I sometimes make batches as large as 4 quarts & prefer to drain only 1 quart in a strainer at a time, so for now I'm Happy with the process I use now. (the process Miss Prissy describes).
smile.png
 
Last edited:
Howdy All You Beautiful People!

For the last five years, I make a gallon of yogurt per week. MY three Boys have a smoothie a day and expect it! lol

What is sterilize mean??? lol


{{{hugs}}}
 
Quote:
True. Or we can put it in this way: The more dry matter (both non-fat dry matter and fat) in the milk, the thicker the yogurt. You may achieve it by chosing a milk with high dry matter percentage (that might not be a possibility), by adding milk powder or by evaporating some of the water of the milk at hand. To evaporate, you plainly boil the milk, preferably in a relatively wide surfaced pot and aiding by taking the milk and pouring in the pot with a laddle. In fact, evenif not to evaporate the water, boiling some is better on contarary to the original recipe.

Quote:
Sure, they do. I didn't try goat milk myself. Traditionally in Turkey, in some "goat regions" people for sure used to make and still making yogurt from goat milk and there's nothing wrong about gout goat milk, but goat milk is not particularly famous for its yogurt. Sheep and water buffalo yogurts are highly admired and it should be associated mainly with their fat+non-fat dry matter proportions (Finding water buffalo milk is not easy nowadays here in Turkey as well, but keep in mind that there are some water buffalo farms in the USA.) Anyway, cow milk is more than okay and I use it and its possible to enhance its dry matter proportion by using the tecniques I've told above.

Quote:
In my opinion sterilisation is not necessary. Throughly washing, rinsing, drying the utensils should be sufficiant. And what's more, the way I advice calls for pouring the boiling milk to the containers you prefer to ferment the yogurt in, so it will additionally help to kill harmfull bacteria. There might still be some unwanted bacteria, fungi inside the lid and on the parts upper than the milk level but they practically do not give harm. Under any condition: This is not a product to last very long. Yogurt should be consumed at most in two weeks at most (stored in the refrigirator).

Quote:
In my opinion and as to the traditional way here in Turkey and according to some Turkish scientific sources: At this stage, no need to measure the temperature. Just boil the milk. And boil it, lets say 15-20 minutes, at least 10 minutes. (For sure, stay by the stove and stir the milk to prevent it from running over. Prefer low heat to prevent burning. Use a long spoon or a laddle+spoon to mix the sticky layer forming inside the pot back to the liquid. Boiling has three advantages: 1- Boiled and then cooled down to proper temperature milk gives a better, thicker yogurt. 2- If you are using raw (unpastaurised) milk, this should be obviously the way to follow to kill the probable pathogens. (Also, remember that, by this way you can evaporate some amount of the water in the milk, resulting a milk with higher dry matter percentage and so a thicker yogurt.) 3- This is a personal preference but I like the slightly caramelized taste of the final product which has roots in boiled milk.

Quote:
Many sources say so: 110° F (43° C), but some call for 113° F (45° C). In fact I personally didn't experience the difference between them. If to be frank, I'm not using a thermometer at all. And I believe that precisely measuring the temperature is totaly useless for most of the people posting under this thread. Let me explain:
1- Without using a thermometer how do I know the correct temperature to add the culture? Tradition says that if you can dip your finger in the milk and stay there up till you count to seven without burning your finger; that's the temperature! (For sure you don't burn your finger in a cold milk too, finding the limit while cooling is important. You can feel the more above temperatures by trying to touch the container from the outer walls.)
2- Why do I believe that most people posting under this thread do not need that much scientific measurements?: For the plain reason that most of the home yogurt makers do not keep that temperature constant actively, with the aid of a heat resource, instead use some wrapping, insulating techniques. Even if you wrap the container or even if you put it in a cooler, the temperature will drop. In my opinion, it will drop dramatically. My late grandmother made yogurt by using wrapping technique as well, but she had an advantage: The stove used for heating the house! It was a little bit easier to find a spot where the temperature stay around those values. Nowadays, my aunt can't even get the result of my grandmother because central heating radiators do not play this role. Aunt relies on wrapping/insulating and her yogurts are -unfortunately- very thin.

So, among other factors, thickness of a yogurt is associated with the constant temperature of 110-113° F during all of its maturing period. If you don't use a system whick keeps the temperature constant for all that 5-8 hours, its useless to deal with a few fahrenheit at the beginning.

What I do for constant temperature: I discovered that our oven's thermostat allows me to set it to function around 110-113° F (again, hand/finger test). So I set it to that degree , pour the boiled milk to my container, wait till it won't burn my finger, add the culture and put the container(s) in the oven (oven's inside, inside walls are heated enough not to burn my fingers). Then wait for the proper time (5-8 hours, lets say) to get it out and cool down. Let it cool overnight or lets say at least 10 hours before spooning the yogurt. It needs that settling time; appearently, something still goes on inside.

Note for DIYers: An insulated box just big enough to take your yogurt container and a heat lamp and a thermostat may work as well: Yogurt incubator!

As container, I don't use jars but oven safe glass casseroles (pyrex?) of about 12 ich in diameter and 4 inch heigt, with a lid. I don't put on the lid while its maturing in the oven to enable further evaporation -and a nice crust formation which is my personal preference. When I'm done I immediately transfer it to the refrigirator (not freezer) or if its winter time to the balcony. (Please don't shake the yogurt during transfer.) I don't prefer to put on the lid before its totally cooled down to enable a fast cooling process and to prevent the condensed water to drip back into the yogurt.

If you don't maintain the proper temperature, if the temperature drops during the process you get a thinner yogurt than you can get with the same milk but with a constant 110-113° F. If you stop the process and begin cooling before its mature, you get a thinner, watery/milky yogurt. If you leave it more than needed before cooling, yogurt begin to get acidic (sourer in some sense) and begin to give out its serum -which is not desired. So, correct timing to stop the process and begin to cool is also important but slightly more or less is not the end of the world. You'll find your ideal by experience.

By prefering a more flat glass casserole than a jar has two advantages for me: 1- While consuming over time, I can take small amounts by a spoon from one side of the glass casserole without "mixing" all the product. 2- Yogurt leaks its serum to the "hole" I spooned off and I have the chance to take it out from time to time. (You can drink it; its tasty and full of nutrients; or you can feed it to your chickens, soaking it to some dry feed.) So, the remaining part waiting to be consumed becomes thicker beause its gives away a considerable amount of water.)

Quote:
Basically that's what I do as well. If to add: That "old yogurt" used as culture shouldn't be a very old one. A not-that-much-old an not-that-much acidic culture gives sweeter results. (Here sweet means "not sour", it has nothing to do with sugar or any other additive.) For pure cultures there's no such discussion, for sure. (I've never used a pure culture. I even haven't seen one. Its not common here.) While preparing the culture, let it some time to reach room temperature, if it was in refrigirator. In a cup, mix it with a spoon/fork to crush its rigidity and obtain a smooth liquid. Then, thin it with adding small amounts of milk which cooled down to the proper temperature to be cultured. Now, you can mix the culture easily to the milk in the container. While doing this, no need to try to throughly mixing it. What I do is, to pour it with spoon from two or three points from the sides of the container, being careful not to crush, spoil the crust of the milk too much and I mix it with the spoon under the crust to some degree. Four-five wave, done with spoon is enough. I try not to crush the crust, which is the fat of the milk because it will be a very nice part of the yogurt on top of it. In a relatively flat container, crust protects yogurt and it can stay more so taking the crust part off from the parts you'll consume and not to crush the other parts would be wise. For the upright small jars, there's no such discussion, for sure.

I might write some more after reading all the thread and I'm ready for your questions if there are any.

marenostrum I feel like I just took a trip back into my childhood. I am Lebanese, and what you described is how my family made yogurt. Thank you for your remarks, they accurately describe traditional yogurt making.
 
Quote:
Congratulations! I love your incubator. Its just what I was trying to tell. Nice job. Your yogurt's consistancy seems very well, as far as can see from the photographs (especially, the last one). I think the milk you use is a homogenized one so there's not much crust formation. Maybe that's better because there are many people who doesn't like the crust of yogurt and when you use homogenized milk, fat will be evenly distributed in yogurt instead of forming a crust.
Special hint: As a dessert, you can try your delicious yogurt by adding some honey on it.
wink.png


hi
yes it was homogenized milk i used
wink.png
the consistancy is ace when it's mixed with some strawberry sauce or i like it with mint sauce or on it's own yum
big_smile.png
 
marenostrum

Thank you for posting your method, I tried it tonight and it was the best yogurt I've ever made, or even eaten. It is a little more involved then my usual method, but sooooooooooo worth it. I have to agree w/ you the cooking the milk down gives a very nice flavor.
bow.gif
droolin.gif
 
CC's CoopCuties :

Quote:
True. Or we can put it in this way: The more dry matter (both non-fat dry matter and fat) in the milk, the thicker the yogurt. You may achieve it by chosing a milk with high dry matter percentage (that might not be a possibility), by adding milk powder or by evaporating some of the water of the milk at hand. To evaporate, you plainly boil the milk, preferably in a relatively wide surfaced pot and aiding by taking the milk and pouring in the pot with a laddle. In fact, evenif not to evaporate the water, boiling some is better on contarary to the original recipe.

Quote:
Sure, they do. I didn't try goat milk myself. Traditionally in Turkey, in some "goat regions" people for sure used to make and still making yogurt from goat milk and there's nothing wrong about gout goat milk, but goat milk is not particularly famous for its yogurt. Sheep and water buffalo yogurts are highly admired and it should be associated mainly with their fat+non-fat dry matter proportions (Finding water buffalo milk is not easy nowadays here in Turkey as well, but keep in mind that there are some water buffalo farms in the USA.) Anyway, cow milk is more than okay and I use it and its possible to enhance its dry matter proportion by using the tecniques I've told above.

Quote:
In my opinion sterilisation is not necessary. Throughly washing, rinsing, drying the utensils should be sufficiant. And what's more, the way I advice calls for pouring the boiling milk to the containers you prefer to ferment the yogurt in, so it will additionally help to kill harmfull bacteria. There might still be some unwanted bacteria, fungi inside the lid and on the parts upper than the milk level but they practically do not give harm. Under any condition: This is not a product to last very long. Yogurt should be consumed at most in two weeks at most (stored in the refrigirator).

Quote:
In my opinion and as to the traditional way here in Turkey and according to some Turkish scientific sources: At this stage, no need to measure the temperature. Just boil the milk. And boil it, lets say 15-20 minutes, at least 10 minutes. (For sure, stay by the stove and stir the milk to prevent it from running over. Prefer low heat to prevent burning. Use a long spoon or a laddle+spoon to mix the sticky layer forming inside the pot back to the liquid. Boiling has three advantages: 1- Boiled and then cooled down to proper temperature milk gives a better, thicker yogurt. 2- If you are using raw (unpastaurised) milk, this should be obviously the way to follow to kill the probable pathogens. (Also, remember that, by this way you can evaporate some amount of the water in the milk, resulting a milk with higher dry matter percentage and so a thicker yogurt.) 3- This is a personal preference but I like the slightly caramelized taste of the final product which has roots in boiled milk.

Quote:
Many sources say so: 110° F (43° C), but some call for 113° F (45° C). In fact I personally didn't experience the difference between them. If to be frank, I'm not using a thermometer at all. And I believe that precisely measuring the temperature is totaly useless for most of the people posting under this thread. Let me explain:
1- Without using a thermometer how do I know the correct temperature to add the culture? Tradition says that if you can dip your finger in the milk and stay there up till you count to seven without burning your finger; that's the temperature! (For sure you don't burn your finger in a cold milk too, finding the limit while cooling is important. You can feel the more above temperatures by trying to touch the container from the outer walls.)
2- Why do I believe that most people posting under this thread do not need that much scientific measurements?: For the plain reason that most of the home yogurt makers do not keep that temperature constant actively, with the aid of a heat resource, instead use some wrapping, insulating techniques. Even if you wrap the container or even if you put it in a cooler, the temperature will drop. In my opinion, it will drop dramatically. My late grandmother made yogurt by using wrapping technique as well, but she had an advantage: The stove used for heating the house! It was a little bit easier to find a spot where the temperature stay around those values. Nowadays, my aunt can't even get the result of my grandmother because central heating radiators do not play this role. Aunt relies on wrapping/insulating and her yogurts are -unfortunately- very thin.

So, among other factors, thickness of a yogurt is associated with the constant temperature of 110-113° F during all of its maturing period. If you don't use a system whick keeps the temperature constant for all that 5-8 hours, its useless to deal with a few fahrenheit at the beginning.

What I do for constant temperature: I discovered that our oven's thermostat allows me to set it to function around 110-113° F (again, hand/finger test). So I set it to that degree , pour the boiled milk to my container, wait till it won't burn my finger, add the culture and put the container(s) in the oven (oven's inside, inside walls are heated enough not to burn my fingers). Then wait for the proper time (5-8 hours, lets say) to get it out and cool down. Let it cool overnight or lets say at least 10 hours before spooning the yogurt. It needs that settling time; appearently, something still goes on inside.

Note for DIYers: An insulated box just big enough to take your yogurt container and a heat lamp and a thermostat may work as well: Yogurt incubator!

As container, I don't use jars but oven safe glass casseroles (pyrex?) of about 12 ich in diameter and 4 inch heigt, with a lid. I don't put on the lid while its maturing in the oven to enable further evaporation -and a nice crust formation which is my personal preference. When I'm done I immediately transfer it to the refrigirator (not freezer) or if its winter time to the balcony. (Please don't shake the yogurt during transfer.) I don't prefer to put on the lid before its totally cooled down to enable a fast cooling process and to prevent the condensed water to drip back into the yogurt.

If you don't maintain the proper temperature, if the temperature drops during the process you get a thinner yogurt than you can get with the same milk but with a constant 110-113° F. If you stop the process and begin cooling before its mature, you get a thinner, watery/milky yogurt. If you leave it more than needed before cooling, yogurt begin to get acidic (sourer in some sense) and begin to give out its serum -which is not desired. So, correct timing to stop the process and begin to cool is also important but slightly more or less is not the end of the world. You'll find your ideal by experience.

By prefering a more flat glass casserole than a jar has two advantages for me: 1- While consuming over time, I can take small amounts by a spoon from one side of the glass casserole without "mixing" all the product. 2- Yogurt leaks its serum to the "hole" I spooned off and I have the chance to take it out from time to time. (You can drink it; its tasty and full of nutrients; or you can feed it to your chickens, soaking it to some dry feed.) So, the remaining part waiting to be consumed becomes thicker beause its gives away a considerable amount of water.)

Quote:
Basically that's what I do as well. If to add: That "old yogurt" used as culture shouldn't be a very old one. A not-that-much-old an not-that-much acidic culture gives sweeter results. (Here sweet means "not sour", it has nothing to do with sugar or any other additive.) For pure cultures there's no such discussion, for sure. (I've never used a pure culture. I even haven't seen one. Its not common here.) While preparing the culture, let it some time to reach room temperature, if it was in refrigirator. In a cup, mix it with a spoon/fork to crush its rigidity and obtain a smooth liquid. Then, thin it with adding small amounts of milk which cooled down to the proper temperature to be cultured. Now, you can mix the culture easily to the milk in the container. While doing this, no need to try to throughly mixing it. What I do is, to pour it with spoon from two or three points from the sides of the container, being careful not to crush, spoil the crust of the milk too much and I mix it with the spoon under the crust to some degree. Four-five wave, done with spoon is enough. I try not to crush the crust, which is the fat of the milk because it will be a very nice part of the yogurt on top of it. In a relatively flat container, crust protects yogurt and it can stay more so taking the crust part off from the parts you'll consume and not to crush the other parts would be wise. For the upright small jars, there's no such discussion, for sure.

I might write some more after reading all the thread and I'm ready for your questions if there are any.

marenostrum I feel like I just took a trip back into my childhood. I am Lebanese, and what you described is how my family made yogurt. Thank you for your remarks, they accurately describe traditional yogurt making.

Yes, I as well. I still make it more or less like this though instead of 7 seconds I do 10 and I also wasn't aware that I could let the milk boil for awhile. I was under the impression that you take it off the heat as soon as it boils. I will try it for my next batch. Thanks​
 
I haven't caught up on all the thread but I wanted to share...
I made yogurt for the first time last week....thanks for all the info....and both batches turned out great, really creamy and pretty thick. Mine did have a crust, i guess you'd call it, of the cream floating up. I added half a cup of cream to the whole milk (plus powdered) I was using. In one batch I did add 2 tablespoons of cherry jello, the cream seemed to separate out in red chunks a little on the top, but the yogurt itself was pretty pink and barely flavored, just how I like it (in case anyone needs to add color and flavor to convince the unconvincable
wink.png
). My favorite was the plain though. I am cooking a batch right now to try it with just the powdered milk, with 4 teens I never have enough "fresh" milk on hand to make anything. I was wondering if everyone is using instant or regular powdered milk? I only have regular and don't really like the flavor of instant, but wondered if it makes a difference in texture. Thanks for all the help and suggestions everybody, I'm so proud of myself:D
Kat
 

New posts New threads Active threads

Back
Top Bottom