Show Me Your Feeders!!

Pics

MrsLumpy

Chirping
6 Years
Jul 5, 2013
29
3
59
Texas
We are currently using a store bought 11 lb feeder for our girls, but they have started scattering their food EVERYWHERE!! We have gone through 40lbs of pellets in 3 weeks for 4 girls and the mess is attracting flies and mice, despite the daily cleaning.
I ordered chicken nipples to help with the water and we are building the waterer this Saturday... but we are stumped on the feeder... we need something that will make it harder to scatter and waste... something that will fill somewhat automatically (fill a hopper and have it funnel down type thing)... Cheap and effective!!
Please help as we have lots of ideas, but not sure which way to go as these are our first ladies...
 
I built one that works great for me, 5 gallon bucket with two 90degree elbows that are about a 1/2 to 3/4 of an inch off the bottom of the bucket, they have to stick their heads in to eat and can't fling the food out so it doesn't attract rodents and no wasted food it holds about a month's worth of food for me.
400
 
I come bearing pictures of how to make this feeder with a 90-degree street elbow (hub & spigot) per LoneOak's instructions. (Hope I got it right!)

This is the street elbow with a hub end (the big part) and a spigot end (the narrower part with the flange). This method won't work with a plain 90-degree street elbow because the parts won't fit into one another at the end (you'll see). I had to check online before I purchased it because not all Home Depot's carry them. Here's a link to the product: http://www.homedepot.com/p/NIBCO-3-...Street-Elbow-C48072HD3/100347226#.UnBRP3BwpLc


I started by cutting off the hub end right where it meets the pipe. I didn't need to make another cut after this because after I had cut the hub off, the cut end was still a 90-degree angle to the spigot end, which would allow it to be parallel to the floor of the bucket after installation.


To determine where to cut my hole, I put a scrap piece of 1"x2" under the cut end of the elbow (to ensure the pipe is 3/4" off the floor of the bucket after installation) and traced the hole on the outside of the bucket.


After I cut my hole I put the spigot end (the narrow bit) through the hole. You can see below the flange doesn't allow it to move any farther outside the bucket, which is good.


Here you can see the spigot end coming out of the bucket and the hub that I will flip around and put over the spigot to keep the elbow from falling back in the bucket.


And here it is! No glue required, it's a tight fit. There's a little play in the elbow but it can't fall in or out of the bucket so it still works. I opted for the fancy screw-top for my bucket but if I had gone with a plain lid I could have made this for a total of $10 and about 15 minutes.

 
Tried EVERYTHING then found this idea at BYC. This is PRICELESS. No waste. Cheap to build. 3" PVC and 3" Y. That's all there is to it! Just made a second one tonight because it works so well!


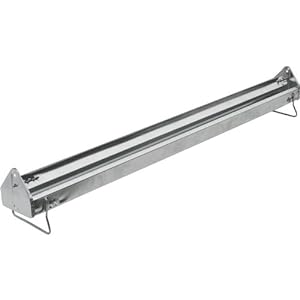
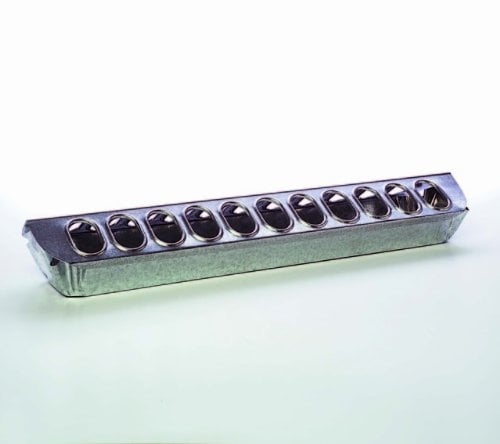
I use a metal trough that I picked up from the feed store. It has a bar on the top that spins and the sides curve in. No more waste for me, just need to pick out the poo once in awhile from it sticking to their feet when they go to scratch. I paid 16.99 and I have probably saved double in the cost of feed. I was using a hanging feeder and small chick feeder with holes but they would grab it with their beak and flip it over.
This is great since its legs elevate it.
41PeVCgjACL._SL500_AA300_.jpg
41UuZX8ewCL.jpg
I do not like this one since it sits on the ground chicks fill with bedding and the bigger chickens flip it.

I have also used a smaller one like the first but since it also sits on the ground(it doe not have the legs) it also gets filled with bedding.
 
400

Cut the elbows like Jimmy said, I turned the elbow around and placed it on the side of the bucket and by eeyeballing it you can see how far off the bottom it will be, mark the bottom edge with a sharpy if you use a 3inch from the line it should be 1 1/2 inches as a starting point for the holesaw.Check twice and cut once.
 
Built one just like yours Jimmywalt. I used 4" sanitary pipe and T. It's about 5' tall and lasts my 8 birds about 1 week before I need to refill. I bungee cord it to the inside of the run. Works very well.
I did add a 4" piece of the pipe to the "T" opening so they have to reach further in to get the feed. Before I did this they were able to flick some out, but no waste now

I'm interested in knowing what your T looks like. Could you post a picture? Thank you.
 
Tried EVERYTHING then found this idea at BYC. This is PRICELESS. No waste. Cheap to build. 3" PVC and 3" Y. That's all there is to it! Just made a second one tonight because it works so well!
Do you need to empty it at all? Maybe weekly or bi-weekly? Since I would think that the feed that sits below the "Y" would get old and stale or do you block it some how to keep the feed from going below the "Y" ?
 

New posts New threads Active threads

Back
Top Bottom