Welcome to FiveHens' Coop Construction Page!

Click HERE to view Run Construction Page!
When I was designing our coop, I used the pictures of all the coops here for ideas, so I thought I'd show how our turns out to give other people a few ideas!
We wanted to build our small coop for not more than 6 hens...and we don't have too much carpentry experience, but I think it turned out quite well, all things considered. We planned on building them a larger permanent run, as we want them to have space to stretch their wings, and there are too many dogs in our area for unsupervised free-ranging. So, here goes!
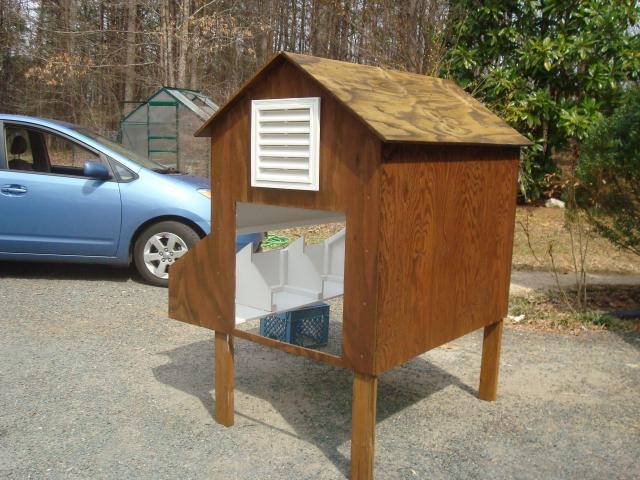
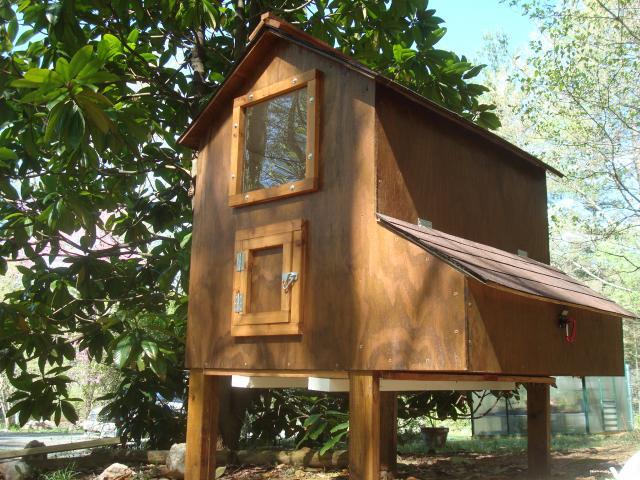
First, the plans. The basic coop design is 4' x 3', with nest boxes stretching the length of one side, 12" deep, so really it's 4' x 4'. This makes it very convenient for buying 4' x 8' lumber pieces. It's raised 1.5' off the ground, and the structure itself is 3' high on the sides, 4.5' high at the apex of the roof.
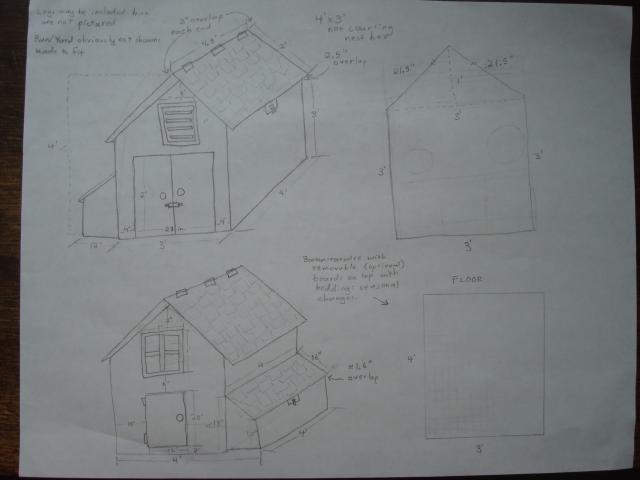
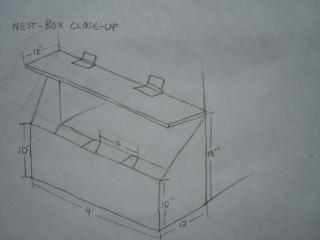
Nest box detail:
We made some modifications to the original plan (above):
1) The roof DID NOT hinge open (we realized that, a. that would be incredible complicated with the shingles, and b. it would be too high up to reach into easily.)
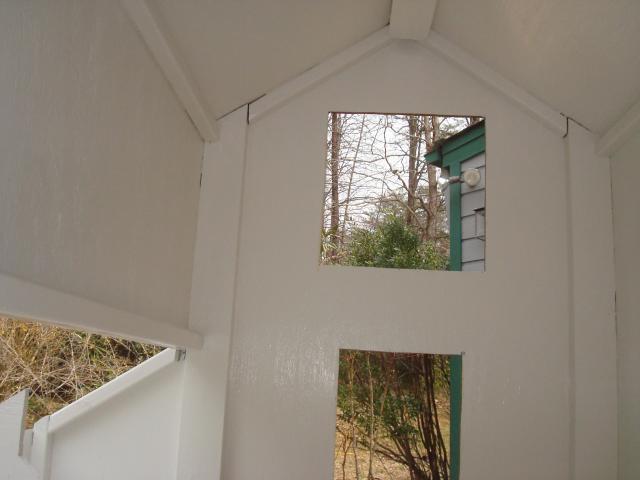
2) We made the chicken door smaller, so that the rain or cold would get in less when it was open. It is now 9" x 12", 6" up from the base of the coop so the bedding doesn't spill.
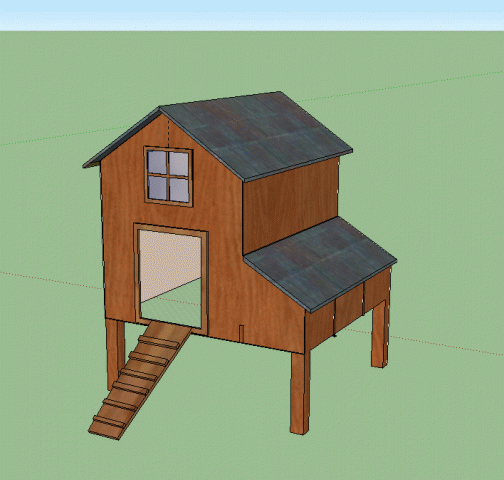
I used the Google Sketchup program (free download from Google) to help me with the original planning--VERY useful in visualizing things! It gives you a 3-D perspective (lets you move around your model)
Then, we went to Lowe's.
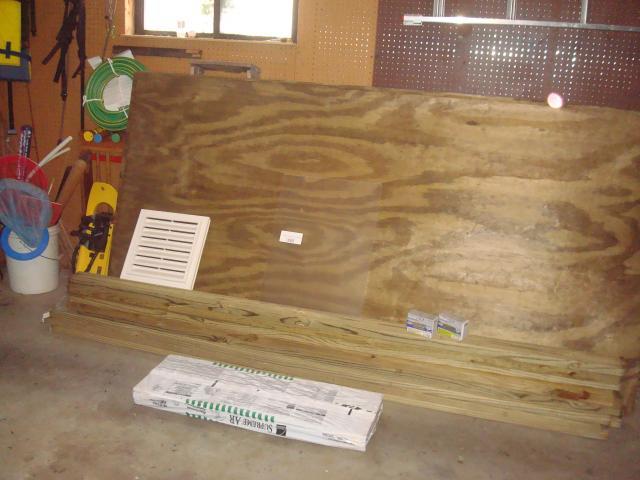
I'll make a list of all the materials we used, even though if took...1...2...3...4...6 trips as we realized we needed more of this or that or the other.
- 3 8'x4' sheets of 1/2" treated plywood
- 6 8' 2x4 s
- 6 8' 2x2 s
- 1 pack (33 ft2) shingles
- 2 packs weather-resistant 1.5" screws
- 1 pack weather-resistant 2.5" screws
- 1 sheet plexiglass, 24x18"
- 25 nuts, 25 bolts, 50 washers for securing plexiglass
- 3 secure latches: 1 for back (service) door, 1 for nest boxes, 1 for chicken door.
- 3 caribeaners to fit those latches
- 1 roll 1x1" welded wire for floor (the shorter the roll is, the less waste. Alternatively, use what ever wire you use on a run or have lying around. 1x1 looked like a good size, though
- 1 12x12" prefab "gable vent"
- 6 hinges to go with the latches on the doors
- 5 (I think) 1x2" 8' long pieces of cedar for the trim
- 3 1x4" 8' long pieces of cedar for the trim
- 2 quarts of primer for the interior
- 2 quarts of exterior high-gloss white paint for interior
- 2 quarts of cherry stain for exterior
- 2 quarts of outdoor high gloss polyurethane for the exterior
I would guess that all those materials cost on the order of $500. If we'd gotten more of the material secondhand, it would have been a lot less. We did not make that much waste, however; used the most of what we got.
Here's a "group shot" of most of the materials
")
You can see what I meant by pre-fab gable vent...In retrospect, it would have been similarly easy to just cover an opening with hardware cloth right under the eaves.
Putting together the front and back...
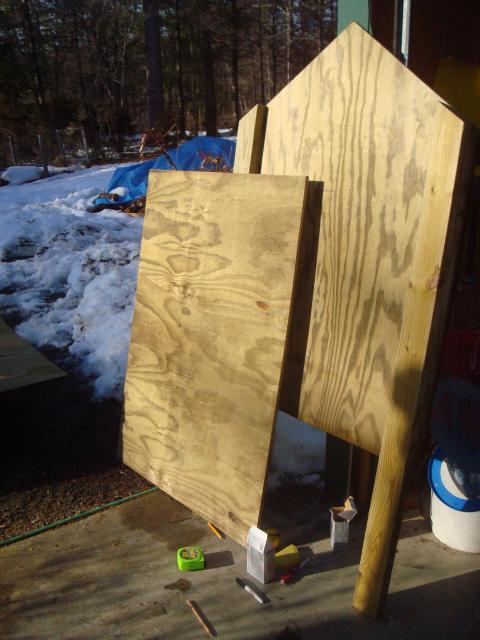
We have reached the three-dimensional stage!
We are (you may notice) building it in our driveway with the idea that at the end it will still be light enough to carry it where it needs to go.
The left hand side (in the picture) will have the chicken door with the window above it. The other side will have the service entrance with the vent above that.
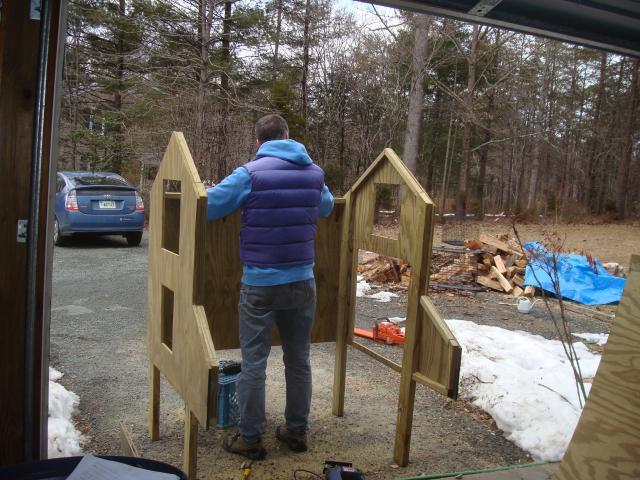
One half of the roof goes on, as well as the nest box floor and two parts of the far wall!
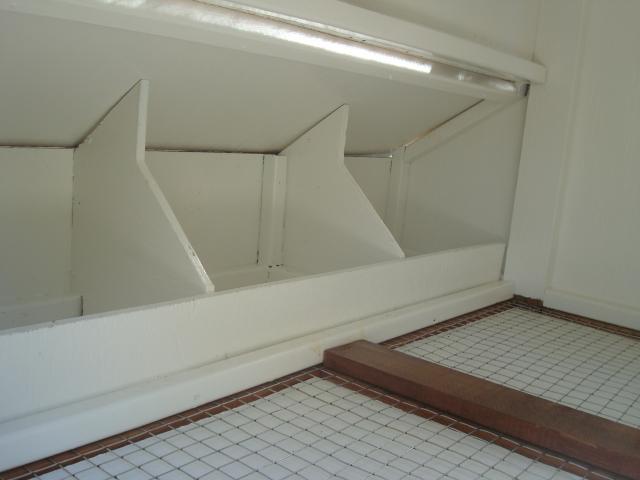
We installed the nest box dividers with 2x2s as framing:
The nest boxes will have a "lip" as well, we just haven't installed it yet.
We are leaving the floor for last, as it will be wire, and it's much easier to work inside the coop when you can stand inside of it.
All the plywood, 2x2s and 2x4s that we have been using are treated lumber, and we don't want the chemicals to get to the little chickies. So, we're going to paint the inside of the coop white. It will make it brighter in there for them, too. Here's a picture of the inside of the coop: the same, but painted.
We used two coats of stain on the outside to cover up the greenish color of the treated wood. We also used two coats of polyurethane, to make it shiny and give it more protection from the elements.
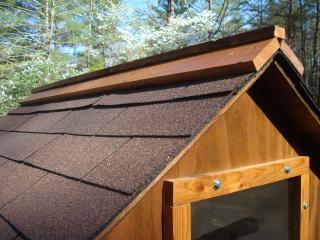
Putting on the shingles...
With good results!
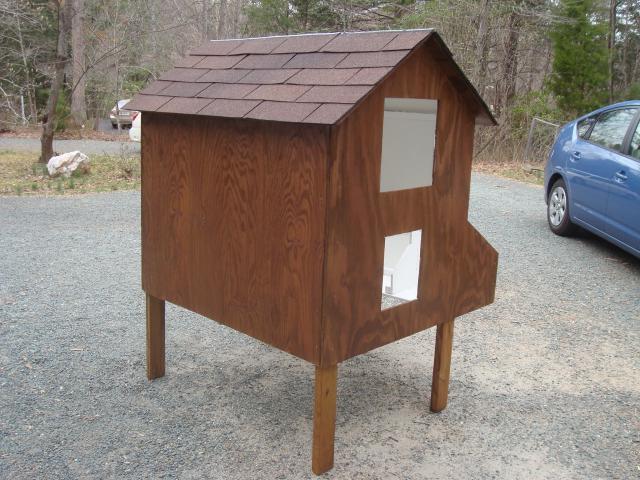
We did not use tar-paper, owing to the small size of the structure, and used regular staple-gun staples instead of nails because we did not want them to poke through. Attaching shingles to the peak of the roof was kiind of awkward, so we are going to instal a wooden roof cap made from the trim wood.
We only put one coat of stain on the cedar trim, to set it off from the rest of the coop. It has two coats of polyurethane like everything else, and looks quite nice!
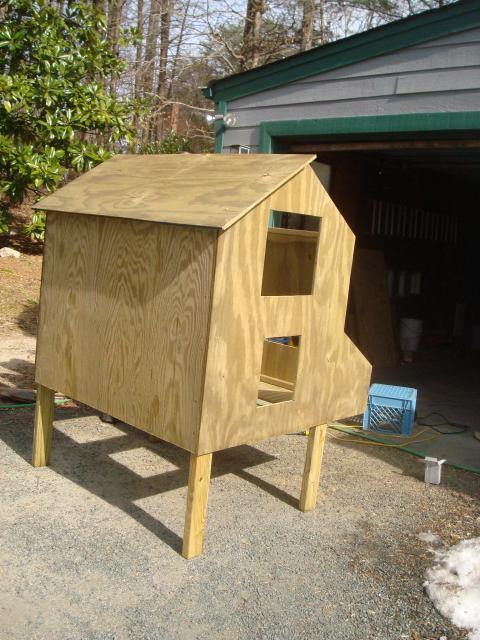
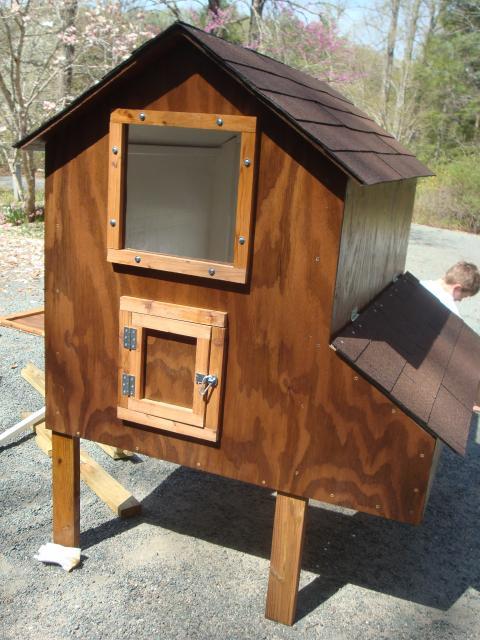
Here's the next picture: we've made quite a few improvements: installed the nest box hinging roof, the trim on the front, the window, and the front door!
Now we get to the floor. Let me take a minute to explain the idea. So, the coop is elevated 18" (1.5') off the ground. It gets very hot here in the summer, and so, in the summer, we wanted the floor to be wire, to provide lots of ventilation, and so the droppings could just fall through. However, in the winter, we wanted to be able to put bedding down to keep the chickens snuggly. So, the floor of our coop IS wire. But underneath the wire are 2 2x4s running the length of the coop. One can slide boards in on top of them, and create a wooden floor just underneath the wire floor to put bedding down on. Let me illustrate:
Floor of coop with floorboards in: (would be covered with bedding)
Floor of coop with floorboards out:
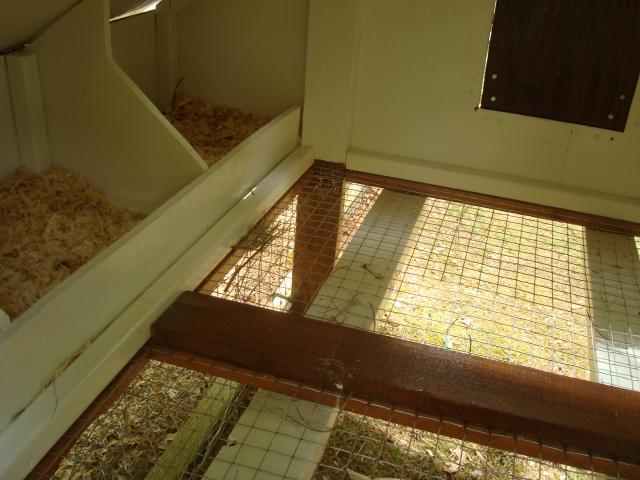
In the winter when the floorboards are on with bedding, all we have to do is slide them out and most of the bedding will fall through! That's the idea, at least.
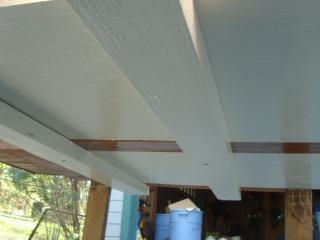
Here's a picture of the floor with the floorboards in from underneath:
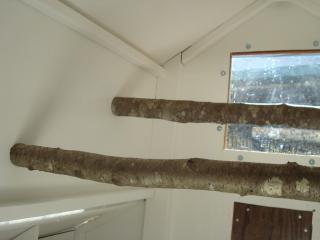
We added roosts...
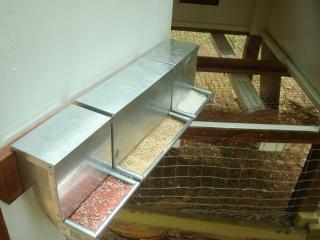
And feeders attached to the back door for easy access...(I know the feeder situation is a little bit overboard...)
We also put hardware cloth on the inside over the vent opening for extra protection.
Added a wooden roof-cap both for looks and to ensure that no water creeps down under the shingles:
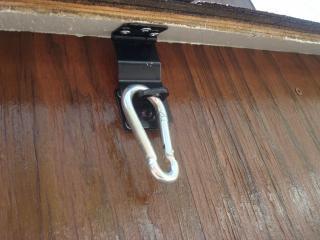
Finished the back door, with a sturdy latch...
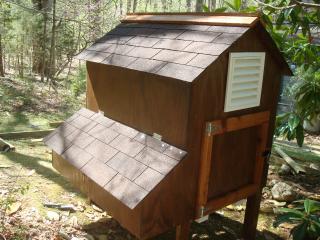
and...Tada!
We were done!
So... now, on to the run!!
Due to space limits on this page,
the description of the construction of the run has been moved HERE
Due to space limits on this page,
the description of the construction of the run has been moved HERE
A few final pictures:
The proud new owners display their turf:
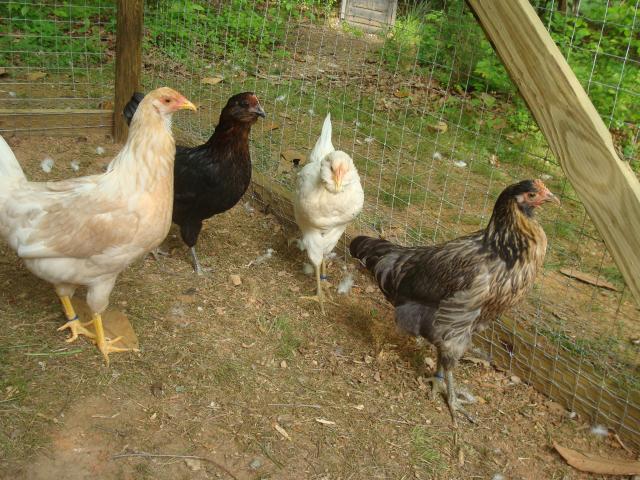
Left to right, it's Pippin, Griffin, Lizzy, and Nutmeg.
Chicken Coop Tour movie!!! Starring...chickens listed above!
Music: Baby Elephant Walk by Henry Mancini
Glad if I've given anyone any ideas!
*
Improvements, etc...
- The chickens really prefer walking on the bedding to the wire, so in the summer, we keep 1 panel in so they can be comfortable in there but still have ventilation
- Planning on expanding coop as we realize that the size is really only good for three chickens, and we want a few more

- Going to add more needed ventilation to the original structure
- Nest boxes definitely didn't have to be that big...the end up mostly shoving the hay in one corner.
- Dropping-falling-through system is extremely handy
That's all for now, folks!


