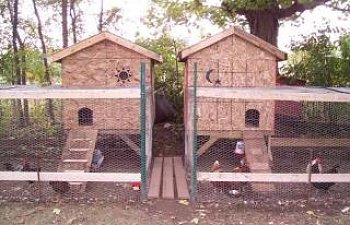
These are my 2 coops, similar but not identical. I call them small and big coop (refering to the size of the chickens, not the coop size). We originally had the chickens in a repurposed metal shed and that worked great until a bear tried to break in. The bear pushed in one of the doors a good 12inches or so, fortunately it was the door we screwed shut and not the other door that actually opened. That was the weekend we built our 1st coop. I have 2 flocks that don't get along so we have 2 coops. My DH is a carpenter (framer) so the building plans are all in his head. I was the inexperienced helper just supplying ideas and chicken knowledge (aquired from BYC and "chickens for dummies") . I would have liked them a little bigger, but my DH insured me that they would be big enough for them. ( i think 4 x 5 ft again, not my area of expertize) So we built the coops using plywood and scrap wood (that we always have laying around). The only things we actually had to purchase was the OSB and some hooks. I have not painted them yet, will do that late spring when the weather is good, hmmm...what color? I have insulated them since this photo using household insulation covered with tarp. They were free range chickens all the time, but now the free range must be supervised due to a large number of predators here. We built the runs, the most expensive part of the project, with chicken wire on the top as well. Which we were glad we did cause the bear tried to climb into one of the runs but couldn't. We could see a huge dent in the top wire where it had been. So here are the pics of my bear proof and hopefully coyote and fox proof coops. (we will know when the snow flies). I hope you like them, if you have any questions and are thinking of building one like this feel free send me a line.

the 1st pic is the front of them, there are windows on both sides of the coops as well that are now closed for the winter. 2nd pic of my DH from the inside of the coop . 3rd pic you can see the length of the runs, they are the same.
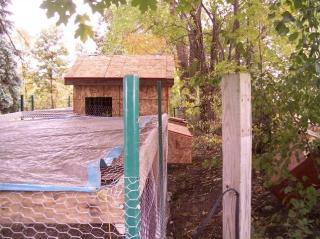
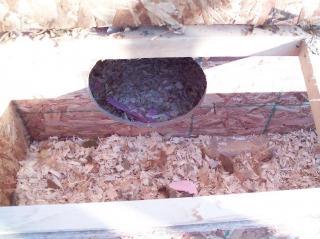
3rd pic from the side to get a view of the egg collection area. We move the tarp on top depending on the weather.
left to right:
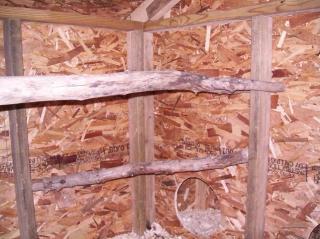
Inside the "small" coop , Inside the "big" coop, Egg boxes from the back with the lid open..small coop on left, big on right. See the pink insulation? A little wholy. The little chickens totally killed it, big chickens only pecked at it a little. I had a feeling about it, but it was another freebie layin around the house so we thought, even though it has low insulative value, we would try. Especially since it allowed good air flow too. The nest boxes were done different cause we built them on 2 separate days and had some better ideas the 2nd time around. It's easier to keep the one with the hole entrance clean cause they can't mix the bedding from the nest area with the bedding from the coop area. Also ran out of pine so we used the branches for roosts in the 2nd one we built.
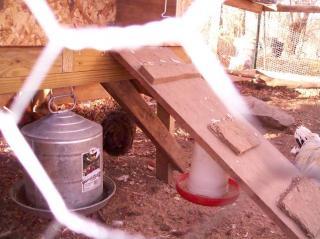
The left photo is where I hand the food and h20, same in both coops. Keeps the food dry under the ramp and they can eat and drink without getting wet if it's raining.
The photo on the right is the hinged door we put on the chicken entrance to the coops. So even if a predator comes in the runs, it wont get in the coops.

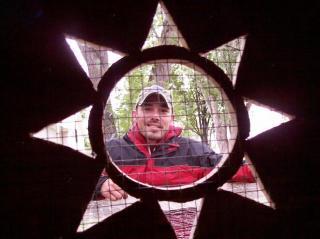
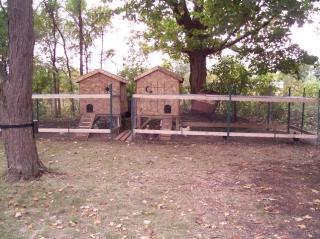
the 1st pic is the front of them, there are windows on both sides of the coops as well that are now closed for the winter. 2nd pic of my DH from the inside of the coop . 3rd pic you can see the length of the runs, they are the same.
3rd pic from the side to get a view of the egg collection area. We move the tarp on top depending on the weather.


left to right:
Inside the "small" coop , Inside the "big" coop, Egg boxes from the back with the lid open..small coop on left, big on right. See the pink insulation? A little wholy. The little chickens totally killed it, big chickens only pecked at it a little. I had a feeling about it, but it was another freebie layin around the house so we thought, even though it has low insulative value, we would try. Especially since it allowed good air flow too. The nest boxes were done different cause we built them on 2 separate days and had some better ideas the 2nd time around. It's easier to keep the one with the hole entrance clean cause they can't mix the bedding from the nest area with the bedding from the coop area. Also ran out of pine so we used the branches for roosts in the 2nd one we built.
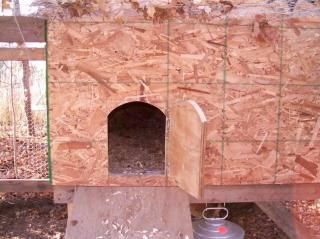
The photo on the right is the hinged door we put on the chicken entrance to the coops. So even if a predator comes in the runs, it wont get in the coops.
")