Our family bought a nice brick ranch on an acre of land. It sits on a dead end, with 5 acres of woods to the side. We have the perfect spot for a chicken coop behind our house. This strip is 35 feet long, raised three feet up and has a concrete retaining wall making it 4 feet wide.
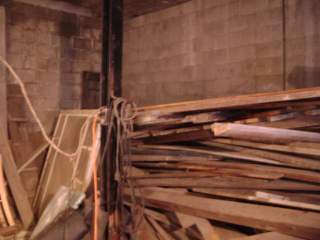
The house had a peculiar feature we were happy to inherit when we bought it at an estate auction; a room under the garage full of wood. The man who built the house and lived in it was a contractor and he put all his leftovers and odds and ends in this dirt-floor room. It was so packed full of wood and stuff, that the door was difficult to open. Because it is mostly dry and very cool in there, even very old wood is in great shape! There are some damp spots, and we'll take care of those this summer with some dryloc.
It took us 4 weeks of sorting out the rotting or just bad wood, moving it about and then building a wooden floor over the dirt. Now we had reduced the load of wood so we could move around, and the wooden floor and new lights overhead brighted up the place my husband dubbed "The Man Cave". There is now a 6 foot high pile of wood to the back of the 'Cave' and serendiptious findings of all kinds located all around it! And out of this, we are building our first chicken coop!

There is still a LOT of wood down there! We planned a coop that is 16 feet long, and four feet wide with a loft over the nests to increase the space for the planned 13 hens. We want to keep the hens from being smushed in during bad weather. Since we are building the coop in the Man Cave and moving it outside, my husband is building it in sections. Right now, it is February, and there is a great deal of ice and snow. But the chicks will arrive in March. We want to have everything built and ready for them when they are feathered out in May. [Just a side note - they grew much faster than we thought!]
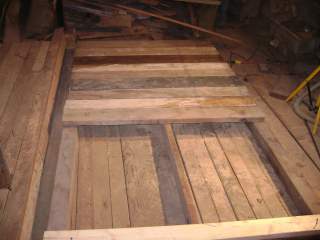
The floor frame:
This is the floor frame. It is built out of heavy posts of the kind you might use to hold up a very heavy porch roof. He cut the posts into four 8 foot segments, and six four foot segments. There are two identical floor sections that will be bolted together outside once we are ready to put it up. This picture shows you one section being built:
He used nine inch pieces of concrete rebar (Iron bar used to strengthen concrete) to 'nail' the horizontal posts to the vertical posts. He clamped the vertical to the horizontal and used a drill to put holes through both posts, and then used a hammer to pound the rebar in. Then he used L shaped brace pieces we found in a cabinet in the Cave to secure the middle horizontal bars in place.
The light colored wood seen behind the floor frame, next to the green tool box was purchased by me. We needed nice pieces for various projects; a feeder, window frames for the windows a friend gave us (double pane, double hung windows from the early 1980's that she had replaced recently; she gave us the old windows but they don't have frames). I went to a Home Depot and went to their 'imperfect bin' in the lumber section. I spoke to a manager, explaining that I wanted as many pieces of wood as he would sell me, but I didn't want to pay a lot for the wood since it was going for a chicken coop. I offered to take every piece of wood he was willing to mark down to his 'best price'. He gave me every 4 foot board and under for fifty cents each! I bought $20 worth of wood and filled my trunk and back seat with it. Always ask, of a manager "Is this the best price you can do for me?" and wait a little. You'll be surprised at how many times you'll get a much better deal. My mother used to do this, and I follow in her footsteps in bargain shopping!
After he finished this frame, we started looking through the wood for floor pieces.
You can see that this is going to be a very heavy floor. We don't want mice getting into it if we can avoid it. We also don't want to have this thing need to be rebuilt any time soon. As soon as Bill finished building one floor section, I took a can of Olympic Deck Fence and Siding Oil Based Stain and put a coat on it on all visible surfaces. This was a can of mistint - it was more than half off the regular price at the hardware (I paid $12 for it) The floor will be covered with linoelum, but we want to prevent any water that may get under it from rotting the floor boards. We also want to be sure that carpenter bees or other wood chewers find the wood unpalatable and that mice won't want to try to chew it either, although I doubt a mouse will work is way through this thick wood (well, if its determined enough I suppose it could) and hopefully the oil based stain will taste lousy enough to prevent that.
So now there are two sections of floor stained a rather ugly green (which will not be seen by anyone but chickens who may wander under their coop)
I will be buying the linoleum at Ollies Bargain Store with a 10% off total purchase coupon I was just sent. Seems to me this stuff goes down in price when they know income tax checks are going to be sent. Let's hope I can get a nice big piece for really really cheap!
And we move to build the walls next.
While we were digging through this woodpile we found a little surprise:
We found an old poultry box! Apparently the former owner had hens at one time. Which doesn't surprise me at all because once upon a time most people did. The back is rotted out of this one, but it isn't as if we don't have enough wood to fix it laying around (look under it! There's tons of wood here!) and the rest of it is in pretty good shape. I'm going clean it up, repair it, paint it and then put fine poultry wire around it and use it.
In this Cave we've found: several screen doors, glass doors, entrance doors, a half barrel of nails (rusty, but not enough to be worthless) a heavy duty winch and chain, cupboard doors, cabinets, roof jacks, McCoy planters, windows (we can build a small greenhouse along side the hens' run) garden tools (nice ones) small tools of all sorts, fencing, gutters both metal and wood, ducts, vents (we have some nice vents for the henhouse) wire, winter chains for truck tires, and all sorts of odds and ends! This is not so much a Man Cave as Treasure Island for chicken keepers!
Here's the second segment of the back wall:
Below is a picture of both sections of the floor, now painted green with the mistint deck & fence paint and bolted together, one section of wall and a the roof on one half, a 'found' door (we'll be putting plexiglass in that missing glass frame and painting it white). This door has a lovely but rusted doorknob with a skeleton key that still works to lock it!
The front wall frames are done and ready to set up, with window frames made for the windows given to us by friends that had theirs replaced.
Where the two sections of the floor are bolted together, a short concrete block wall between the two sections (under the floor) will prevent the hens from going under the second half of the floor and digging it up and stinking it out. We'd never get it clean under there otherwise. DE is going to be spread out under there in the 'forbidden zone' to keep insects from making homes for themselves under it. It ought to stay very dry under there. Hardware cloth set in the dirt behind the retaining wall, and lattice fencing outside will keep critters like raccoons, dogs and rodents out from under the coop from the outside.
More coop going up. The roof is 'found' interlocking tiles from the Mancave. We're about 20 short of finishing. I'm going to call a few local contractors to see if they might have any extras we could buy off of them or beg ^-^
Just a boy and his chicken
June's Update
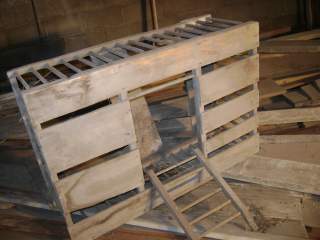
This is the underside of the box, so you can see the panels.
The house had a peculiar feature we were happy to inherit when we bought it at an estate auction; a room under the garage full of wood. The man who built the house and lived in it was a contractor and he put all his leftovers and odds and ends in this dirt-floor room. It was so packed full of wood and stuff, that the door was difficult to open. Because it is mostly dry and very cool in there, even very old wood is in great shape! There are some damp spots, and we'll take care of those this summer with some dryloc.
It took us 4 weeks of sorting out the rotting or just bad wood, moving it about and then building a wooden floor over the dirt. Now we had reduced the load of wood so we could move around, and the wooden floor and new lights overhead brighted up the place my husband dubbed "The Man Cave". There is now a 6 foot high pile of wood to the back of the 'Cave' and serendiptious findings of all kinds located all around it! And out of this, we are building our first chicken coop!
There is still a LOT of wood down there! We planned a coop that is 16 feet long, and four feet wide with a loft over the nests to increase the space for the planned 13 hens. We want to keep the hens from being smushed in during bad weather. Since we are building the coop in the Man Cave and moving it outside, my husband is building it in sections. Right now, it is February, and there is a great deal of ice and snow. But the chicks will arrive in March. We want to have everything built and ready for them when they are feathered out in May. [Just a side note - they grew much faster than we thought!]
The floor frame:
This is the floor frame. It is built out of heavy posts of the kind you might use to hold up a very heavy porch roof. He cut the posts into four 8 foot segments, and six four foot segments. There are two identical floor sections that will be bolted together outside once we are ready to put it up. This picture shows you one section being built:

The light colored wood seen behind the floor frame, next to the green tool box was purchased by me. We needed nice pieces for various projects; a feeder, window frames for the windows a friend gave us (double pane, double hung windows from the early 1980's that she had replaced recently; she gave us the old windows but they don't have frames). I went to a Home Depot and went to their 'imperfect bin' in the lumber section. I spoke to a manager, explaining that I wanted as many pieces of wood as he would sell me, but I didn't want to pay a lot for the wood since it was going for a chicken coop. I offered to take every piece of wood he was willing to mark down to his 'best price'. He gave me every 4 foot board and under for fifty cents each! I bought $20 worth of wood and filled my trunk and back seat with it. Always ask, of a manager "Is this the best price you can do for me?" and wait a little. You'll be surprised at how many times you'll get a much better deal. My mother used to do this, and I follow in her footsteps in bargain shopping!
After he finished this frame, we started looking through the wood for floor pieces.
So now there are two sections of floor stained a rather ugly green (which will not be seen by anyone but chickens who may wander under their coop)
I will be buying the linoleum at Ollies Bargain Store with a 10% off total purchase coupon I was just sent. Seems to me this stuff goes down in price when they know income tax checks are going to be sent. Let's hope I can get a nice big piece for really really cheap!
And we move to build the walls next.
While we were digging through this woodpile we found a little surprise:
In this Cave we've found: several screen doors, glass doors, entrance doors, a half barrel of nails (rusty, but not enough to be worthless) a heavy duty winch and chain, cupboard doors, cabinets, roof jacks, McCoy planters, windows (we can build a small greenhouse along side the hens' run) garden tools (nice ones) small tools of all sorts, fencing, gutters both metal and wood, ducts, vents (we have some nice vents for the henhouse) wire, winter chains for truck tires, and all sorts of odds and ends! This is not so much a Man Cave as Treasure Island for chicken keepers!
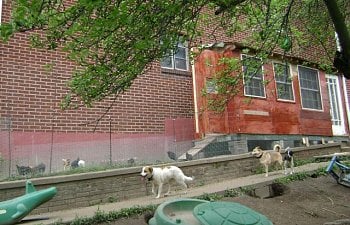
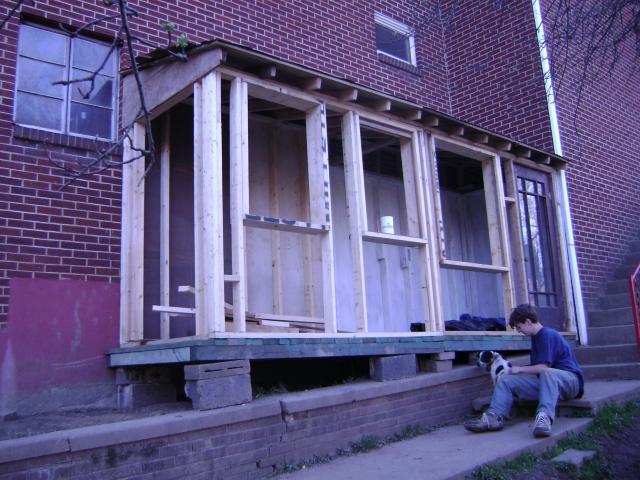
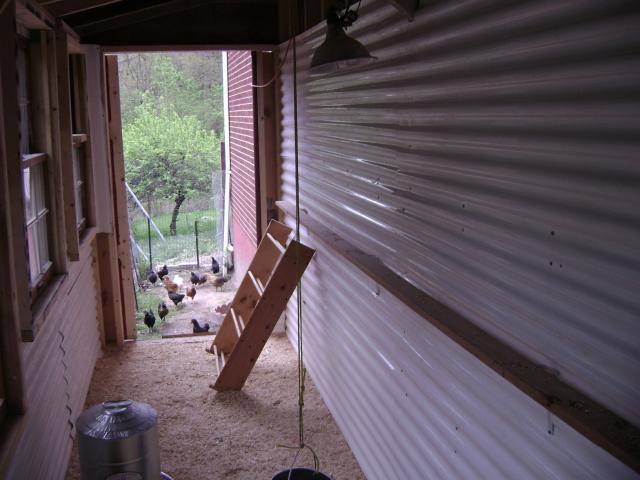
Here is the space the coop goes in:
March's work
The space is 35 feet long but just 4 feet wide
March's work

The space is 35 feet long but just 4 feet wide
Awesome teen son and husband worked to level the ground and get concrete blocks set for the coop to rest upon. An aside here, too - I got the blocks last spring when I drove past a warehouse that was being torn down. I stopped and asked the contractors if they were going to sell the block or throw it out. They told me they planned to take it to a land fill - I had 48 hours to haul whatever I wanted out and they would even use a the loader to push block to where I could more easily load it into my truck. Teen son (lucky boy that he is) and husband and I took out three pickup truckfulls of block and even some nice brick & glazed blocks. Would have gotten more, but had no place to store them!
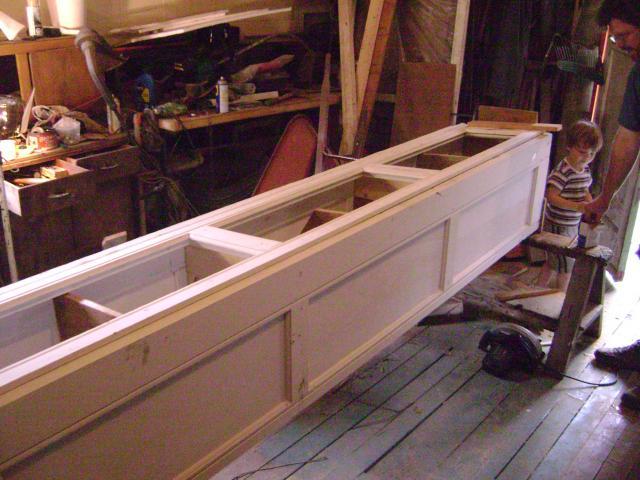
THE WALLS
Bill used an old plywood sign he found already cut into segments for the back of the coop walls - the part facing the house. This is super old! Probably for an old A & P grocery. One of my little sons looks on.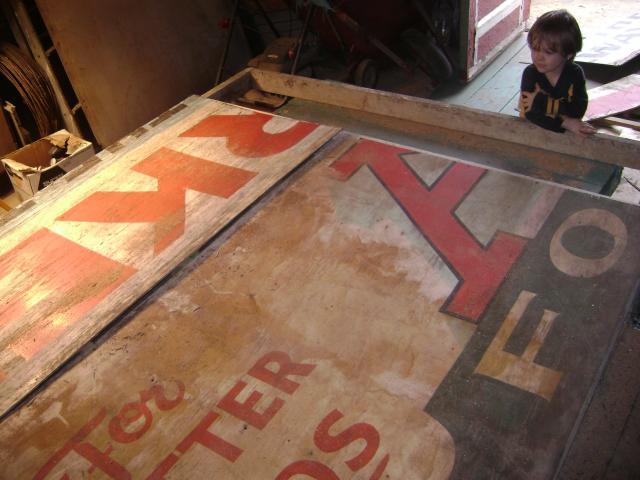
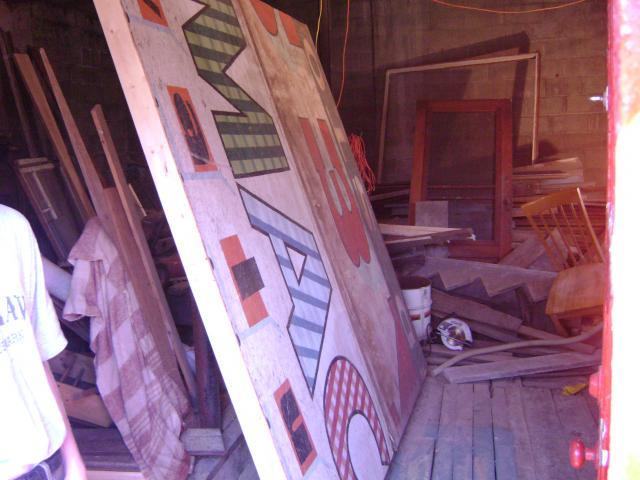
Here's the second segment of the back wall:
The front wall frames are done and ready to set up, with window frames made for the windows given to us by friends that had theirs replaced.
And we move into April!
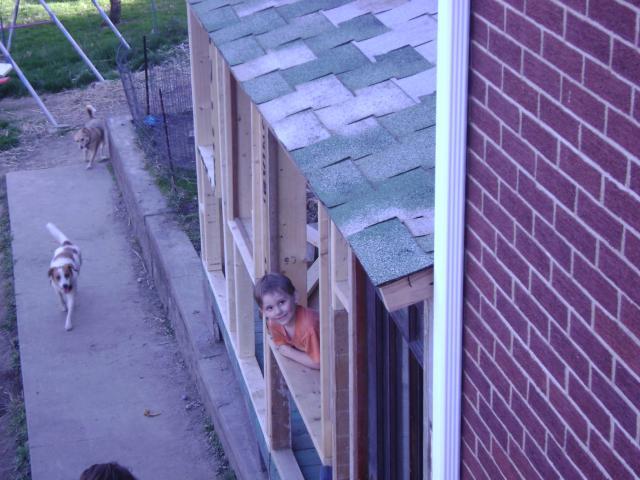
Another view of the first section. Door, roof one wall and the frame for the front wall. Bill works with our teen son and another little son 'helps'. The floor section near the run area is raised over a foot off the ground. There will be concrete tiles under here, and it can be a place for the hens to hide or shade themselves. This is already a shady area; it sits facing the east and a beautiful old apple tree sends branches out over it.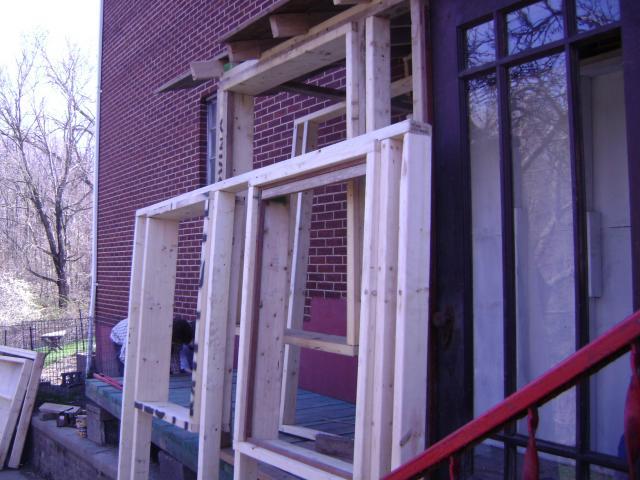
Where the two sections of the floor are bolted together, a short concrete block wall between the two sections (under the floor) will prevent the hens from going under the second half of the floor and digging it up and stinking it out. We'd never get it clean under there otherwise. DE is going to be spread out under there in the 'forbidden zone' to keep insects from making homes for themselves under it. It ought to stay very dry under there. Hardware cloth set in the dirt behind the retaining wall, and lattice fencing outside will keep critters like raccoons, dogs and rodents out from under the coop from the outside.

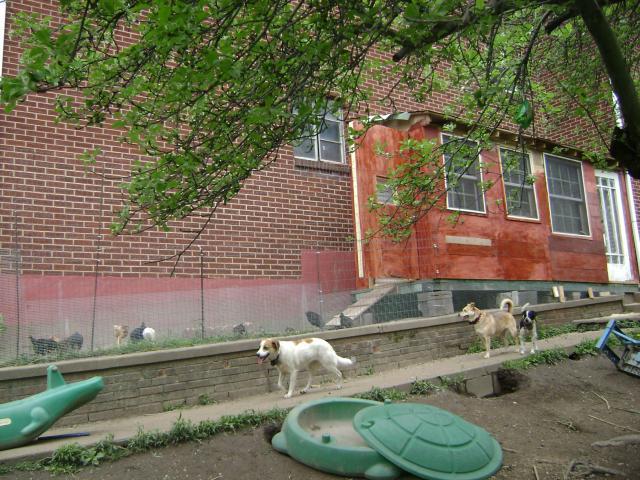
In the picture is my 6 year old and two of my three beloved idiot dogs.
Teen son with our favorite beloved idiot dog. Another view of the coop with the walls and roof on, and the windows framed.
The retaining wall is a little crooked, so the henhouse is up on blocks to level the floor out. The pullets can go under the henhouse about half way, then it is blocked from there with brick and block. We want them to have the underside so they can hide or get shade, but not so they can crawl way back in where it gets narrow and get stuck. We also can't clean out that side closest to the house and don't want odor to be a problem back in there.
It will have hardware cloth down the length of it, and then eventually have some lattice nailed onto it.

Here it is, ready for the new occupants! It will eventually have siding put on it, but for now, we had to rush to get the pullets into it before they got to stressed out in the brooder. They grew much faster than my husband could build!
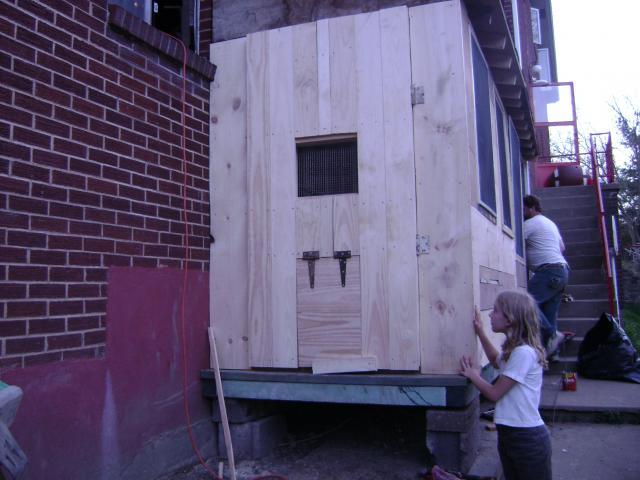
A daughter observing the double door: chickens exit at the bottom, people can go in and out through the big door. There is a nail preventing the chicken door from being opened temporarily until we have a good, raccoon-proof lock for it.
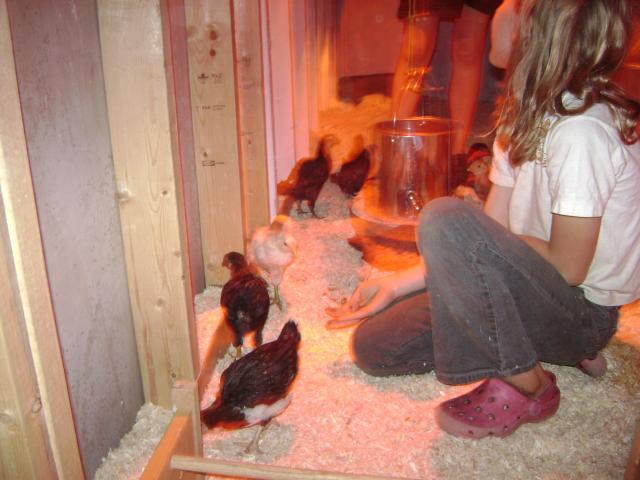
Here are the pullets inside their new residence on their first night.
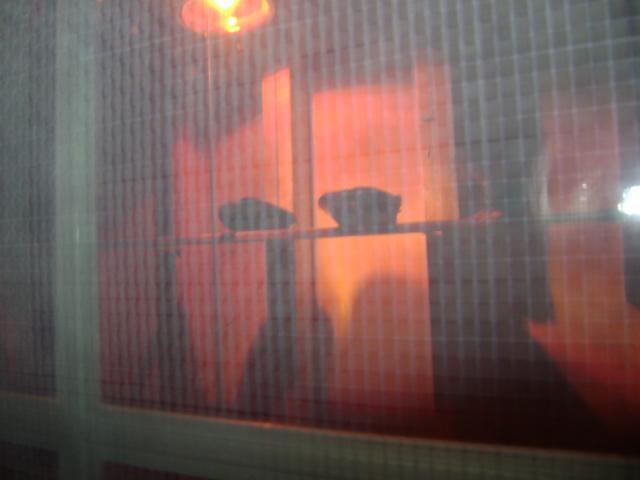
We left their light on just for the first night so they would be able to find their food and water. I took this through their window.
May
We purchased vinyl panels (like you use for deck roofing) to finish the inside, so we can hose the walls down when they are needing cleaned. This is the biggest expense we planned in the coop (about $140 in materials with the insulation), but one we hope will help us keep the hen house cleaner in the long run, and leave less places for insects to dwell. We also put foam insulation in the walls to keep them cooler in our hot summers and warmer in our very cold winters.
They have an old home-made CD rack for a temporary roost until they can all reach the 'big chicken' roost themselves (and I'll rework this CD rack with flat wood when the bantams are old enough to go in.).
If they get too big for the 'big chicken' roost, since it is so close to the wall, we've got different brackets with which to replace the ones on it now that we gleaned from an old shelf in the garage. The pullets like being on the big perch, but most can't fly up themselves yet. When they are put up there, they settle happily.
Outside in the run, to the right (just beyond the CD rack perch in the picture above), you see a red scalloped edging block sand pit for the chickens to dust themselves in. We had a friend give those edging blocks to us. It is in the center of the run in the picture below.
The outside was painted red with oil based barn paint (Valspar barn paint, clearance at the Lowe's, $13/can) to protect all the wood from the spring rains until the siding, also gleaned from the Mancave, can be put up. Then the siding will be painted with the red oil based barn paint. The nest boxes will be made next, but since the chickens are only 6 weeks old, we're not worried about those just yet. They will be put in under the windows once they are made, and we (at the moment) plan to have roll away boxes, with access doors from the outside. "Opa" sent us the plans. Bill is considering his options! And I don't blame him. Its more work!
The chickens in the run, the dogs anxiously wishing they could chase them and getting swatted when they jump at them and all is right with the world. We have hardware cloth around the bottom, attached to four foot welded fence we got at an auction for $10, and either another piece of 4' welded fence or chicken wire attached above given to us by another friend. We will have the run fully enclosed as soon as we figure out how we want to do that so no hawks can get in. Right now, the pullets don't go out in their run without someone watching over them so the hawks can't get them.
The chickens in the run, the dogs anxiously wishing they could chase them and getting swatted when they jump at them and all is right with the world. We have hardware cloth around the bottom, attached to four foot welded fence we got at an auction for $10, and either another piece of 4' welded fence or chicken wire attached above given to us by another friend. We will have the run fully enclosed as soon as we figure out how we want to do that so no hawks can get in. Right now, the pullets don't go out in their run without someone watching over them so the hawks can't get them.
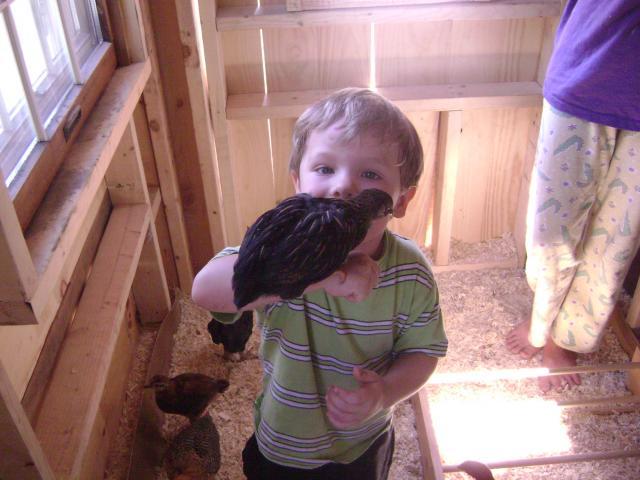
Just a boy and his chicken
June's Update
The girls are now getting red faces, and squatting more frequently. Its getting time for nest boxes.
We found the perfect stuff for it in the Man Cave. An old wooden sectioned garage door. We used the 'glass' side (knocking out the glass completely first) as the front of the box, and the other panels to frame the box. We used old wood to divide each section of the garage door into six boxes.
We found the perfect stuff for it in the Man Cave. An old wooden sectioned garage door. We used the 'glass' side (knocking out the glass completely first) as the front of the box, and the other panels to frame the box. We used old wood to divide each section of the garage door into six boxes.
This is the underside of the box, so you can see the panels.

Heavy vinyl flooring leftover from the hen house floor is stapled to the top so they can run on it and increase some of the space they have to use in the hen house.
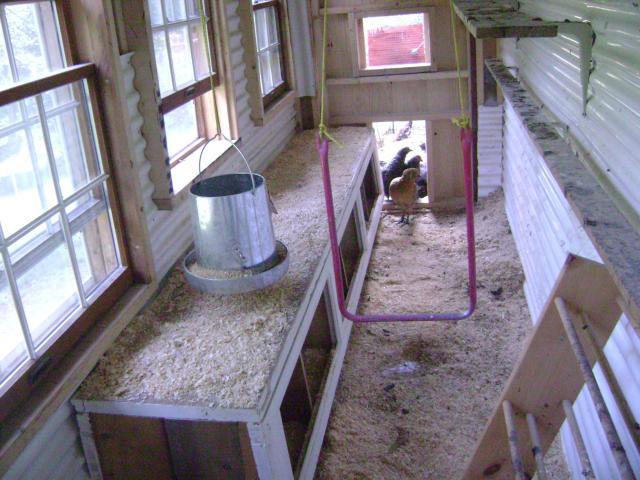
Here it is, installed, with little pink, blue and green plastic easter eggs in the nesting material to give the pullets ideas of what we want them to use it for! Sue, one of our Easter Eggers, comes in for a look. There is a swing in the center aisle for the girls to use to amuse themselves on rainy days.