This article is broken down by section in the additional pages because it would be far too long and cumbersome to put them all on one.
After keeping chickens for about 4 years, I gave my birds to a friend and sold my tiny coop on craig's list. After only two summers I came to the conclusion that I liked having chickens, but I didn't like the daily maintenance that was required with my former set up.
I don't want to clean out poop on a weekly basis, nor do I want the daily commitment of letting them out at dawn and locking them up at dusk - so an automatic pop door will be an essential purchase. I also know I want a walk in sized coop that I can store feed/bedding within instead of taking up vital space in my shed.
Here is a link to the build thread: https://www.backyardchickens.com/threads/building-a-new-coop-suggestions-welcome.1539131/
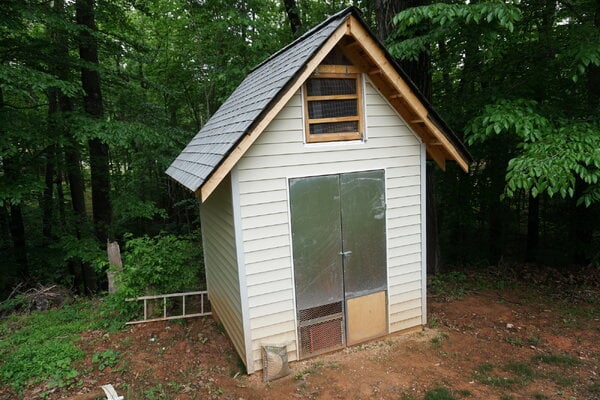
After consideration and consulting my wife, I chose a location for the new coop and began designing it in my head. I wanted to use deep bedding so a dirt floor was essential to my design. Being that my location was on a steep grade, I chose to build a cinder block foundation. The reasoning was two-fold: 1. It would allow me to have a level floor despite the grade of the surrounding soil. 2. I already had most of the block. This project started out using reclaimed/free materials for the most part, but when lumber prices fell to acceptable levels I decided to take that route. The layout would be 8'x8' with standard 8' walls and a 12:12 (45 degrees) roof with 16" overhangs all around. The sheathing would be 7/16" OSB for the sides with tyvek wrap and vinyl siding, both of which I already had. The roof would utilize the same sheathing with roofing felt and asphalt shingles because I already had nearly a whole square of shingles on hand. The roof has 8' of ridge vent at the peak and the eaves and gables would be open for ventilation. At this writing it still needs a few trim pieces on the eaves and the rafters on the gables, but it is currently occupied by 12 pullets and those little details will have to wait a little longer.
After keeping chickens for about 4 years, I gave my birds to a friend and sold my tiny coop on craig's list. After only two summers I came to the conclusion that I liked having chickens, but I didn't like the daily maintenance that was required with my former set up.
I don't want to clean out poop on a weekly basis, nor do I want the daily commitment of letting them out at dawn and locking them up at dusk - so an automatic pop door will be an essential purchase. I also know I want a walk in sized coop that I can store feed/bedding within instead of taking up vital space in my shed.
Here is a link to the build thread: https://www.backyardchickens.com/threads/building-a-new-coop-suggestions-welcome.1539131/
After consideration and consulting my wife, I chose a location for the new coop and began designing it in my head. I wanted to use deep bedding so a dirt floor was essential to my design. Being that my location was on a steep grade, I chose to build a cinder block foundation. The reasoning was two-fold: 1. It would allow me to have a level floor despite the grade of the surrounding soil. 2. I already had most of the block. This project started out using reclaimed/free materials for the most part, but when lumber prices fell to acceptable levels I decided to take that route. The layout would be 8'x8' with standard 8' walls and a 12:12 (45 degrees) roof with 16" overhangs all around. The sheathing would be 7/16" OSB for the sides with tyvek wrap and vinyl siding, both of which I already had. The roof would utilize the same sheathing with roofing felt and asphalt shingles because I already had nearly a whole square of shingles on hand. The roof has 8' of ridge vent at the peak and the eaves and gables would be open for ventilation. At this writing it still needs a few trim pieces on the eaves and the rafters on the gables, but it is currently occupied by 12 pullets and those little details will have to wait a little longer.
Footer
To anyone considering the same design/path that I took, the mini excavator and a friend who knows how to run it is worth every penny. I ended up having a 24" drop in grade in 8 feet of distance between the front of the coop and the back. I went with a 12" deep, by 12" wide, by 4" thick footer. The grade is stepped every 8" to match the change of a cinder block. My oldest has continuously inspected my work to ensure everything is going smoothly. Also- for working by yourself a grade laser is a winning tool if you have access to one.

The next part of the foundation was to pour the footer. Each grade step had concrete placed before the pour so that the entire footer was tied together as one single piece. In the pictures, the gravel is where I had dug too deep and needed to come up on my grade some. My footer wasn't perfect, but it was close enough for me to fix in the block. The pieces of rebar you see in the bottom of the footer were placed using the grade laser to be 4" taller than the grade that I originally set. By using these stakes as a reference point for the top of the concrete it did not matter if the soil beneath them was exactly 4" from the top because all of the stakes were within 1/4" of each other and to top of the step forms.
The next part of the foundation was to pour the footer. Each grade step had concrete placed before the pour so that the entire footer was tied together as one single piece. In the pictures, the gravel is where I had dug too deep and needed to come up on my grade some. My footer wasn't perfect, but it was close enough for me to fix in the block. The pieces of rebar you see in the bottom of the footer were placed using the grade laser to be 4" taller than the grade that I originally set. By using these stakes as a reference point for the top of the concrete it did not matter if the soil beneath them was exactly 4" from the top because all of the stakes were within 1/4" of each other and to top of the step forms.
Foundation
Next phase: Cinder blocks
I had roughly 60 cinder blocks laying around my yard in various places that I planned to use for this build. I ended up buying 15 new blocks to finish out an extra course that I had not planned on. I used Quickwall surface bonding cement to secure the blocks in place. It is a fiber reinforced portland cement product that is waterproof and when applied at 1/8" thick provides greater strength than traditional mortar joint construction. The blocks are dry stacked and then covered with the product. But before all that I needed to level up the blocks . I ended up with a corner being about 1" low compared to my highest point (can't go down, so all others must come up!). I used a 4 ft level with an 8ft piece of angle steel that was good and straight to level up the blocks on the corners and then I adjusted all of the blocks in between them. I used pieces of 2x8 that I could precisely cut to get the blocks as close to level as possible. After shims were placed, I mixed up mortar and filled the gap. This prevented me from using an excessive amount of quikwall, but also ensured that the block would not be subject to a load that was unsupported between the shims.
Just when everything was going smoothly, surprise surprise! A tree fell down right through where my coop would have been standing if I had built it in the fall when I was originally planning to. Thankfully God delayed my schedule and the only casualty was the grill (which still works despite the dent). It took a couple months to get back on track because life happens.
Once all the blocks were dry stacked and mortar was placed in any gaps as needed, it was time for the Quickwall. There was some learning curve for me because I have applied joint compound for drywall before and this was similar. Once the quickwall was applied and cured, I leveled out the soil inside the foundation and it was conveniently about 8" from the top, which will allow me to have 8" of bedding before even reaching the bottom of the walls, much less the doors. Following this, I then used the extra concrete that was leftover from pouring the footer to fill in several portions of the cinder block walls to give a place to secure the sill plate to. I also topped the blocks that would be in the doorway. Next I ran the electrical line. Hindsight being 20/20, I should have done that BEFORE I applied the quickwall, but I patched it up with hydraulic cement and called it a day. Electrical service consists of a 20 amp circuit that I dropped off the panel in my shed, which has a 50 amp, 240V circuit run to it. I ran underground wire instead of burying conduit the entire length. I ended up burying some conduit because of some of the things that were buried in the ground like sinks, ceramics, and other sharp edges that I did not want to cut the wire after it was in the ground. Once the the wire cleared those items it was buried directly. All the wire inside the coop was run inside of conduit to protect it from pecking beaks or chewing rodents that might gain access.
Framing
Once all the elements of the foundation were completed, it was time to start framing. This meant a bill of materials (which ended up being short, oh well) and a trip to Lowe's to buy materials. I ended up purchasing "stud" boards which are 93" and cut square because they were cheaper than standard 96" 2x4s, which is not normally true. It made framing walls easier because there were a lot of cuts that I didn't have to make when I was laying out and fabricating the walls. I used tapcon anchors to secure the sill plate to the foundation on the cells that I had previously filled with concrete. I made a convenient mistake by miscutting the header for my 50" door frame at exactly 50" instead of 53" to sit on the jack studs. I used this 50" header to make a 47" opening to have external access to the nesting boxes which makes it much easier to ask a friend or neighbor to come collect eggs while were are out of town. I made all the cuts and laid out the walls and rafters at the top of the hill with the miter saw before carrying them down and assembling the walls on the foundation in a strategic manner so that they were in the order that I would be standing them up in. A friend of mine with more experience framing came over and helped me stand up the walls and frame the roof. Having everything laid out and cut accurately made the roof a breeze.
Sheathing
After the building was framed, it was time to sheath and protect the OSB from moisture. I had a 52" roll of tyvek in my shed so I would need to tape the seams, but it cost me nothing extra and worked just fine. Same goes for the vinyl flashing around the door and nesting box opening. I also started installing the vinyl siding parts at this point, so that the siding would go smooth when I started. I had surgery right after I got the coop to this phase so there was a delay where I couldn't do any work on it, but it was sealed for water and would be there when I recovered.
Roofing
After I finished healing from surgery, I knew I needed to put a roof on this coop before winter came. Some tyvek on the walls is no big deal, but a roof is an absolute necessity. I had some shingles that were leftover from my parent's house and my dad gave them to me when they moved out of town. I eventually had to buy 4 extra bundles, but I had nearly 3 on hand, so there was some savings. I also purchased starter shingles and ridge cap shingles for this project. I installed a ridge vent along the entire length of the roof line and it is cut back along the whole interior of the coop to allow hot air to rise and escape without building up in the loft. At this point in the project, my phone stopped taking pictures without them being very blurry unless I used the forward facing camera, so the volume of pictures I took dropped off.
Siding
Anything I build gets vinyl siding on it. Despite the implications if the building catches fire (hint: vinyl is made from oil and burns really quick), vinyl siding is REALLY easy to put up, looks good, and is maintenance free. You can cut it with some tin snips (or a miter saw with the blade on backwards if you want to be fancy), and it goes up with a hammer and some galvanized roofing nails. It covers up imperfections and is easy to work with. I had vinyl on hand of mixed colors that went on the back side, and I purchased a carton that finished it off.
On the gables my original plan was to use wooden planks that I harvested from pallets to use as "siding" that I could ventilate by not letting them sit directly on one another. This proved very time consuming and wasn't worth the effort given the ridge vent, open eaves, and the loft door that would allow free flow of air through the coop. And needless to say, the vinyl looked like a million bucks compared to what I was trying to do with the pallet wood.
On the gables my original plan was to use wooden planks that I harvested from pallets to use as "siding" that I could ventilate by not letting them sit directly on one another. This proved very time consuming and wasn't worth the effort given the ridge vent, open eaves, and the loft door that would allow free flow of air through the coop. And needless to say, the vinyl looked like a million bucks compared to what I was trying to do with the pallet wood.
Doors
I wish I could have taken photos while I was building these, but I was in a bit of a hurry and as previously mentioned, the camera on my phone was very limited. I made the door custom to the fit the opening, which is a rough opening for 48" french doors. I have a friend who is an iron worker that let me use his welder and shop. They are constructed from welded 1 1/4" steel angle with aluminum sheet for skin and some steel mesh on one side. I have since added a baffle of sorts that prevents the wind from blowing all the chips away from that door, but still allows a low intake for ventilation. They're mounted directly to the studs with 3" screws and the hinges are welded on. the stationary door is pinned in place using a barrel latch and the bottom his held in place by a bolt dropped into a hold drilled in the block. The plan is to paint them eventually.
Electrical and predator proofing
I have a shed about 30' away from the coop that is fed by a 50 amp breaker from the house. I took off of that panel a 20 amp circuit that is partially in conduit, partially just buried underground wire to the coop. Everything inside the coop is in conduit and has covers designed for wet locations. All I have is a GFCI outlet that also serves as protection for the light circuit. The wire is actually underground wire that is inside conduit because it was cheaper than the standard romex at the time of purchase.
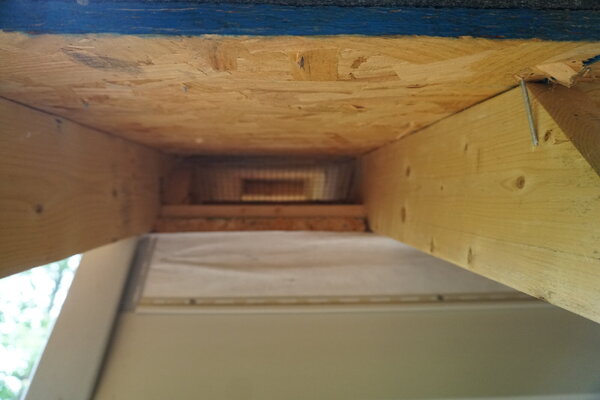
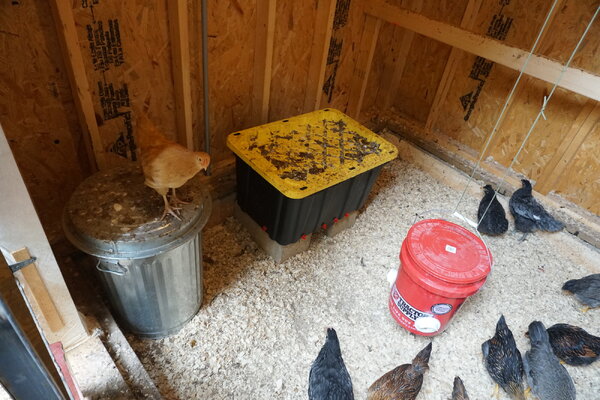
Predator proofing was pretty standard fare. 1/2" galvanized hardware cloth adhered with 1/2" staples put on with an air stapler. I ended up having enough OSB to put in a loft with an almost 8x4 floor, with the rest of it covered with hardware cloth. I used blocks of wood to seal the space in between the ceiling joists for the eaves. The loft door is made out of pallet wood and has hardware cloth attached to it. It allows plenty of ventilation as well.
Predator proofing was pretty standard fare. 1/2" galvanized hardware cloth adhered with 1/2" staples put on with an air stapler. I ended up having enough OSB to put in a loft with an almost 8x4 floor, with the rest of it covered with hardware cloth. I used blocks of wood to seal the space in between the ceiling joists for the eaves. The loft door is made out of pallet wood and has hardware cloth attached to it. It allows plenty of ventilation as well.
Nesting Boxes
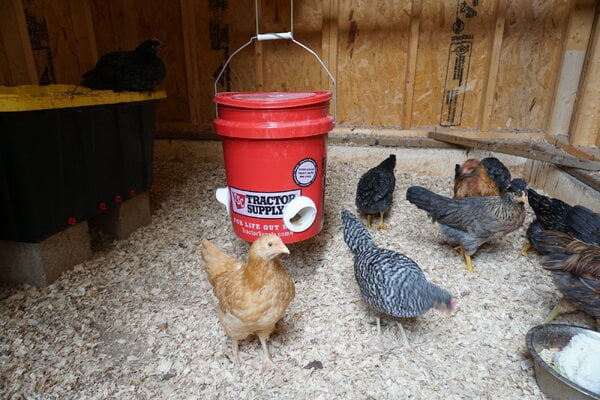
I chose to build roll away style nesting boxes because I did not want to deal with crushed and poop covered eggs like I had in the past. I used a design found on this forum and modified it to suit. If you had to buy it all new you'd need 2 sheets of plywood, but you COULD do it with a single sheet if you make the ramp out of two pieces instead of 1.