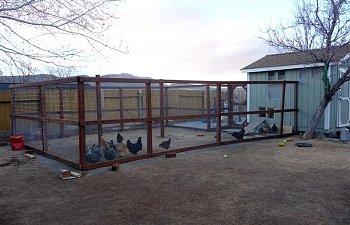
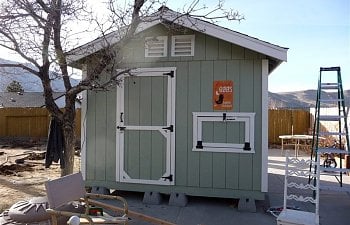
I have 25 chicks that hatched on 9/14/11 and arrived on 9/16/11. I started the coop build on September 2, 2011 and moved the chicks in on October 31, 2011. I continued to work on the details of the coop throughout the fall and winter.
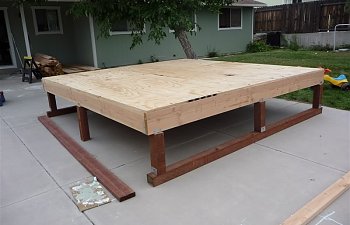
I followed the plan for the walk-in coop in Building Chicken Coops for Dummies, making some adjustments and expanding the size from 8x8 to 10'x10'. The coop is built on an existing cement pad. The run will go onto the lawn. I used 2x8's for the frame of the floor and 2x6's for the floor joists. I also used a 2x8 for one of the floor joists near the center for extra support. The base of the coop originally was two 4x4x10 skids, as you can see in the photos below. The floor frame was originally supported by 4x4 posts which were attached to the two skids and two sides. The other posts in the center of the two other sides and the middle of the coop rested on the cement pad. I used metal post to beam connectors and joist hangers. I say, "originally" since shortly after I finished the coop and moved the chicks in, a very strong wind storm caused the posts on the skids to collapse. Fortunately no one was hurt. I strongly caution against putting your large coop up on posts like these, although I saw many similar designs when browsing the BYC coop pages. We were lucky that the coop happened to land on top of two five gallon buckets. That gave us the space to get a jack under the coop and place the cement deck blocks under it as supports. We were able to get the posts and skids out from under the coop. It all worked out well and the coop is very secure now on the cement blocks.
Here is the base of the coop with the posts and floor joists.

I used 3/4" plywood for the floor. I plan to cover that with vinyl flooring.

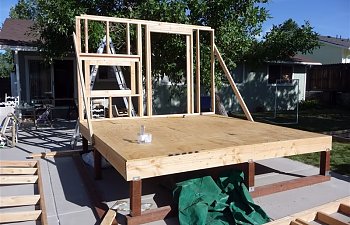
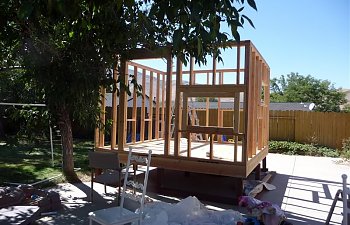
Here is the front wall framed and raised.

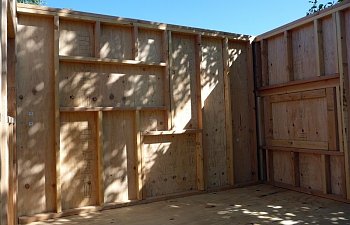
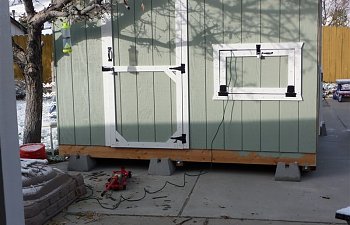
Here is the coop with all 4 walls raised from several different angles.First from the front which has the people door and the nest box door.

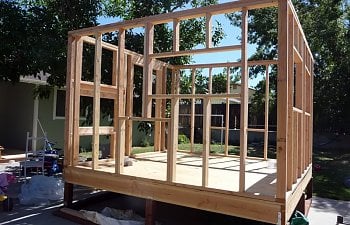
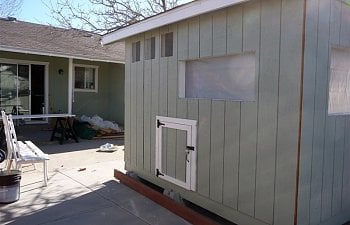
This is the north wall which has a window and a clean out door.

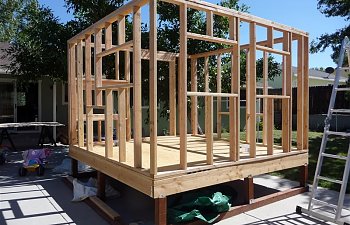
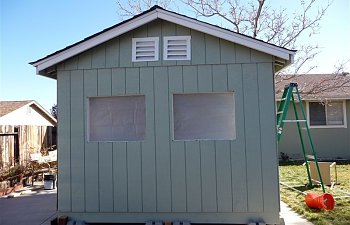
Here's the back wall which has 2 windows.

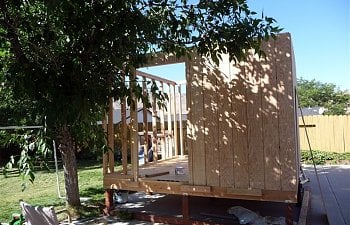
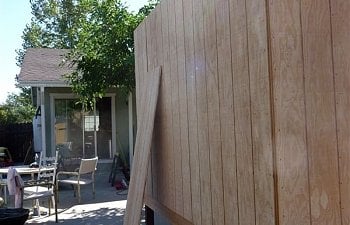
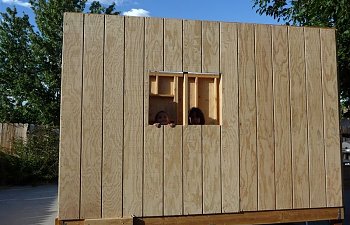
We started to put up the siding. We used T1-11. Since it was just my husband and I working on the coop build, we used small 2x4 supports temporarily screwed into the coop base to help support the large pieces of the siding while we screwed it in. This made the job very doable with just the two of us.


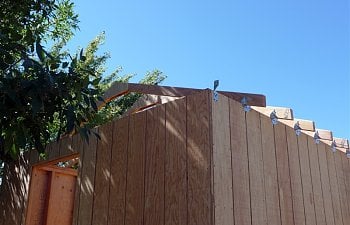
We used hurricane ties to put the trusses up. The roof was the hardest part of the coop build for us and it is far from perfect. However, it does the job of keeping things dry inside.

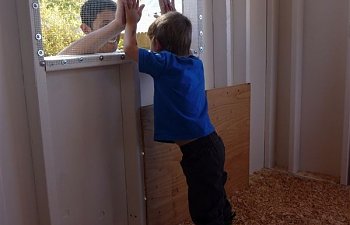
Move in day! The windows have 1/4" hardware cloth over them which is secured with screws and fender washers. I haven't finished the windows yet. There will be hinged plexiglass windows on the outside. For this winter, I have stapled heavy duty plastic over the windows to keep out drafts.

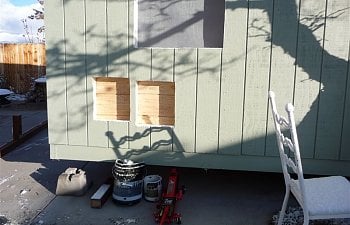
There are 10"x12" vents along the top edge of the walls. They will have hinged plywood vent covers that could be closed if needed. They are also covered with 1/4" hardware cloth secured with screws and fender washers. Since the run isn't done yet, i have covered the pop door openings with plywood. I have two pop door openings so that in the future I can have the coop and run split into two for different age groups.

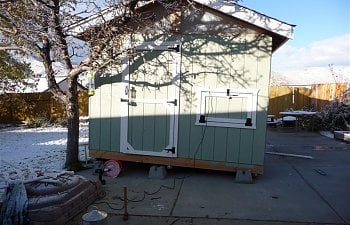
This is when the coop collapsed. In this picture I'm in the process of jacking up the coop to put the deck blocks under it.

That 5 gallon paint bucket really saved us! It gave us the space we needed to get the jack under the coop.

Problem solved! We feel the coop is very secure now on these cement blocks.

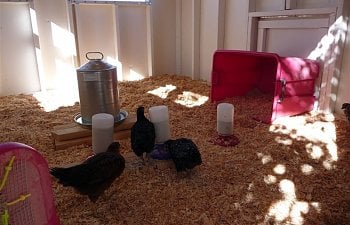
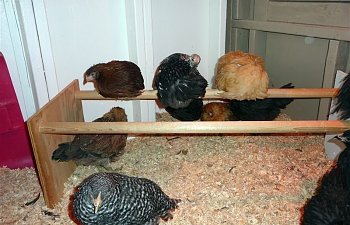
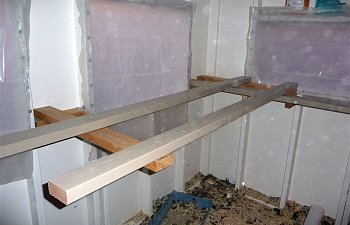
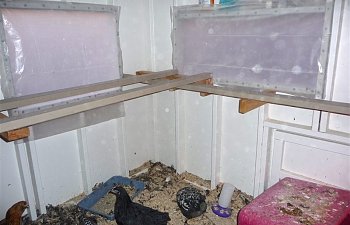
Here's the "junior" roost I made them before they were ready for the higher roosts.

This photo shows the side with the cleanout door. You can also see the three vents at the top. The area under the rafters I left open, just covered with 1/4" hardware cloth for extra ventilation.

Here's the view from the back of the coop. you can see our slightly crooked roof.

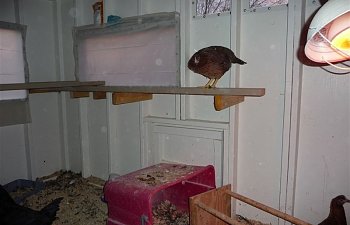
In late December, I finally installed the big girl roosts. They are about 3 1/2 feet up.


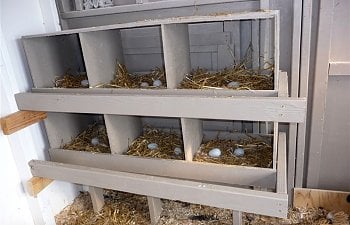
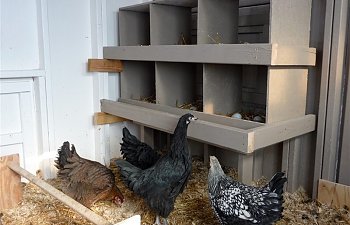
When the girls were 18 weeks old, I built and installed the nest boxes. The eggs in there are old glass eggs. They are very light weight and hollow.


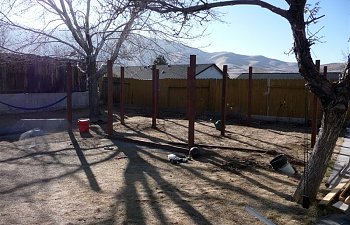
An unusually warm winter has allowed us to start building the run. We dug holes about 18" deep into our very rocky, clay soil. My husband was the muscle on that job. What a chore! Then we put the 4x4 pressure treated posts into the holes on top of a base of a little gravel. We refilled the holes with the original clay soil, watering and packing down the soil as we went along in several layers until the hole was filled. The posts are very secure. If we had looser soil, we may have used cement. Then I started with the pressure treated 2x4's along the bottom of the run.

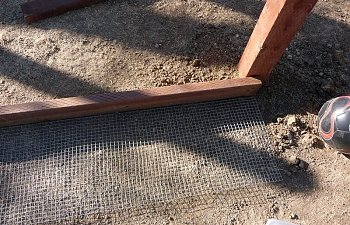
I put 18" of 1/2" hardware cloth wrapped under the 2x4 and coming out on the outside of the coop for the apron.

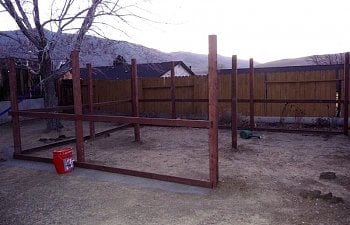
Next, I started putting on the middle 2x4 3 feet high. The weather is changing so we'll see when I have a chance to work on the run some more.

Here is the run with hardware cloth and welded wire on it. We will be putting welded wire over the top next.

I followed the plan for the walk-in coop in Building Chicken Coops for Dummies, making some adjustments and expanding the size from 8x8 to 10'x10'. The coop is built on an existing cement pad. The run will go onto the lawn. I used 2x8's for the frame of the floor and 2x6's for the floor joists. I also used a 2x8 for one of the floor joists near the center for extra support. The base of the coop originally was two 4x4x10 skids, as you can see in the photos below. The floor frame was originally supported by 4x4 posts which were attached to the two skids and two sides. The other posts in the center of the two other sides and the middle of the coop rested on the cement pad. I used metal post to beam connectors and joist hangers. I say, "originally" since shortly after I finished the coop and moved the chicks in, a very strong wind storm caused the posts on the skids to collapse. Fortunately no one was hurt. I strongly caution against putting your large coop up on posts like these, although I saw many similar designs when browsing the BYC coop pages. We were lucky that the coop happened to land on top of two five gallon buckets. That gave us the space to get a jack under the coop and place the cement deck blocks under it as supports. We were able to get the posts and skids out from under the coop. It all worked out well and the coop is very secure now on the cement blocks.
Here is the base of the coop with the posts and floor joists.

I used 3/4" plywood for the floor. I plan to cover that with vinyl flooring.
Here is the front wall framed and raised.
Here is the coop with all 4 walls raised from several different angles.First from the front which has the people door and the nest box door.
This is the north wall which has a window and a clean out door.
Here's the back wall which has 2 windows.
We started to put up the siding. We used T1-11. Since it was just my husband and I working on the coop build, we used small 2x4 supports temporarily screwed into the coop base to help support the large pieces of the siding while we screwed it in. This made the job very doable with just the two of us.
We used hurricane ties to put the trusses up. The roof was the hardest part of the coop build for us and it is far from perfect. However, it does the job of keeping things dry inside.
Move in day! The windows have 1/4" hardware cloth over them which is secured with screws and fender washers. I haven't finished the windows yet. There will be hinged plexiglass windows on the outside. For this winter, I have stapled heavy duty plastic over the windows to keep out drafts.
There are 10"x12" vents along the top edge of the walls. They will have hinged plywood vent covers that could be closed if needed. They are also covered with 1/4" hardware cloth secured with screws and fender washers. Since the run isn't done yet, i have covered the pop door openings with plywood. I have two pop door openings so that in the future I can have the coop and run split into two for different age groups.
This is when the coop collapsed. In this picture I'm in the process of jacking up the coop to put the deck blocks under it.
That 5 gallon paint bucket really saved us! It gave us the space we needed to get the jack under the coop.
Problem solved! We feel the coop is very secure now on these cement blocks.
Here's the "junior" roost I made them before they were ready for the higher roosts.
This photo shows the side with the cleanout door. You can also see the three vents at the top. The area under the rafters I left open, just covered with 1/4" hardware cloth for extra ventilation.
Here's the view from the back of the coop. you can see our slightly crooked roof.
In late December, I finally installed the big girl roosts. They are about 3 1/2 feet up.
When the girls were 18 weeks old, I built and installed the nest boxes. The eggs in there are old glass eggs. They are very light weight and hollow.
An unusually warm winter has allowed us to start building the run. We dug holes about 18" deep into our very rocky, clay soil. My husband was the muscle on that job. What a chore! Then we put the 4x4 pressure treated posts into the holes on top of a base of a little gravel. We refilled the holes with the original clay soil, watering and packing down the soil as we went along in several layers until the hole was filled. The posts are very secure. If we had looser soil, we may have used cement. Then I started with the pressure treated 2x4's along the bottom of the run.
I put 18" of 1/2" hardware cloth wrapped under the 2x4 and coming out on the outside of the coop for the apron.
Next, I started putting on the middle 2x4 3 feet high. The weather is changing so we'll see when I have a chance to work on the run some more.
Here is the run with hardware cloth and welded wire on it. We will be putting welded wire over the top next.
