Our Balcony Coop
Overview
| ||||||||

|
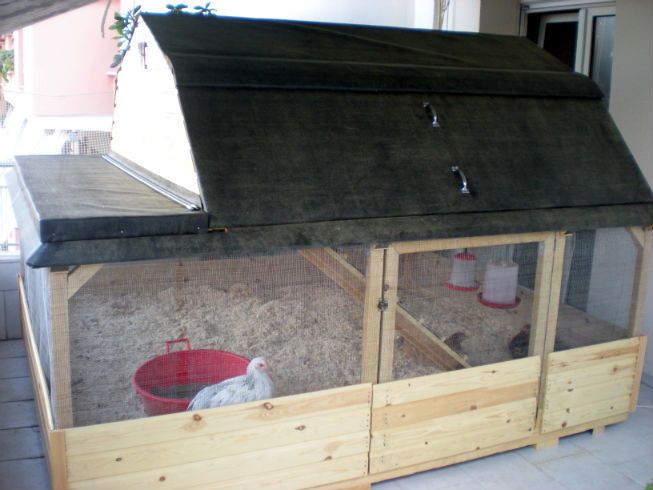
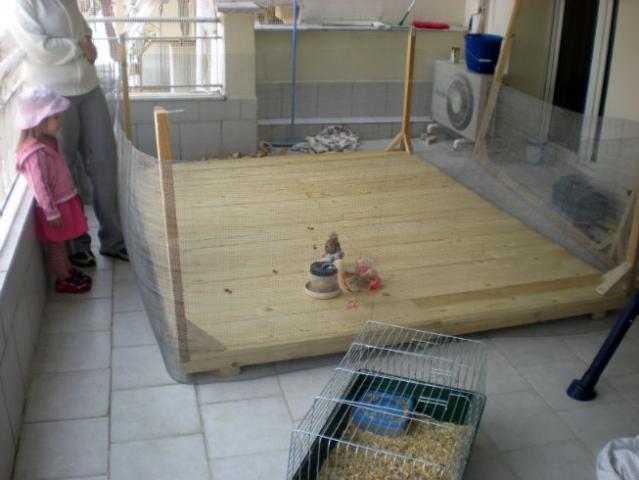
| The Occupants It started with these little things. They were an impulse buy from the side of the road. There's a guy from one of the villages nearby who stands at the traffic lights selling eggs (that's not unusual here) and one day i stopped at a red light on the way home and saw a bunch of chicks wandering around next to him. What happened next is under dispute, wife and i spent the next 2 weeks thinking it was the other persons idea, but anyway, 15 mins later we were heading back down the mountain with our kids and an empty cardboard box to buy some chicks. We knew nothing about raising chickens at this point. These things just seem to happen to us... The "Design" We had a couple of slightly strange design constraints for our coop. 1) It's on a 3rd floor balcony (quite a large one but still...), so the chickens will be confined to coop, pretty much all the time, so it needed to have as much space and sunlight and shade for them as possible without taking up the entire balcony. 2) It's, um, on a 3rd floor balcony... We're moving house in a couple of years, but not for at least that long and money is a bit tight right now so it was designed and built to be good enough but as cheap as possible...we'd like to be able to get it off the balcony and to the new house with a hoist when we move (hence "good enough") but realise it may not happen (hence "cheap as possible"). If we have to leave it behind then we'll just have to build a new one ") 3) Done quick. We didn't know how fast these things grow and with a baby who wanted to be hanging on someone's leg all day and a toddler who wanted to help build the coop, we quickly realised that just getting the thing up asap was a factor. This is what we came up with. We started off looking at tractor type designs, then wife decided that it should have vertical walls for the bottom part so they had a bit more height to jump around and stretch their wings, and a hinged roof on the end part on the left (not shown on the plan) so we could flip it up to give then a bit more sun when they needed it and drop it down when it was raining or too sunny. The missing bit of roof on the plan is a lift out panel for cleaning. They have 4 sq m/43 sq ft upstairs in the "coop" (that's 1.3/14.3 each) and 5 sq m/53 sq ft downstairs in the "run" (that's 1.6/17.6 each). It's open on all 4 sides downstairs, temps here can hit 40C/104F in the summer. |


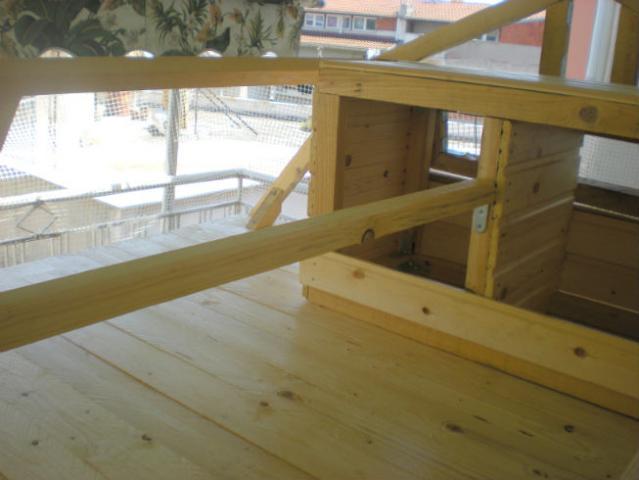
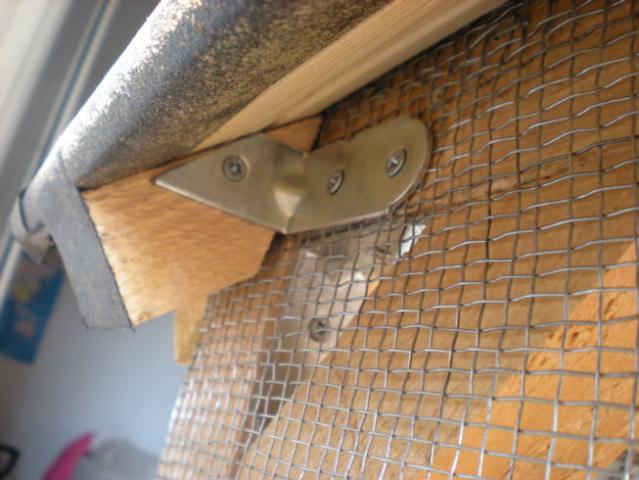
| Construction The whole thing was framed with 4x5cm to keep it as cheap as possible. This actually worked out ok...the whole thing started to sag a bit under its own weight along the long side (the corners were jacked up on bits of 4x5cm for feet, see pic below) but i stuck a couple more bits underneath either side of the door and it's fine now. For speed and ease of construction there was heavy use of corner brackets (DIY newbie tip: buy a metric ton of these and stop worrying about your lack of carpentery skills). They're also kinda necessary when you're using 4x5cm...you just can't cut proper joints or screw things together the way you normally would if you were using bigger joists. I'm using 6x6cm brackets. All the corners were braced to make it a bit more rigid. (DIY newbie tip: they're the little bits of wood in all the corners, about 20cm on the long side should do, 45 degrees at each end, 2 or 3 nails at each end of them...keeps the whole thing rigid and keeps all the corners square). Corner brackets will hold the thing together when you're throwing a quick and dirty structure like this together but they won't keep it stable enough on their own. Make sure all the angles are 90 degrees with some kind of square before you nail the braces in place. It has hardware cloth around the run and planks around the bottom ~40cm to keep the shavings in since we're using DLM . We don't have a predator problem which requires hardware cloth but it should stop the chickens and the children annoying each other a bit better than chicken wire would and it stops the baby trying to feed the chickens crayons. |


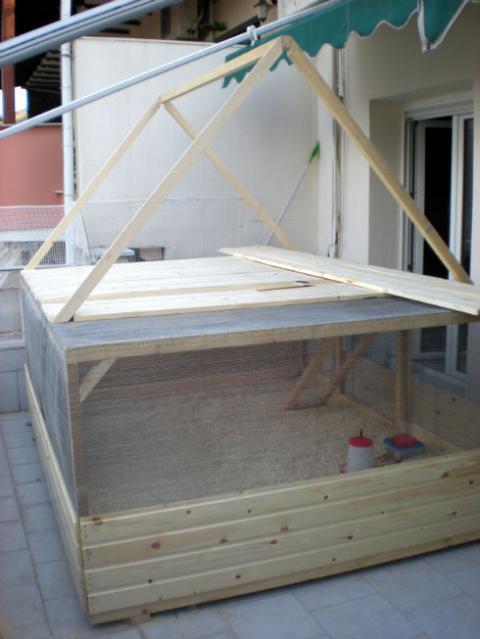
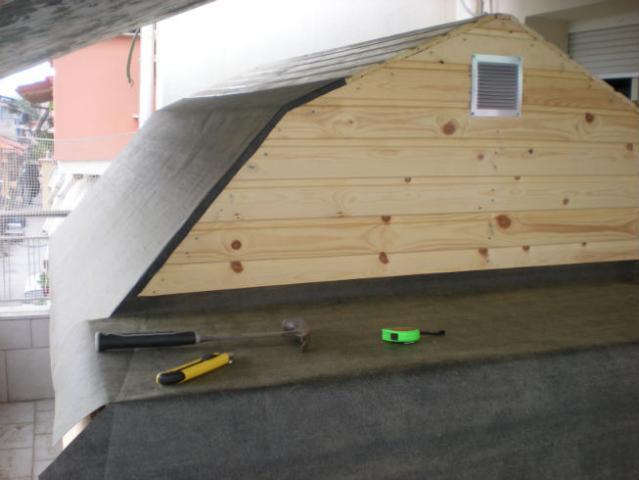
| The Roof The roof turned out to be a bit of a problem. The original roof (top) was going to be too high to fit under the balcony tent (american: awning?) once it was in its final position, and the lift out panel would have been pretty heavy, so it ended up looking like the second picture instead. Do yourself a favour, get yourself a roofing square or quick square to mark out the angles on the rafters. I could not live without this thing. The new roof has much less headroom for the chickens but it actually fits on the balcony which is kinda important. This also introduced a new problem, the bit where the angle changes on the roof would now need some kind of waterproofing so it didn't let water in. NB: spot the deliberate mistake yet? Yeah, no overhang on the roof. I blame chicken tractors. See, i started off with a tractor design, which then had the vertical walls added at the bottom in google sketch-up. I then proceeded to start building exactly what i had on the rough plan fom google sketchup. Don't panic, we'll bodge an overhang on later... |

| Next Up, we're going to need some nest boxes. 30x30x50 framed with 4x5cm, plank across the bottom to keep the "stuff" in the nest. The egg collecting door to the nest boxes is 20cm tall. That's too small. It's quite hard to see all the way inside the nest to see if any eggs have fallen to the back or the sides. It won't be as bad once they have shavings/straw/whatever for the actual nests making it a bit higher, but it's still not great. I'd make this door at least 30cm high next time. I'd probably also have prefered to make the nest boxes the "outside" kind for ease of cleaning / egg collecting but balcony space was an issue. Roost. Apparently you need one of these. Our birds seem to disagree so far. They sleep downstairs at the bottom of the ramp unless i put them on the roost myself (and that gets old really quickly, trust me). Ours is a 4x5cm with the top edges rounded off with a router. I've since seen some people saying that a roost should be 4" (~10cm) wide so i may end up having to swap this one out later if the chickens don't take to it. |


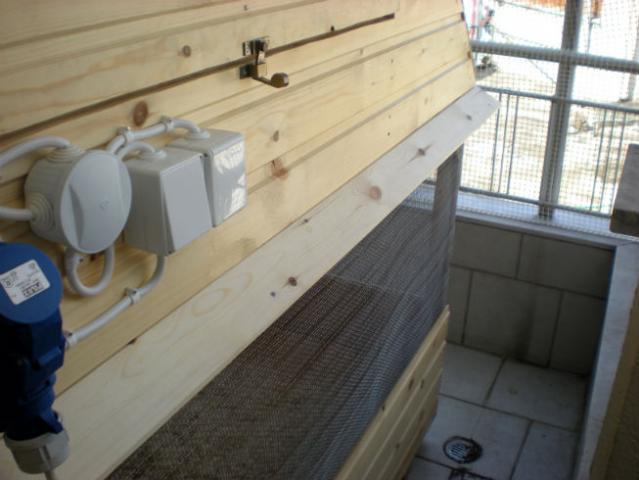
| Electrics & Ventilation Next in, as the roof starts going on, are the electrics. It has a small bathroom ventilation fan installed on top of the nest boxes (for the summer) along with a plug socket for a heat lamp (for the winter). The planks at the top of the nest boxes (2nd pic) stop the birds getting up there (to poop, roost, eat the electrics) and help diffuse the air coming from the fan so it doesn't blow straight down the roost. The outside has a plug socket for a floor standing fan. The mains goes in via a ceeform plug (americans: i don't remember what you guys call those...it's the big blue thing in the 3rd pic) so the cable can be removed at the times of year it's not required...one less thing for the kids to trip over. Ventilation...you see those holes at the top covered by metal vent plates? That's it...however, we don't have a predator problem so the ramp stays down at night and there's always plenty of air flow through the upstairs. I should point out 2 mistakes at this point... 1) Since i hacked a bunch off the top of the roof, there's no longer enough height for a heat lamp. I should have installed a small fan-heater on top of the nest boxes. I'll be doing that before this winter...it sometimes hits -10C/14F here although it's normally not that bad so hopefully they won't need it. 2) Light. I didn't put one in. Then i read about other people having problems getting their birds to use the ramp or go inside at night and i put one in. It would have been much easier at this stage than afterwards. |


| Roof Overhang To bodge an overhang onto the roof, take a look at the first pic. You're going to need an angle grinder and some saftey glasses. Here's some trivia for you...the sparks an angle grinder shoots out, they're little red hot bits of metal. Ok you knew that...but if you get one stuck in your eye (yes inside your eyeball), do you know how they get it out? With a hypodermic needle and syringe. They stick the needle into your eyeball and suck out the bit of metal. That's even less fun than it sounds. So, now you're wearing your safety glasses, cut some corner brackets down at 45 degrees as shown in the pic. Cut some 4x5cm with a 45 degree cut at one end, long side the same width as your planks, or double that if you want to run 2 planks around... Stick a bunch of those around the outside and run the planks around over the top (2nd pic). The angle at the end of the planks will depend on the angle you cut those little bits of 4x5cm...if the 4x5cm is at 45 degrees, the ends of the planks are 35 degrees iirc. It didn't matter if there was a small gap at the top edge of the "overhang" since it was all going to get covered in tarmac sheet later anyway. |
| Lift Out Panel This is the lift out panel on one side of the roof. It's bodged together with corner brackets. Is there nothing you can't do with these things? The 1st pic shows the bottom corner of the panel which lifts out. The bracket on the right is holding the frame together, the one on the left is acting as a hook to hold the panel in place (note the gap!). Once you have the bits for the frame cut to size, create a recess on the bottom of the verticals for the hook bracket...router if you have one, hammer and chisel if you don't. You may have to chop one side of your "hook bracket" down with an angle grinder (like the one in the 2nd pic) depending on the size of your wood and the size of your brackets. The 2nd pic shows the main coop frame where the panel drops in, another "hook bracket" with suitable size gap so the 2 "hooks" engage with each other and hold the panel in place. Now you need something at the top to keep the rain out. We've got 2 hinged planks running the width of the roof (3rd pic). The top plank needed to be jacked up about 0.5cm higher than the bottom one. It turns out that the wood they make fruit crates from is 0.25cm thick...2 bits of that at each end of the top plank as spacers worked great. |


| Next... Um, next up is tarmac sheet for the roof....i wasn't planning on doing this but the hatchet job on the roof, and the overhang being, um, retro-fitted made something like this a requirement. Ho hum... We made them a dust bath. They sat around the edge and ate bugs from it. One of them took naps in it. One of them used it to poop in. Eventually one of them worked out what it was for. |


| Cost The wood & asphalt sheet came in at ~300 euros. Electrics were 30 euros. We haven't checked our account at the hardware shop yet but everything else (nails, screws, brackets, catches, handles, grills, varnish etc etc) will comfortably have pushed us up to ~400 euros (~560 USD). What I'd Do Differently Next Time 1) Not get the chicks first. I'd like to have spent a bit more time doing a better job (design & build). 2) Personally i'm not sure the fold-up roof was worth the effort although time will tell. 3) Install light and fan-heater up front. 4) Bigger egg collecting door 5) Get better tools. This is the 3rd time i've gotten to the end of a project and announced i'm going to buy a mitre saw "next time" but we never have the money so this time i compromised (after we'd finished) and bought a cheap circular saw. Now i'm ready for "next time" and i won't have to hand cut all the joists and rafters. Also "next time" i want a better router, mine is awful...Wife: if you're reading, maybe we should just call it my fathers day present ... |