~~~ Urban Cottage Coop ~~~
Welcome to evidence that even beginners with a tight budget can make a cute little coop!

Thanks to everyone who has posted their coop construction pages, advice, questions and encouragement - we have learned so much from you. Thanks, too, for this site. Thanks, finally, to those who made variations of the Playhouse Coop which were our inspirations for this Coop!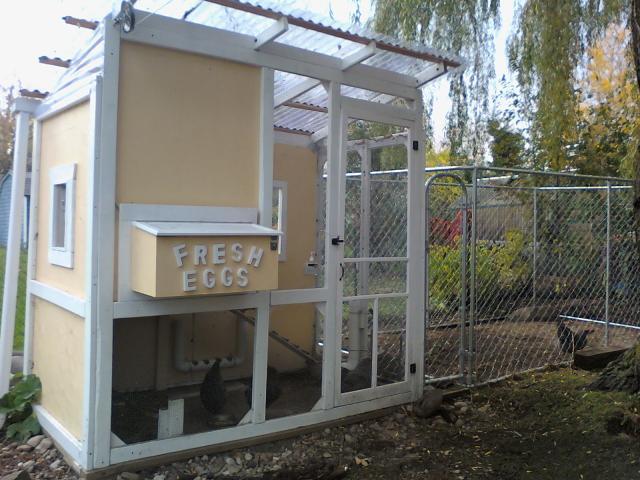
We started our coop with the following criteria:
-must look like a shed to those walking on the street to be inconspicuous
-must make use of a lot of reclaimed materials as we were on a restricted budget
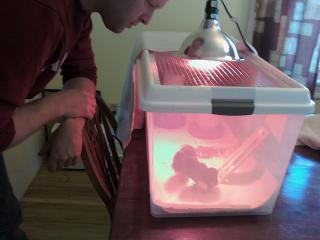
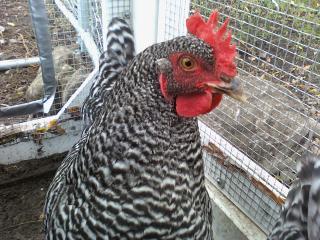
-must be suitable for 4 Barred Rocks (arrived April 21st, 2010 as day olds!)
-must be cute
-must be functional and easy to clean (included in that is we wanted it to be walk-in height for my 6'3" husband)
-must protect our chickens from winter elements (we are in Southern Ontario, but it gets pretty cold here in the winter by Georgian Bay, often around -20C) and summer heat waves (it can be in the mid 30'sC )
-must be easy to build
My husband and I have somewhat limited construction skills and experience - we learned a lot, much from our mistakes.-must make use of a lot of reclaimed materials as we were on a restricted budget
-must be suitable for 4 Barred Rocks (arrived April 21st, 2010 as day olds!)
-must be cute
-must be functional and easy to clean (included in that is we wanted it to be walk-in height for my 6'3" husband)
-must protect our chickens from winter elements (we are in Southern Ontario, but it gets pretty cold here in the winter by Georgian Bay, often around -20C) and summer heat waves (it can be in the mid 30'sC )
-must be easy to build
Our Google Sketchup Conceptual Drawing: (would have been nice to have actual plans to work with!)
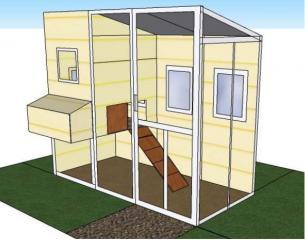
Once we got started, I realised that because I was trying to make the best use of passive solar by having south and east facing windows, the front window over the egg box was going to be overkill and it faced north. So even though it looked nice, I eliminated it from the actual plan (in my head!). I also eliminated the second window in the run in favour of a larger centred window.
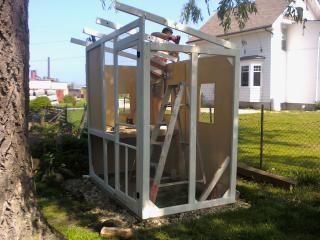
I started with a pretty unlevel patch of ground, so we had to level, remove a massive root and dig a trench around the perimeter to fill with gravel/rocks.
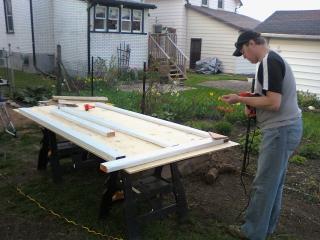
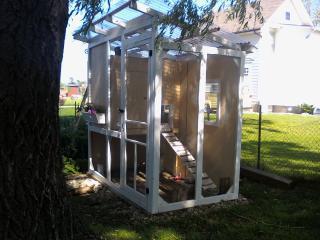
You can kinda of see how small our yard is and how close our neighbours are from the pictures of my husband building the coop.
You might say I had more of a supervisory role, and that of chief painter. We got the walls finished the first day, then it rained for the next few days (back in May) and we got nothing done for nearly a week. We needed to hurry as the chicks were growing fast!
Our yard is only about 32'x55' (sorry for those using metric!). The coop is slightly larger than 4x8 - 94" high at the front and 82" at the back. The "house" part is about 3x4 and begins at 30" off the ground (I wanted to be able to get under there). This makes their "house" about 52" high.
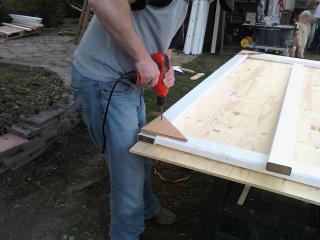
*Note to anyone else who has little in the way of construction skills like us - using this method of building (making each of the the walls separately first, then screwing them together) without a set of plans actually is more difficult than framing the traditional way. As you can see from this picture my DH was using gussets, but because we weren't using a set of plans, it is easy to put these too close to the edge (as well as the hardware cloth if you are attaching before hand as we were) which will make it impossible to put walls together. This is why we had to attach with the shorter walls on the outside and the higher front wall (to form the sloped roof) on the inside. It is still functional, but it added some more difficulties later we had to overcome.
You can see the numerous holes in the 2x4s. This is because we used free lumber from a company which made kid's climbers and was going out of business. So, they had been pre-drilled for whatever playset they were from. The holes do not affect the wood structurally. We actually had these for over ten years stacked at the side yard just waiting for a project to use them (Some of the lumber went towards fixing up our deck years ago). We only had to purchase a few more which we got from Habitat Restore for $1 each. Trim around the windows was pallet wood from free pallets we picked up and my DH tore apart. The windows are Lucite.
The girls spent a lot of time out here at this stage as it was nice out and I felt they were fairly safe in the coop during the day (even though there was no place to sleep at night yet!).
Update ~ June 2010
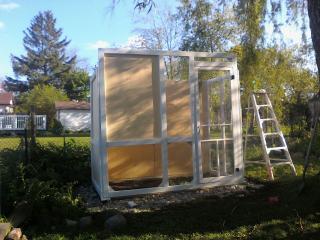
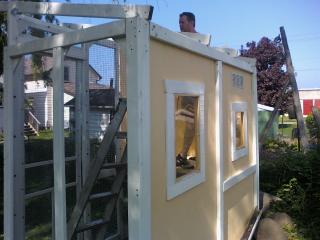
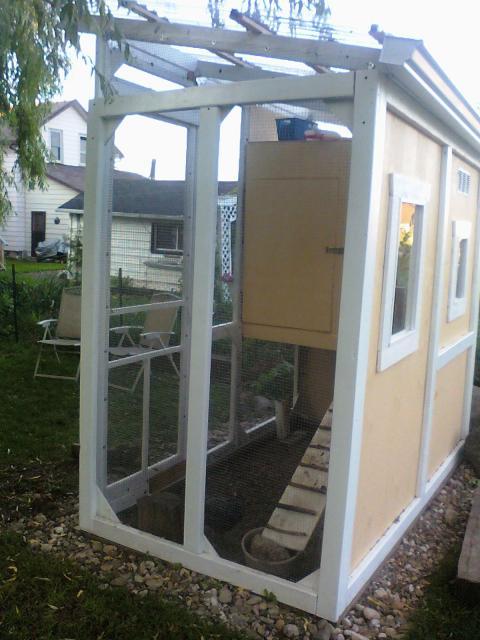
The following pictures are now that it is 90% done and they are sleeping in there, yay! We moved them out at 6 weeks even though it was pretty cold some nights (my nerves were shot for awhile!). One night after a week or so out there went down to -6C!
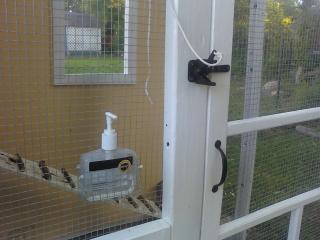
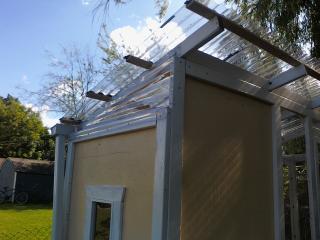
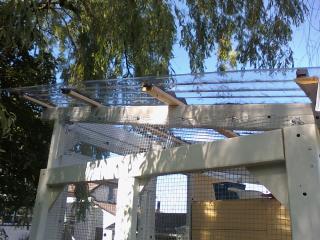
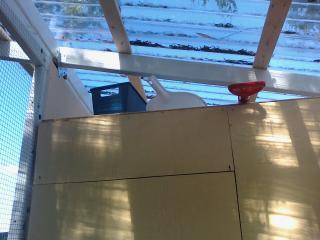
The gate hardware is working great. We worked with our design flaws and it has been fine so far. We have had a few really nasty thunder storms with a lot of rain and the coop has stayed nice and dry - the Palruf closed in the side triangle (middle) really well! The right picture shows how we closed the run side with hardware cloth.
Below shows how the pullets are getting out for some running around - they still need a door for them as putting a log in to prop open the screen door is a little annoying. Not to mention, passerbys may see the door propped open and wonder why a shed has a screen door!
Sorry for the darkish pictures; we have a very shady yard.
Note to self: Never paint anything white where chickens are going to poop!
") We will be replacing the ladder with a different design shortly. The perimeter of the coop has 6" deep gravel/rocks to assist drainage and the run is sand. There was some grass in there for about two weeks before they ate it all!
We will be replacing the ladder with a different design shortly. The perimeter of the coop has 6" deep gravel/rocks to assist drainage and the run is sand. There was some grass in there for about two weeks before they ate it all!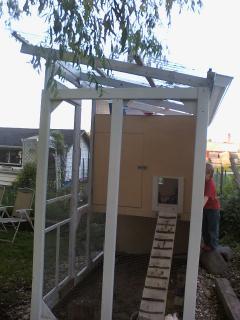
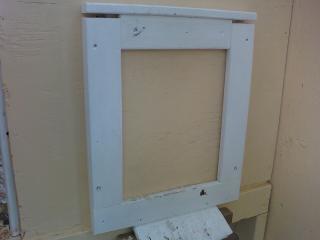
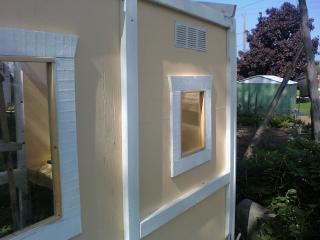
The area above the clean-out door and below the dust pan and rake will be a fold down vent for summer; it does get really hot here in the summer as it has been 35c a few days already by early June. Pop door actually fits tighter, but there were some shavings down in it when I took the picture.
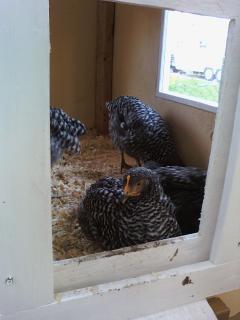
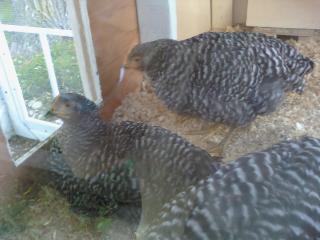
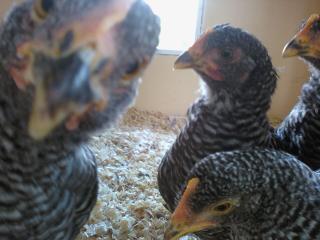

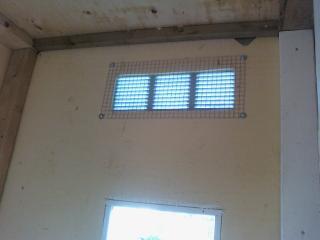
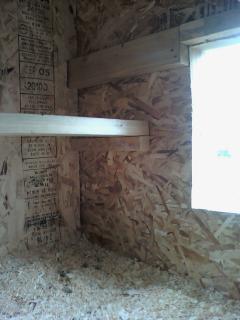
These are a few pictures of the girls enjoying the inside of their "house" - when they first learned to climb the ladder they were up and down all the time! For now, the above vent is the only one we have - but we will be adding a fold down vent door later.
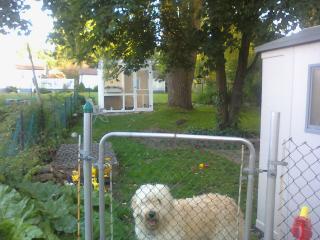

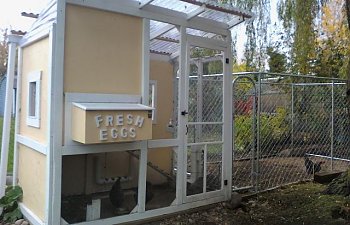
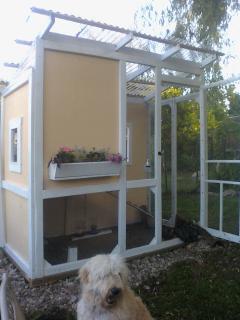
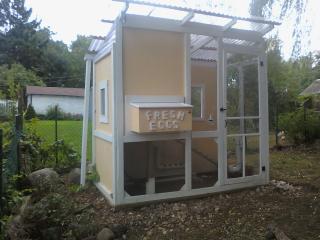
Here are some views to show you what it looks like from farther away. The second one is from around the corner (we are third from last to the corner) and you can see how tiny the coop looks from the sidewalk - but it is really inconspicuous. Yes, that is a giant willow tree in our tiny yard! The coop isn't actually visible from the front of our house and sidewalk because the yard is sloped.
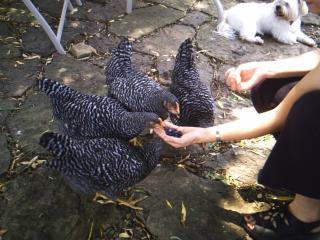
Not sure where the rest are, perhaps on the perch, but one lady is watching me take her picture from inside. They seem to enjoy the coop, but I am pretty sure they love free ranging even more! Every morning when I let them out - they run all around the yard, flying about 30 cm off the ground. We sure love these ladies!
We are really happy with what we have accomplished. However, it was much more expensive than we anticipated because the Palruf roof (we couldn't afford Suntuf) and hardware cloth together were about $200 (Canadian $) - the most expensive parts of the coop! Originally we were going to use mainly pallets for the coop- however we didn't think that we could build what we wanted primarily out of pallets this time around.
Update ~ September 2010
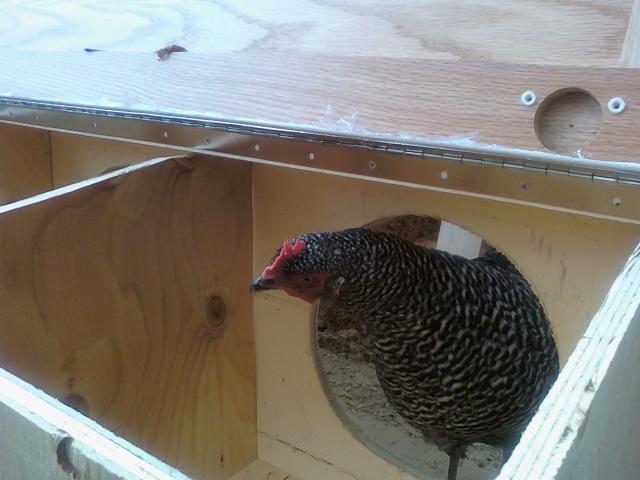
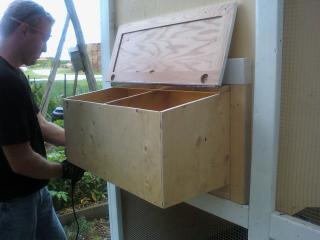
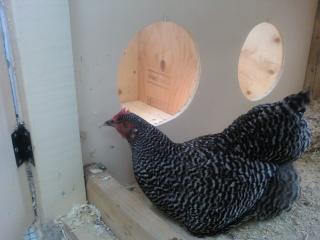
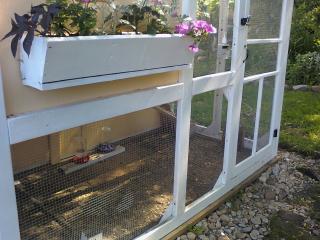
We added our new nestboxes finally! One of our girls was so curious she couldn't wait to try it out, even though my hubby was still attaching it!
We love the circle design and even though the boxes face the south window the design keeps them private and reasonably dark.
Update ~ October 2010
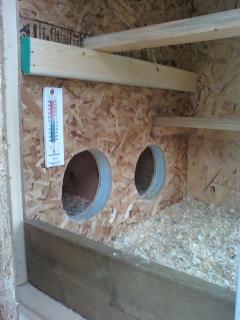

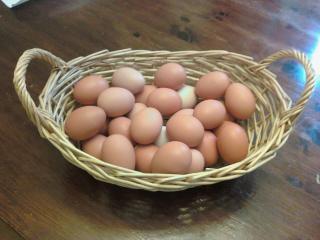
Above is our progress as for winterizing. We insulated with blue foam insulation (R-8) plus another layer of board. We have about an R-11 now. Our girls are happily enjoying insulation (not sure how well it is going to work but we will keep you posted) and we are enjoying full production. We are getting an average of 27 eggs per week from four hens! Whoops, looks like someone is looking for privacy.
What we would change?
-Develop a real plan!
-Budget for more $
-Build it a little bigger, our run is a little too small, but we were trying to utilize the 2x4 we had so we ended up expanding by adding a dog run
-We wouldn't paint the ladder white - it only stayed nice for about a week!
We still have to finish:
-Securing the dog run expansion with hardware cloth and aviary netting
-Adding vinyl flooring to their house
-Add the rain barrel
Costs to Date (Canadian $)
-50' roll of 3' wide 1/2" hardware cloth (it only came in 10' or 50' in our area) - $75
3x4 piece of Lucite - $50
30" screen door - $30
5 - 2x4x8s - $5
5 - 2x2x8s - $10
5 - 1x2x8s - $5
2 - 1x4x8s - $3
4 - 1/2" plywood - $73
Materials for Palruf roof - panels 4, foam strips, screws, wood straping - $125
Screws for construction - $25
Washers for hardware cloth - $5
Gate hardware - $17 (latch, hinges, screws)
flowers - $3
eavestrough and downspout- $25
3 bags of sand - $12
Dog run - $300
1/2" press board-?
Blue Board insulation - ?
Total (to date ) $763
Free stuff
18 - 2x4s
Pallet wood for trimming windows, door stops etc.
Cleanout door latch
2 packages of screws
Paint - white and yellow
Twigs for ladder and perch
Several loads of gravel and rocks (we live across the road from Georgian Bay, so, that means "loads" were gotten by reuseable cloth grocery bags over a few days.)
Updates on progress of our girls:
~ 07-06-10 ~
10 weeks old - enjoying some blueberries on a hot day.
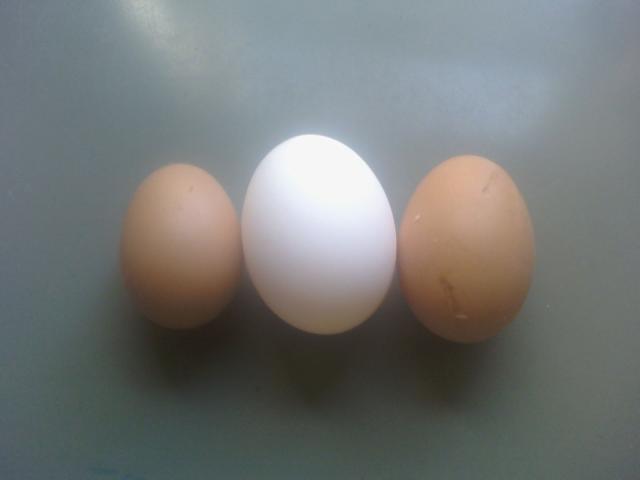
~ 08-27-10 ~
First Eggs! Middle is a commercial large egg, for reference only!