Here's a picture of our first coop. In this picture we hadn't put the doors on the left side that opened to the nest boxes. We didn't want to put the nest boxes in too soon so that they wouldn't roost in them.
Here's what the nest box door and nests look like with curtains that I made and the roost on the other end.
This coop is now used for new chicks, broody hens and or a hospital for injured hens.
This is our new 10 x 16 coop. Right now it's in the driveway until we can build the roost, poop boards and nest boxes.
We installed a window in the door and will also cut out holes for windows on both sides. When the insides are done it will be moved
to the backyard behind the fence.
The roost and poop boards are done on both sides of the coop. We painted them with Blackjack 57, also the floor and part of the way up the walls. The Blackjack felt rough to touch so we put vinyl flooring over it and wood shavings. I also sanded the side boards of the poop board. The ladder is too steep so that was changed. Right now my baby RIR chicks are inside with a broody hen that adopted them.
Here's the inside with PDZ on the poop boards and a fan in the window to keep them cool at night. You can see how we changed the ladder. I wanted to be able to get eggs from the outside like our first coop but I couldn't talk him into doing that. There are 14 nest boxes on each side of the coop. They only use the top 7 on each side. I wish we had known that, could have saved some time and wood building the nests and given them more floor space. My husband built the nest boxes all attached so I can't take out the bottom rows. They free range all day so they're only in the coop to lay eggs or at night. Since my younger chickens like to roost on the black side boards of the poop board, I installed another board full length on both sides so now they have two rows of roosting space on both sides of the coop. In the 2nd picture you can see we added more roosting space and poop board.
Moving the coop wasn't easy due to the ground being so wet but we finally got it moved in the backyard inside the fence. You can see the windows we cut out on this side of the coop. There's another on just like it on the other side of the coop. I can lower those windows in the winter if I need too. Also we cut a hole in the front for the pop door (Ador). I have two lights, both on timers, one inside and one outside of the coop. I adjust the time the light comes on the inside according to the length of our days from winter to summer. Another thing we did this summer and you can't see it in this picture is that we added ridge vents across the top of the roof.
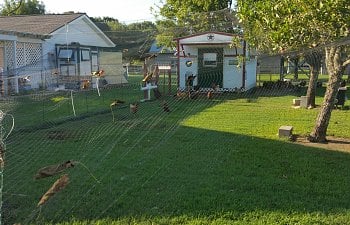
This is our latest project, adding a fine netting over the entire backyard to prevent a hawk attack. I've had three and so far was able to save the chickens. My husband ran cables across the yard that are attached to our patio cover and run all the way back to the trees. We then ran the netting the opposite direction over the cables. It took two orders of netting and lots of pull ties but the backyard is covered. You can see my old coop behind the garage.