Thompson Farm Coop
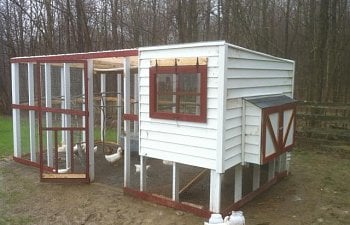
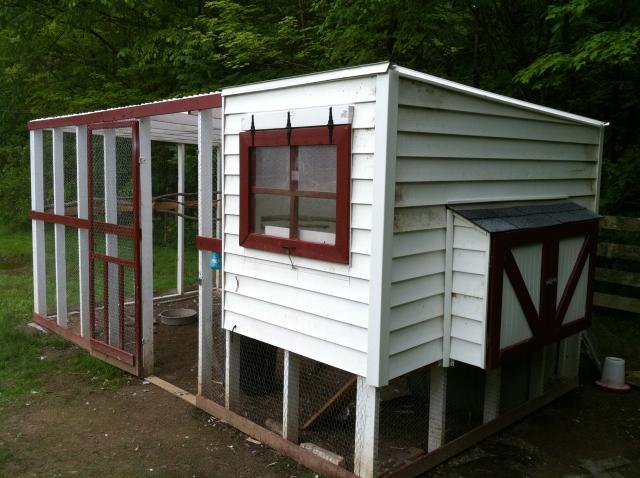
Ill get started by saying that this whole coop/chickens and ducks thing started by going to tractor supply with the Boss her name is lindsay. i was there to get some horse feed and some things for the tractor,then boom we were also leaving with 20 chicks and 6 ducks. so of course she thinks that we have months till we have to worry about a coop, well to her surprise chickens in the basement with the heat on makes the house smell like a barn. so i had to kick it in high gear and build a coop first thing i did is hit the internet looking for ideas and the cheapest way to do it. so this is what we ended up with.

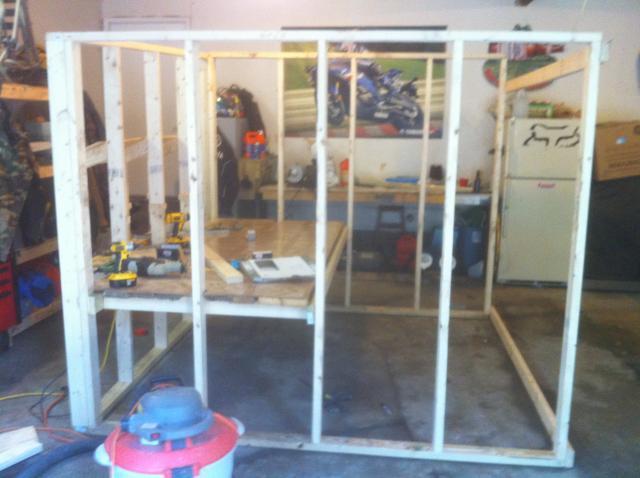
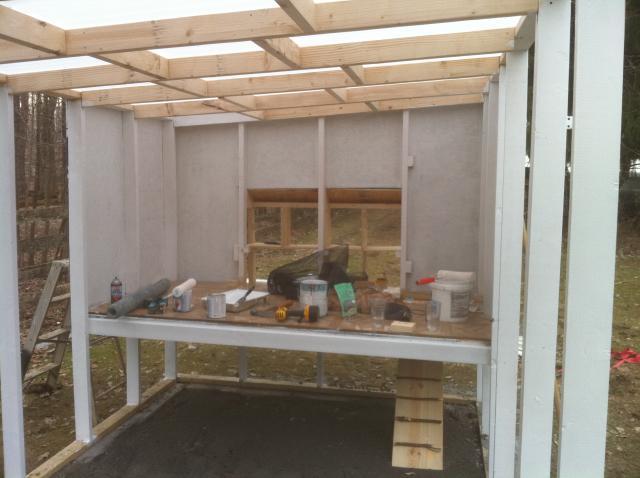
i went to home depot and bought a ton of 2 by 4s the coop demensions are 8ft by 16ft that way i didnt have to cut that much lumber. i built the frame in two halves in the garage since it was still winter. this is the half with the coop floor which is 2 feet off the ground. the floor of the coop is 4ft by 8ft and has the nesting boxes off the side which i will explain later.
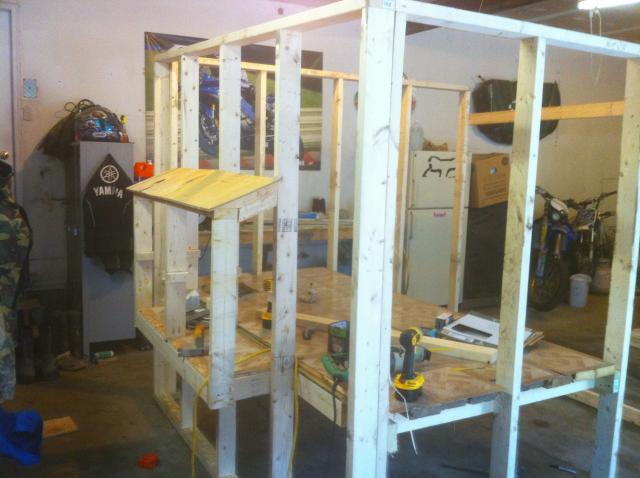
i built the nesting boxes off the side for easy egg retreival and to save floor space in the coop there are 8 nesting boxes all 12in by 12 in.
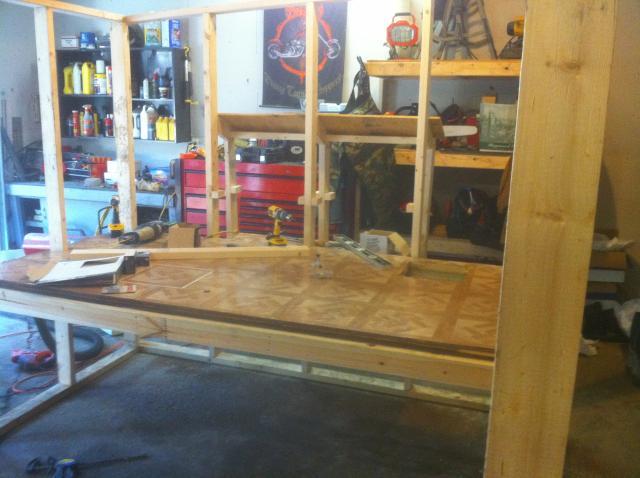
the floor of the coop are old tong and groove boards i had from my barn and i first put down 1 by 1 sticky tiles but would not reccomend at all they started coming up within the first month and i replaced them with a solid piece of lenoliem that works much better
for the base of the coop i used cheap paver stones and 304 limestone under that and leveled everything with a laser.i also used treated 2 by 4s for the bottom board of the coop. at this point is were i put the two halves together. i then put in all the roof cross members and corrugated panels. i used the panels not cause they were cheaper but i wanted the light to be able to come through. in this picture i started to put up the sides of the coop i just used osb since i sided it. while i was building i had the boss start the painting process.
after i got all of the plywood up i put the roof on the nesting boxes. as you can see in this picture the front of the coop is 7 ft tall and the rear is 6 1/2 ft
.
as you can see in this picture i have the access door for the chickens in the bottom with a ramp i have a string that goes from the ramp to the floor and out the side so you dont have to go in the coop to raise our lower it.
i used chicken wire to close the whole thing in i got a 4ft roll and a 3ft roll. after the wire was up i used 1 by 4s to cover where they met and the top and bottom for added support and looks.
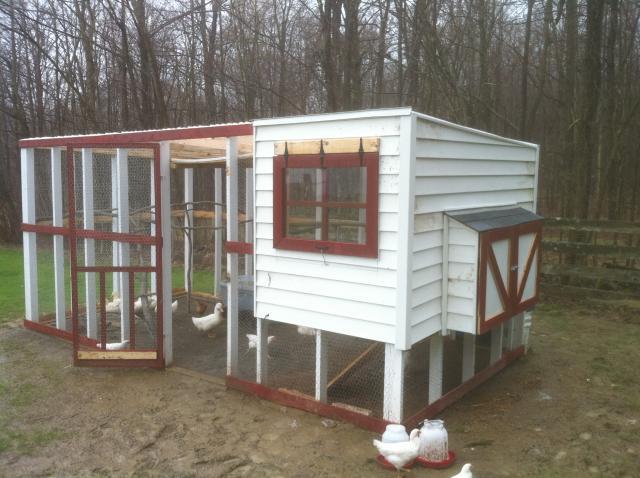
once the wire was put up i sided the whole coop. you cant tell by the picture but i have the inside wall on hinges it flips up and latches to the ceiling. i did this for 2 reasons one because it makes cleaning the coop a breeze and two we just open the whole thing up in the day for maximum ventilation.
in this picture you can see i built doors for the nesting boxes i used two old pieces of waincote for the backing and a frame made of 1 by 4s both are on hinges and have seperate locks.
inside the run i used some branches to make perches for them to play on i put the steps on the one when they were little cause they had a hard time. i used limestone shaving for the floor but i am soon switching to something else it doesnt drain the best and the ducks make a mess of it in a hurry.
for the window i used a piece of lexan 2ft by 3ft and made a frame and mounted it with hinges i used a board to support it open and i chicken wired behind it
.
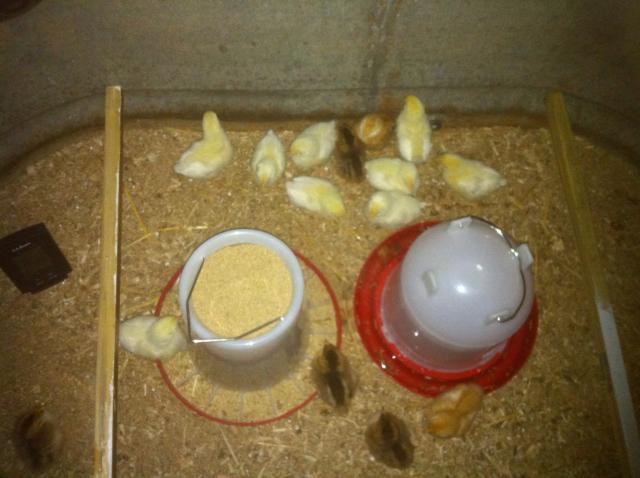
as you can see in this picture i replaced the sticky tiles this was the cheapest flooring they had i didnt figures chickens would care. in this picture also shows the custom feeder and waterer that i built the waterer is a cup waterer i made with pvc a hose fitting and poultry cups i used a piece of pvc panel to make a anti roost over top. the feeder is made out of 3in pvc and works awsome they cant get into it and scratch it out they actually eat about 95% of the food that i put in it. prior to this setup i made 5 gal bucket feeder and waterer and they just waste so much food and make a mess of the waterer. if there is anything that you should copy from my coop it is these two things they make life ten times easier. the waterer is connected to a 15 gal drum mounted to the back of the coop which also feeds the same waterer in the chicken run.
this is the feeder and waterer i have for the run the only reaon i have them in both areas is the ducks stay down in the run at night i made a rain guard for the feeder out of pvc panel and a torch. if you have any questions about either the feeder our waterer let me know i can also build them for you
.
but from chick to chicken i have had alot of fun building this coop and raising chickens.know all it needs is some landscaping. If you have any question our want more pictures just send me a message thanks for looking at my coop.
i went to home depot and bought a ton of 2 by 4s the coop demensions are 8ft by 16ft that way i didnt have to cut that much lumber. i built the frame in two halves in the garage since it was still winter. this is the half with the coop floor which is 2 feet off the ground. the floor of the coop is 4ft by 8ft and has the nesting boxes off the side which i will explain later.
i built the nesting boxes off the side for easy egg retreival and to save floor space in the coop there are 8 nesting boxes all 12in by 12 in.
the floor of the coop are old tong and groove boards i had from my barn and i first put down 1 by 1 sticky tiles but would not reccomend at all they started coming up within the first month and i replaced them with a solid piece of lenoliem that works much better
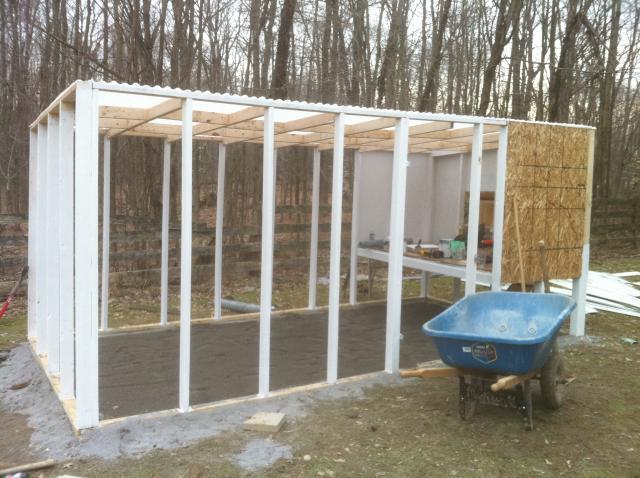
for the base of the coop i used cheap paver stones and 304 limestone under that and leveled everything with a laser.i also used treated 2 by 4s for the bottom board of the coop. at this point is were i put the two halves together. i then put in all the roof cross members and corrugated panels. i used the panels not cause they were cheaper but i wanted the light to be able to come through. in this picture i started to put up the sides of the coop i just used osb since i sided it. while i was building i had the boss start the painting process.
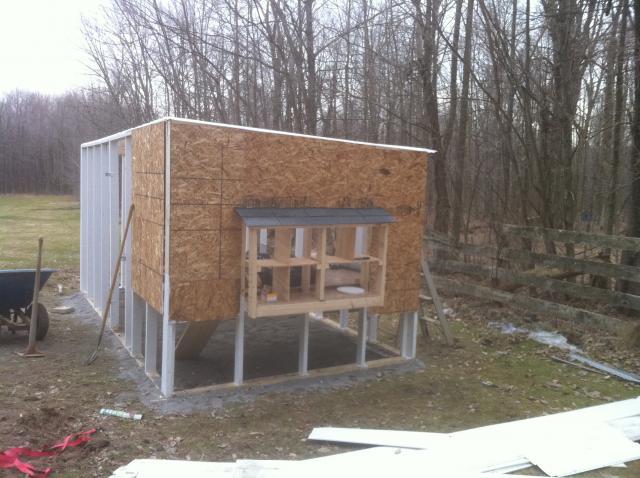
after i got all of the plywood up i put the roof on the nesting boxes. as you can see in this picture the front of the coop is 7 ft tall and the rear is 6 1/2 ft
.
as you can see in this picture i have the access door for the chickens in the bottom with a ramp i have a string that goes from the ramp to the floor and out the side so you dont have to go in the coop to raise our lower it.

i used chicken wire to close the whole thing in i got a 4ft roll and a 3ft roll. after the wire was up i used 1 by 4s to cover where they met and the top and bottom for added support and looks.

once the wire was put up i sided the whole coop. you cant tell by the picture but i have the inside wall on hinges it flips up and latches to the ceiling. i did this for 2 reasons one because it makes cleaning the coop a breeze and two we just open the whole thing up in the day for maximum ventilation.
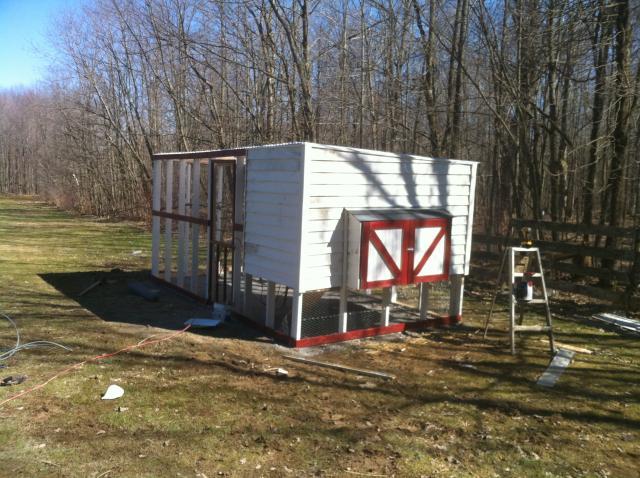
in this picture you can see i built doors for the nesting boxes i used two old pieces of waincote for the backing and a frame made of 1 by 4s both are on hinges and have seperate locks.
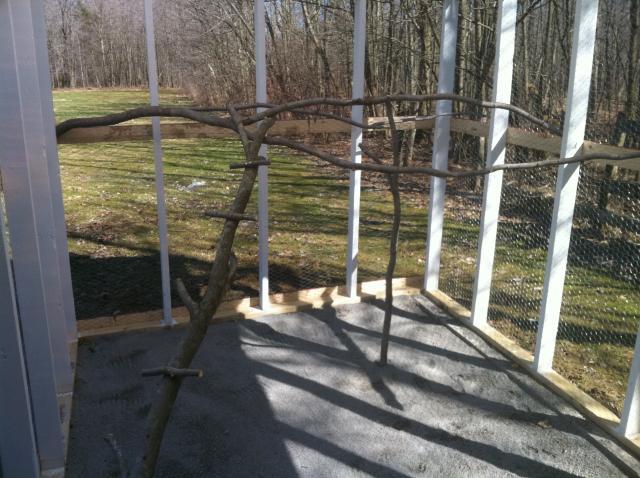
inside the run i used some branches to make perches for them to play on i put the steps on the one when they were little cause they had a hard time. i used limestone shaving for the floor but i am soon switching to something else it doesnt drain the best and the ducks make a mess of it in a hurry.
for the window i used a piece of lexan 2ft by 3ft and made a frame and mounted it with hinges i used a board to support it open and i chicken wired behind it
.
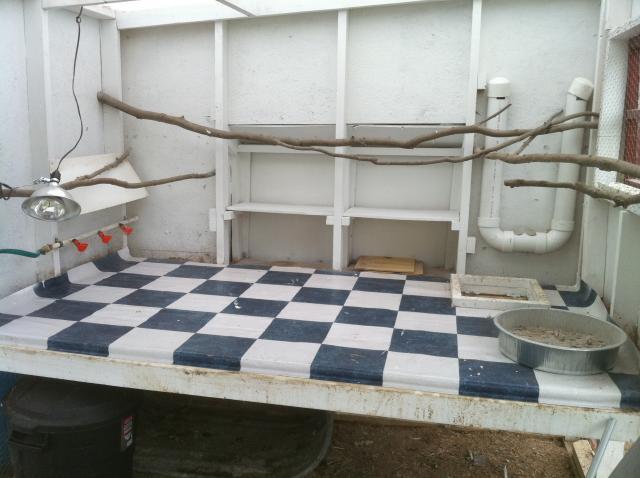
as you can see in this picture i replaced the sticky tiles this was the cheapest flooring they had i didnt figures chickens would care. in this picture also shows the custom feeder and waterer that i built the waterer is a cup waterer i made with pvc a hose fitting and poultry cups i used a piece of pvc panel to make a anti roost over top. the feeder is made out of 3in pvc and works awsome they cant get into it and scratch it out they actually eat about 95% of the food that i put in it. prior to this setup i made 5 gal bucket feeder and waterer and they just waste so much food and make a mess of the waterer. if there is anything that you should copy from my coop it is these two things they make life ten times easier. the waterer is connected to a 15 gal drum mounted to the back of the coop which also feeds the same waterer in the chicken run.
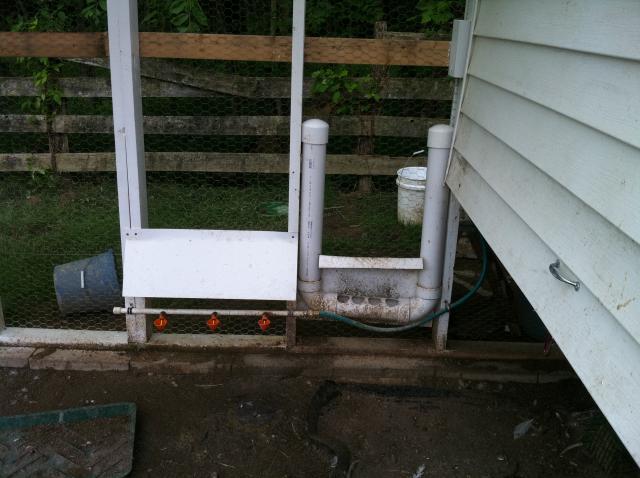
this is the feeder and waterer i have for the run the only reaon i have them in both areas is the ducks stay down in the run at night i made a rain guard for the feeder out of pvc panel and a torch. if you have any questions about either the feeder our waterer let me know i can also build them for you
.
but from chick to chicken i have had alot of fun building this coop and raising chickens.know all it needs is some landscaping. If you have any question our want more pictures just send me a message thanks for looking at my coop.