The Chicken Experience...
It all began when my good friend, Rachel, started giving us fresh eggs. When I saw how simple and effective her coop setup was, I started thinking that I'd like to have a few hens myself. I love eggs!
So, one day I mentioned to my DH that I really would like to have a few hens. After grumbling and groaning about having %#&! chickens, he told me about the pet chicken he had when he was a child. Needless to say, it didn't take much convincing to get him to buy into my idea.
Being a fan of Internet research, I did a lot of searching on Yahoo! and Google and found BackYardChickens.com. This site has been so incredibly invaluable in every aspect of our Chicken Experience. It was through BYC members that I learned about MyPetChicken.com and that I could order a small number of chicks from them. I placed my order in March for a May delivery (I had to plan for a time that I knew I would not be gone to a horse show and would have time to take care of my new little fuzzy butts for the first several weeks). Boy, that was a loooooooong wait! On May 12th, the post office called and our Chicken Experience was under way!

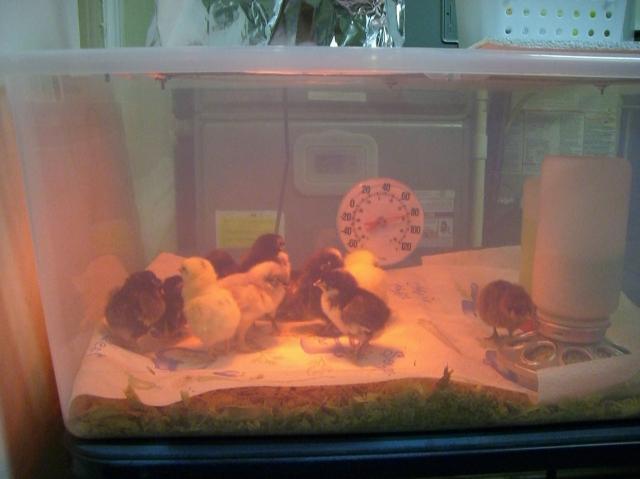
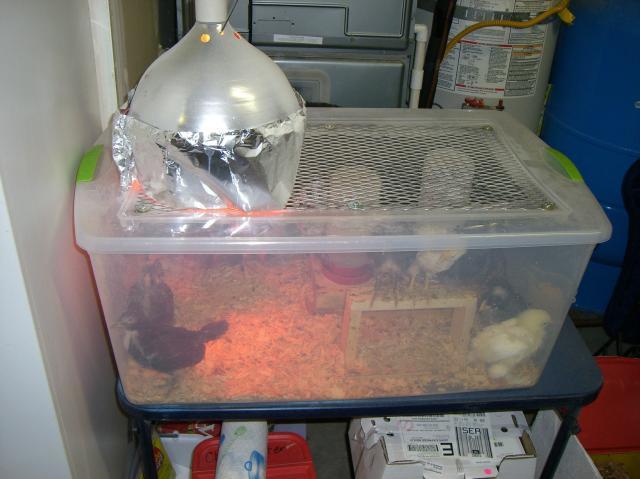
I had read and seen so many great ideas on BYC for brooder set ups. I went the plastic tote route, and I had everything ready and up to temperature when I got home from the post office. There is nothing as cute as baby chicks!
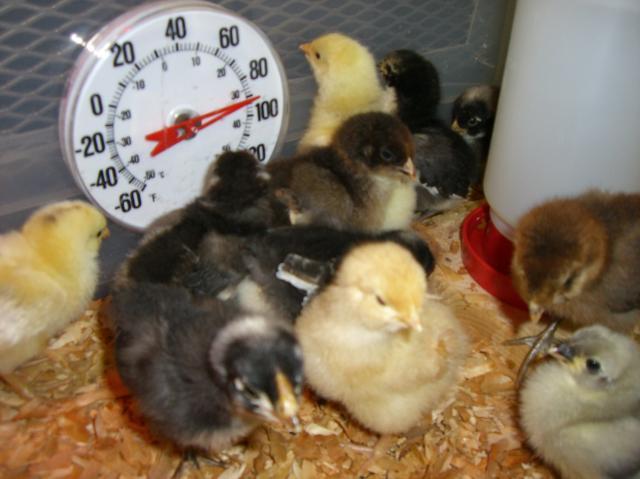
It was amazing how quickly the chicks grew and started getting their feathers. Here they are at one week old:
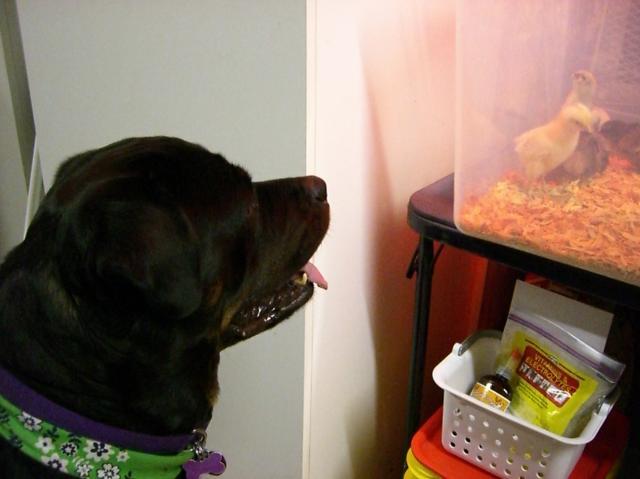
Our Rottie, Brinx, absolutely loves the new babies!
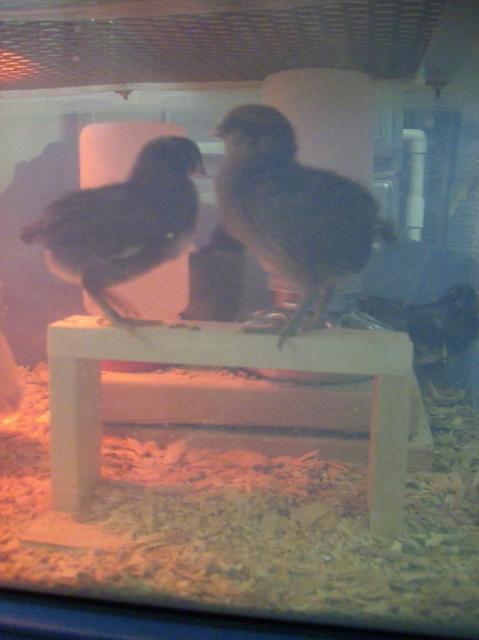
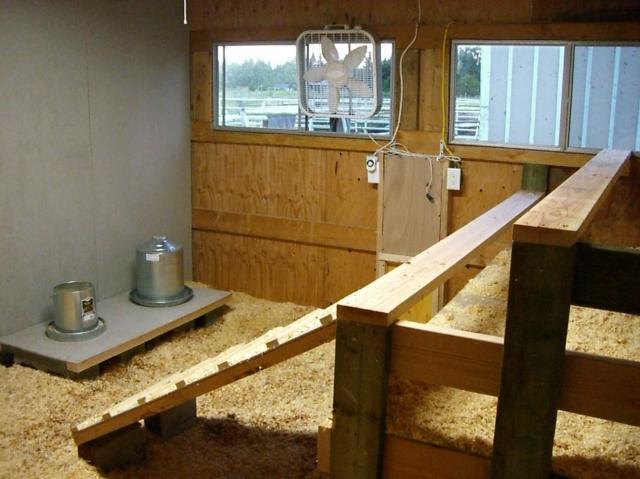
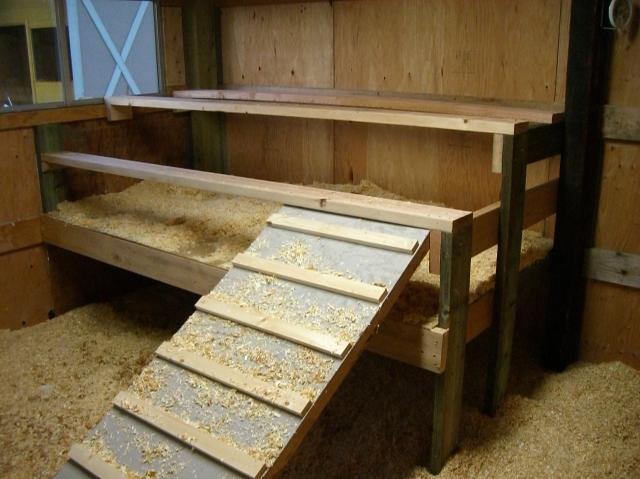
I thought they needed a little entertainment, so I built them a perch. They loved it!
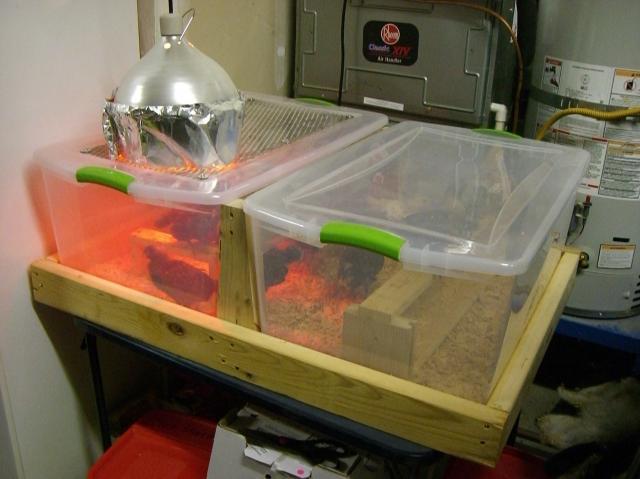
After three weeks (boy, those babies grow FAST!) it became apparent that we needed to expand the brooder. After tossing around several ideas, we decided to create a "duplex brooder", so off to Walmart I went to pick up two more totes. We built a frame from scrap lumber, cut the adjacent sides out of the new totes (we wanted to keep the original one to use again for babies), and moved the growing chicks into their new brooder.
We finally had a nice, warm day, so we set up the dog exercise pen outside and took The Girls out for their first outdoor adventure.
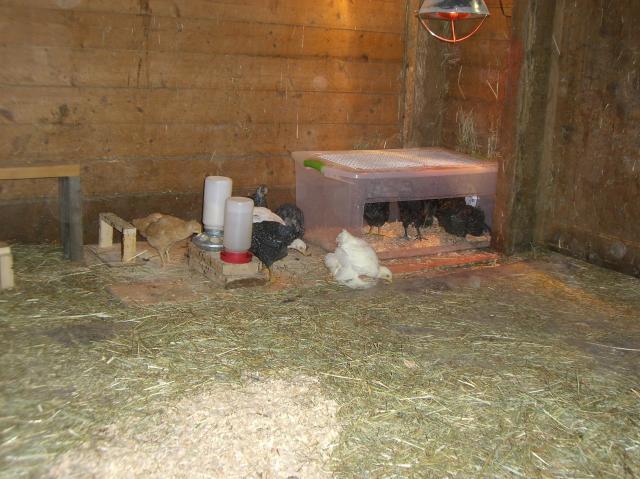
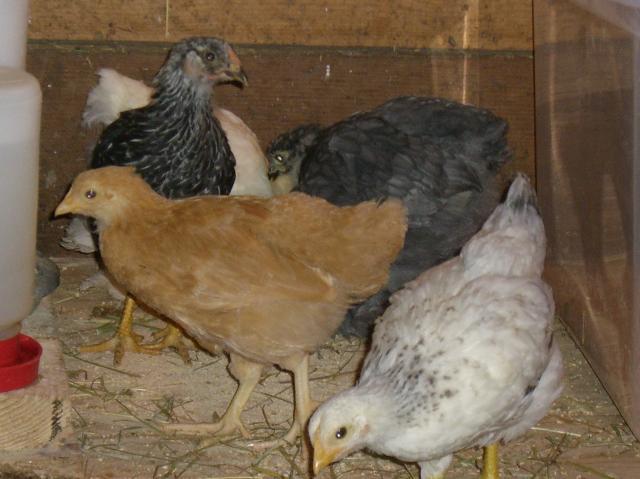
When they hit 5 weeks old, we knew it was time to move them out of the brooder. But the coop wasn't ready yet...so we moved them to an empty stall in the barn. They didn't know what to do with all the space! They decided very quickly that they liked their new home.
This is Betty White, the Cochin. She's really turning into a beautiful young lady. To the right is Wynona, the Gold Laced Wyandotte. She's already getting her pretty feather pattern.
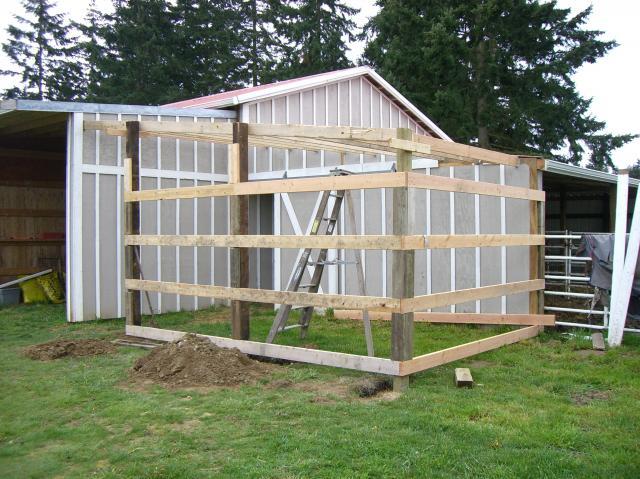
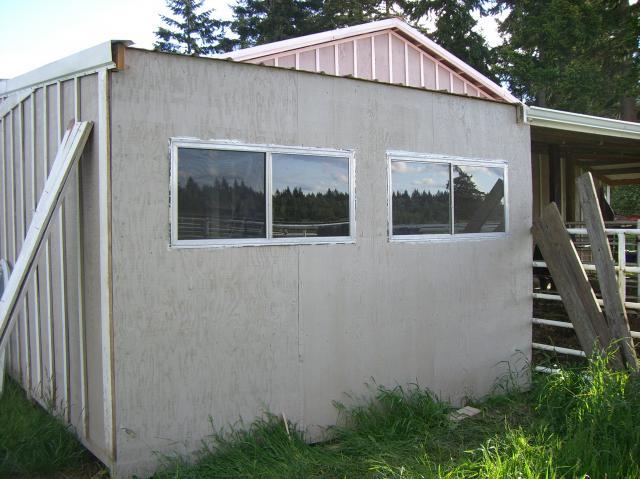
In the meantime, we were working away on the coop...
Then I got the brilliant idea that I'd like to incubate some eggs! I found a wonderful small table-top incubator from Brinsea, and craigslist provided me with 7 French Black Copper Marans hatching eggs! 21 days seemed like forever to wait, but what fun watching them hatch!
Four of the chicks died from too much humidity, but these are our 3 survivors:
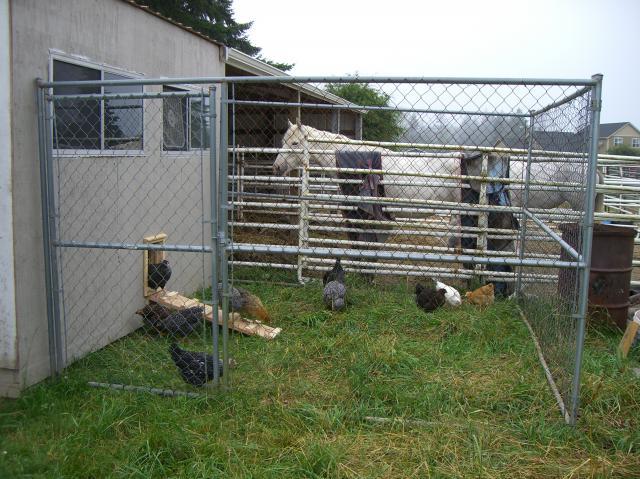
Finally, the day arrived that The Girls got to move into their new home!
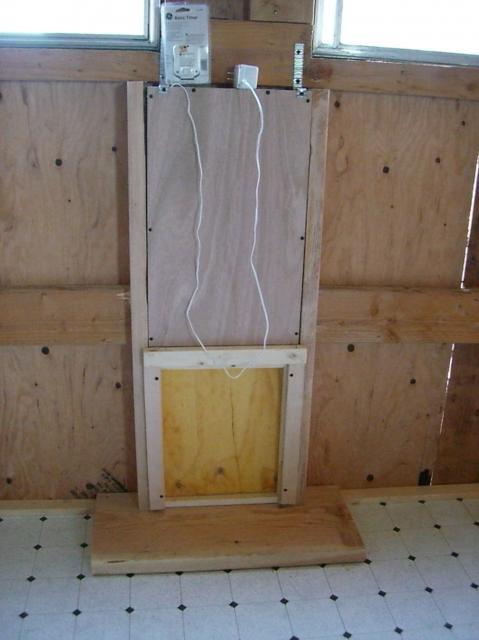
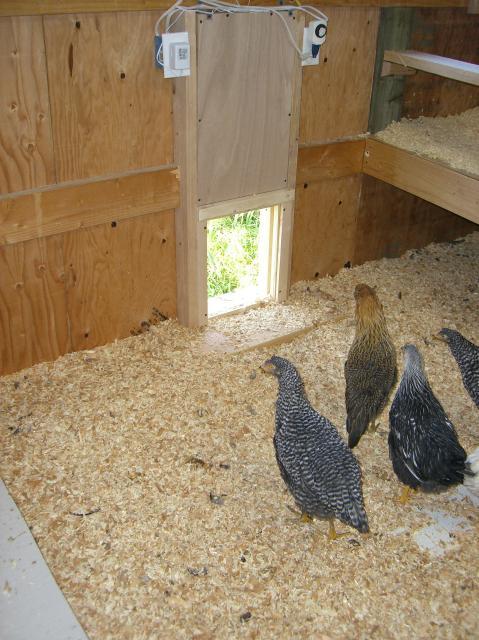
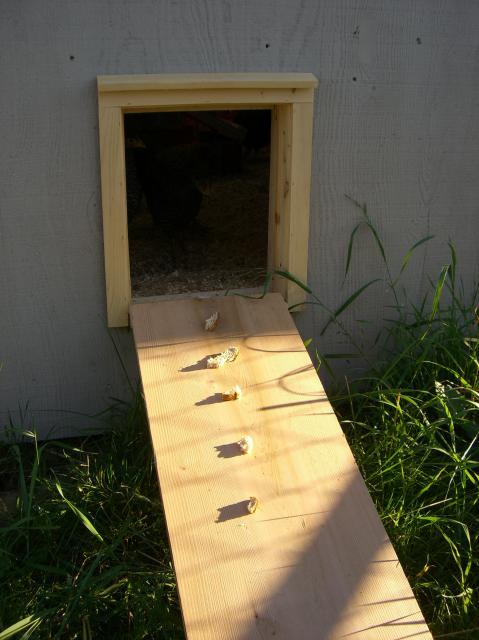
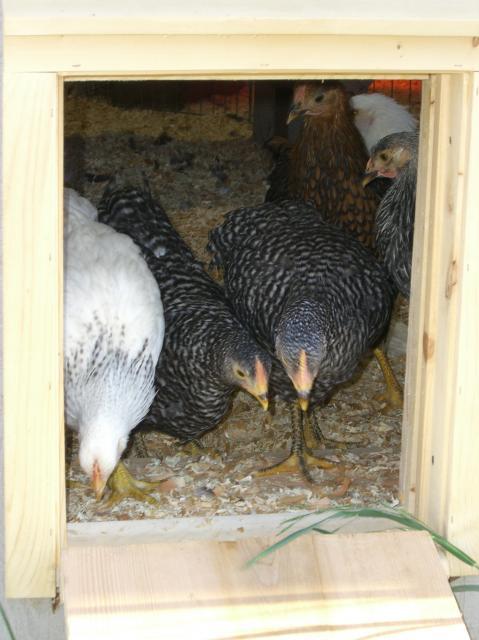
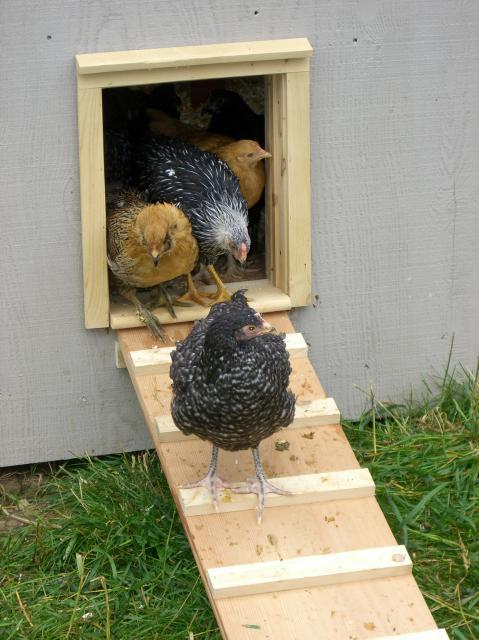
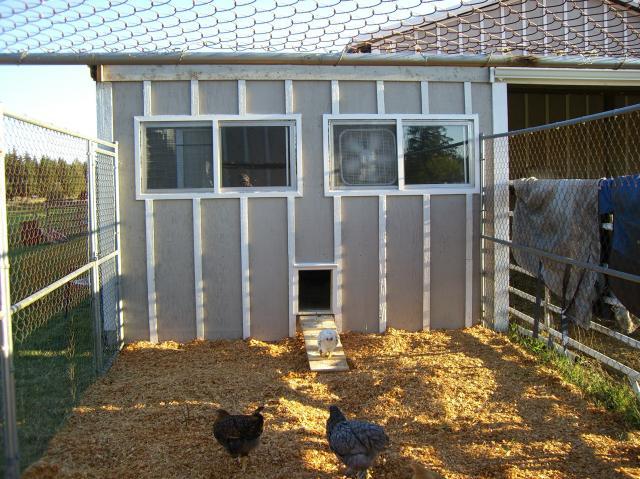
After a couple days locked inside, getting accustomed to their new home, we opened the automatic pop door for the first time. It was pretty comical!
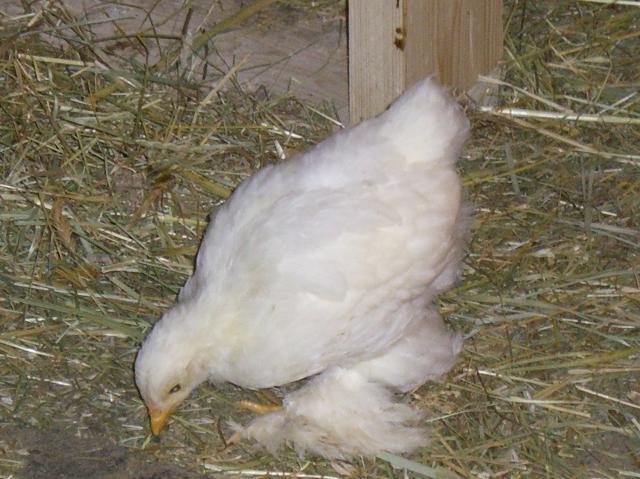
They finally decided that it was safe to come out.
We added fresh shavings, much to The Girls' delight!
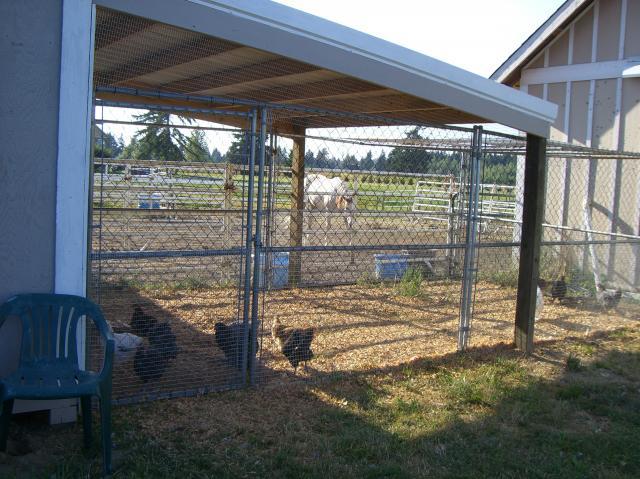
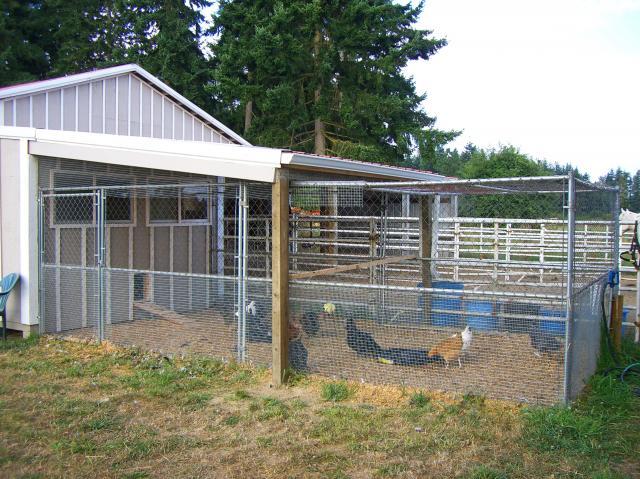
We built a roof over part of the run to give The Girls dry gound in the winter. We also wrapped the bottom 3' with welded wire to keep them safe from predators.
The happy Girls in their new home!
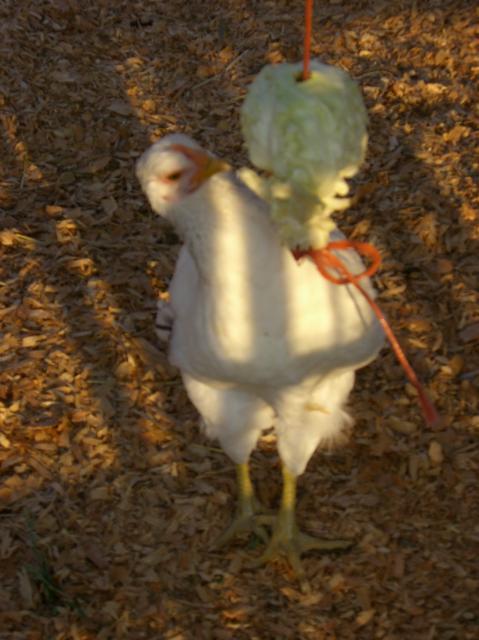
I read on the BYC Forum that hanging a cabbage on a string would be fun for the chickens. I had no idea how much fun it would be for us watching them!
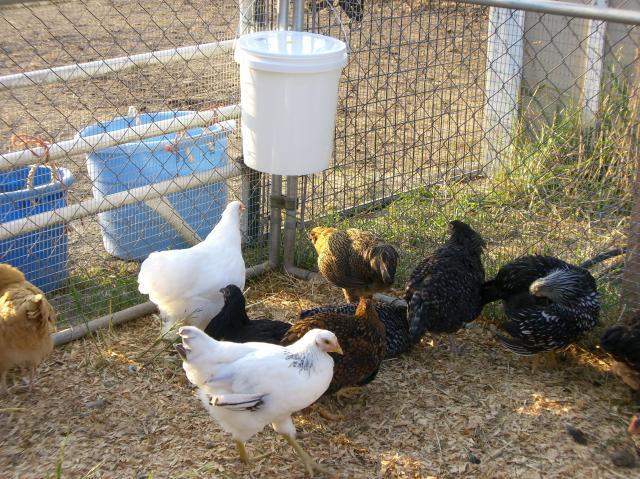
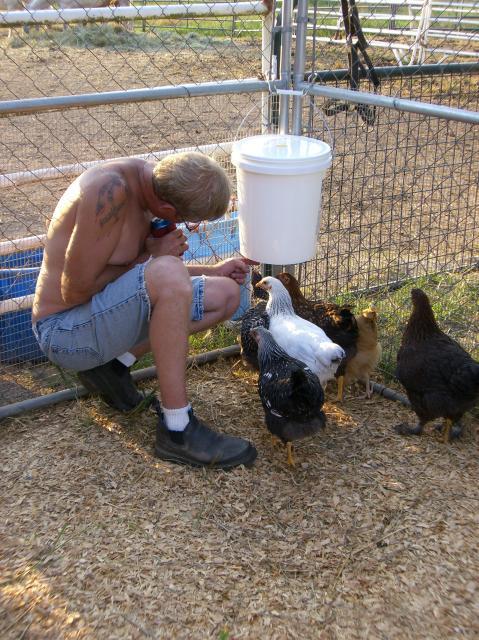
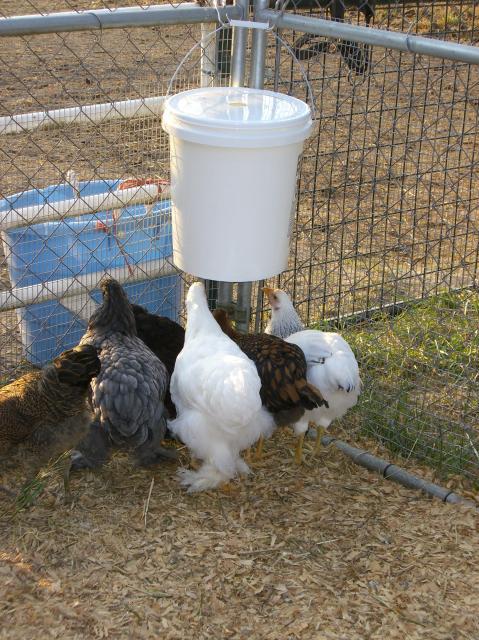
We made a waterer out of a bucket from Walmart and some chicken nipples from QCSupply.com. They weren't sure about it at first, so my DH decided to teach them how to use it. Chickens learn amazingly fast! It couldn't have been 5 minutes and they all had it figured out.
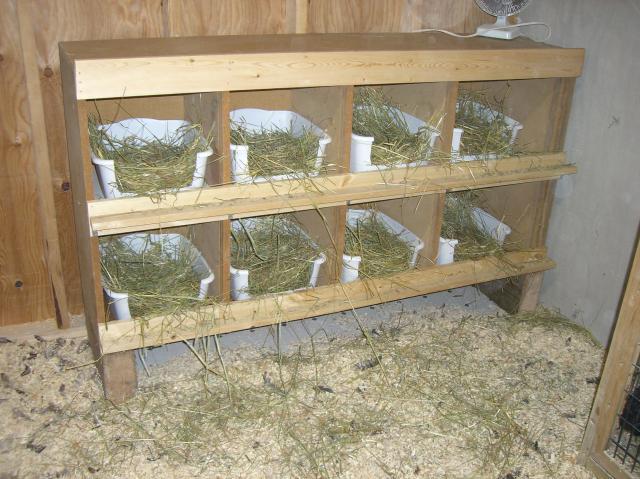
We were looking for materials to make the nesting boxes, and I spotted a particle board cabinet with sliding doors in the barn. I had purchased the cabinet at a school surplus sale for only $2. The dimensions were 60"hx30"wx15"d. We turned it on its side, added shelves and perches across the middle, added some scrap pieces of timbers to the bottom for legs...instant nesting boxes! The plastic tubs came from Walmart -- we just cut the fronts out to make access easier. I stole some hay from the horses (they didn't seem to mind) and lined the boxes. Now all we need are eggs!! Soon, I hope!!!
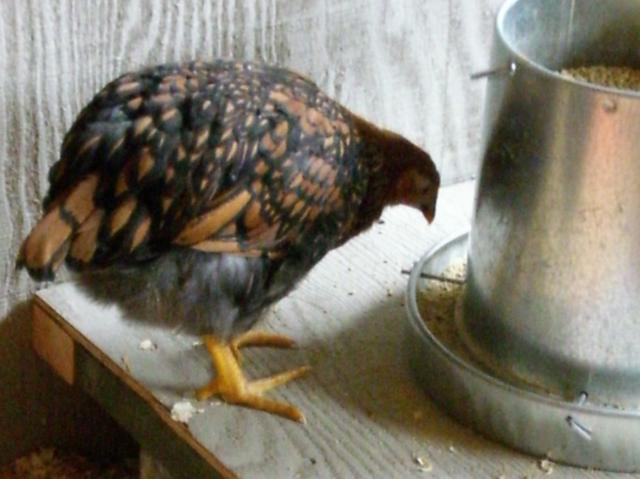
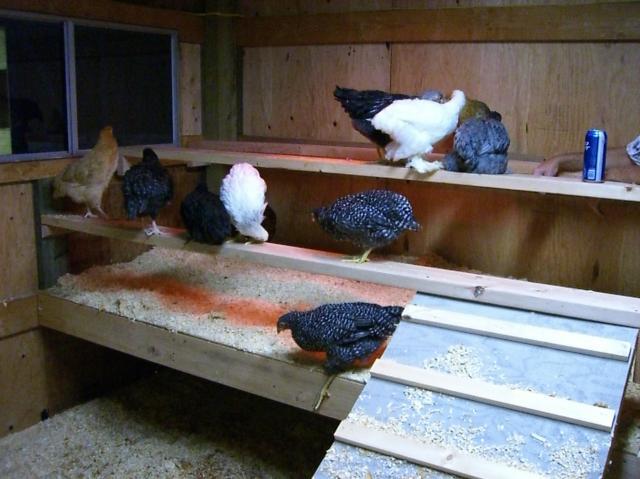
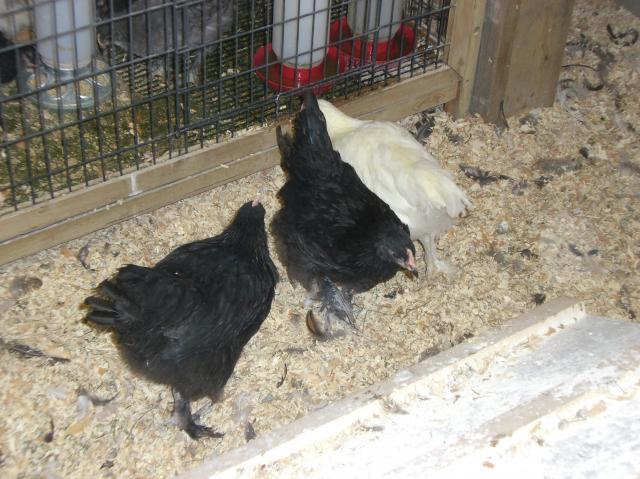
We're in the process of integrating our oldest chicks in with The Girls. They're getting pretty good sized and are holding their own. One is a White Marans roo, the others are a pair of Black Copper Marans.
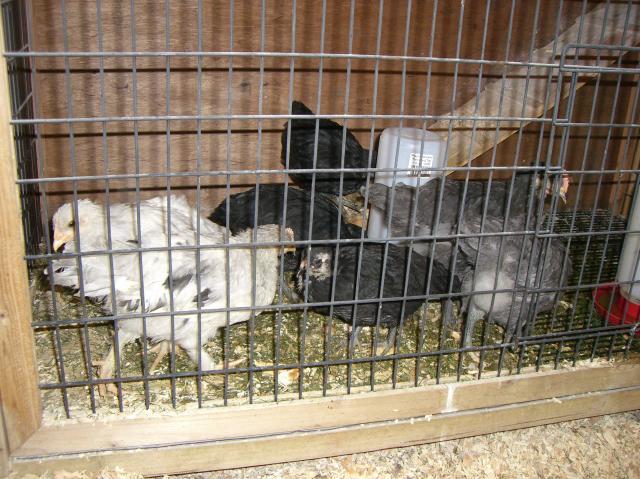
Next we will be introducing our youngest to the flock -- we have a pair of Blue Marans, a pair of Splash Marans, and three Ameraucanas.
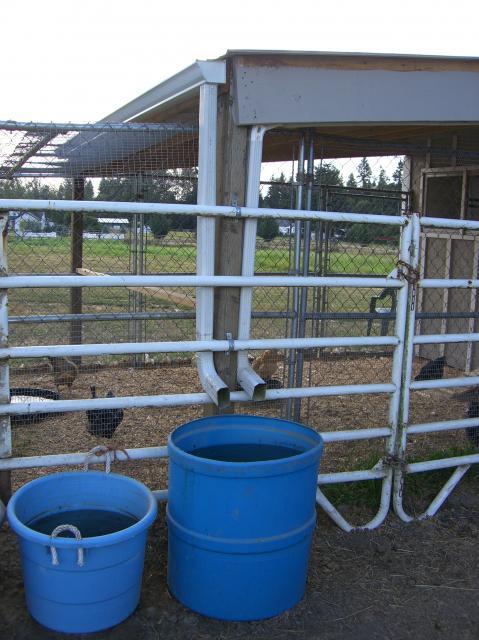
This is how we designed our gutter system. It channels rainwater into a water tub for the horses:
It all began when my good friend, Rachel, started giving us fresh eggs. When I saw how simple and effective her coop setup was, I started thinking that I'd like to have a few hens myself. I love eggs!
So, one day I mentioned to my DH that I really would like to have a few hens. After grumbling and groaning about having %#&! chickens, he told me about the pet chicken he had when he was a child. Needless to say, it didn't take much convincing to get him to buy into my idea.
Being a fan of Internet research, I did a lot of searching on Yahoo! and Google and found BackYardChickens.com. This site has been so incredibly invaluable in every aspect of our Chicken Experience. It was through BYC members that I learned about MyPetChicken.com and that I could order a small number of chicks from them. I placed my order in March for a May delivery (I had to plan for a time that I knew I would not be gone to a horse show and would have time to take care of my new little fuzzy butts for the first several weeks). Boy, that was a loooooooong wait! On May 12th, the post office called and our Chicken Experience was under way!

I had read and seen so many great ideas on BYC for brooder set ups. I went the plastic tote route, and I had everything ready and up to temperature when I got home from the post office. There is nothing as cute as baby chicks!
It was amazing how quickly the chicks grew and started getting their feathers. Here they are at one week old:
Our Rottie, Brinx, absolutely loves the new babies!
I thought they needed a little entertainment, so I built them a perch. They loved it!
After three weeks (boy, those babies grow FAST!) it became apparent that we needed to expand the brooder. After tossing around several ideas, we decided to create a "duplex brooder", so off to Walmart I went to pick up two more totes. We built a frame from scrap lumber, cut the adjacent sides out of the new totes (we wanted to keep the original one to use again for babies), and moved the growing chicks into their new brooder.
We finally had a nice, warm day, so we set up the dog exercise pen outside and took The Girls out for their first outdoor adventure.

When they hit 5 weeks old, we knew it was time to move them out of the brooder. But the coop wasn't ready yet...so we moved them to an empty stall in the barn. They didn't know what to do with all the space! They decided very quickly that they liked their new home.
This is Betty White, the Cochin. She's really turning into a beautiful young lady. To the right is Wynona, the Gold Laced Wyandotte. She's already getting her pretty feather pattern.
In the meantime, we were working away on the coop...
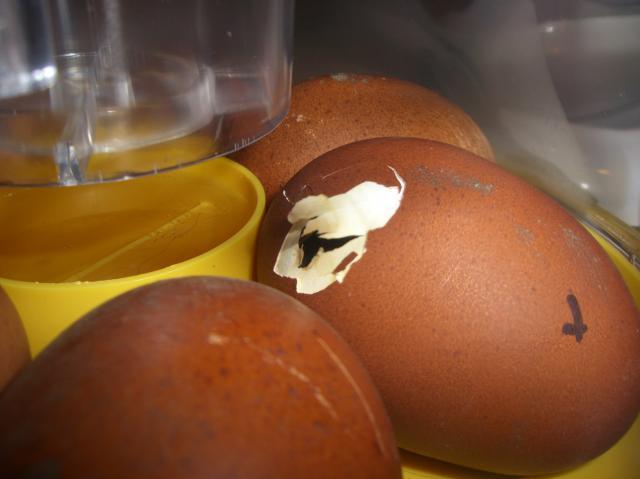
Then I got the brilliant idea that I'd like to incubate some eggs! I found a wonderful small table-top incubator from Brinsea, and craigslist provided me with 7 French Black Copper Marans hatching eggs! 21 days seemed like forever to wait, but what fun watching them hatch!

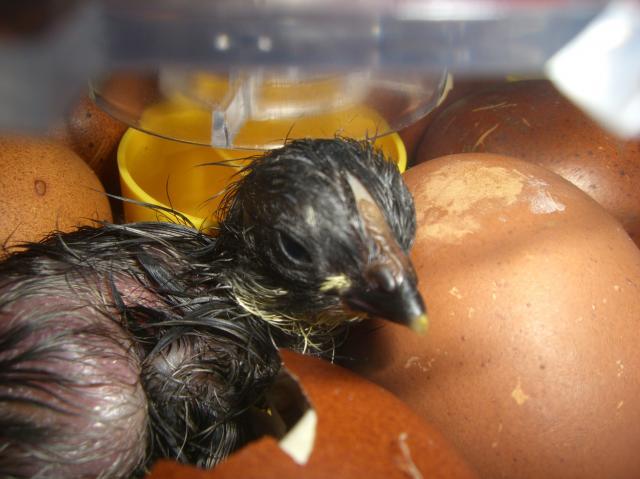
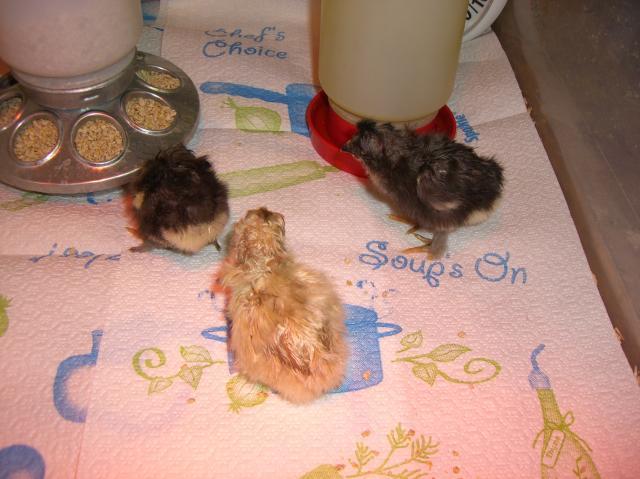
Four of the chicks died from too much humidity, but these are our 3 survivors:
Finally, the day arrived that The Girls got to move into their new home!
After a couple days locked inside, getting accustomed to their new home, we opened the automatic pop door for the first time. It was pretty comical!
They finally decided that it was safe to come out.
We added fresh shavings, much to The Girls' delight!

We built a roof over part of the run to give The Girls dry gound in the winter. We also wrapped the bottom 3' with welded wire to keep them safe from predators.
The happy Girls in their new home!
I read on the BYC Forum that hanging a cabbage on a string would be fun for the chickens. I had no idea how much fun it would be for us watching them!

We made a waterer out of a bucket from Walmart and some chicken nipples from QCSupply.com. They weren't sure about it at first, so my DH decided to teach them how to use it. Chickens learn amazingly fast! It couldn't have been 5 minutes and they all had it figured out.
We were looking for materials to make the nesting boxes, and I spotted a particle board cabinet with sliding doors in the barn. I had purchased the cabinet at a school surplus sale for only $2. The dimensions were 60"hx30"wx15"d. We turned it on its side, added shelves and perches across the middle, added some scrap pieces of timbers to the bottom for legs...instant nesting boxes! The plastic tubs came from Walmart -- we just cut the fronts out to make access easier. I stole some hay from the horses (they didn't seem to mind) and lined the boxes. Now all we need are eggs!! Soon, I hope!!!
We're in the process of integrating our oldest chicks in with The Girls. They're getting pretty good sized and are holding their own. One is a White Marans roo, the others are a pair of Black Copper Marans.
Next we will be introducing our youngest to the flock -- we have a pair of Blue Marans, a pair of Splash Marans, and three Ameraucanas.
This is how we designed our gutter system. It channels rainwater into a water tub for the horses: