We got three Barred Rock hens when they were a day old. Barred Rock hens are supposedly docile, quiet, and well mannered and supposed to be heavy birds that produce large brown eggs, and so far they have definitley lived up to the "quiet and friendly" stereotype. We will see about the eggs when they get to laying age.
So with three chicks in a small crate with a heating lamp it was time to get busy building a coop.
I started by doing the obligatory google search for plans, photos, tutorials etc and soon found the BYC site and forums. I had hit the motherlode!
There were plenty of small coops here for inspiration and i ended up choosing to base mine on this one by Trictle https://www.backyardchickens.com/a/trictles-chicken-coop-with-plans
So i don't really have any plans to share as i perhaps foolishly didn't bother to make any but i had the ones provided by trictle so i just used them as a guide and adjusted them slightly on the fly.
Here are the main resources / inspirations / plans:
interior / exterior general ideas:
https://www.backyardchickens.com/a/new-henstein-castle
framing ideas
https://www.backyardchickens.com/a/trictles-chicken-coop-with-plans
The framing is basically the same as the above link here and i just modified the nesting box and he has lots of photos.
nesting box
http://www.buildeazy.com/chicken_coop_7.html
copied this and used it almost exactly (measurements are there) roughly a square foot for each chicken. but i didnt bother with the "storage" area on this plan.
roof and general ideas
https://www.backyardchickens.com/a/small-coop-tutorial
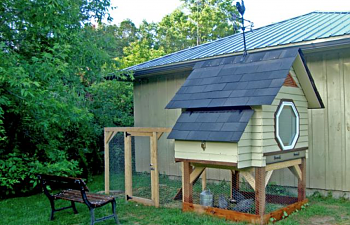
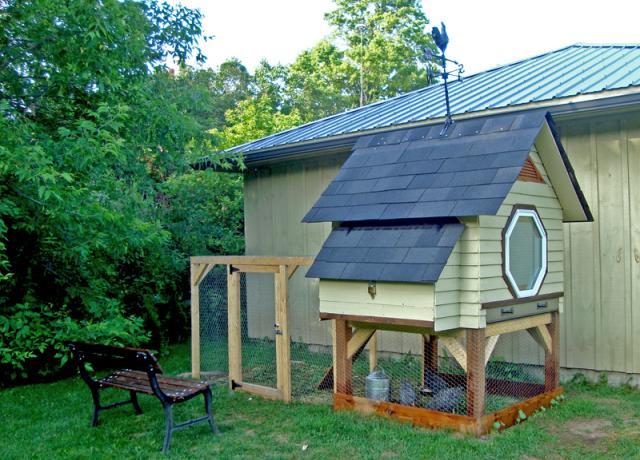
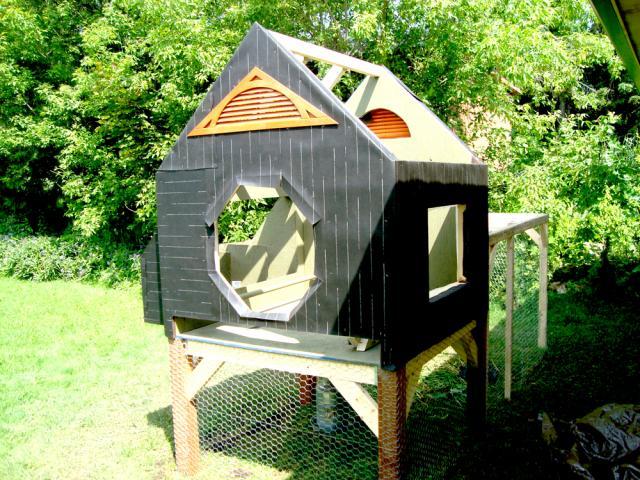
I went with a 4' x 4' base on cedar legs and repurposed some parts of the kids old playhouse that they were not using anymore (I used the plastic vents and cedar siding and some of the cedar roof shingles when i ran out of siding on the nesting boxes).
The nesting box is divided into 3 equal spaces of 1' x 1' as per some site i found that recommended those dimensions. It has a hinged lid for access to the eggs with an overhang on the roof to stop leaks. We had a huge thunderstorm the day aftter i finished the roofing and there were no leaks to i was relieved.
One of the main differences from the Trictle design is that i added a tray under the south facing window so that we could hopefully more easily clean out the bedding when needed. It sticks a bit as it is painted ply sliding on painted OSB but seems to work ok.
I went for an insulated design as we are in Ontario and get plenty of snow and occaisional -30C temperatures. I will keep an eye on the temperature in there and we may need to put a heating pad or somthing in there if gets too cold.
Materials used:
- 4 sheets of 4' x 8' x 1/4" OSB for the outside sheeting
- 4 sheets of 4' x 8' x 1/4" Ply for the inside sheeting
- one 4" x 4" x 8' Cedar for the legs
- a couple of 2" x 4" x 8' spruce for the base
- lots of 2" x 3" x 8' spruce for most of the framing. i lost count but at least 10 of them i think.
- One octagon double glazed fixed window from HomeDepot
- Lots of deck screws of different sizes.
- some roofing nails
- some brad nails of various lengths
- 1 roll of roofing tar paper (was way more than i needed) for the outside of the sheeting
- 1 pack of roxul R14 insulation (again more than i needed - only used half the pack)
- some tubes of caulk and roofing goop
- lots of chicken wire
- some paint
- an old bucket of drywall plaster for the feeder
- One and a half packets of roofing tiles
- Air compressor
- Brad/Finishing Nailer
- Hammer
- Cordless screwdriver/Drill
- Dropsaw
- Jigsaw
- Skill saw
- Heavy duty stapler
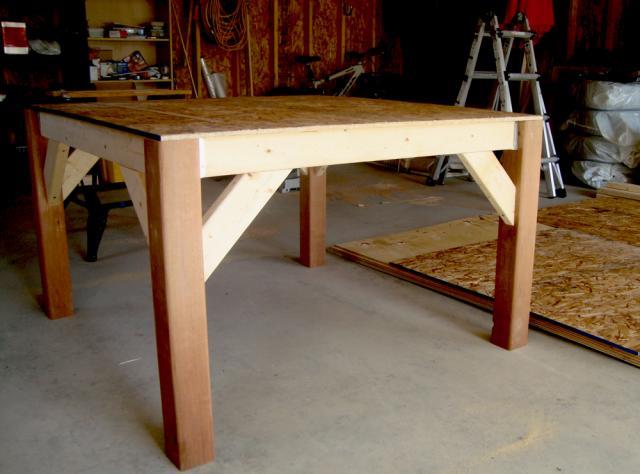
The base, put together in the garage
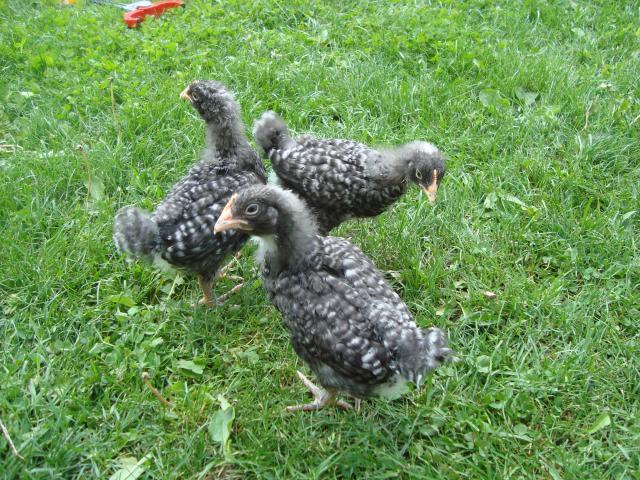
The girls waiting for their new home to be finished
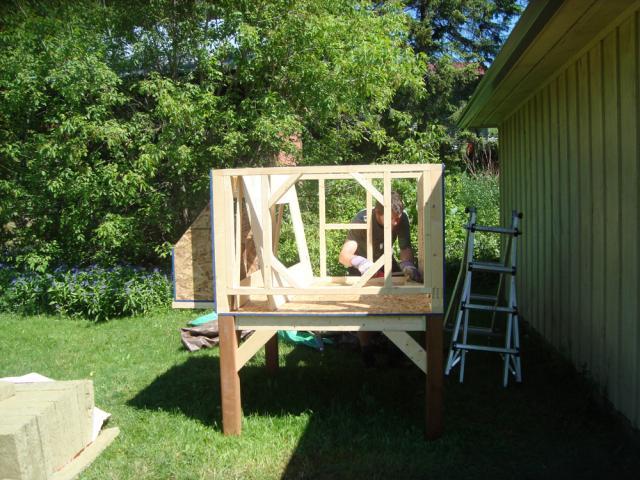
I made the four sides of the frame and then screwed them together in place.
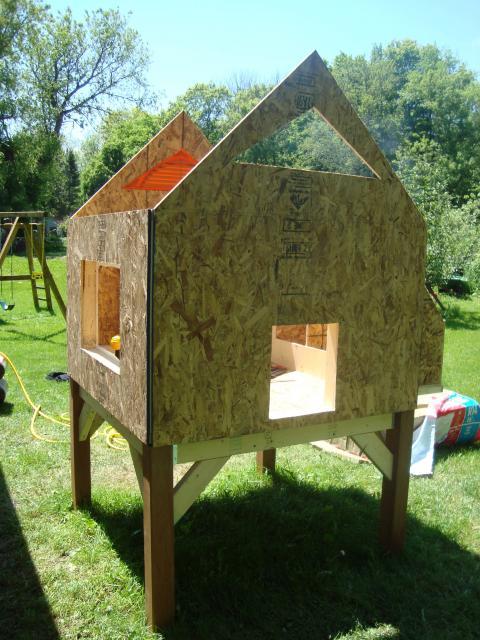
Outside sheeting in place showing the opening for the girls to come and go.
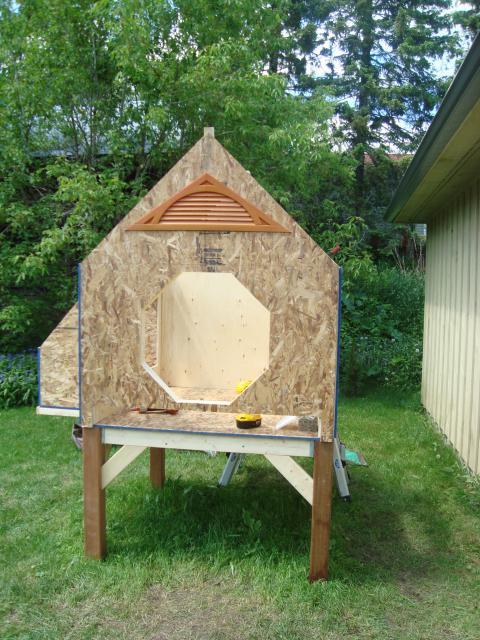
The opening for the window (facing south) and the opening for the sliding tray to clean the coop later
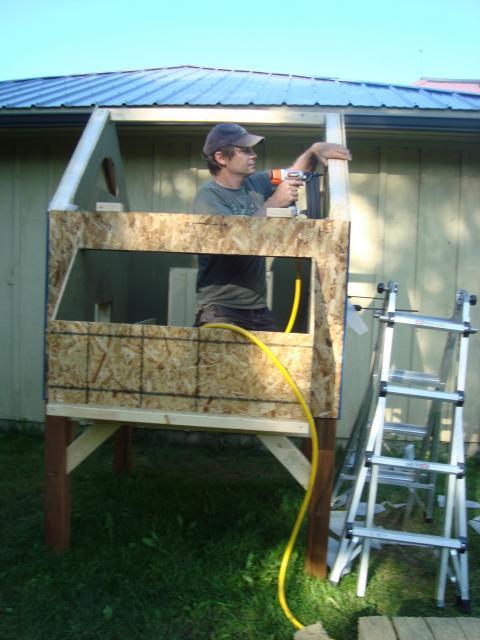
Nailng the inside ply sheeting in place (prepainted after cutting to make it a little easier)
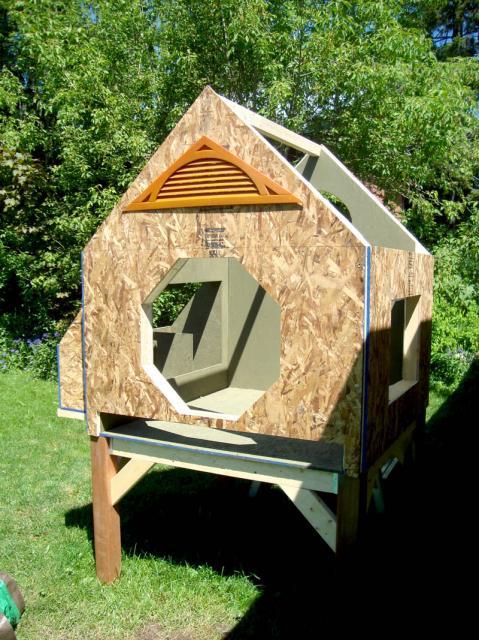
Insides done. notice the opening on the right for a door for easier access later. Big enough to get in there to finish building when i have to do the ceiling
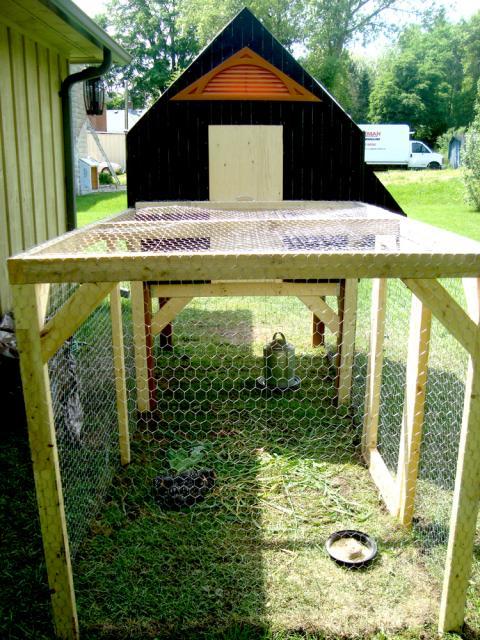
Jump to completed chicken run and tar paper covering
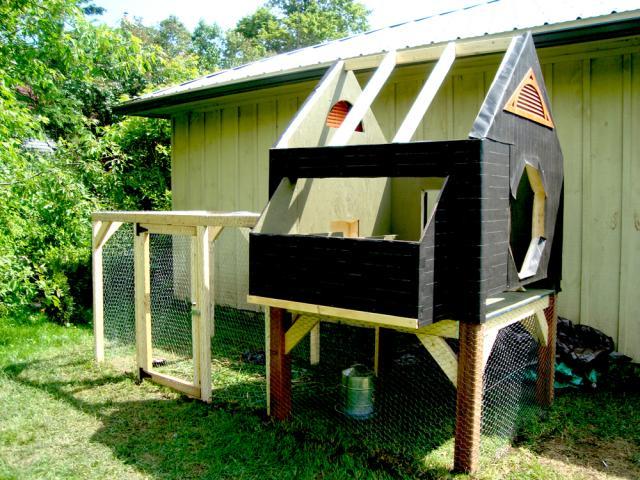
The chicken run is a full foot and a half taller than shown so that any raccoons/cats/whatever will really have to work for their chicken nuggets.
I put together the frame, then covered it in chicken wire and then dug a small trench the same size as the run down to one and a half feet and then tried to get it as level as i could.
I had put marks on the wood at the height / depth i wanted it to go down then back filled.
not done yet but enough so that the girls can stay there during the day.
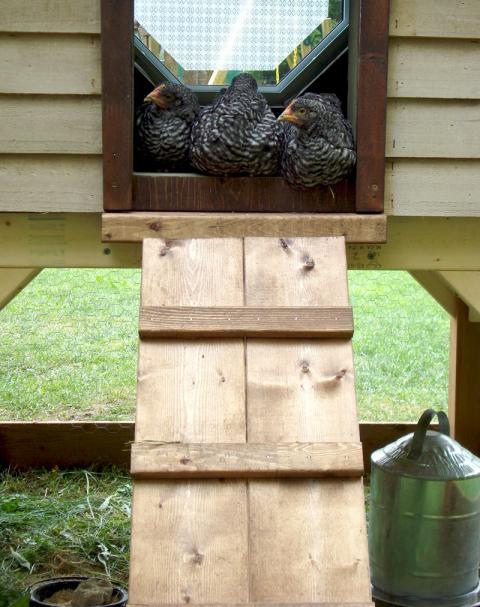
The girls hanging out at the top of the stairs. i just guess-timated the distance between the rungs / steps and they seem ok with it. I think it is about 7" between each step.
it only took them a few minutes to get the hang of it.
If you look behind the girls you can see the window. We had some leftover patterned window film and i thought it might be nice to give them some privacy and stop the sun from cooking them in summer. My wife put it on before i installed the window and i think it looks pretty good.
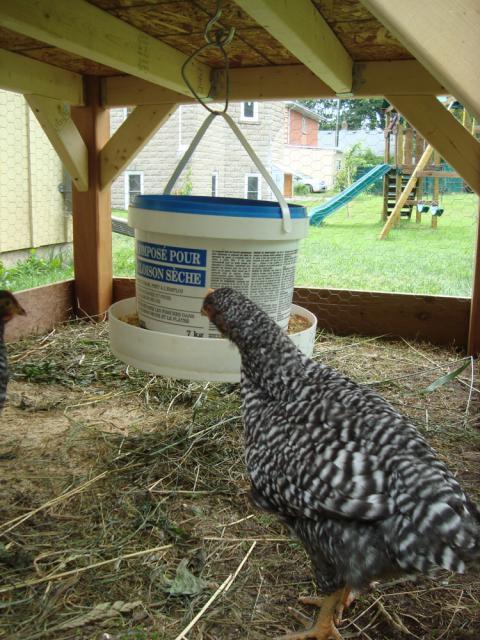
This is the feeder i made. I saw some examples on this site and it was simple to make. just a four large holes in the bottom edge of an old drywall compound container and screwed on to the cut out bottom of another larger old bucket.
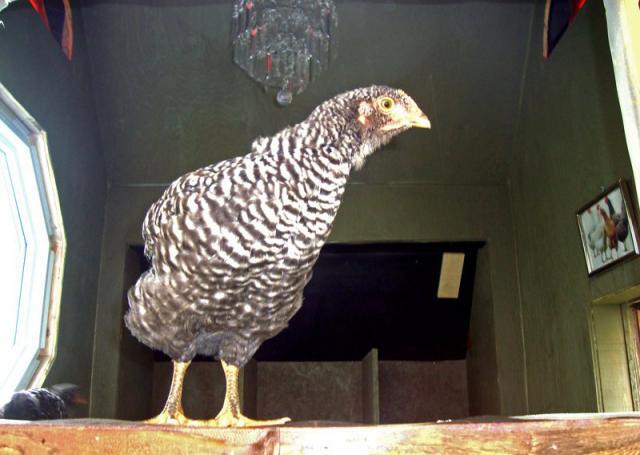
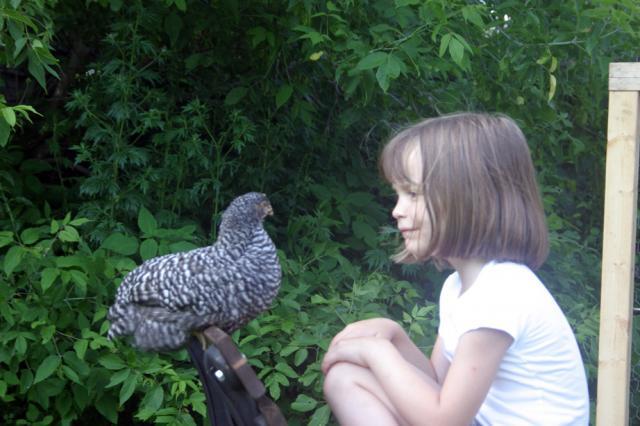
Isabel showing off her digs.
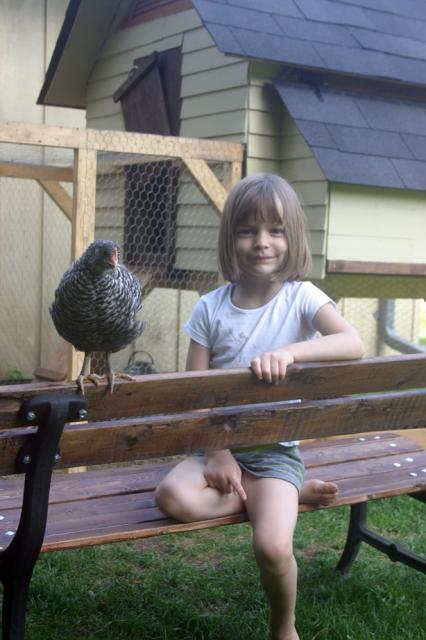
My daughter with her friend Isabel (the friendliest/tamest of the girls and the alpha chicken for now)
Things i would do differentley next time?
It's still a bit early so i will add more as i think of things later but for now it seems to meet our needs quite well. There have been some attempts to get into the run by something(s) at night but the depth it is buried has deterred it/them so far. Whatever it is has given up after only digging down 3-4 inches at most in a few places.
The girls have adjusted well to their new place. We let them out at least once a day (under supervision as we have cats) and they run around and forage in the undergrowth and lawn. Once it gets dark i go out and close the sliding door as an extra precaution in case something does make it into the run. At first we were having to herd them indoors but now they automatically go in when the sun goes down which is nice.
--- Update | Feb 2012 ---
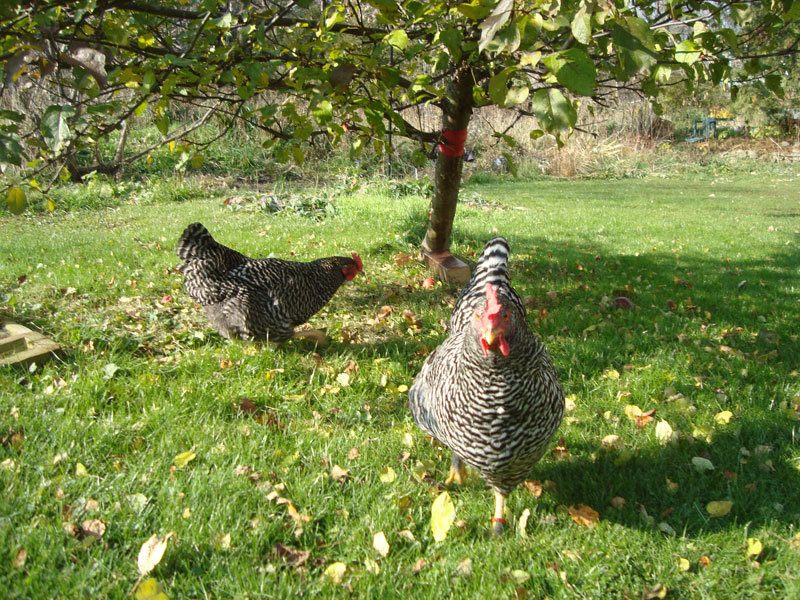
Under the apple tree
The coop and chickens have been working out well. I added a small roof over part of the run as we got a lot of rain at one point and it was getting a bit muddy in there. It also helped later with the snow. They started laying in October and apart from one very freaky rubbery egg at the beginning they have all been laying one a day once they got going properly.
I put one heat lamp in the coop originally for the really cold days and that was working well but when it got to -20C outside it wasn't enough to stop the water freezing in the coop so i added a second one that i only turn on for the less than -15C days. I am using 150watt ceramic infrared heat only bulbs.
I insulated the floor before winter came (you can see it before insulation in one of the photos above with the feeder bucket).
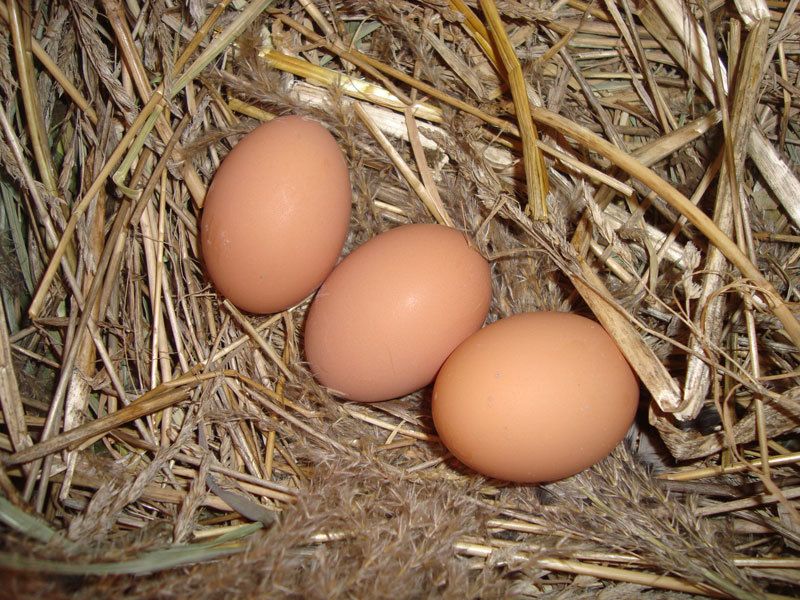
fresh eggs!
After plenty of snow i was having a hard time opening and closing the run door, so recently i took it off and shortened it and reattached it a bit higher with some backing wood on the inside of the door way to block the extra space created so no predators can sneak in through the larger gap. This has the added benefit of creating a back stop for the door now so it wont try and swing into the run and mess with the hinges.
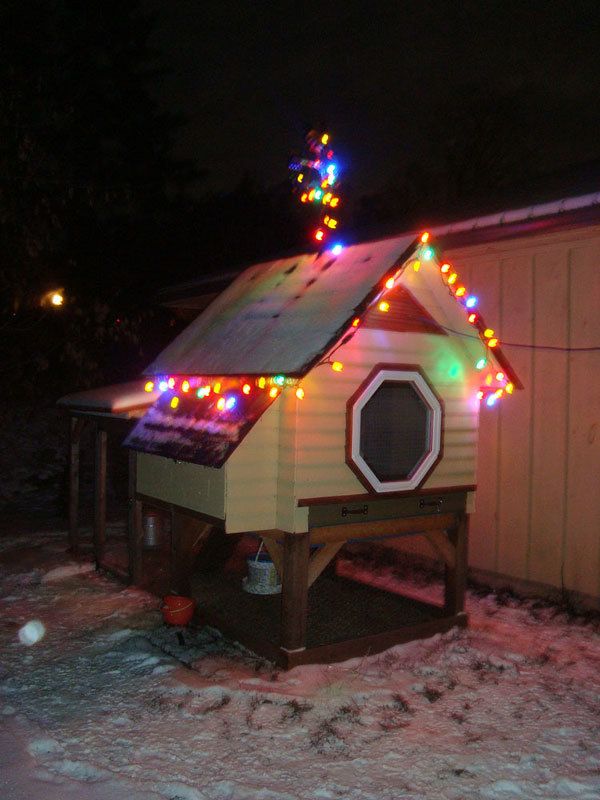
Christmas is for everyone, chooks included
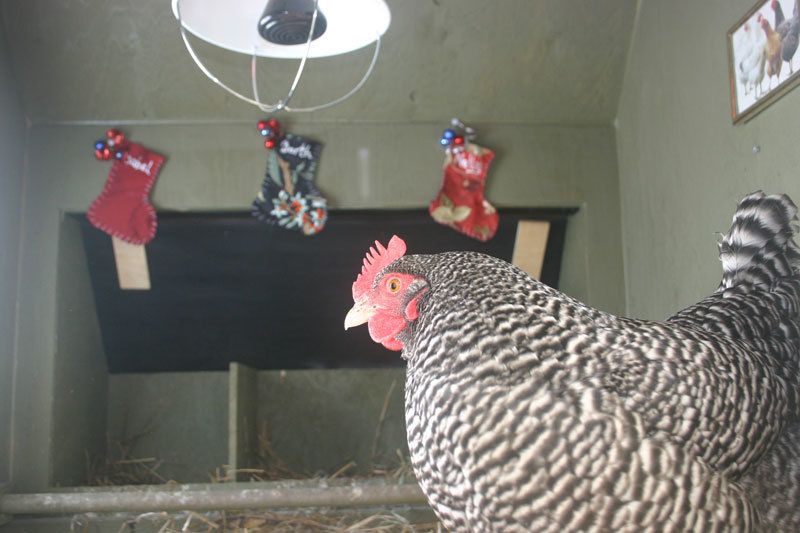
Above you can see the heat lamp (and their Christmas stockings... say no more).
-- Update --
Here are some recent photos of the coop in the snow.