Storage room transformation for New York city coop!

 we got 4 Buff Orpington chicks (actually we ordered 3 and received 4
 ) We live in New York City and we are very lucky to have a backyard, but we don’t know anybody that has chickens, so we had to research a lot (specially in this forum) to be prepare for this amazing experience of having backyard chickens! We started the project of making the coop... the chicks were already at home so we had to act quickly!
At first we were going to build a whole structure outside in the backyard, but then we realized that we have a little storage room in the basement that’s right next to our backyard and could be perfect since it’s already weather proof! (and it would take less work and $ of course).
This was the initial plan that we had for the coop, we stick with it for the most part:⬇

This was the storage room full of dirt, gardening supplies, and tools:

First of all we had to remove all the old shelving and clean up the old paint:
Then we painted the walls (of course pink
 )
)
and added plywood flooring, since the concrete floor was very uneven, we put lumber peaces underneath to even it out:

Then we framed the coop access door:
And used leftover plywood from the flooring to add next to the access door for extra insulation.

We had leftover fence that we used for our backyard (we had to add the fence to one side of the backyard that had only a low mesh fence, not secure enough to keep the chickens inside the backyard). We separated the fence parts to make a door for our little coop:
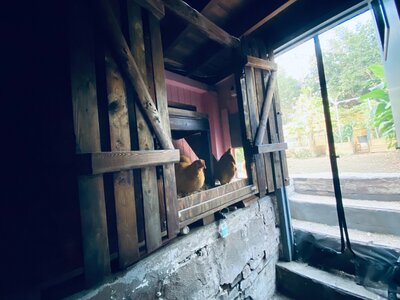
After that we started working on the chicken door. We had to make a hole in the wall to add the chicken door that goes from the coop to the backyard:
and added a opener motor to the chicken door, this is one of the best things to have in a coop. not having to wake up early to open the door is the best!!

Then we made the elevated roost that has underneath wood that’s serves as a poop board. We also added stain to the wood to make it look similar to the wood from the ceiling. Also added and electrical line with a power outlet :
We added the nesting boxes (cat litter boxes for easy cleaning)
We added the ladder ramp for the chickens to go up and down the roosts.
As you can see the ramp is way too narrow, eventually we had to replace for a wider one, because the chickens were having trouble going up to the roost:

Here you can see the current wider ladder ramp.
 The bottom floor has the nesting boxes and space for the chickens to hang out when is raining.
 I added a deep layer of wood shavings in the bottom floor and sweet PDZ for the poop board...

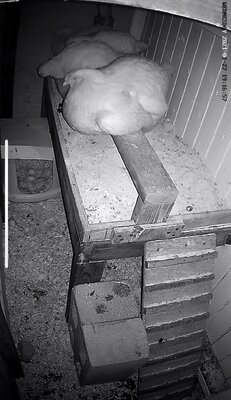
The girls at bed time! ⬇This was a warm night and they are using all the roost. When is cold they snuggle next to each other and only use half of the roost.


This coop is being use by our 4 chickens and they seem very happy with it.
It’s also very easy to clean as the big access door let me have enough space for me to clean it. This coop is only for them to sleep at night, and protect themselves from the weather, as they have the hole backyard to be during the day. Fortunately we don’t have predators around here.
After moving the chickens to the coop, we had to make a couple of changes.
- We made the roost ramp wider as our first ramp was way too narrow.
- We added a wood trim around the poop board as the poop and sweet PDZ was falling to the bottom floor.
- We added a wood trim down in the picket door as the chickens were kicking wood shavings outside the coop.
- We placed a piece of cardboard on top of the bottom nesting box to protect it from falling poop.
One thing that we want to add is hardware cloth in the interior of the picket door, to prevent mice to get into the coop.
We are very proud of our little creation! And I hope you like if too! Please comment!
An extra picture of Greta, Chata, Anke and Gaviota in the backyard... they are spoil chickens


They bring joy all the time!