Contessa's Chicken Farming Adventure
NOTE: This is my first foray into chicken farming and building an incubator from scratch. Below you'll find my first incubator building attempt, and then the new and improved one that actually works. It's all a nice scientific experiment!
7/8/11
Won an auction for 12+ eggs from FarmerJohn3285
7/9/11
Set about building my own incubator.
Supplies:
Rubbermaid type tub
Heating duct padded insulator (silver stuff)
light bulb plug
humidity gauge
water heater thermostat
computer fan (12v)
bakers rack
thermometer (used in aquariums)
egg carton w/holes poked in egg cups
saucer w/water
duct tape
plexiglass
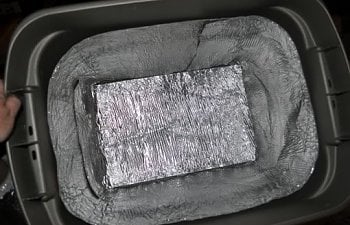
Here I took the tub and lined it with the heating duct padded stuff (can't remember real name.) Originally I had bought one of those car window thingies you put in in the window to block the dash from getting too much sun and cracking. A visor? Anyway, it has a reflective side. But then I found this duct stuff. Much easier because its stick on one side.
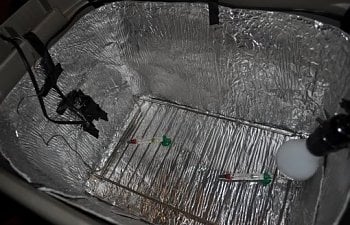
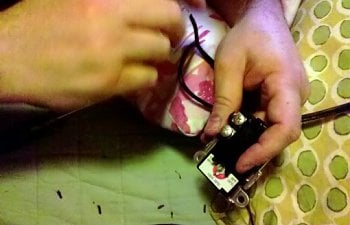
I then wired thermostat in the middle of the light using this video:
(okay, hubby did the wiring.)

I taped down all the wiring, lamp and water heater thermometer.
NOTE: Don't use black electrical tape. Of course I forgot duct tape at the store today so I used what I have. But as it got hotter, the tape started to all pull off. Plus I'm having trouble with the temperature thermostat regulating to exactly 99.5 to 100 degrees. I will pick up duct tape in the morning and try again. Hubby needs to wire in computer fan as well so we can add that element so it will circulate the air for a more even temperature flow.
7/10/11 (1 am)
** still trying to regulate temperature. Water heater thermostat is not turning back on after it's gone off. Will keep testing it tomorrow.
7/11/11
I've added duct tape instead of the black tape. Works much better although it doesn't stick to the silver stuff inside the tub. Weird.

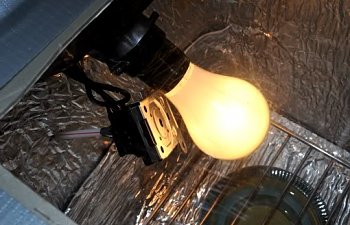
I've moved the thermostat to within about an 1" of the lamp. I slowly moved the thermostat around the tub until it was this close. No other position has worked. I'm getting 3 degree variance with this close. I"ll be moving it closer so its almost touching and hopefully it will stick within 1/2 a degree variance. I could not get the thermostat close enough so I taped a straw to the front of it and then lodged it in the side silver stuff. I've also turned it up much higher because while near the lamp might be 101 degrees, the thermostat on the rack where the eggs will be was only getting up to 88 degrees.

The testing continues...
7/12/11 (10:45 am)
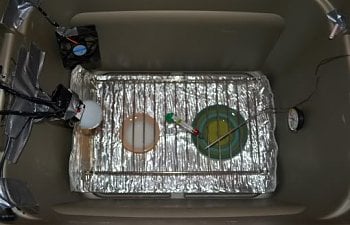
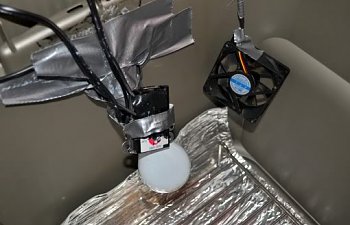
Still testing. Last night I removed the foil insulation stuff around the sides and taped the thermostat to the lamp. I moved the fan down by the lamp/thermostat. I also added a 2nd bowl to the bottom to lower the humidity. So far, the temp goes up to 101 and turns off, then doesn't turn on until 97. Can't seem to regulate that. The humidity gets down to 38%. Wondering if that is good enough? I have a 100 watt bulb in the incubator. Eggs shipped today, so I have 2 days to get this right! URGH!
I taped down all the wiring, lamp and water heater thermometer.
NOTE: Don't use black electrical tape. Of course I forgot duct tape at the store today so I used what I have. But as it got hotter, the tape started to all pull off. Plus I'm having trouble with the temperature thermostat regulating to exactly 99.5 to 100 degrees. I will pick up duct tape in the morning and try again. Hubby needs to wire in computer fan as well so we can add that element so it will circulate the air for a more even temperature flow.
7/10/11 (1 am)
** still trying to regulate temperature. Water heater thermostat is not turning back on after it's gone off. Will keep testing it tomorrow.
7/11/11
I've added duct tape instead of the black tape. Works much better although it doesn't stick to the silver stuff inside the tub. Weird.
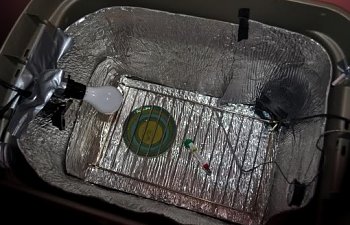
I've moved the thermostat to within about an 1" of the lamp. I slowly moved the thermostat around the tub until it was this close. No other position has worked. I'm getting 3 degree variance with this close. I"ll be moving it closer so its almost touching and hopefully it will stick within 1/2 a degree variance. I could not get the thermostat close enough so I taped a straw to the front of it and then lodged it in the side silver stuff. I've also turned it up much higher because while near the lamp might be 101 degrees, the thermostat on the rack where the eggs will be was only getting up to 88 degrees.
The testing continues...
7/12/11 (10:45 am)
Still testing. Last night I removed the foil insulation stuff around the sides and taped the thermostat to the lamp. I moved the fan down by the lamp/thermostat. I also added a 2nd bowl to the bottom to lower the humidity. So far, the temp goes up to 101 and turns off, then doesn't turn on until 97. Can't seem to regulate that. The humidity gets down to 38%. Wondering if that is good enough? I have a 100 watt bulb in the incubator. Eggs shipped today, so I have 2 days to get this right! URGH!
7/13/11 Plan B - Rebuild the Incubator
So, the last incubator set up was not holding in heat. Since yesterday (but no pictures), I tried adding 'heat sinks' (jars half filled with water, covered in duct tape because i had no lids) but it did not work. I think it varied in temperature about 6 degrees. So today, with eggs on the way, it was time to start over. I'd been told I might need to drill in my thermostat like this video shows but I was reluctant to do something so permanent that A- might screw up the thermostat or B-I couldn't return it after that (just in case i decided it wouldn't work for us.) So here is the new set up:
Supplies: (new items in red)
Rubbermaid type tub
Heating duct padded insulation (small square only - could go without)
light bulb plug
100 watt bulb
humidity gauge
water heater thermostat
computer fan (12v)
shelf square from wire shelves like THIS
2 thermometers (used in aquariums, Walmart $1.65)
egg carton w/holes poked in egg cups
4 small mason/canning jars 1/2 filled w/water - 2 open w/1/2 a sponge, 2 closed w/lids or duct tape
pieces of styrofoam (like used in packing a stereo or VCR)
batting or other insulation, old towel, etc...
brick, for heat absorbtion
duct tape
plexiglass
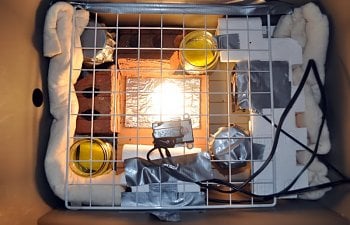
1- I filled my jars, taped two closed and put in the bottom of the tub.
2 - I cut the corner off a styrofoam thing, made a hole to hold the lamp and wired it through the hole. This holds the lamp off the bottom of the box and at a horizontal angle. I also had to slip a thin carboard box under it because my styrofoam piece was about 1" shorter than I wanted. I wanted the lamp closer to the shelf. I then taped the styrofoam lamp pieces inbetween 2 jars on the one side.
3 - A large piece of styrofoam was put down the one side, basically to take up space so chicks wouldn't fall to the bottom of the tub. I stuffed batting behind it to act as insulation. I added more batting on the opposite side beside 2 jars.
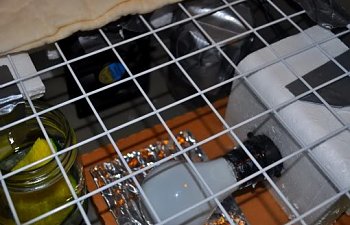
4 - I taped the computer fan to the middle of the large styrofoam piece, in the middle so it would blow directly across the lamp. Cord went up and over the corner side of the box (probably should drill a hole for it but I'm lazy and without a drilling tool.)
5 - I was describing the jars to hubby, telling about them holding heat and that I might need rocks too. He found a brick and broke it in 1/2 an put it inbetween some of the jars in the bottom.
6 - I placed the wire shelf on the tops of the mason jars. Even though it fit pretty snuggly, and mostly laid flat, I just gave it a few pieces of duct tape to secure it on the sides that touch the tub.
7 - I added a piece of batting over the styrofoam so chicks won't peck at it. I can always add something else if the batting will be a problem. I'm thinking it won't since chicks aren't in there very long before moving to the brooder.
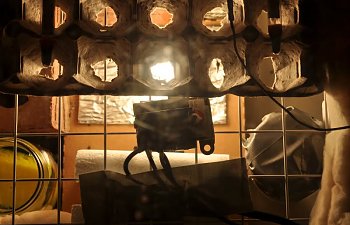
8 - I taped the lamp wire w/the wired in thermostat on top of the wire shelf, right over the switch part of the lamp (not directly over the bulb), no scientific reason why, it just fit there better and needed to be close to the heat at least.
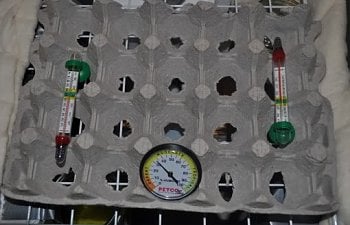
9 - I places the egg carton, with the cut out bottoms of the holes on top of the wire rack, directly over the lamp. I added the thermometers and humidity gauge on top of the egg carton.
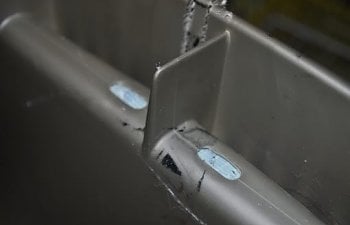
10 - I realized there were tiny holds in the handles of the tub so I plugged them with duct tape from the outside. That way, if I need to release a bit of humidity, I just untape one or two.
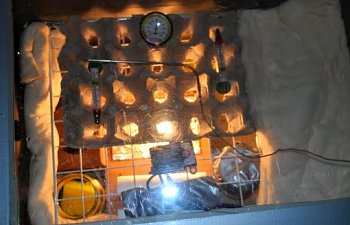
Surprisingly it's holding the heat for much longer. It cuts off at 101 degrees and turns back on around 99.5 degrees. Not sure how to get it to stay less than 1 degree in variance; maybe more batting? I will experiment some more! I'm very excited to get it working this well finally!
