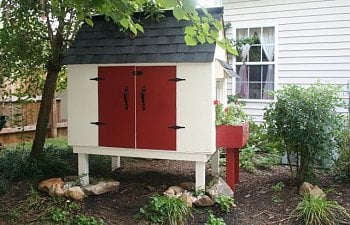
Finished Picture....

And this is where it began~
LOL ~ I seriously feel like doing that!!
This is what I have done over the weekend, with the kids gone to their fathers house. Me and my tools have now taking our relashionship to the next level~ and built this built cool Chicken House! I'm not done and still lots to do but for 2 days I am happy with what I see... Tell me what you all think!!
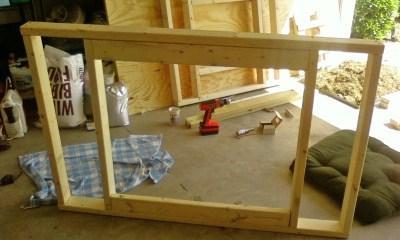
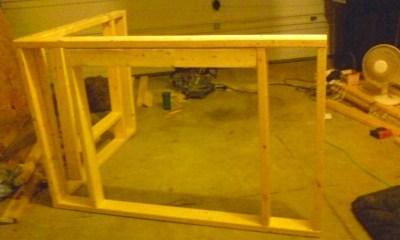
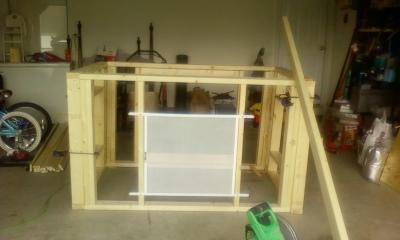
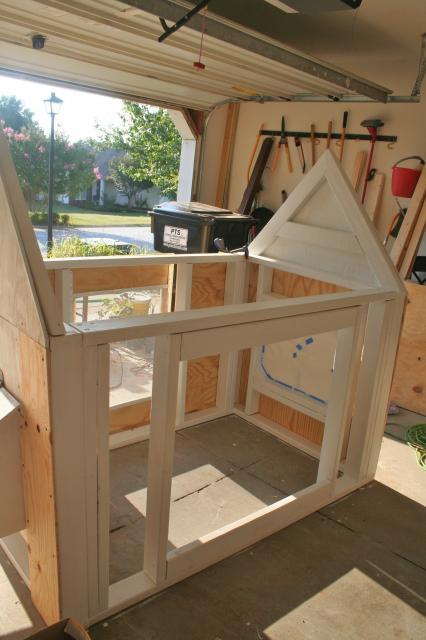
These are the walls the coop will be 5 x 3.5 Built these on Friday night
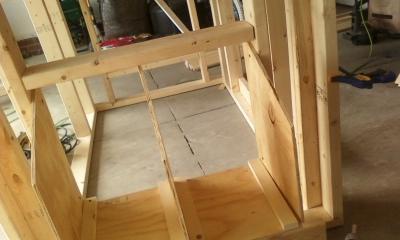
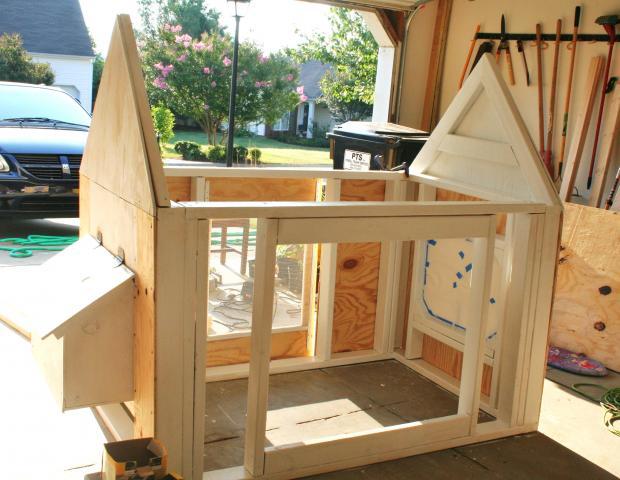
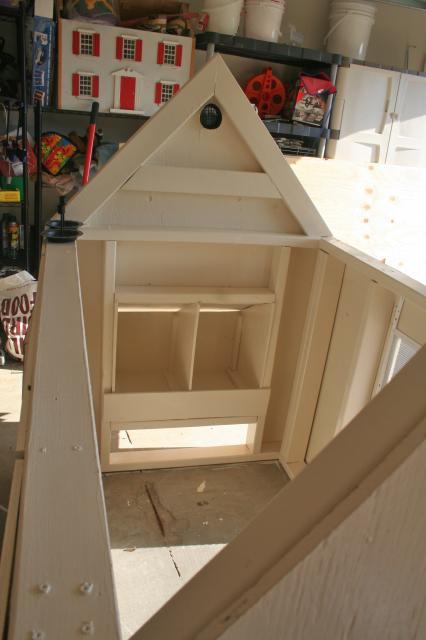
Saturday morning after I finished the other two walls~ I clamped them all together and they look beautiful!
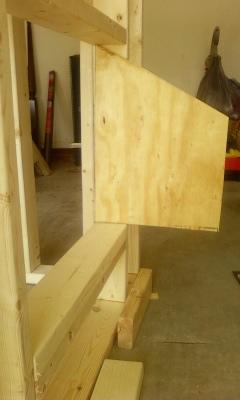
This mesh screen will be raised higher and centered and put in as a window that will allow sunlight and airflow to enter the coop. I will construct a hinged shutter that will enclose this during bad weather. I just tacked it on for the purpose of figuring out the spacing I needed for the 2 x 4's in the center wall for now
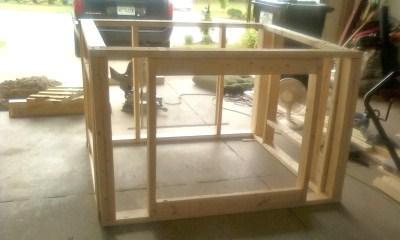
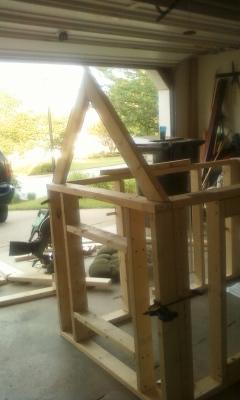
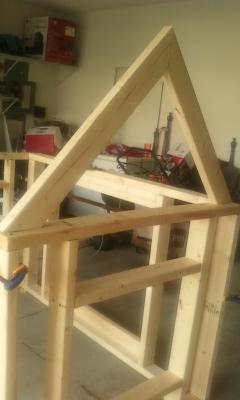
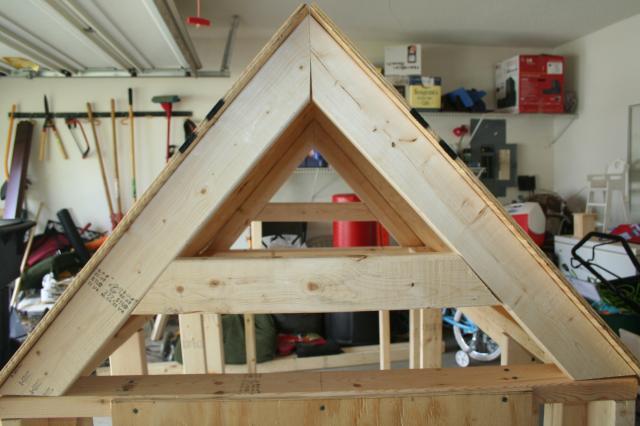
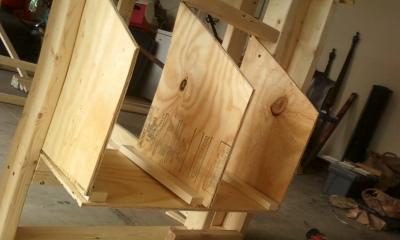
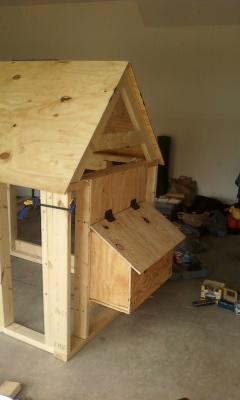
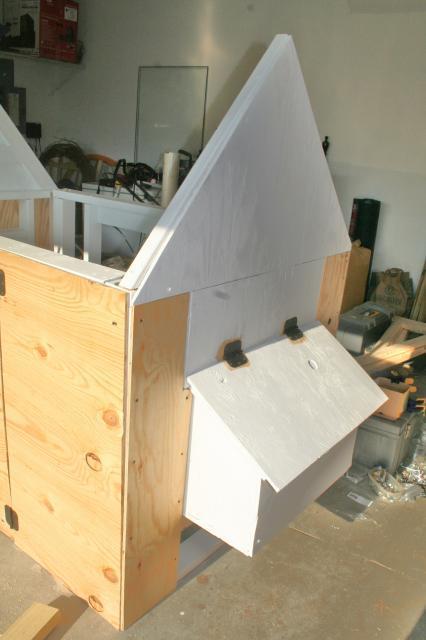
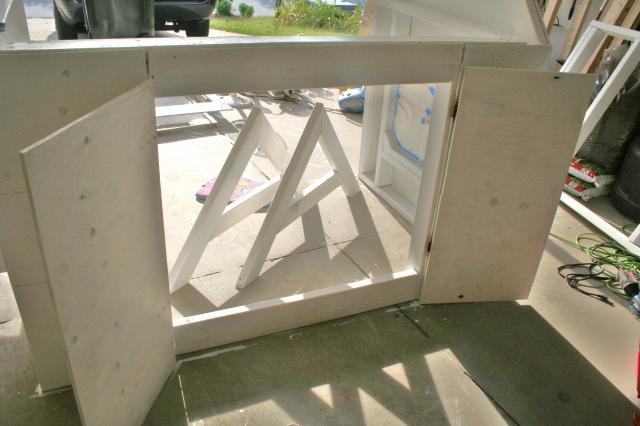
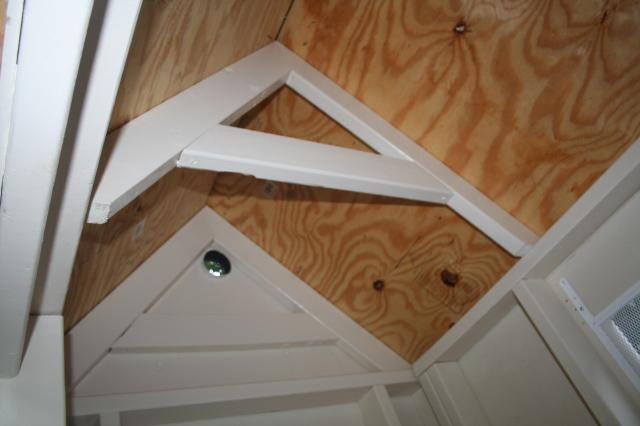
Saturday afternoon~ figuring out the dimensions of the roof was a little tricky but I did it! I made 4 of these "A" frame roof trusses you'll see A in a few more pics~ I added another piece of wood through the center for additional support.
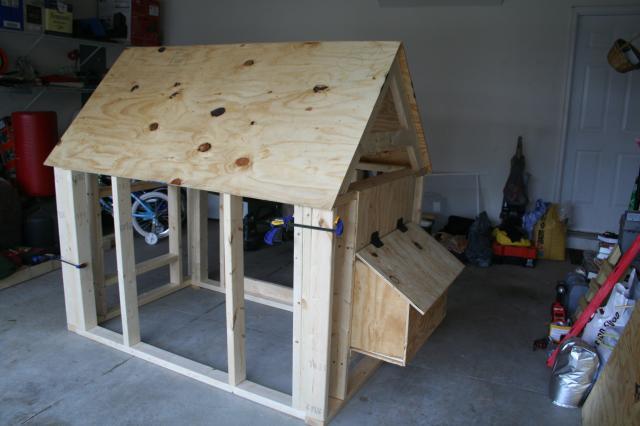
Here it is!
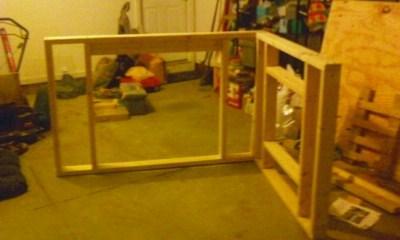
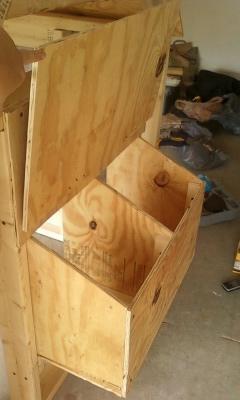
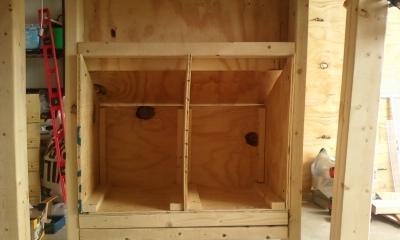
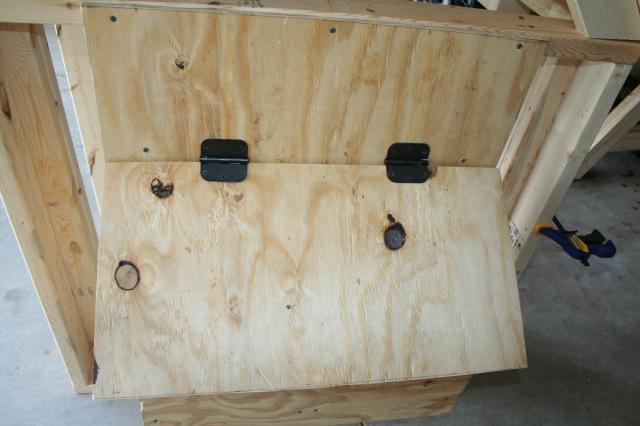
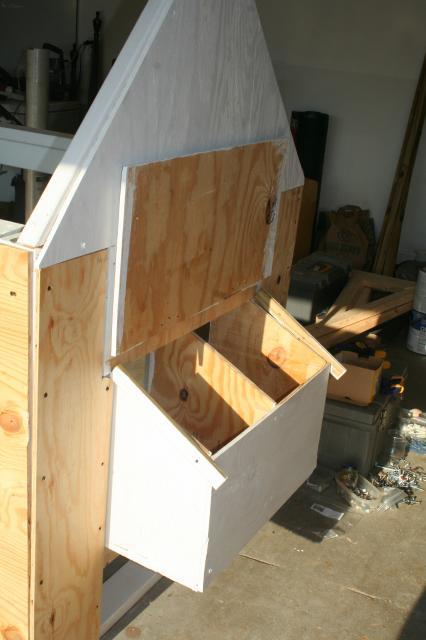
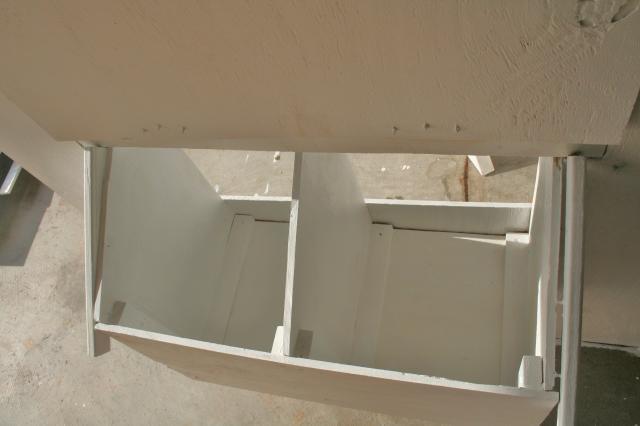
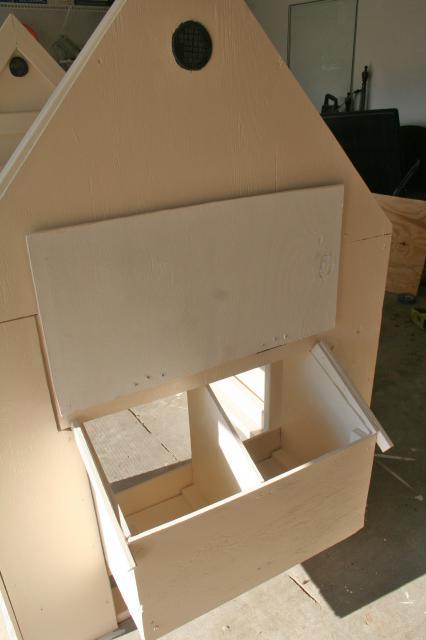
Sunday Morning ~ Then onto building the nest boxes! This was tricky to~ but pulled it off. Gave it lots of support and will reinforce the outside with trim to help keep it safe from the elements. This will be duplicated on the opposite side which will provide 4 nest boxes for my girls!
And here are the full view pictures where I left off...
Window Side
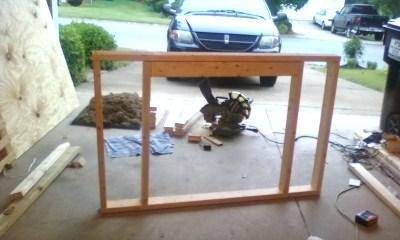
Main Access door will go on this side.
To give you perspective on house big it is! It stands 5'3 in height it's 5 x 3.5 wide
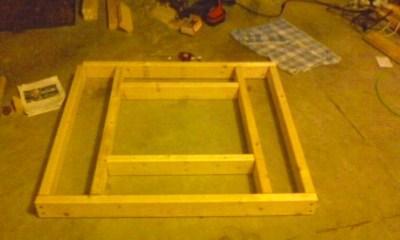
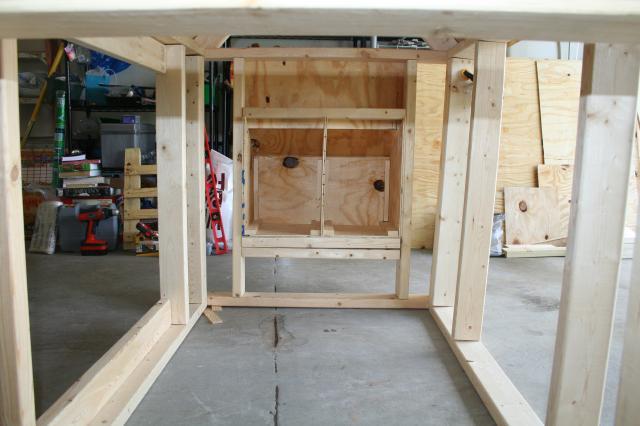
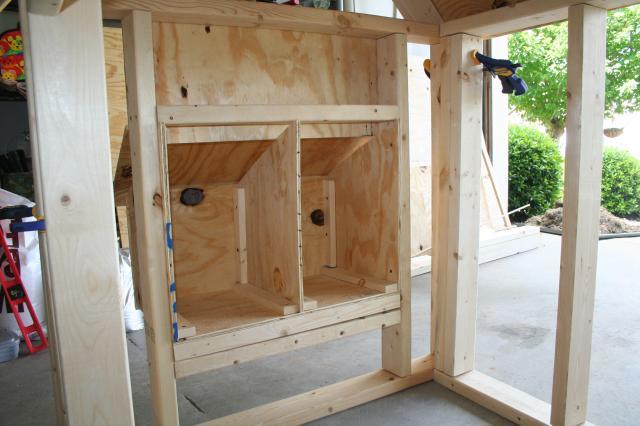
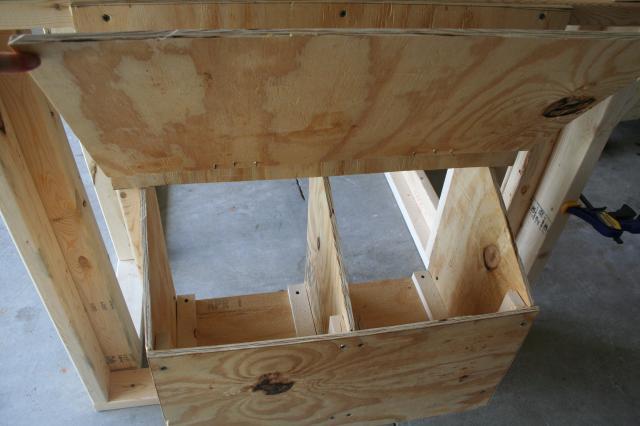
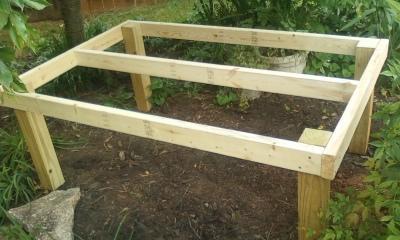
Here is the base out back which I will need to shorten since I built my coop so high! Haha
In this location, it will give them lots of shade in the summer months ~ and in the winter the leaves will be gone and they will get some good sunshine~ when it counts!
I still have so much to do but I really hope in the next 2 weeks I can finish! I will be putting shingles on the roof and over the nest box lids, and lots of personal touches! Hope you all like I will contine to post pics if any of you are interested. And yes a Woman built IT!!! HAHA
Last edited by tiffanyg2 (05/17/2011 10:40 am)
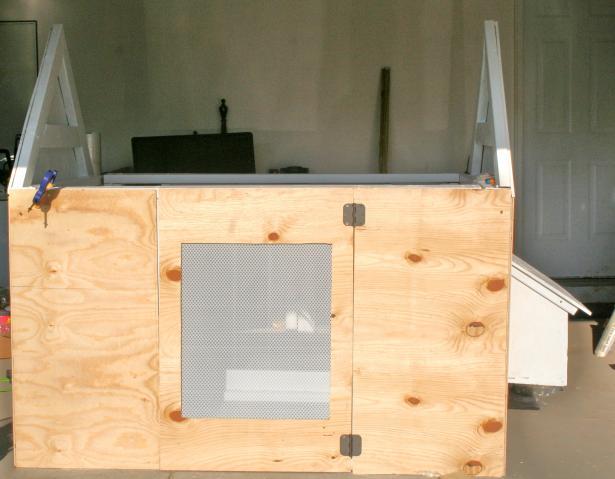
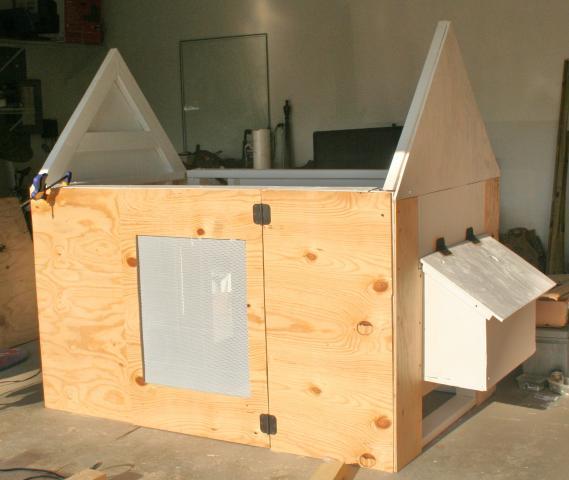
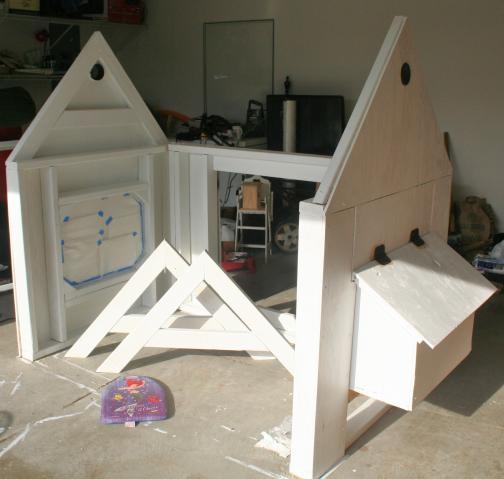
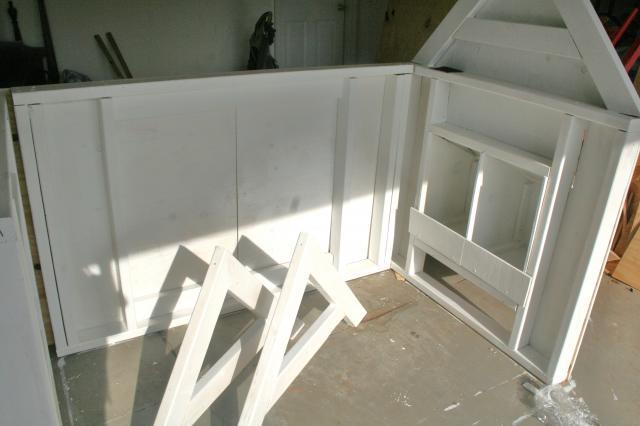
Update~ OK I took a break but started working on it again, I removed the roof so I could start working on enclosing the walls. This week I have 3 of the walls all measured and cut out and two are permantely attached but the 5ft sides cannot be attached permanately yet because I will have to be able to carry each wall to the backyard. I just tacked them on for the purpose of getting everything lined up and measured correctly. I also altered my original plans (well original thought, there wasn't any plans haha! ) to install a mesh screen window on one of the 5ft sides . I decided to make a mesh screen door! That way I have easy access in from both 5ft sides. I didn't want to have to climb all the way into the coop if I had to reach a corner or something. So I cut out the frame of the door and then cut out an opening for the metal screen and screwed it into the plywood from the inside~ attached hinges and now we have a door! I also need to install a lock for it as well. I will just pick up one from Lowes. I also took a piece of plexi glass I purchased from the store and made a window (which will be facing south) on the coop! It actually came out really cute. I took leftover cuts from when I made the A frame roof cuts and used those in each corner (front and back) to hold the plexiglass into place. I will use caulking around the plexiglass to prevent any moisture from getting in. This will help in the winter to warm the coop~ and in the summer if I think it allows to much heat in I can hang a little curtain from the outside!
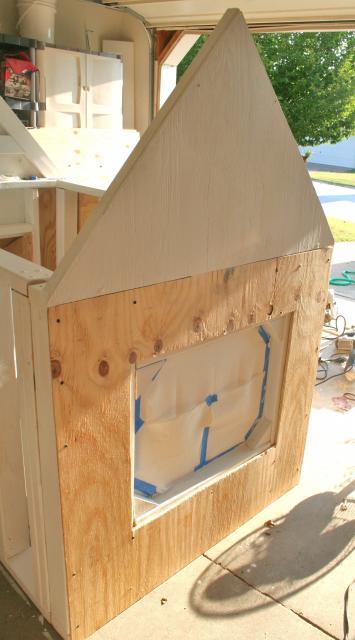
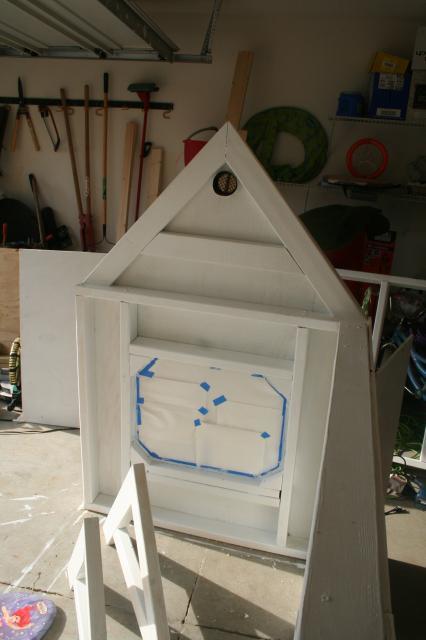
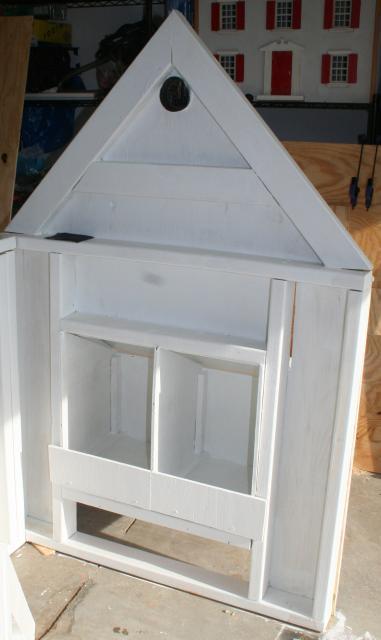
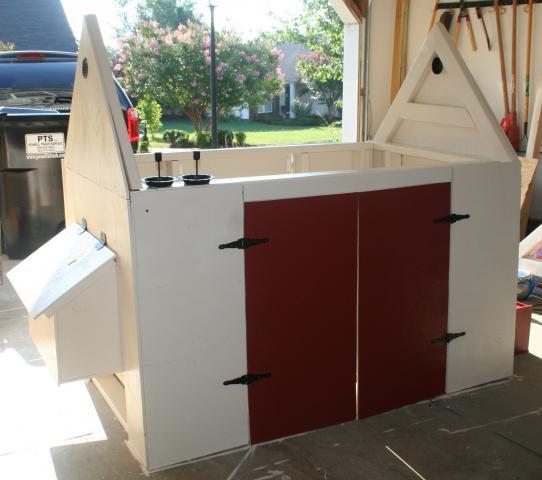
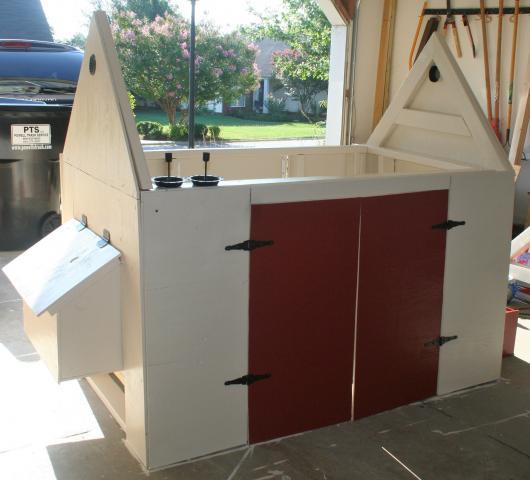
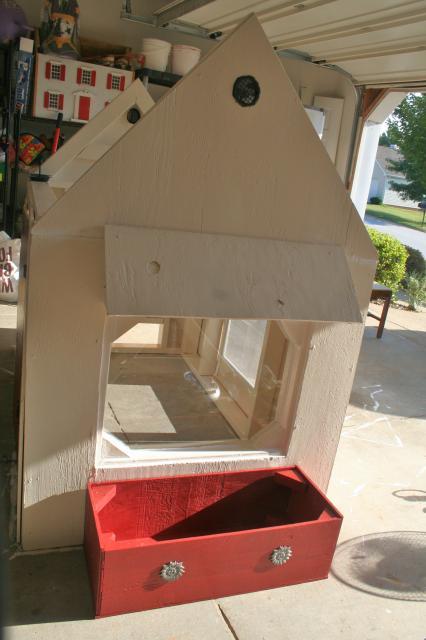
I taped up the window while I've been priming the wood and getting ready to paint it. So what you see is painters tape and papertowels haha. I made the cuts for the wall around the eggboxes and they fit awesome! I just have to do the little part beneath the egg boxes which I will probably do tonight. And also the main access door on the other 5ft side. I was going to make one door that swings open but because of the size of the door it will be. I'm thinking about making two doors that swing out. I'm thinking that might be better and less weight on the hinges. I will play around with a sketch and see if I might prefer that instead.
You can see I already primed the frame and will need to finish priming the walls once they are all up.
I love the fact the sun is shining on this... haha
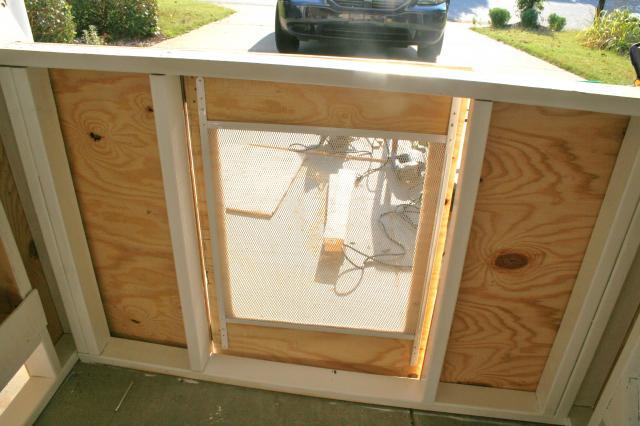
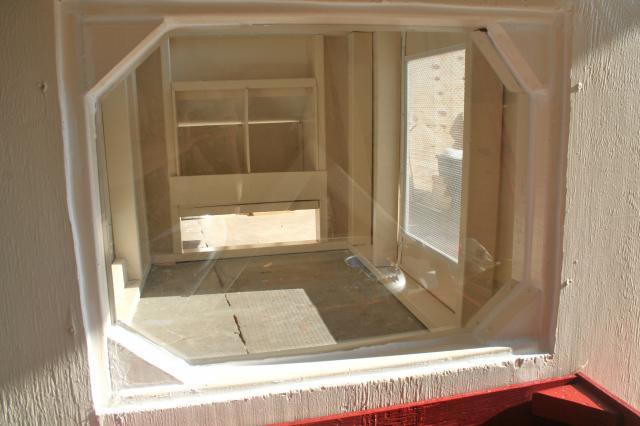
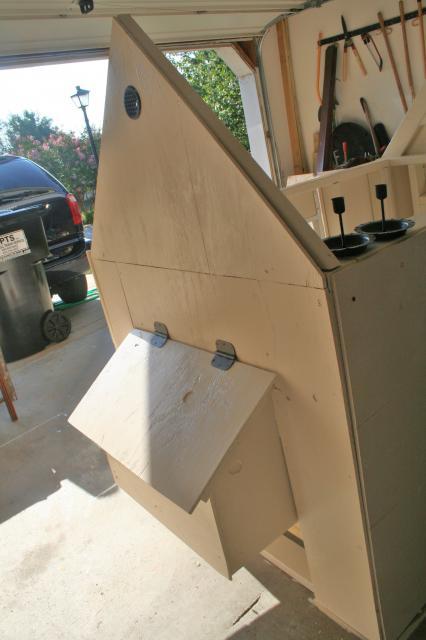
This is the screen door from the inside view (I still need a latch for the one side)
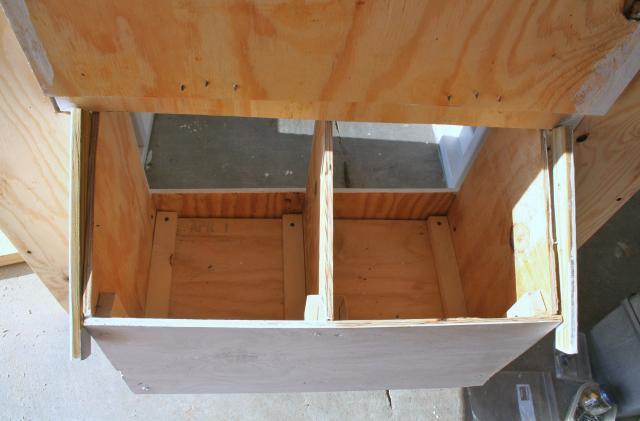
This is a inside view of the nestboxes (notice below, I still have to cut out that piece and attach it)
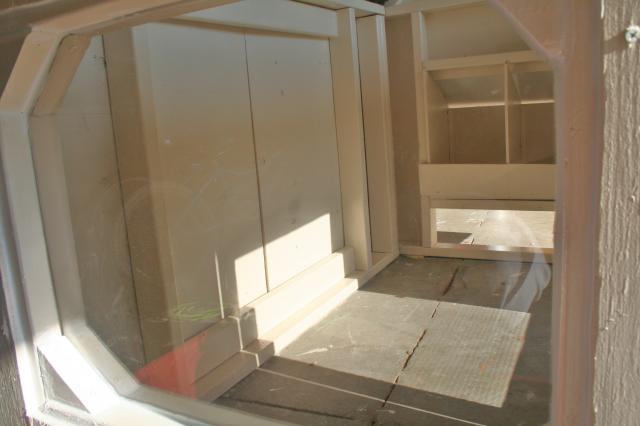
This is the plexiglass window~ can you see the wood cuts in the corner I love that! I taped it all up so I wouldn't get any scratches or paint on the plexi while I'm still working on it! Ohhh and also I am going to make a little roof line above the window and shingle it to deter the rain from splashing down into the window frame.
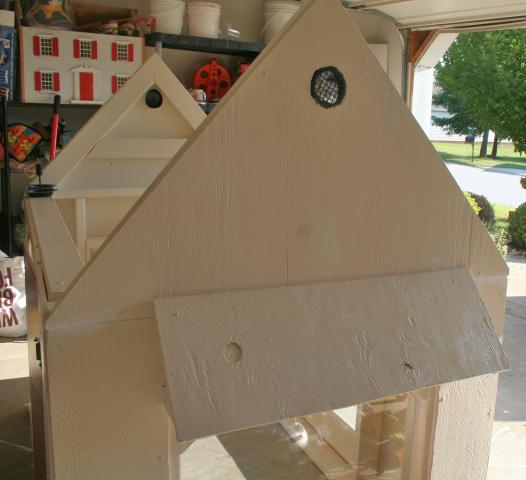
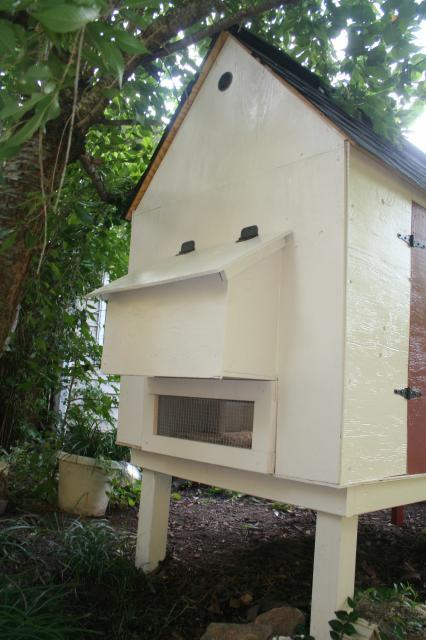
Full View of the Screen Door~ this will make for some good ventilation in their house!! I will also have some smaller vents below the roof line...
This picture makes the lid look slightly longer on the left side! oops
but nothing that the roof shingles won't hide!!!
This is the inside view of the nestboxes from the outside~ I cut out some smaller wood pieces and framed out the top of the nest boxes to cut down on any draft that might through the small openings. I definately don't want any access from the rain~ who wants to lay eggs in a puddle
Here's a view stepping back~
I will use caulkin anywhere there is a crack!! I want to totally weather proof this baby~ so it will last a very very long time!! So this was my update~ I will be working on the other door tonight and I guess I will be painting as well. Funny thing is I'm trying to build this and watch 4 kids now!! LOL I opted for babysitting my nephew and neise for my family since they needed a hand and I could use the extra money. So this is fun!!
Last edited by tiffanyg2 (06/15/2011 9:16 am)
Alrighty~ Got some more done this weekend!!! I don't want to come in the house and do laundry, dishes, or even cook~ I wanna stay in the garage all day and finish this coop!! LOL But I must still do all my other chores in between~ but atleast all I had to make for dinner was peanut butter and jelly sandwiches
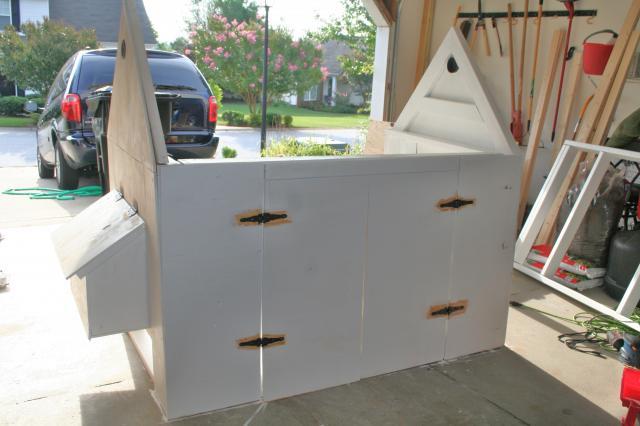
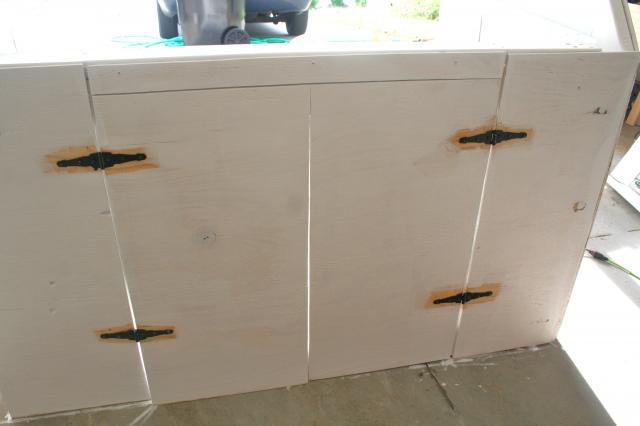
I have pretty much primed everything. I have cut out the walls and installed the doors!! It lines up awesome~ doors swing perfectly
I will still have to remove this wall so I can prime the wood behind. I want to cover every inch of this wood, so it lasts a long time!
This shows the main doors open and I also primed the other two "A" Frames for the roof...
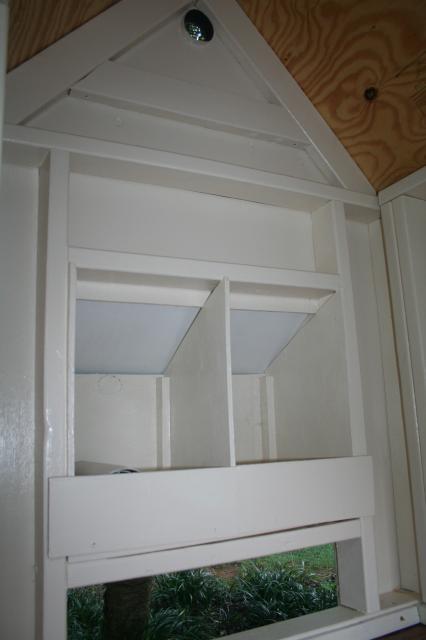
This is an inside view of where the window will be... completely primed. I also added a home-made gable at the top of the roofline!!!!
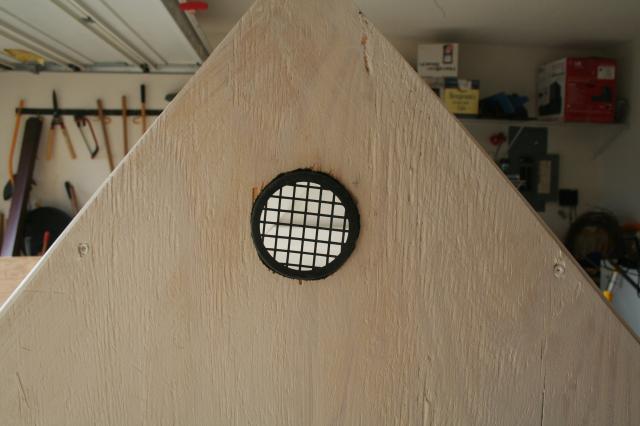
Close up view~ I added this so the heat can escape out of the building and it looks pretty! I Have this fine mesh screen that I will attach to the inside of the gable to prevent any flys or wasps and other insects from getting inside the coop.
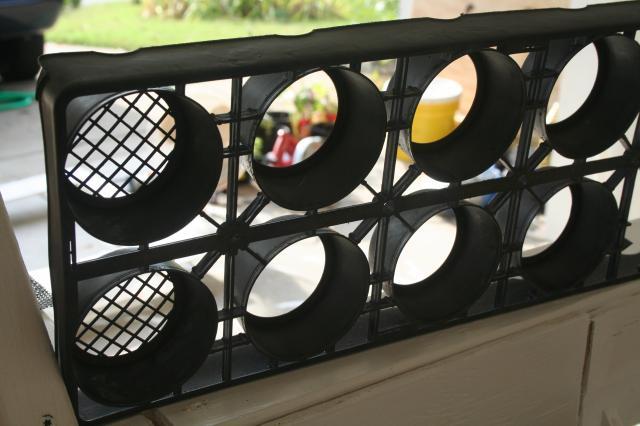
You'll laugh~ this is where I got the "gable" from some sort of cup holder tray!!!
Nesting Boxes all primed!
I removed the one wall so I could prime all the plywood and I will probably leave it down so I can paint it as well then I will reinstall the screen door!
Inside view of the other gable and the inside of the nest boxes
Window Side View
So I will be cutting out the foor and priming that~ Then I will paint it and cover it with some vinyl sheet flooring I picked up on clearance. I also have some trim to put down around the vinyl which will look pretty to! So I will update you as I get more done! I'm thinking this weekend I should be able to have this put together out back!!!!
So I feel like I have been painting for weeks!
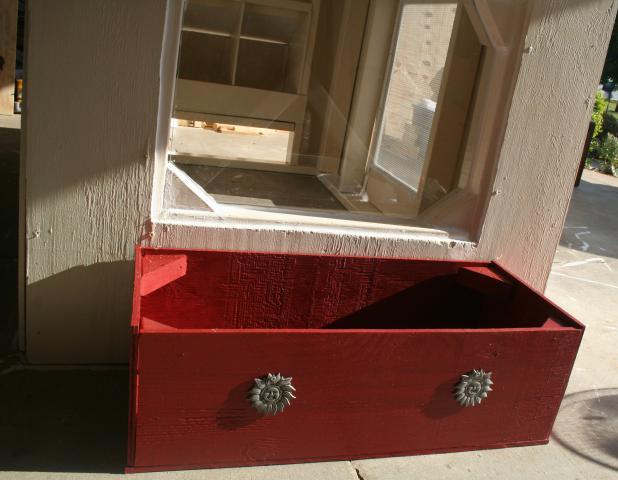
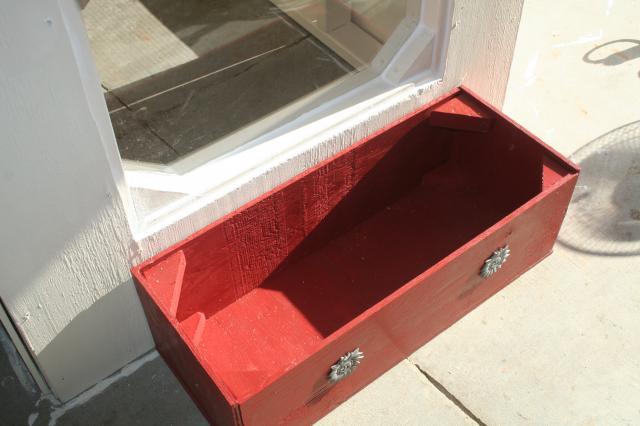
First the 2 coats primer, then 2 coats of paint~ every nook and cranny is covered! I just finished caulking around the window this morning and attaching the miniature overhang above the window as well. I built a a planter box!! It's so cute I'm going to add legs to it so it's self supportive and then attach it to the building so it's secure and won't fly away in one of our crazy storms!!
Here are the updated pictures~ and thanks for all the cheering and kind words!!!
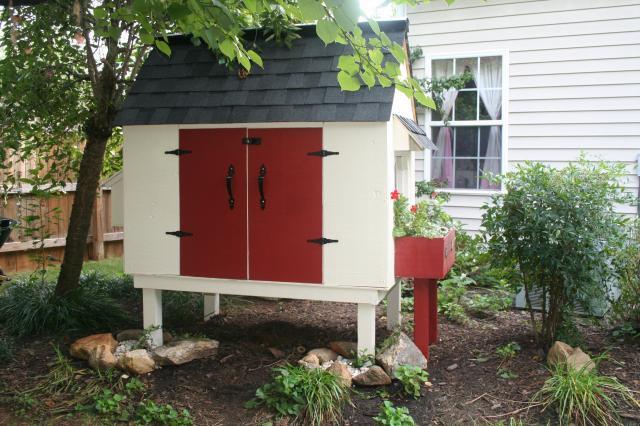
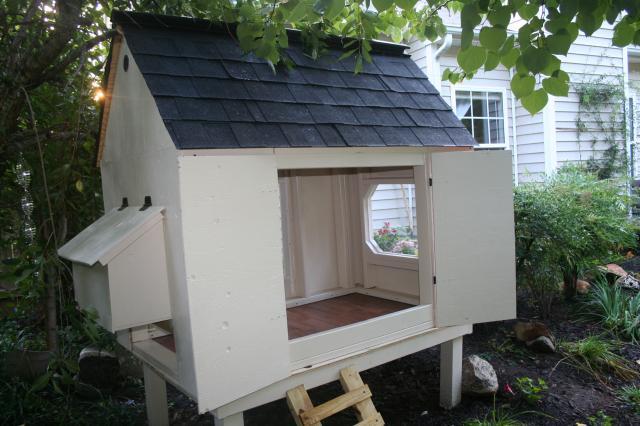
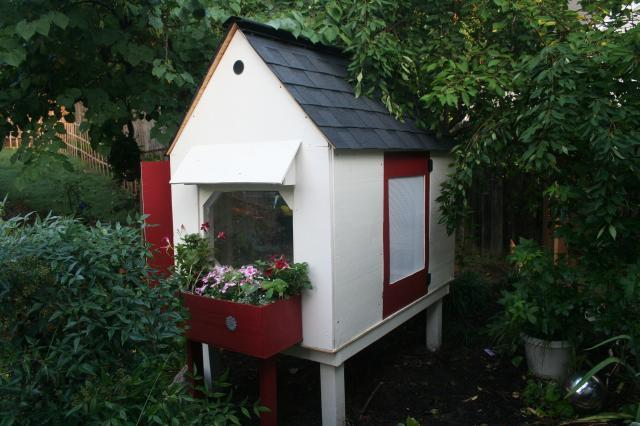
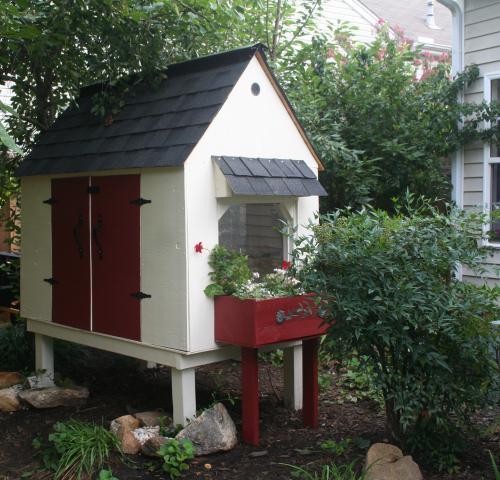
The front of the Hen House! These colors will match my house perfectly
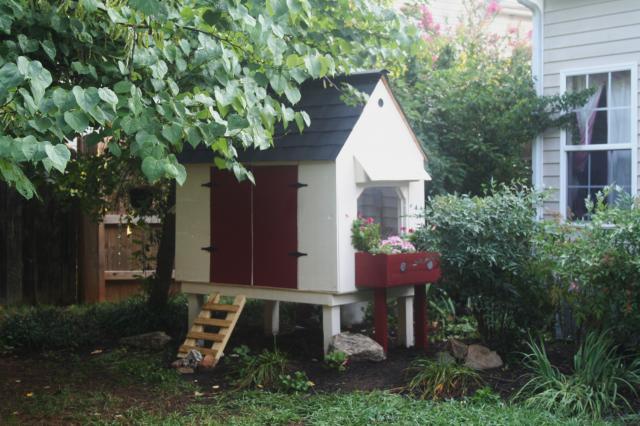
This is the backside~ this is where I installed the (metal kickplate) screen door!
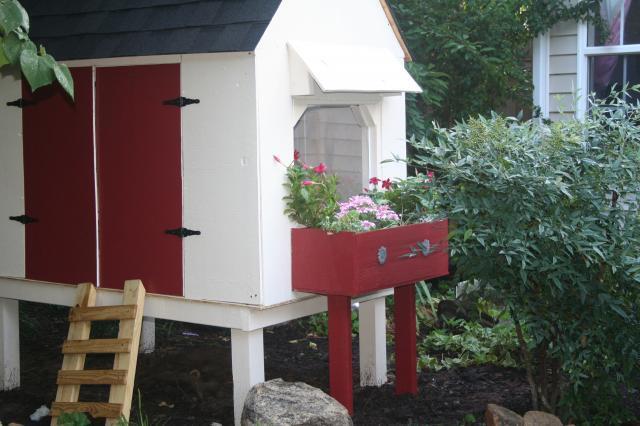
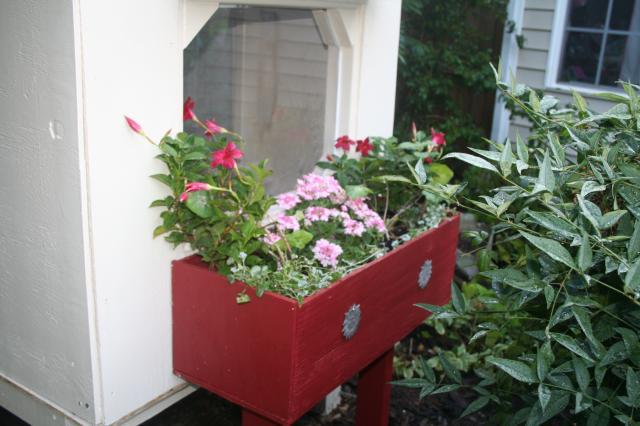
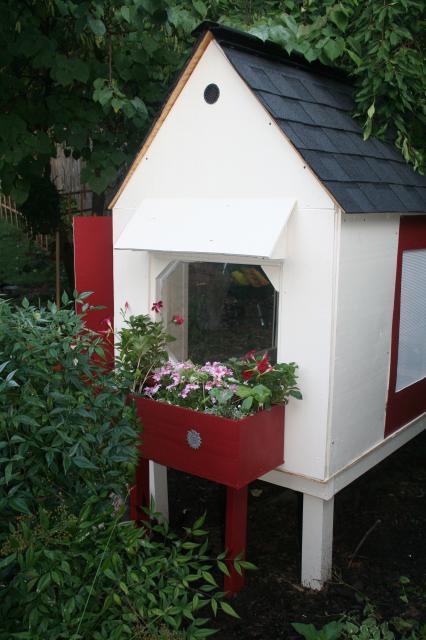
This is the planter box I made! I had these two metal suns that went to a broken set of chimes and I attached them on the front of the box for a little decor
And because of the large size of this planter box~ it will have some legs!!
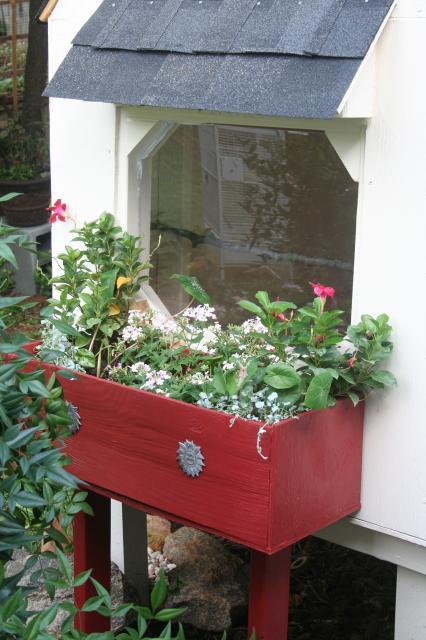
Now you can see the window! I pulled off the paper towels that were protecting it from the paint and the construction... I built the little overhang to deter any running water that will come off of the roof from splashing onto the window~ instead it should water the planter box!
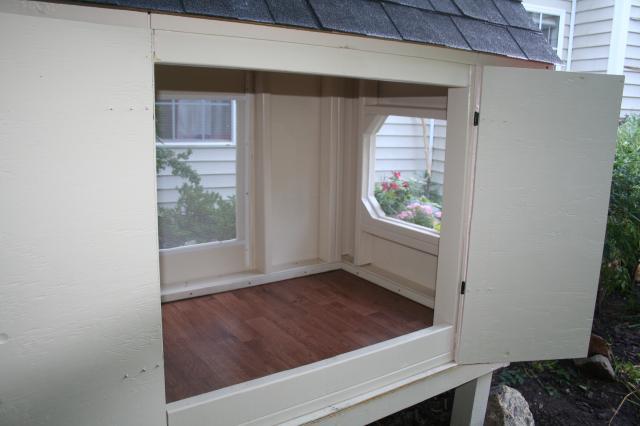
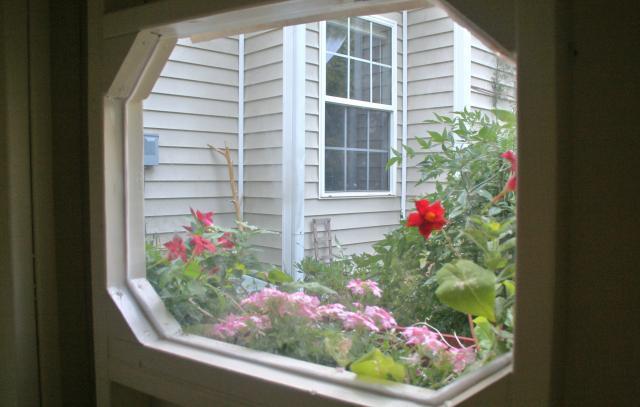
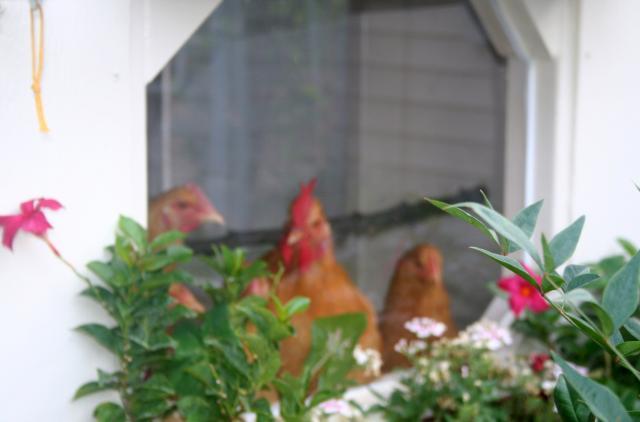
OK this is a looking in the window inside view of the hen house. The screen door is on the right~ and you can see the nest boxes! My girls will have a beautiful view of flowers and I will have a beautiful view of them!
I have to cut that small piece of wood for underneath the nest boxes~ Haha I didn't want to get that low to the ground just yet
I figured I could plug that in right before I move it out back!
Here you can see the 2 main access door on the left!
I wanted to keep everything on the inside almond~ it makes it look so pretty and big!
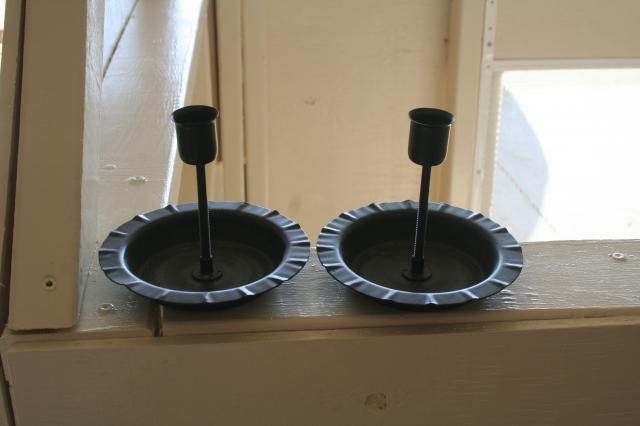
I'm going to use these somehow inside of the hen house~ I'm not quite sure how but I will~ and obviously it won't be for burning candles!
Nest boxes~ these are all painted Almond to~ but the sun kinda makes the color on this side appear strangely
Well I'm almost done~ if I could refrain from adding to much more I just might have it finished this weekend!! I just have to cut out the floor and design a floor plug for the bottom~ for easy access cleaning. Build the legs for the planter box and I need some roofing paper~ which I forgot to get to put beneath the shingles. I will finish the caulking today. Paint the floor ~ (more painting)
And the walls are all still seperated! So once all that stuff is done I can take each wall and carry it to the backyard! WoooHOOO! So close~ So close~ SO close!
Last edited by tiffanyg2 (06/28/2011 9:52 am)
OK I finally moved the Hen House outside!!! Saturday night I had built the legs for the planter box and painted them to match. I measured out and cut the floor, painted it and attached it to the base. My brother came over Sunday morning and we carried the walls outback! We got one wall up and just put one screw in it (thinking it would hold it steady) since it sat level. Then my brother lifted up the second wall and went to line it up and totally knocked the wall down!!!!!!!!!!
Haha The whole street probably heard me scream his name!! LOL The wall was ok~ but it freaked me out so bad when I saw it hit the ground~ but it was sturdy as can be
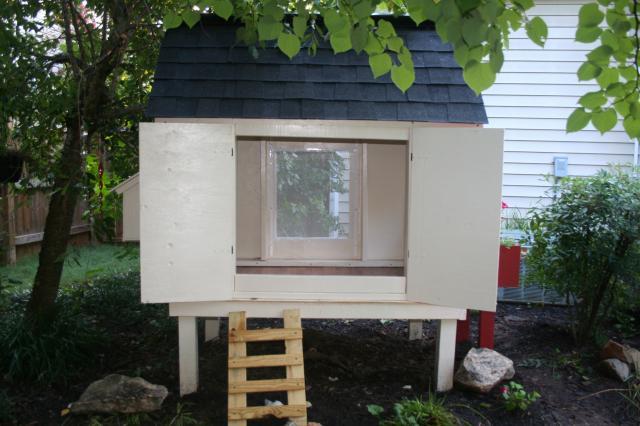
So we got the other walls up and screwed them together. I attached the braces I got for the walls to hold them extra sturdy. Put the roof on and thank God for my brother!! I'm 5'5 and the roof peak was at 7.5 feet!! My brother is like 6'4 so he was awesome and nailed the shingles on for me! We went to Lowes and picked up this Roof cap that works awesome! We had flood rains on Sunday and Monday afternoon~ no Leaks!!! So we are good and almost completely finished
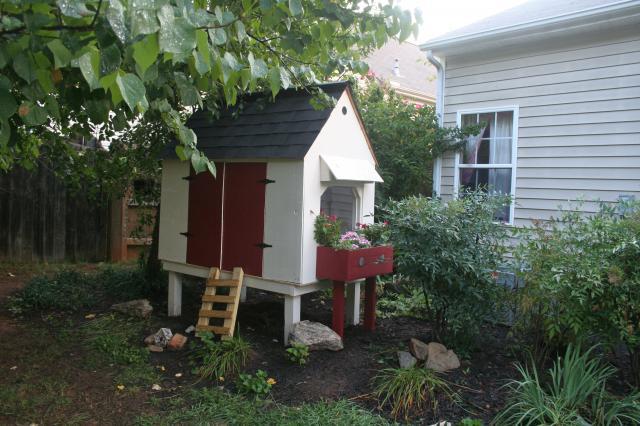
Here is a view from off the patio (I know the makeshift ladder is laying crooked~ I just put it out there for kicks to see if the chickens would go up!!) No takers yet
I LOVE this planter box! It came out so cute and it makes the side of the hen house look so pretty.
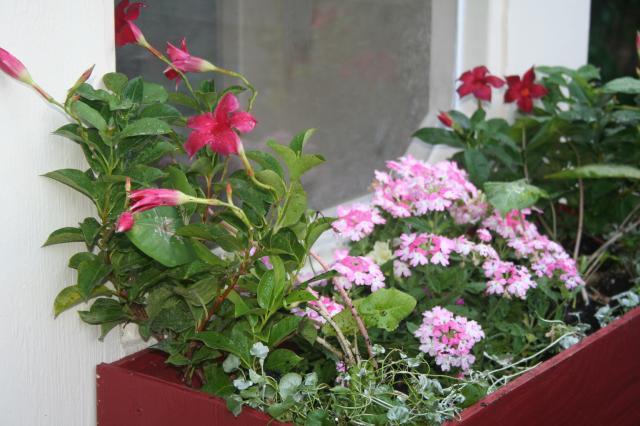
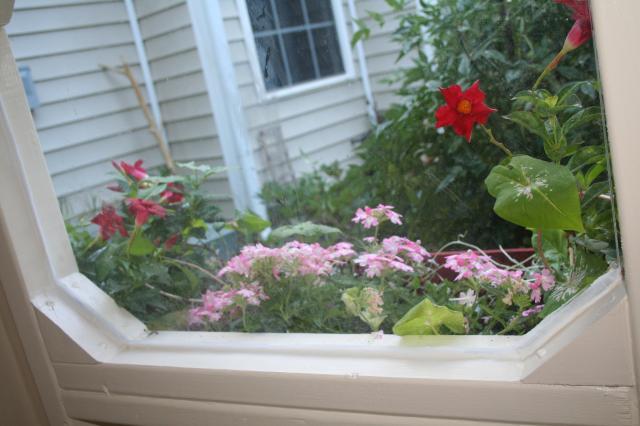
Pretty Flowers!
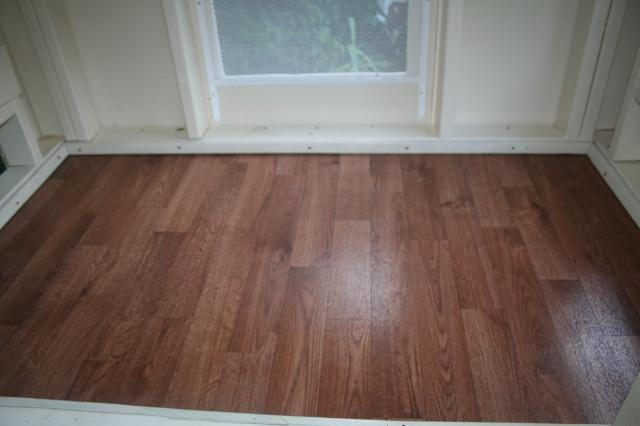
OK so I got this awesome deal on this vinyl sheet flooring~ so I picked out a wood color that matches my house! (my dad thinks I'm nuts) I cut it to size and used this painted trim to screw it into place.
Purty Shiny Floor~ that will soon be covered by layers of sand!
This will be their view out the window!!
Inside View of the ceiling!
Nest Boxes~ still have to cover the opening beneath here but I'm considering another hardwire mesh screen to allow more air circulation!
Doors wide open view...
Back and side view...
From a distance view...
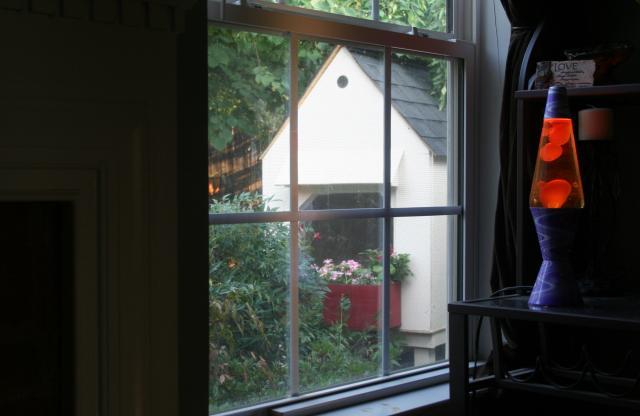
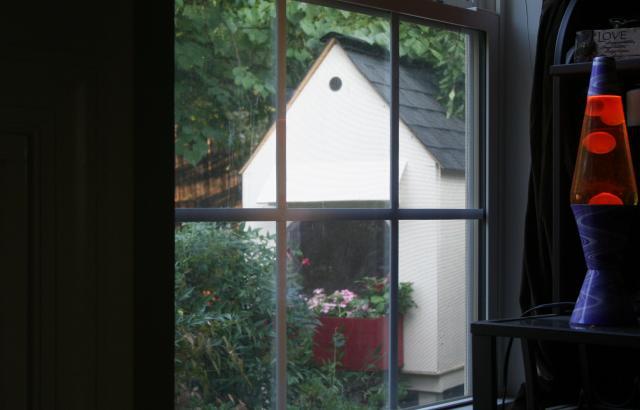
This is what I can see from my family room window...
Well that's my update! I have to build the roosts inside which I will make from natural brances! I'll be picking up some sand this weekend for it and also designing the feeders and waters. I'm so happy to have it outside
Alrighty!!!! I am officialy finished!!!
I know I will add a few decrative touches~ but that will be just for fun~
Here are the pics along with the narrative to go with it...
Added the door handles and latches and locks, finished touch up painting
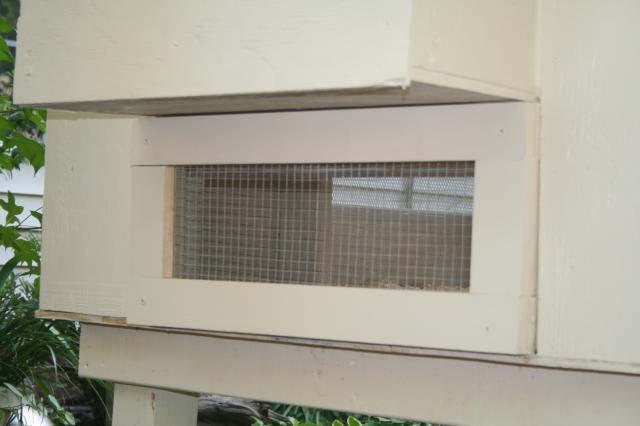
Here I made the enclosure for this opening out of hardwire chicken cloth and also some screen to allow more airflow in the coop I will also make a cutout to block this in the winter time so they stay warm!!
I finished doing the shingles on this mini-roof! I need to cover up the nails heads with some tar stuff so it blends with the roof.
My baby next to her new house!
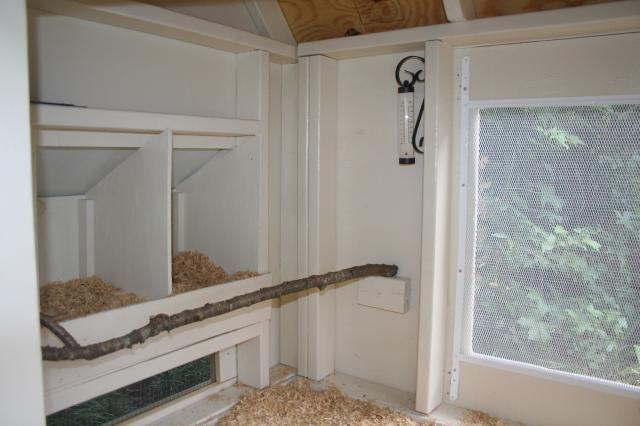
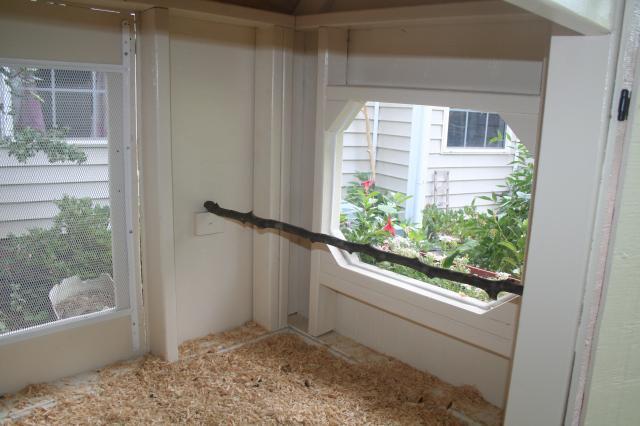
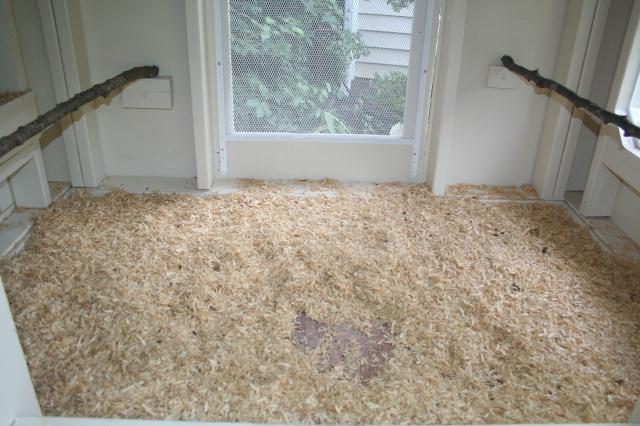
Here is the inside with the natural perches and shavings~ and a thermometer!
This would be the window seat!
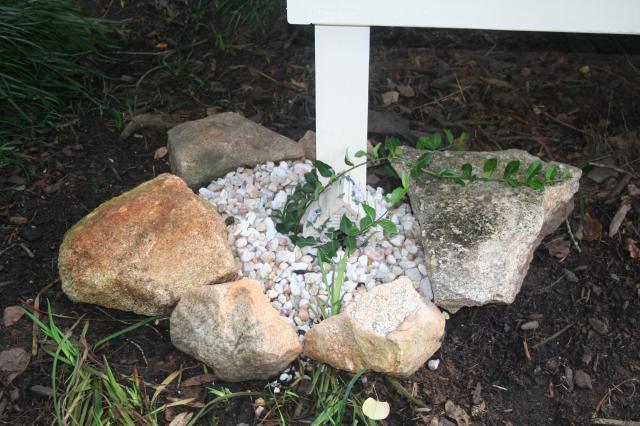
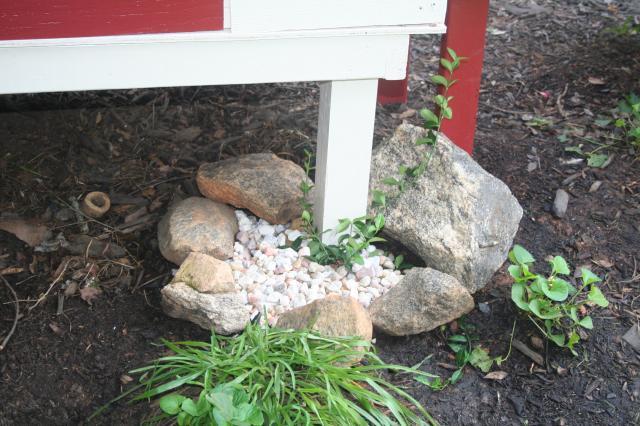
My little touch around the front legs
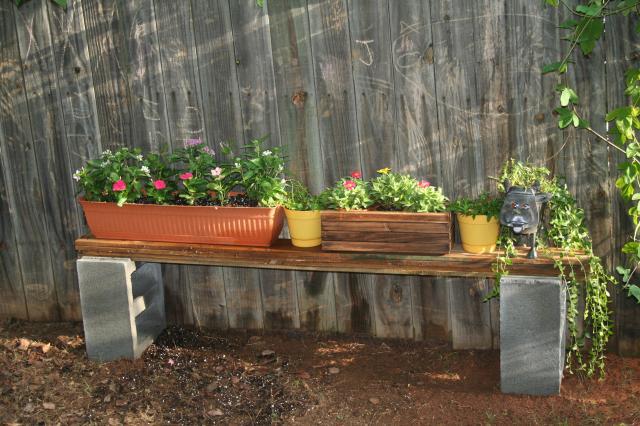
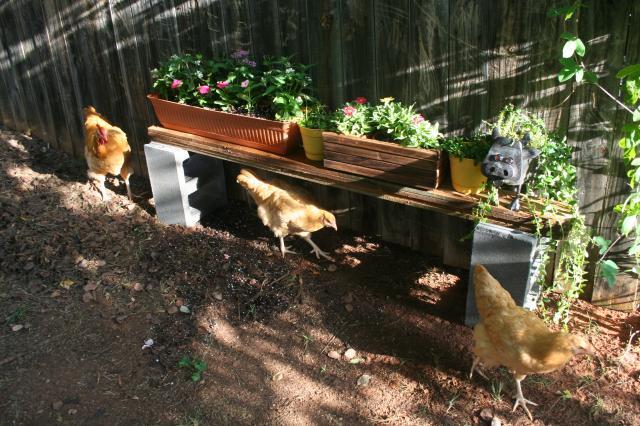
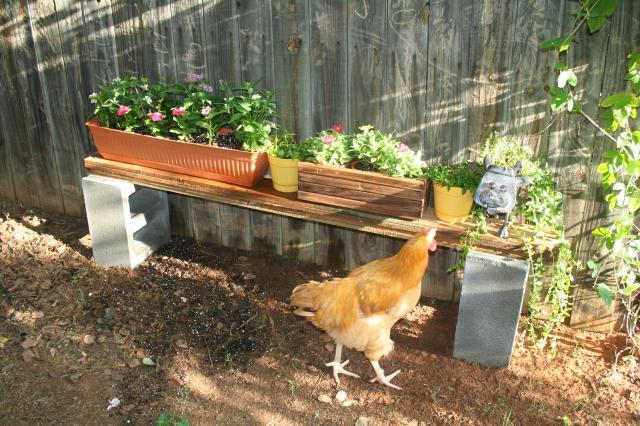
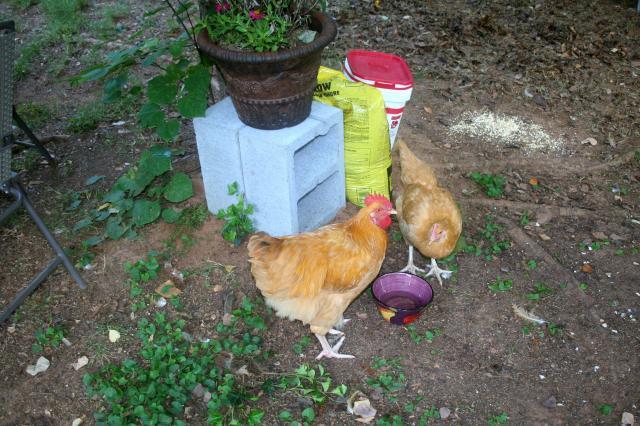
After the chickens decided to eat some of my potted flowers~ I decided to outsmart them and build a little outdoor table out of some leftover cinder blocks and fence panels Haha now it's to high for them to reach and no room for them to get their big butts up on here!!!
But it doesn't mean they won't try!!
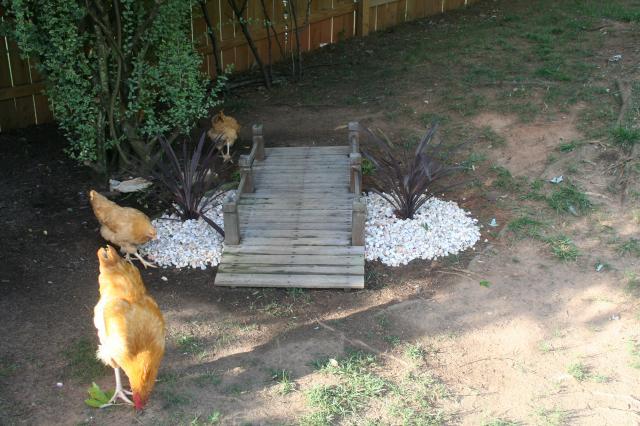
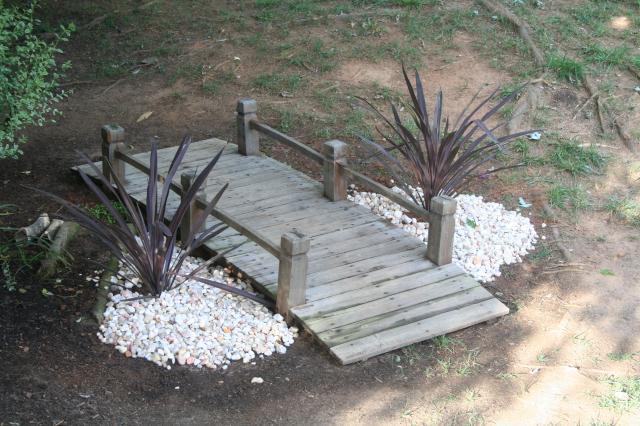
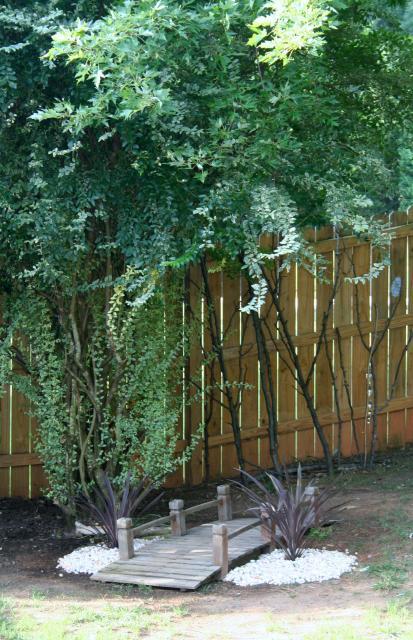
I put the extra rocks over here by the bridge with some plants I picked up on clearance from Lowes!
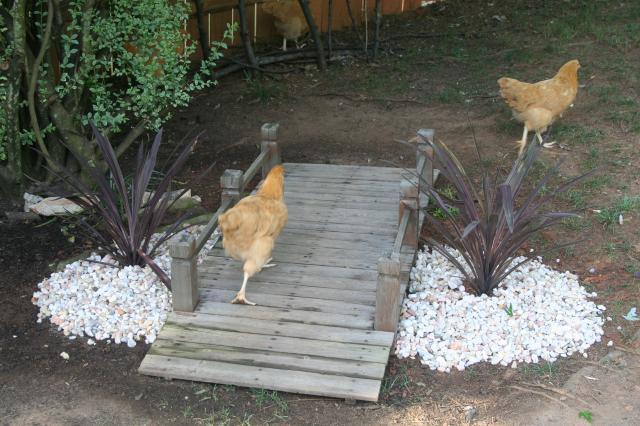
Why did the chicken cross the bridge??? Well to get to the other side of course..
.
I'll get pics once they are inside the coop~ now the fun part is retraining them to sleep inside their new house!
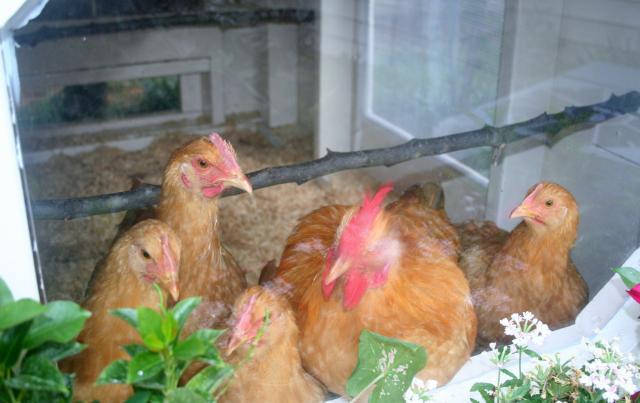
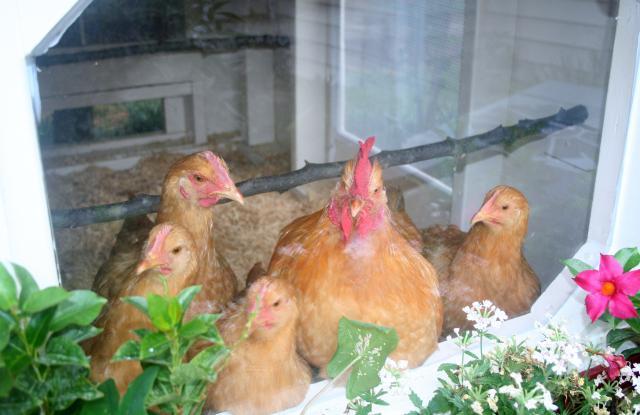
So last night I carried them one by one into the coop! Haha Retraining them to sleep in the house should be fun~ I got them all in inside and they all just stared at me through the window somewhat confused
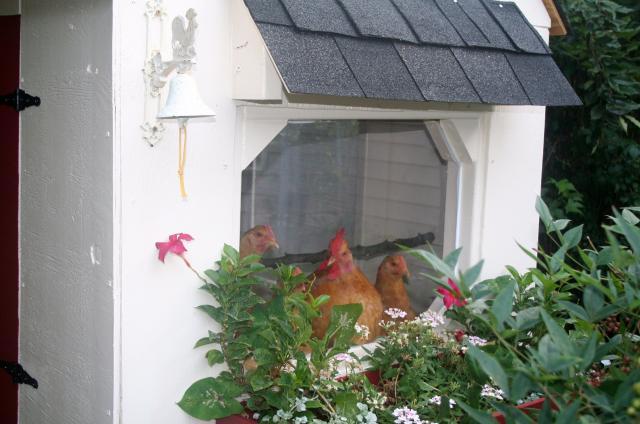
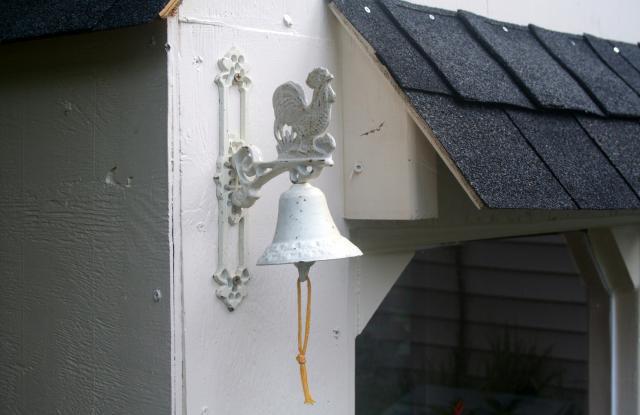
I tapped on the window and said my goodnight. I love my babies they are so darn cute. Well this morning I went to let them out and figured I'd snap a few photos of them in the coop before I let them out. And I added the chicken dinner bell! Haha my plan is to train the chickens to come inside when I ring the bell in the evenings
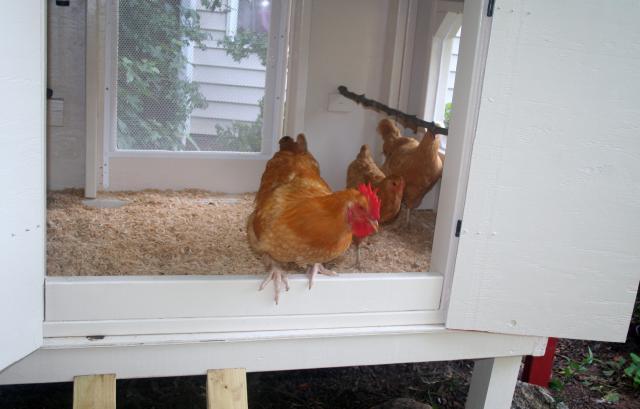
Freedom at last! Haha
Chicken Dinner BELL!
OK so now that everything is finished~ I don't know that there is to much I would change about it so far!
Maybe It could be bigger! Wider~ to give more room. I think the height is perfect. I suppose I could always add on and build off of the screen door side! Maybe make a little hallway into a larger screened encloser.
I can see that I need to put an additional latch on the front 2 doors to keep them more sturdy when they are locked. But that would be a simple fix. I also ended up using aspen shavings after somebody suggested they make great mulch for the vege garden~ that sounded good to me! I never did add a drain in the floor for easy cleaning. I was in a time crunch and was still contemplating whether that would become a nuisance dealing with pests~ so I opted not to put it in. I am also thinking about added a fan on the inside to help circulate air better on these hot humid days. The ventilation is good but when there isn't a breeze it just seems so hot outside. And again they will only be locked up at night when the temperatures are much cooler out. So the fan would probably just be a nice touch for the birds. All in all I absolutely love this coop~ I couldn't have imagined it any better than this!! And the only reason for the possible thought of increasing it's size would be the inevitable side effects of chicken math!!!! Hahaha
And this is where it began~
LOL ~ I seriously feel like doing that!!

These are the walls the coop will be 5 x 3.5 Built these on Friday night
Saturday morning after I finished the other two walls~ I clamped them all together and they look beautiful!
This mesh screen will be raised higher and centered and put in as a window that will allow sunlight and airflow to enter the coop. I will construct a hinged shutter that will enclose this during bad weather. I just tacked it on for the purpose of figuring out the spacing I needed for the 2 x 4's in the center wall for now

Saturday afternoon~ figuring out the dimensions of the roof was a little tricky but I did it! I made 4 of these "A" frame roof trusses you'll see A in a few more pics~ I added another piece of wood through the center for additional support.

Here it is!
Sunday Morning ~ Then onto building the nest boxes! This was tricky to~ but pulled it off. Gave it lots of support and will reinforce the outside with trim to help keep it safe from the elements. This will be duplicated on the opposite side which will provide 4 nest boxes for my girls!
And here are the full view pictures where I left off...
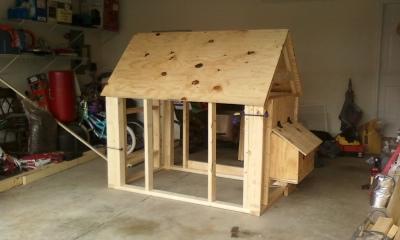
Window Side
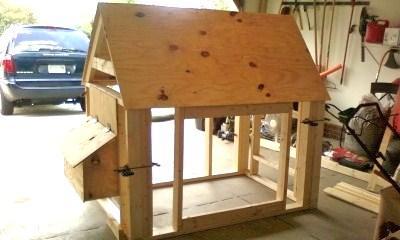
Main Access door will go on this side.
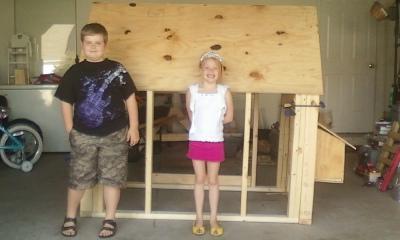
To give you perspective on house big it is! It stands 5'3 in height it's 5 x 3.5 wide

Here is the base out back which I will need to shorten since I built my coop so high! Haha
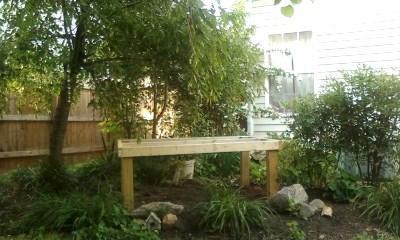
In this location, it will give them lots of shade in the summer months ~ and in the winter the leaves will be gone and they will get some good sunshine~ when it counts!
I still have so much to do but I really hope in the next 2 weeks I can finish! I will be putting shingles on the roof and over the nest box lids, and lots of personal touches! Hope you all like I will contine to post pics if any of you are interested. And yes a Woman built IT!!! HAHA

Last edited by tiffanyg2 (05/17/2011 10:40 am)
Update~ OK I took a break but started working on it again, I removed the roof so I could start working on enclosing the walls. This week I have 3 of the walls all measured and cut out and two are permantely attached but the 5ft sides cannot be attached permanately yet because I will have to be able to carry each wall to the backyard. I just tacked them on for the purpose of getting everything lined up and measured correctly. I also altered my original plans (well original thought, there wasn't any plans haha! ) to install a mesh screen window on one of the 5ft sides . I decided to make a mesh screen door! That way I have easy access in from both 5ft sides. I didn't want to have to climb all the way into the coop if I had to reach a corner or something. So I cut out the frame of the door and then cut out an opening for the metal screen and screwed it into the plywood from the inside~ attached hinges and now we have a door! I also need to install a lock for it as well. I will just pick up one from Lowes. I also took a piece of plexi glass I purchased from the store and made a window (which will be facing south) on the coop! It actually came out really cute. I took leftover cuts from when I made the A frame roof cuts and used those in each corner (front and back) to hold the plexiglass into place. I will use caulking around the plexiglass to prevent any moisture from getting in. This will help in the winter to warm the coop~ and in the summer if I think it allows to much heat in I can hang a little curtain from the outside!

You can see I already primed the frame and will need to finish priming the walls once they are all up.
I love the fact the sun is shining on this... haha
This is the screen door from the inside view (I still need a latch for the one side)

This is a inside view of the nestboxes (notice below, I still have to cut out that piece and attach it)

This is the plexiglass window~ can you see the wood cuts in the corner I love that! I taped it all up so I wouldn't get any scratches or paint on the plexi while I'm still working on it! Ohhh and also I am going to make a little roof line above the window and shingle it to deter the rain from splashing down into the window frame.
Full View of the Screen Door~ this will make for some good ventilation in their house!! I will also have some smaller vents below the roof line...
This picture makes the lid look slightly longer on the left side! oops

This is the inside view of the nestboxes from the outside~ I cut out some smaller wood pieces and framed out the top of the nest boxes to cut down on any draft that might through the small openings. I definately don't want any access from the rain~ who wants to lay eggs in a puddle
Here's a view stepping back~
I will use caulkin anywhere there is a crack!! I want to totally weather proof this baby~ so it will last a very very long time!! So this was my update~ I will be working on the other door tonight and I guess I will be painting as well. Funny thing is I'm trying to build this and watch 4 kids now!! LOL I opted for babysitting my nephew and neise for my family since they needed a hand and I could use the extra money. So this is fun!!
Last edited by tiffanyg2 (06/15/2011 9:16 am)
Alrighty~ Got some more done this weekend!!! I don't want to come in the house and do laundry, dishes, or even cook~ I wanna stay in the garage all day and finish this coop!! LOL But I must still do all my other chores in between~ but atleast all I had to make for dinner was peanut butter and jelly sandwiches
I have pretty much primed everything. I have cut out the walls and installed the doors!! It lines up awesome~ doors swing perfectly
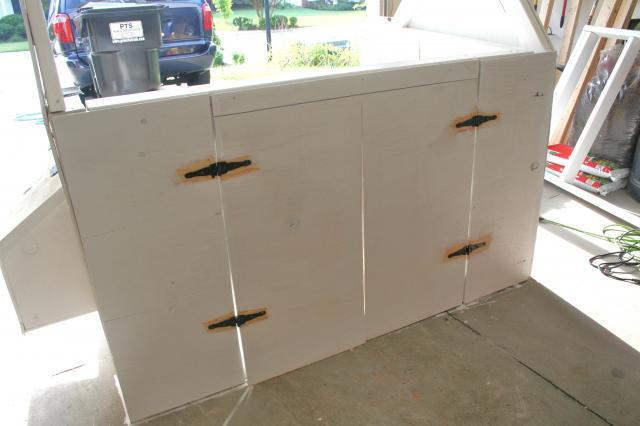
This shows the main doors open and I also primed the other two "A" Frames for the roof...
This is an inside view of where the window will be... completely primed. I also added a home-made gable at the top of the roofline!!!!
Close up view~ I added this so the heat can escape out of the building and it looks pretty! I Have this fine mesh screen that I will attach to the inside of the gable to prevent any flys or wasps and other insects from getting inside the coop.
You'll laugh~ this is where I got the "gable" from some sort of cup holder tray!!!
Nesting Boxes all primed!
I removed the one wall so I could prime all the plywood and I will probably leave it down so I can paint it as well then I will reinstall the screen door!
Inside view of the other gable and the inside of the nest boxes
Window Side View

So I will be cutting out the foor and priming that~ Then I will paint it and cover it with some vinyl sheet flooring I picked up on clearance. I also have some trim to put down around the vinyl which will look pretty to! So I will update you as I get more done! I'm thinking this weekend I should be able to have this put together out back!!!!
So I feel like I have been painting for weeks!

The front of the Hen House! These colors will match my house perfectly
This is the backside~ this is where I installed the (metal kickplate) screen door!

This is the planter box I made! I had these two metal suns that went to a broken set of chimes and I attached them on the front of the box for a little decor
Now you can see the window! I pulled off the paper towels that were protecting it from the paint and the construction... I built the little overhang to deter any running water that will come off of the roof from splashing onto the window~ instead it should water the planter box!
OK this is a looking in the window inside view of the hen house. The screen door is on the right~ and you can see the nest boxes! My girls will have a beautiful view of flowers and I will have a beautiful view of them!
I have to cut that small piece of wood for underneath the nest boxes~ Haha I didn't want to get that low to the ground just yet
Here you can see the 2 main access door on the left!
I wanted to keep everything on the inside almond~ it makes it look so pretty and big!
I'm going to use these somehow inside of the hen house~ I'm not quite sure how but I will~ and obviously it won't be for burning candles!
Nest boxes~ these are all painted Almond to~ but the sun kinda makes the color on this side appear strangely

Well I'm almost done~ if I could refrain from adding to much more I just might have it finished this weekend!! I just have to cut out the floor and design a floor plug for the bottom~ for easy access cleaning. Build the legs for the planter box and I need some roofing paper~ which I forgot to get to put beneath the shingles. I will finish the caulking today. Paint the floor ~ (more painting)

Last edited by tiffanyg2 (06/28/2011 9:52 am)
OK I finally moved the Hen House outside!!! Saturday night I had built the legs for the planter box and painted them to match. I measured out and cut the floor, painted it and attached it to the base. My brother came over Sunday morning and we carried the walls outback! We got one wall up and just put one screw in it (thinking it would hold it steady) since it sat level. Then my brother lifted up the second wall and went to line it up and totally knocked the wall down!!!!!!!!!!

Here is a view from off the patio (I know the makeshift ladder is laying crooked~ I just put it out there for kicks to see if the chickens would go up!!) No takers yet

I LOVE this planter box! It came out so cute and it makes the side of the hen house look so pretty.

Pretty Flowers!
OK so I got this awesome deal on this vinyl sheet flooring~ so I picked out a wood color that matches my house! (my dad thinks I'm nuts) I cut it to size and used this painted trim to screw it into place.
Purty Shiny Floor~ that will soon be covered by layers of sand!
This will be their view out the window!!

Inside View of the ceiling!
Nest Boxes~ still have to cover the opening beneath here but I'm considering another hardwire mesh screen to allow more air circulation!
Doors wide open view...
Back and side view...
From a distance view...

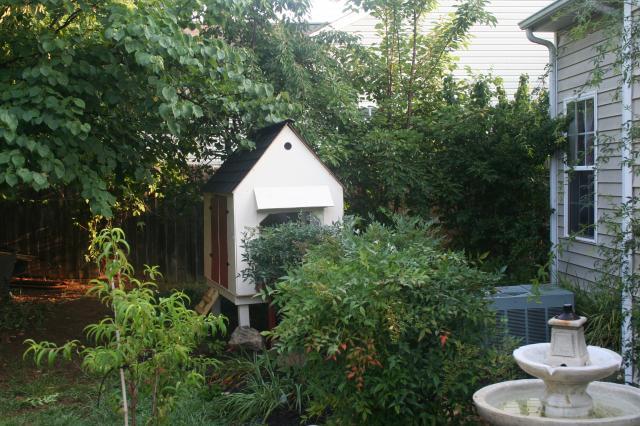
This is what I can see from my family room window...
Well that's my update! I have to build the roosts inside which I will make from natural brances! I'll be picking up some sand this weekend for it and also designing the feeders and waters. I'm so happy to have it outside
Alrighty!!!! I am officialy finished!!!
Added the door handles and latches and locks, finished touch up painting

Here I made the enclosure for this opening out of hardwire chicken cloth and also some screen to allow more airflow in the coop I will also make a cutout to block this in the winter time so they stay warm!!
I finished doing the shingles on this mini-roof! I need to cover up the nails heads with some tar stuff so it blends with the roof.
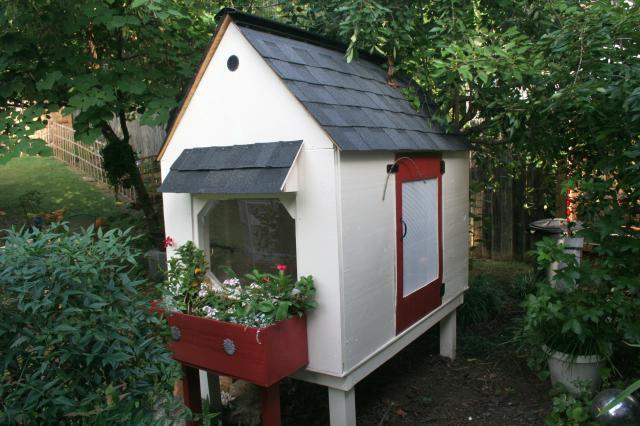
My baby next to her new house!

Here is the inside with the natural perches and shavings~ and a thermometer!
This would be the window seat!
My little touch around the front legs
After the chickens decided to eat some of my potted flowers~ I decided to outsmart them and build a little outdoor table out of some leftover cinder blocks and fence panels Haha now it's to high for them to reach and no room for them to get their big butts up on here!!!
But it doesn't mean they won't try!!
I put the extra rocks over here by the bridge with some plants I picked up on clearance from Lowes!
Why did the chicken cross the bridge??? Well to get to the other side of course..
I'll get pics once they are inside the coop~ now the fun part is retraining them to sleep inside their new house!
So last night I carried them one by one into the coop! Haha Retraining them to sleep in the house should be fun~ I got them all in inside and they all just stared at me through the window somewhat confused

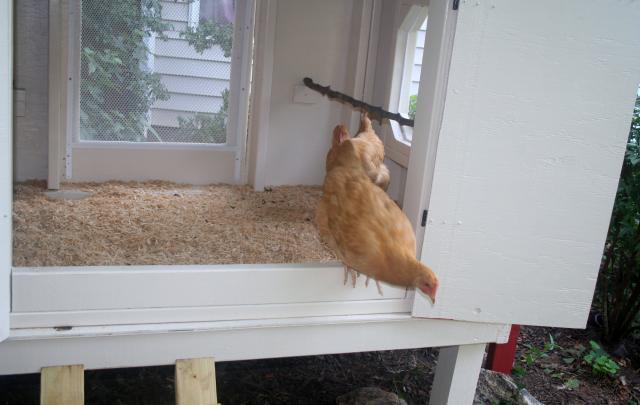
Freedom at last! Haha
Chicken Dinner BELL!
OK so now that everything is finished~ I don't know that there is to much I would change about it so far!
Maybe It could be bigger! Wider~ to give more room. I think the height is perfect. I suppose I could always add on and build off of the screen door side! Maybe make a little hallway into a larger screened encloser.

I can see that I need to put an additional latch on the front 2 doors to keep them more sturdy when they are locked. But that would be a simple fix. I also ended up using aspen shavings after somebody suggested they make great mulch for the vege garden~ that sounded good to me! I never did add a drain in the floor for easy cleaning. I was in a time crunch and was still contemplating whether that would become a nuisance dealing with pests~ so I opted not to put it in. I am also thinking about added a fan on the inside to help circulate air better on these hot humid days. The ventilation is good but when there isn't a breeze it just seems so hot outside. And again they will only be locked up at night when the temperatures are much cooler out. So the fan would probably just be a nice touch for the birds. All in all I absolutely love this coop~ I couldn't have imagined it any better than this!! And the only reason for the possible thought of increasing it's size would be the inevitable side effects of chicken math!!!! Hahaha