My Starter Coop
and very first Building Project!
and very first Building Project!
Let me preface this by saying: I've never built anything by myself -- only assisted hubby in remodeling projects, etc. Secondly, I've had chickens several years ago - like 20+ years ago, so I'm having fun renewing my chicken knowledge. I've missed keeping chickens!
And also I want to say - thanks to everyone here at BYC who have so generously shared their knowledge and building projects. What a wonderful network!
Hubby is incredibly busy this Spring, and I finally decided if I was going to have a chicken coop I would just have to build it myself. My 15 Ameraucana pullets plus 1 cockerel will arrive mid-May, so that is my deadline. This is NOT a permanent coop for 16 chickens... obviously. The plans for the bigger coop, as the chicks outgrow this little coop, are already underway. When they've graduated to the big coop, this Starter Coop can be used as a portable coop (I plan to incorporate wheels & portable run).
First, I found plans on eBay that looked doable for a novice like myself. I needed detail! And so far, these plans haven't let me down.
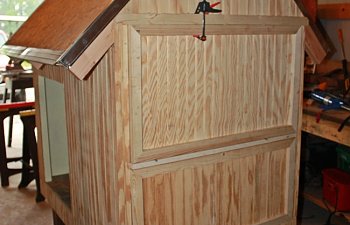
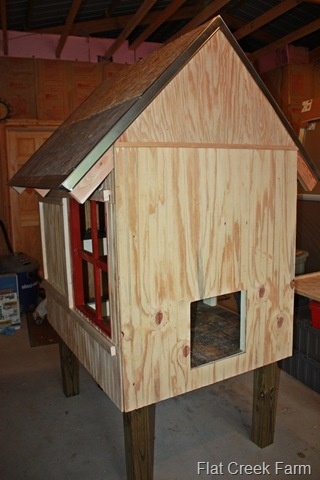
This coop is 3 x 4 foot.
I also wanted to keep the project to $100 or less. So far, I've spent about $80, including the Valspar oil-based porch paint. We had leftover beadboard panels which I will use for the siding. We also had chipboard left over to use for flooring. As well, we had leftover tin for the roofing from our garage project last year. Leftovers are good!
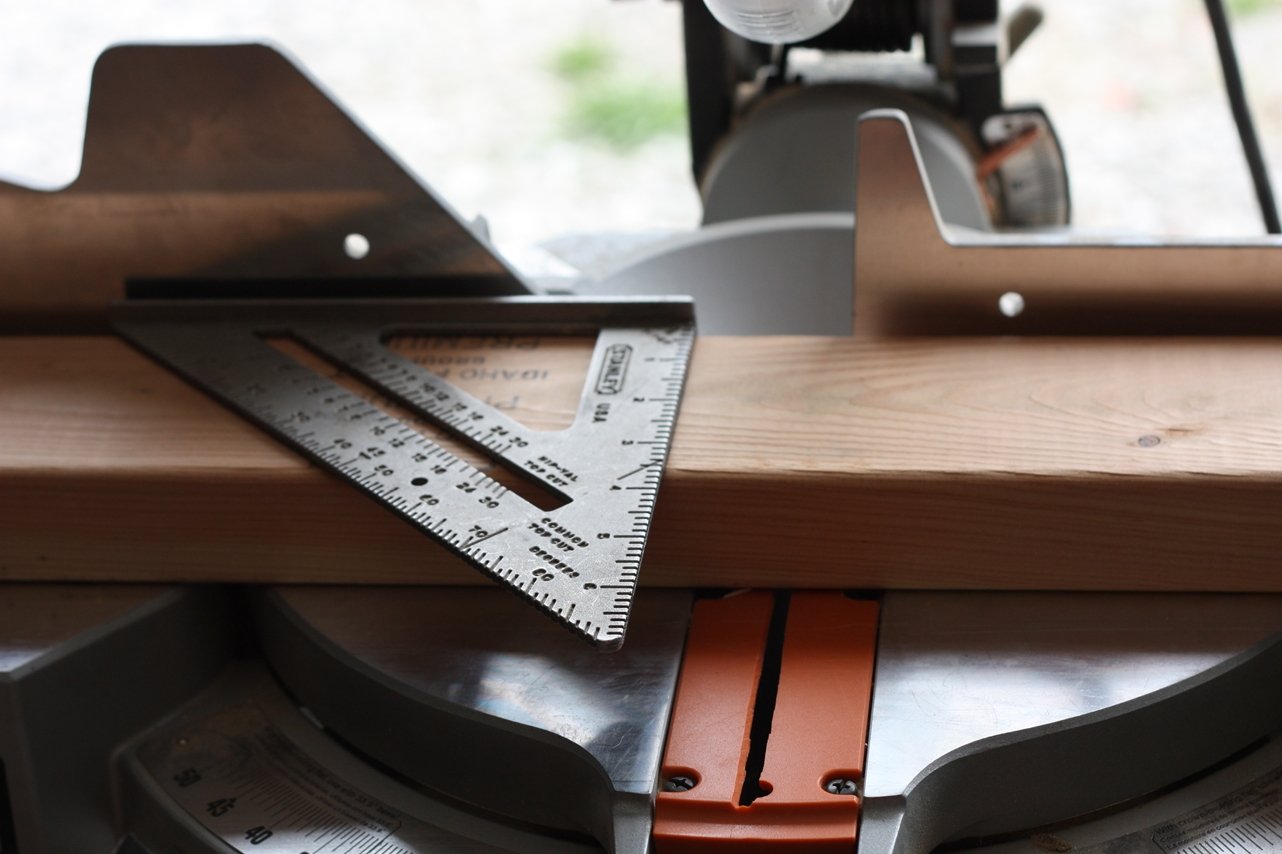
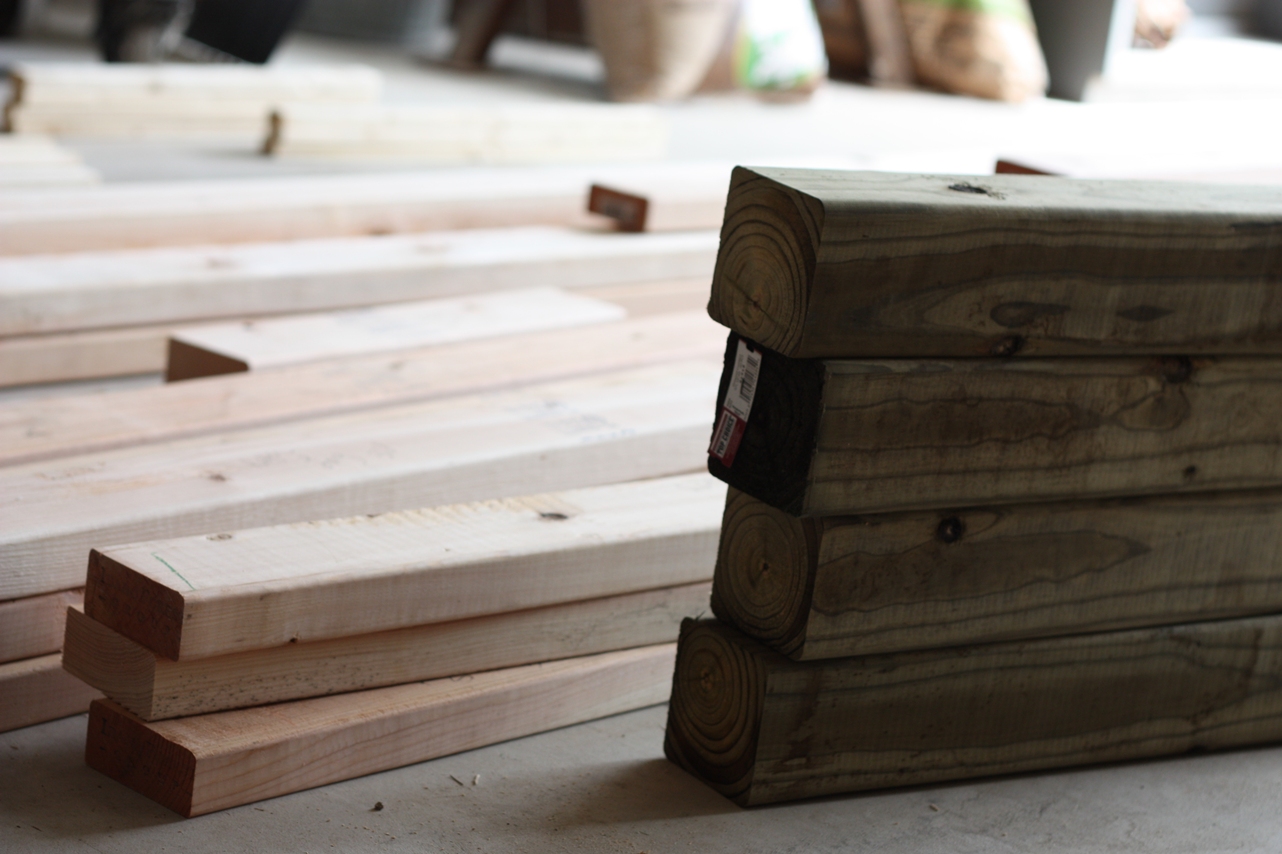
The first afternoon I cut all of the 2x4's and 1x2's on the miter saw. Let me just say, how wonderful it is after 30 years to finally have a garage to work in.
The pieces were then CLEARLY labeled and organized into neat little piles.
The next afternoon I proceeded to build. Oh, what fun! An hour or so into the project I decided to set up TWO cordless drills - one for drilling pilot holes and the other for screwdriver purposes. Best idea I've had yet.
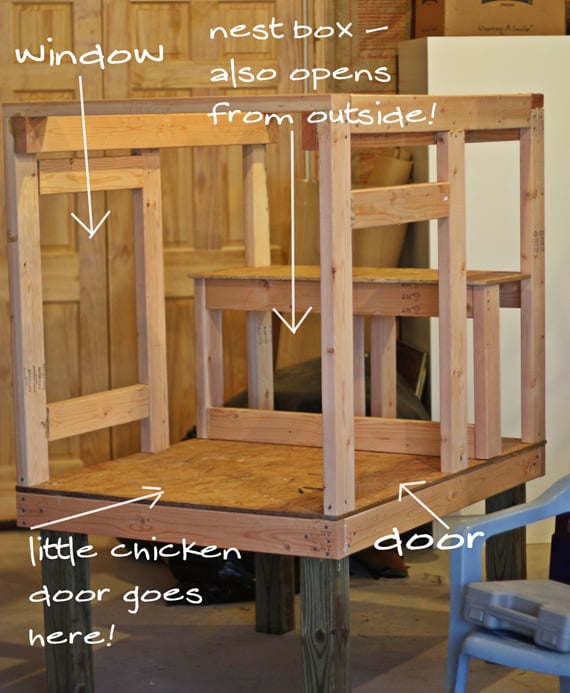
At the end of the second afternoon I had the base frame complete with four 2-foot legs, floor attached, upper frame constructed, window & door frames, nest box structure complete, and the top frame attached to the base frame & floor.
Obviously, I have a ways to go. But so far, I am pleased! I hope to work on this again tomorrow.
Thanks for looking.... more updates in the coming days!
********************Week of April 26th - Progress******************
(I'm cheating a bit here and copy/pasting from our blog to save time)
If only all the other tasks would go away for a little while, I could get soooo much more done on this project. I’ve invested two more partial afternoons this week so far. It’s such a little drop in the big bucket of time, but all I can usually muster in a week.
Things that were accomplished: my modifications to the plans – framed a “grid” in the window to help support the hardware cloth, framed in the little chicken door (original plan didn’t require this). I also installed a vinyl flooring scrap on the main floor, as well as the roost shelf. And my biggest “ta-dah” …. rafters. Although it was also my biggest blunder so far. I completely assembled one rafter “bass-ackwards” as they say. I fixed the problem and all seems okay. This coop is definitely not perfect, but it’ll do I think! And did I mention how much fun this is?? Really, it is!
My favorite tools so far: miter saw, air nailer, cordless screwdriver/drill. My least favorite thing so far: Liquid Nails – ugh! I somehow manage to glue my fingers together each and every time. I also don’t care much for the circular saw or the jig saw, but they beat the heck out of using a hand saw
") All in all though – fun, interesting, addictive (what to build *next*?!).
All in all though – fun, interesting, addictive (what to build *next*?!). Next step will be installing the hardware cloth on the interior of the window, and figuring out a way to install the hardware cloth in the ventilation area by the rafters. Hmmmm, more modifications may be in order?? I think I need another board situated in there somewheres….

****************Week of May 3rd Updates**************************
This beginning carpenter is getting her coop built
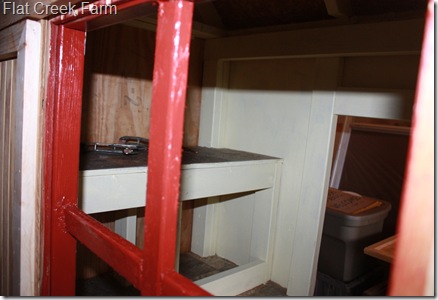
I really think the framing part has been the most fun so far. The rest of it has moved much slower. It didn’t seem like I accomplished much during my building sessions this week, but now I realize: two hours here – two hours there.. I’m starting to see the light at the end of the tunnel.Chipboard was installed on the roof (this stuff will *not* show in the end. I’m putting nice shiny tin on my roof). This is the view from the back - nest box & roost area (where I’ll be installing a door).

Most of the bead board siding is installed. I had planned to perfectly match everything (i.e., the “beads” on the bead board), but let’s just say… measuring, and cutting accordingly has not been my strong suit so far. But then again, I’m a beginner! Trim will hide most of my errors (I hope). I am getting better and less nervous with the jig and circular saws.
This view shows the opening for the little chicken door, and the side window.

And here’s a quick view of a step that proved to be very tedious – I installed hardware cloth in the ventilation around the rafters. At that point I wished for verrrry tiny hands.

A few of the next steps –
*one more piece of siding installed because of another slight modification I made
*paint the interior – I have a quart of nice lemony yellow eggshell that was FREE from Glidden a few months ago.
*install hardware cloth on the inside of the window.
*cut out doors & brace them, as well as cut the window cover.
*trim window, doors, corners, roof lines.
*install doors, window, hinges, latches, etc.
*drill hole in back for heat lamp cord.
*caulk, caulk, caulk.
*paint exterior.
*install galvanized tin roof.
More updates soon – chicks arrive week after next! [/FONT]
*****************************
Sorry I'm late with another update. Here is an overview of progress for week of May 10th through 16th.
I had one good productive afternoon last week in which I built two doors. With mitered trim, thank ya very much
I painted the interior a lemony yellow yesterday. And today.. I had help! Which I gladly accepted since this is Chick Week after all, and the babies are scheduled to be shipped to me one day this week. I was getting so close, but still a lot of details to do. So I swallowed my Farmgirl Pride and said… yes, it’s okay to have a helper today And a most excellent helper he was.Here is a view of the interior.
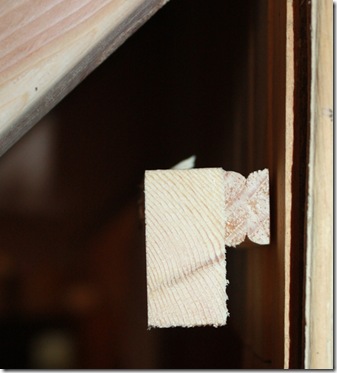
Mr. W was kind enough to build a sliding window cover bracket for me. This is the “gridded” window. I still have hardware cloth to attach inside. I had visualized the cover for this window as being a slider, and voila, the hubs came through for me again. It is perfect… just as I had imagined.

Here is a view from the front – you can see the window with sliding cover here as well. Also the tin edge trim he installed today. It is actually silver/galvanized but looks green in this picture for some reason…
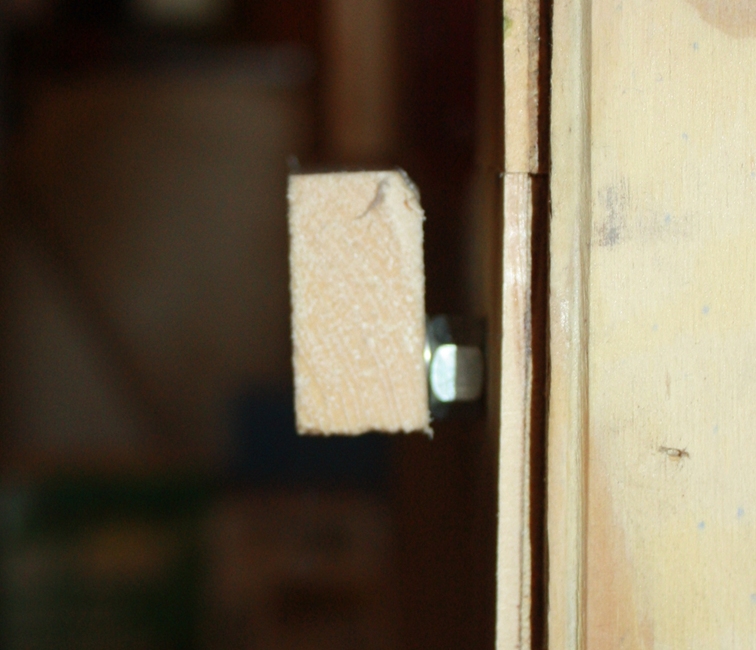
For those interested in how the sliding bracket was made, here’s a close-up of first the top bracket and then the bottom. Laminated wood and nuts & washers were used to shim the back.
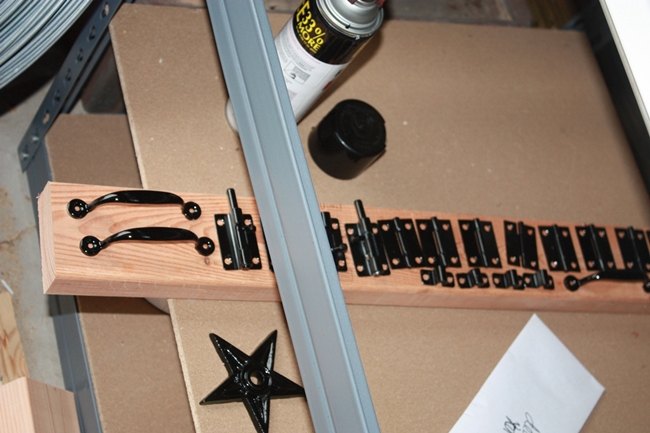
I painted the hinges, latches, handles, etc. today also.
Also, the remaining doors were built. Here is a view of the back. These doors are not attached yet (awaiting exterior paint). The top door is the roost access door. The bottom door is the egg access door. Of course, for our brooder purposes the egg door won’t be utilized. However sometime in the future it most likely will be used as a portable coop, and the nest boxes & access door should come in handy.
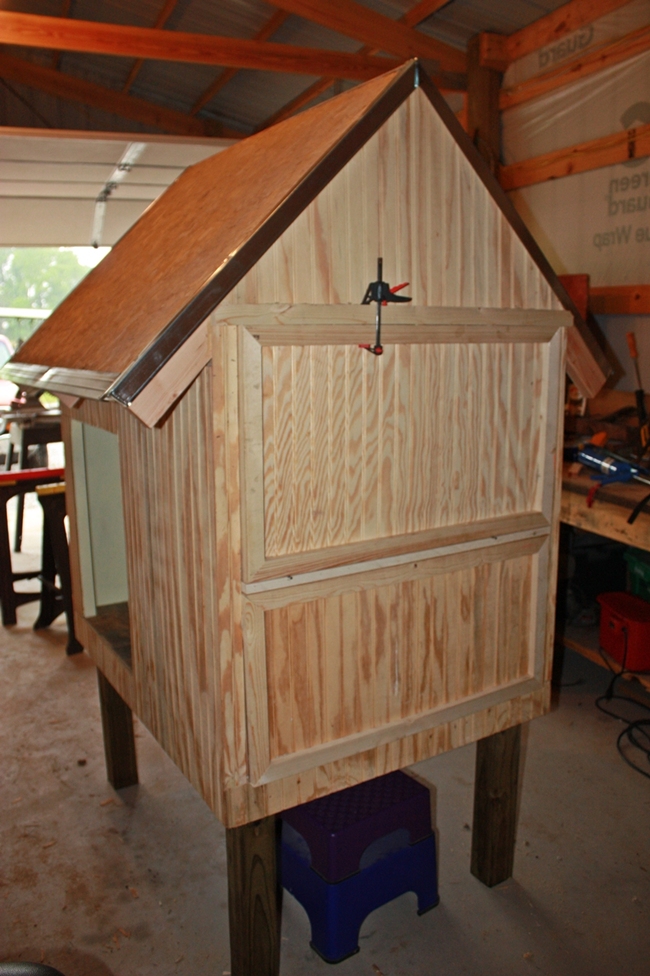
Next up will be to paint the exterior with red oil-based (Valspar Porch & Floor) paint; apply the tin roof; trim corners; attach the doors and installing all necessary hardware, and a couple other miscellaneous items.
Now, how do I get oil-based paint to dry fast in this 100% humidity, daily rain, and chill we’re experiencing now? That is the question.
This little coop is just about finished. Stay tuned for more Coop Building Adventures, and also the long-awaited arrival of….
the return of Chickens to Flat Creek Farm!