Last year I started an adventure, set in motion by my wife. She slowly convinced me that I wanted chickens. She is devious that way. She convinced me to build this coop. The process took me about 6 months to complete, and more money than budgeted (when do you ever stay under budget?). My approximated costs for the coop in total is around $500-$600, +/- $100, not including the chickens and chicken supplies. This was the largest thing I had ever build, before it came a doll's crib, compost bin, and a book shelf. The whole process was very rewarding, and I had help from some good friends. I thank them for getting eaten by bugs in the summer months while helping me with things I couldn't do alone. Here are the pictures, roughly in chronological order. I will do my best to explain my process, picture by picture. Also I may refer to the hardware I use in very general terms, most of it I can't remember the names of.

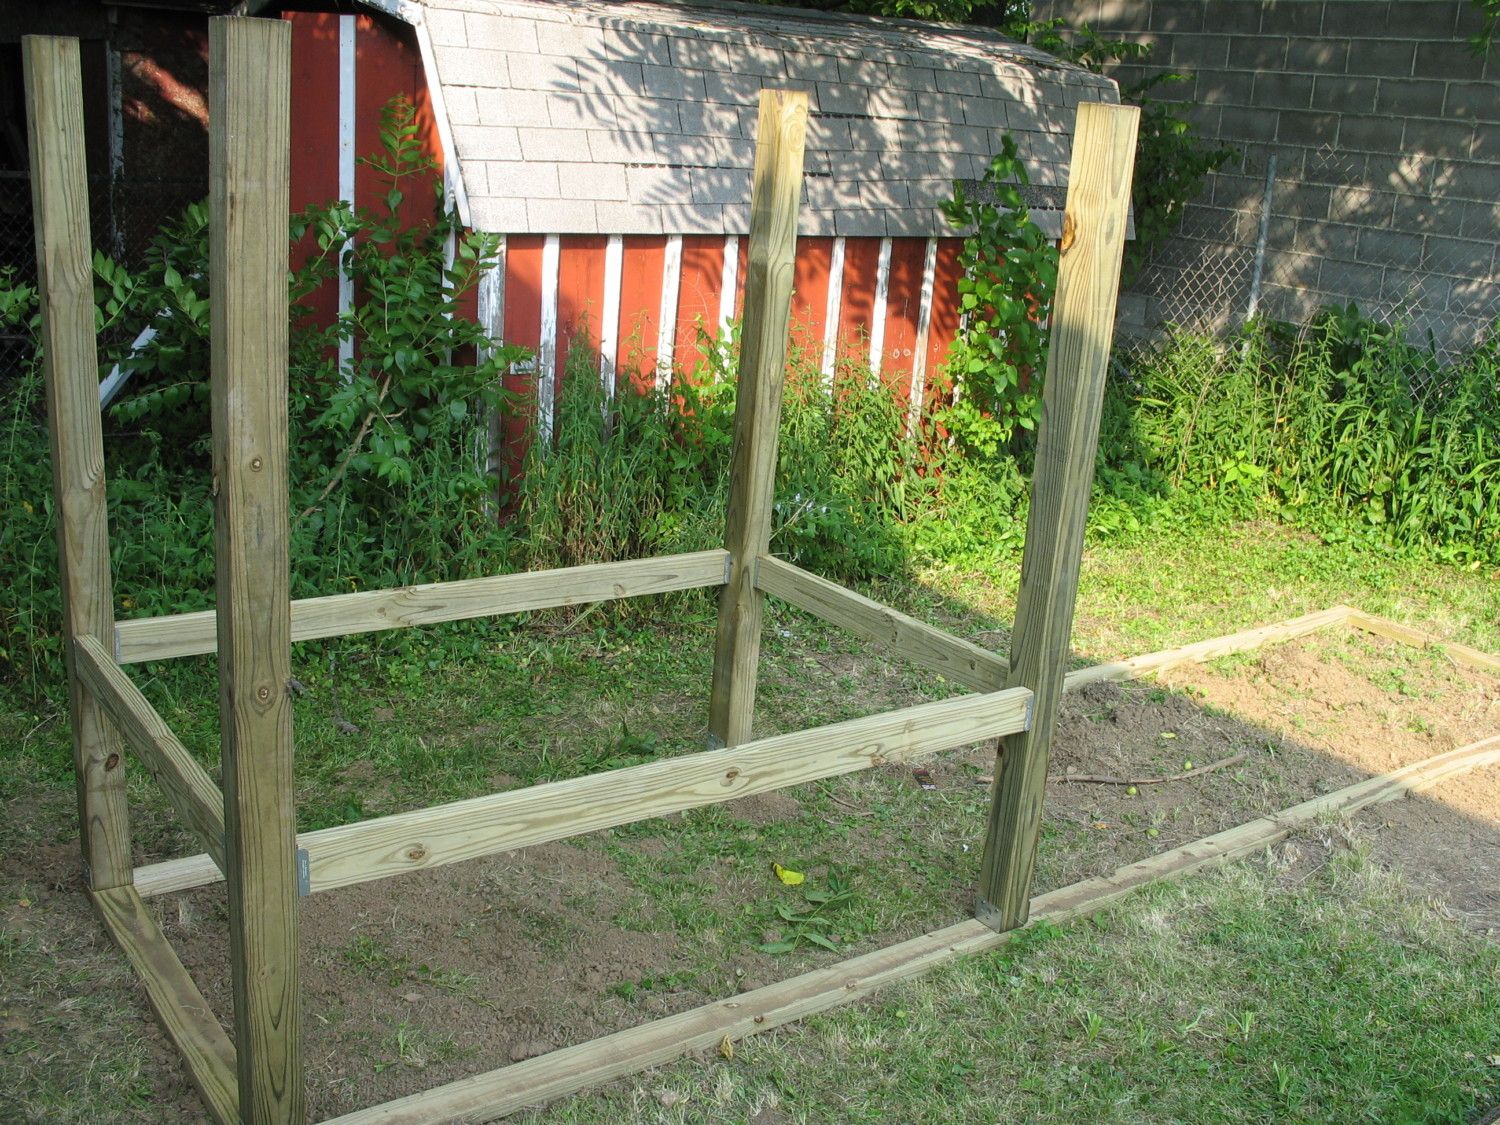
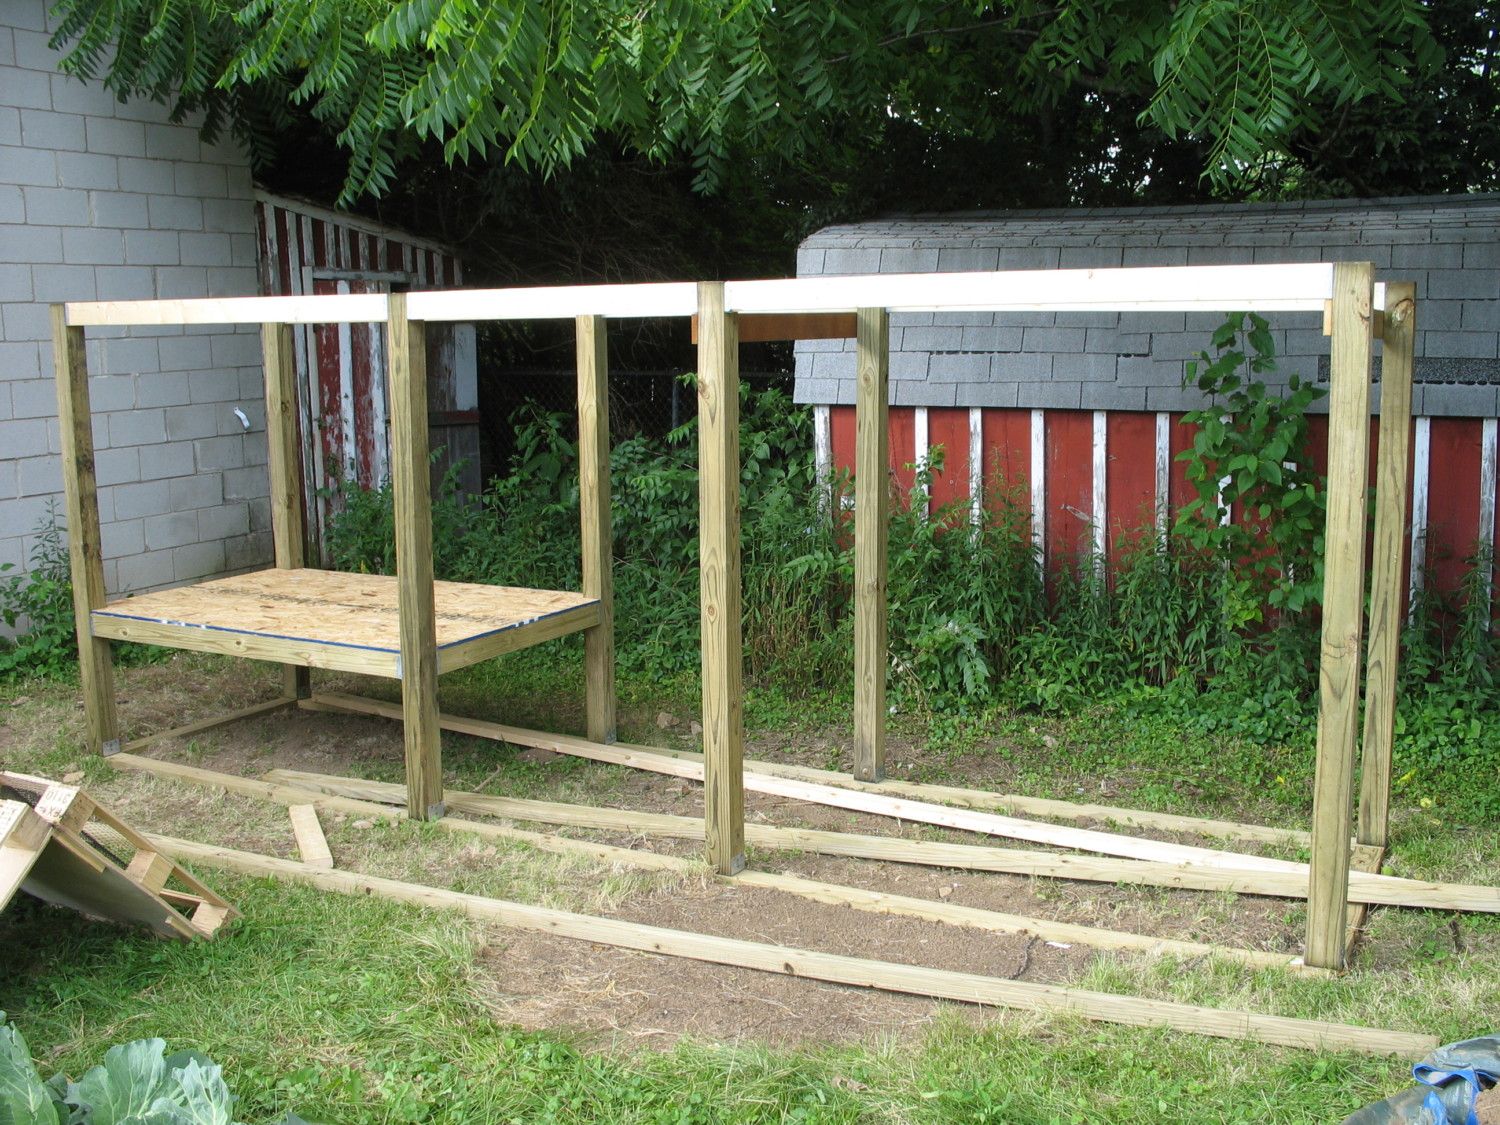
So here you see the very beginning of the project. But before this I have to back up a step or two. The coop dimensions are as follows: The coop itself will be 2 ft off the ground. It will measure 4ft x 6ft. The entire project, coop + run is 4ft x 16ft. So I had to first level the ground I was building on. I wasn't super careful, just made sure it was mostly flat. If where to do it over I would consider a better foundation. Speaking of foundation. To build up from I used treated lumber, 2x4s. I laid 2 16ft lengths down, and cut another piece to make the total width of 4ft (about 3'5" length between the 16' lengths). I nailed each end into another, checking for square as I want. Next I had to add the vertical beams. those beams are treated lumber, 6ft long 4x4s. I attached them to the foundation. On the long side there, from end to end it should measure 6 ft, the length of the coop. I used a metal piece of hardware to attach them (see next pic). Next I added the starting to the floor of the coop. I used just regular ol' 2x4s (I probably should have used treated lumber, but oh well, it gets painted) and attached them to the vertical beams using some more metal hardware. From the bottom of the vertical beam to the top of the 2x4, should be 2ft.
Here you see how the 4x4 vertical beam was attached to the base. That metal piece is under the beam as well. So it was nailed into the base boards, the beam placed on it, then it was nailed into the sides of the beam.
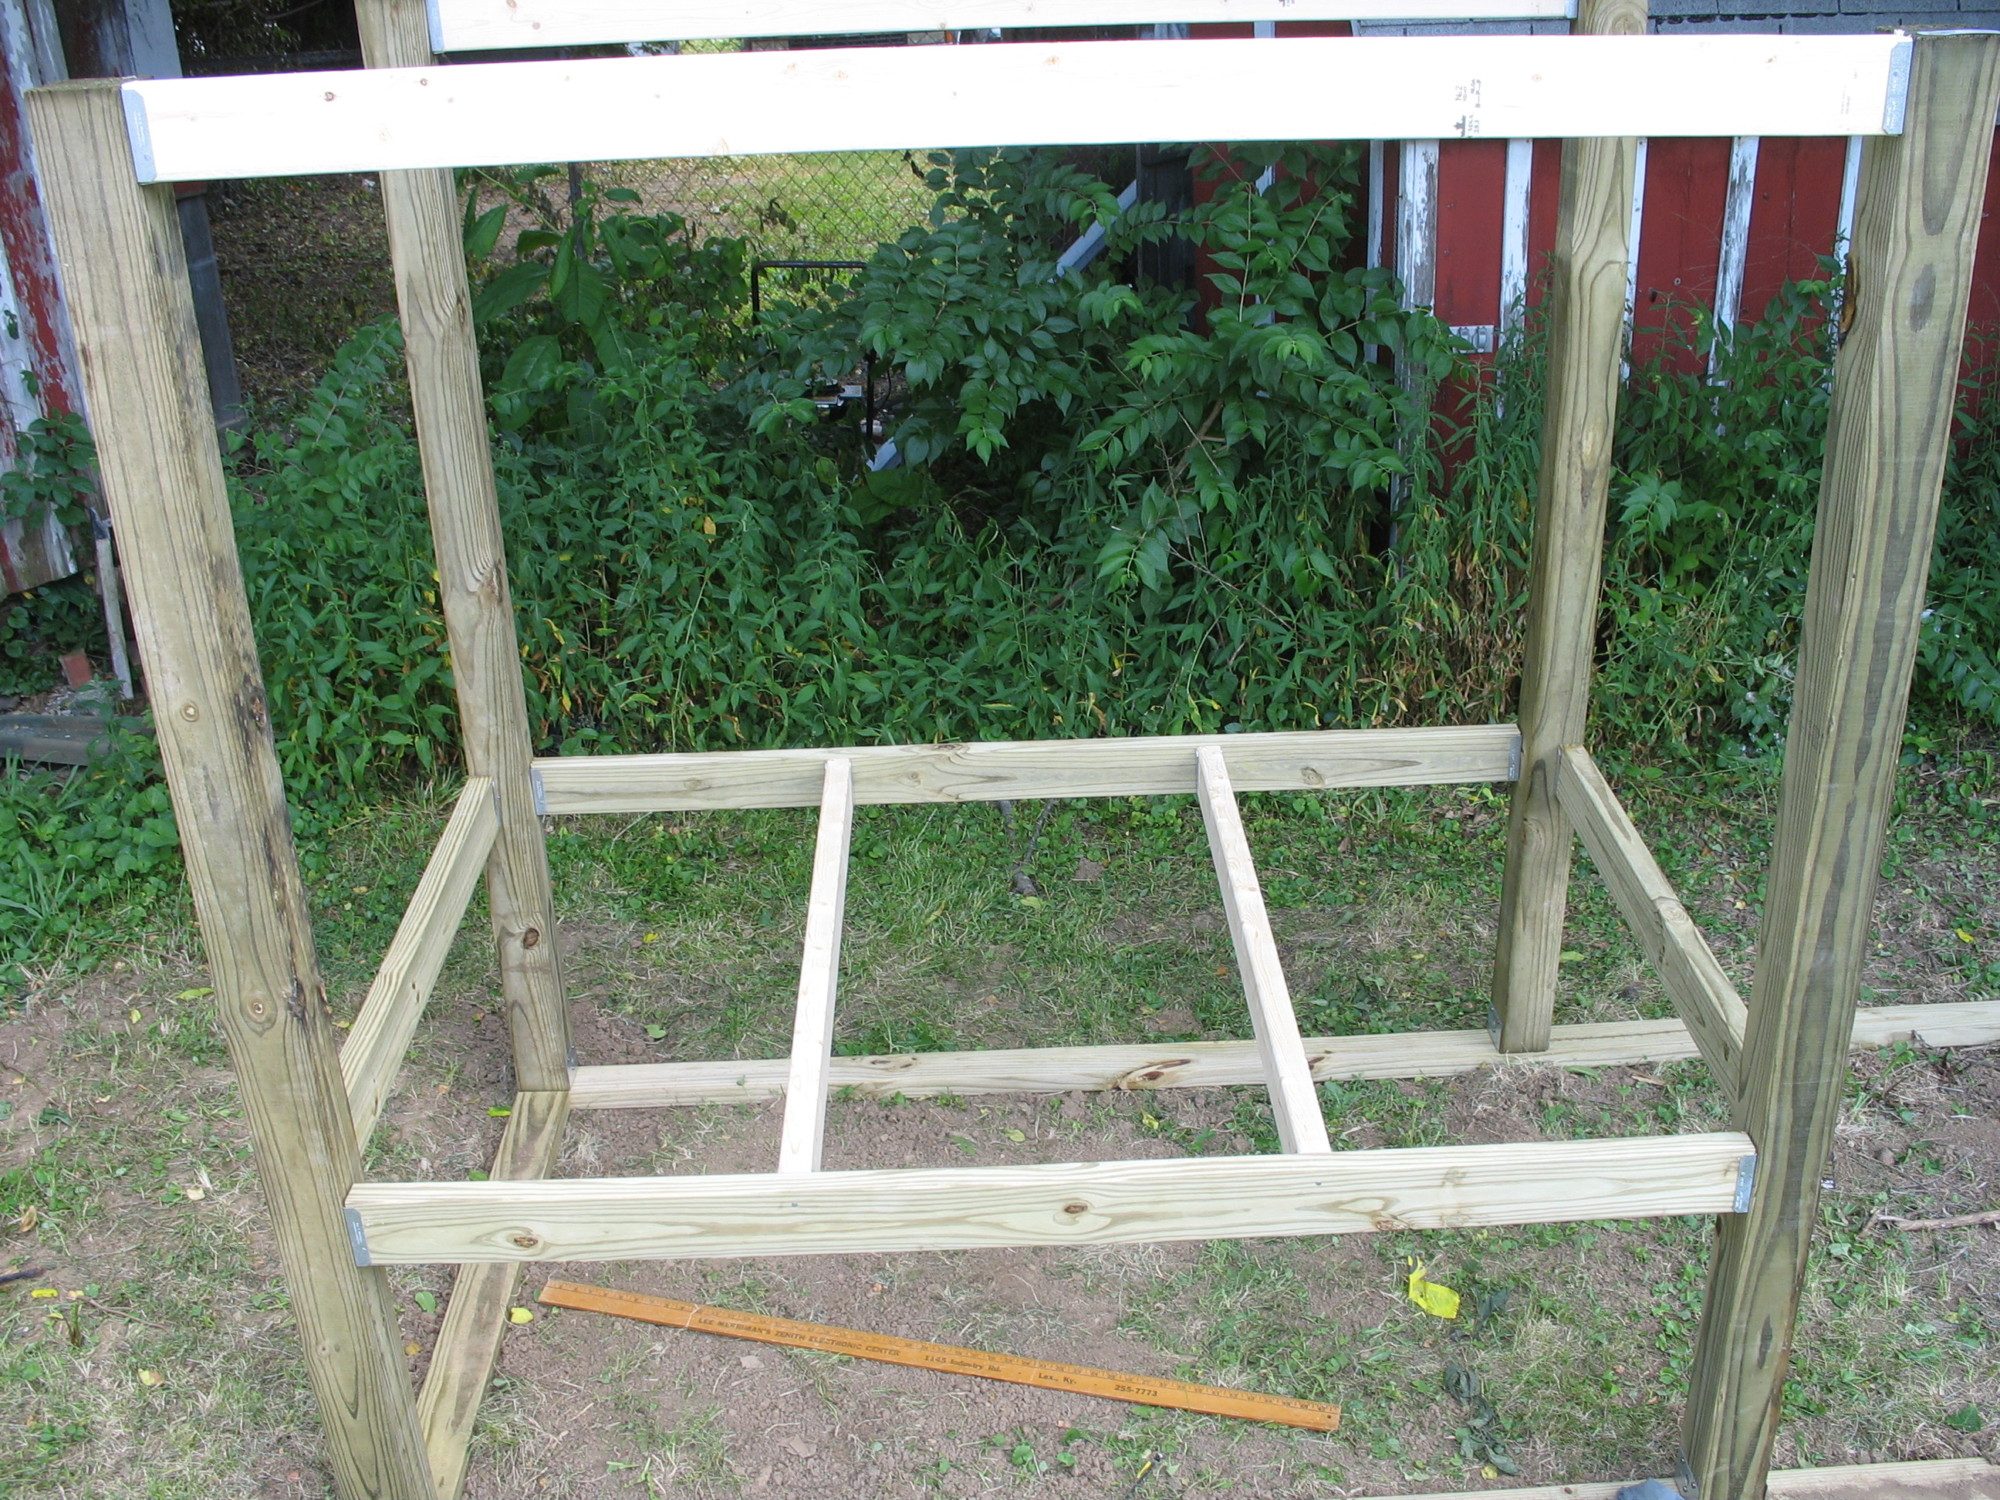
Next up was more floor support and some horizontal beams at the top. These will be used to help framing the walls as well as to place the roof trusses later. These pieces were all regular 2x4s and were all inserted using some hardware. That hardware was used a lot, it was nailed into the already placed beam, then the new beam could be placed into the hardware to be nailed underneath and on both sides of the 2x4.
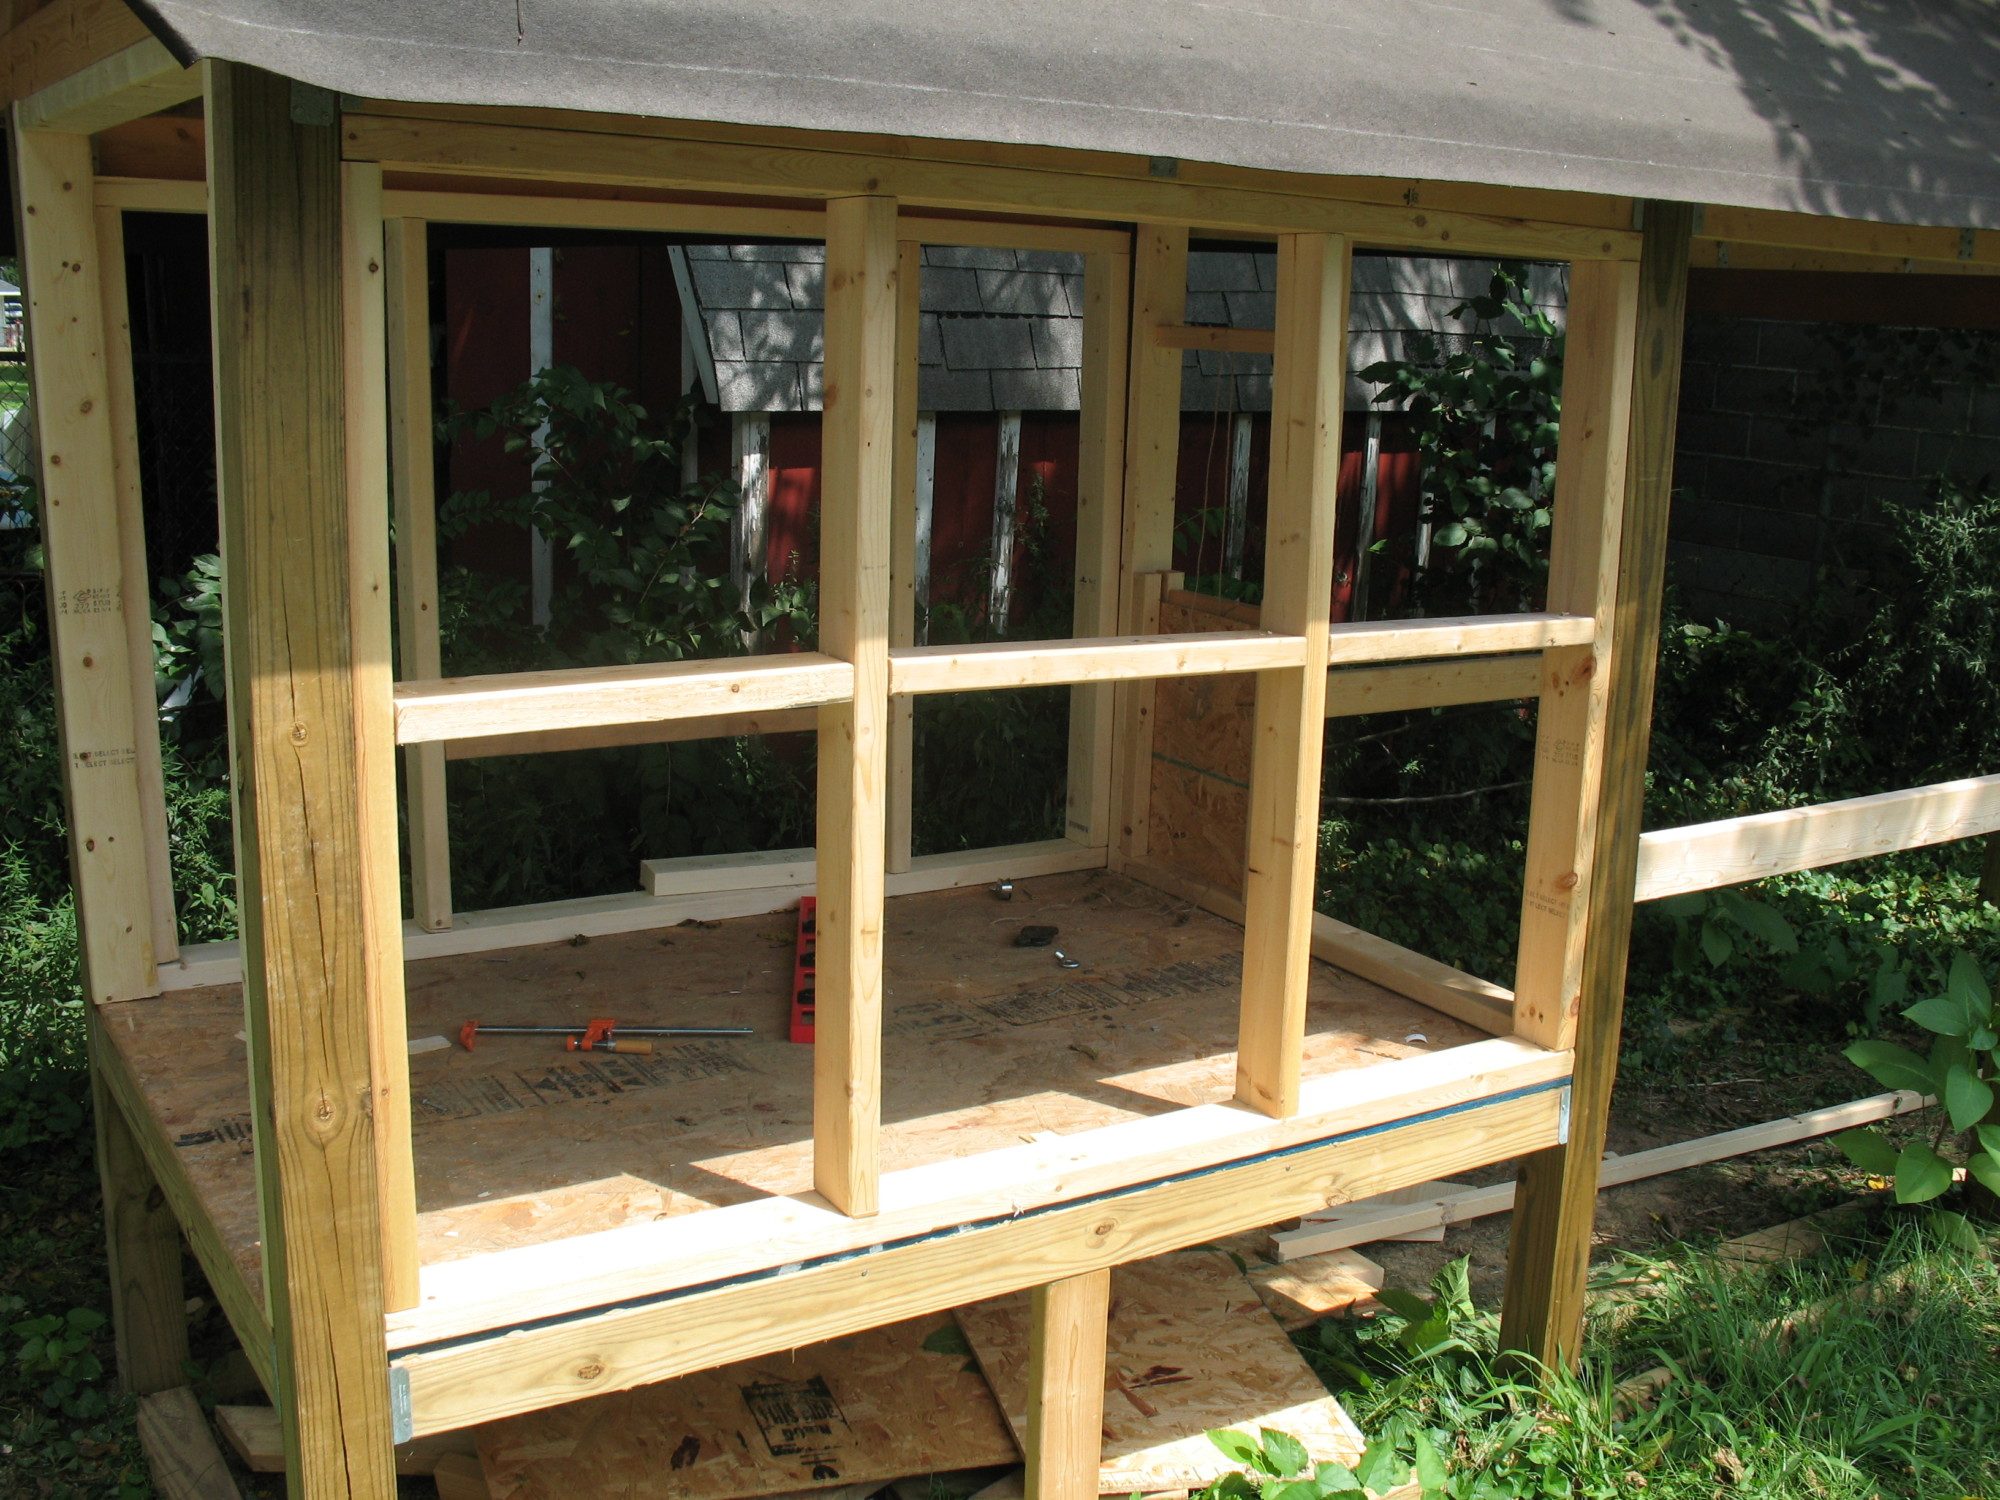
Now it was time to add the floor of the coop and some more vertical beams, as well as the top vertical beams to connect them all. Now If I was smart. I would have waited for the floor until I had a roof. Unfortunately it got rained on some, damaging the floor a little. But it still did the job. The floor is 7/16" OSB board. I used this same size OSB board for the walls and roof. I cut the floor so it would be flesh with the horizontal 2x4s it lays on. The newly added vertical beams are again treated lumber 4x4s. The one in the middle(ish) is about 4ft from the coop. I used that distance because I planned on placing a truss right on top of it. Your distance may vary. The horizontal beams attaching the 4x4s together are again regular 2x4s attached with the same metal hardware piece. You may also see some boards going across the structure, those are just nailed in for some support. Those can be removed later.
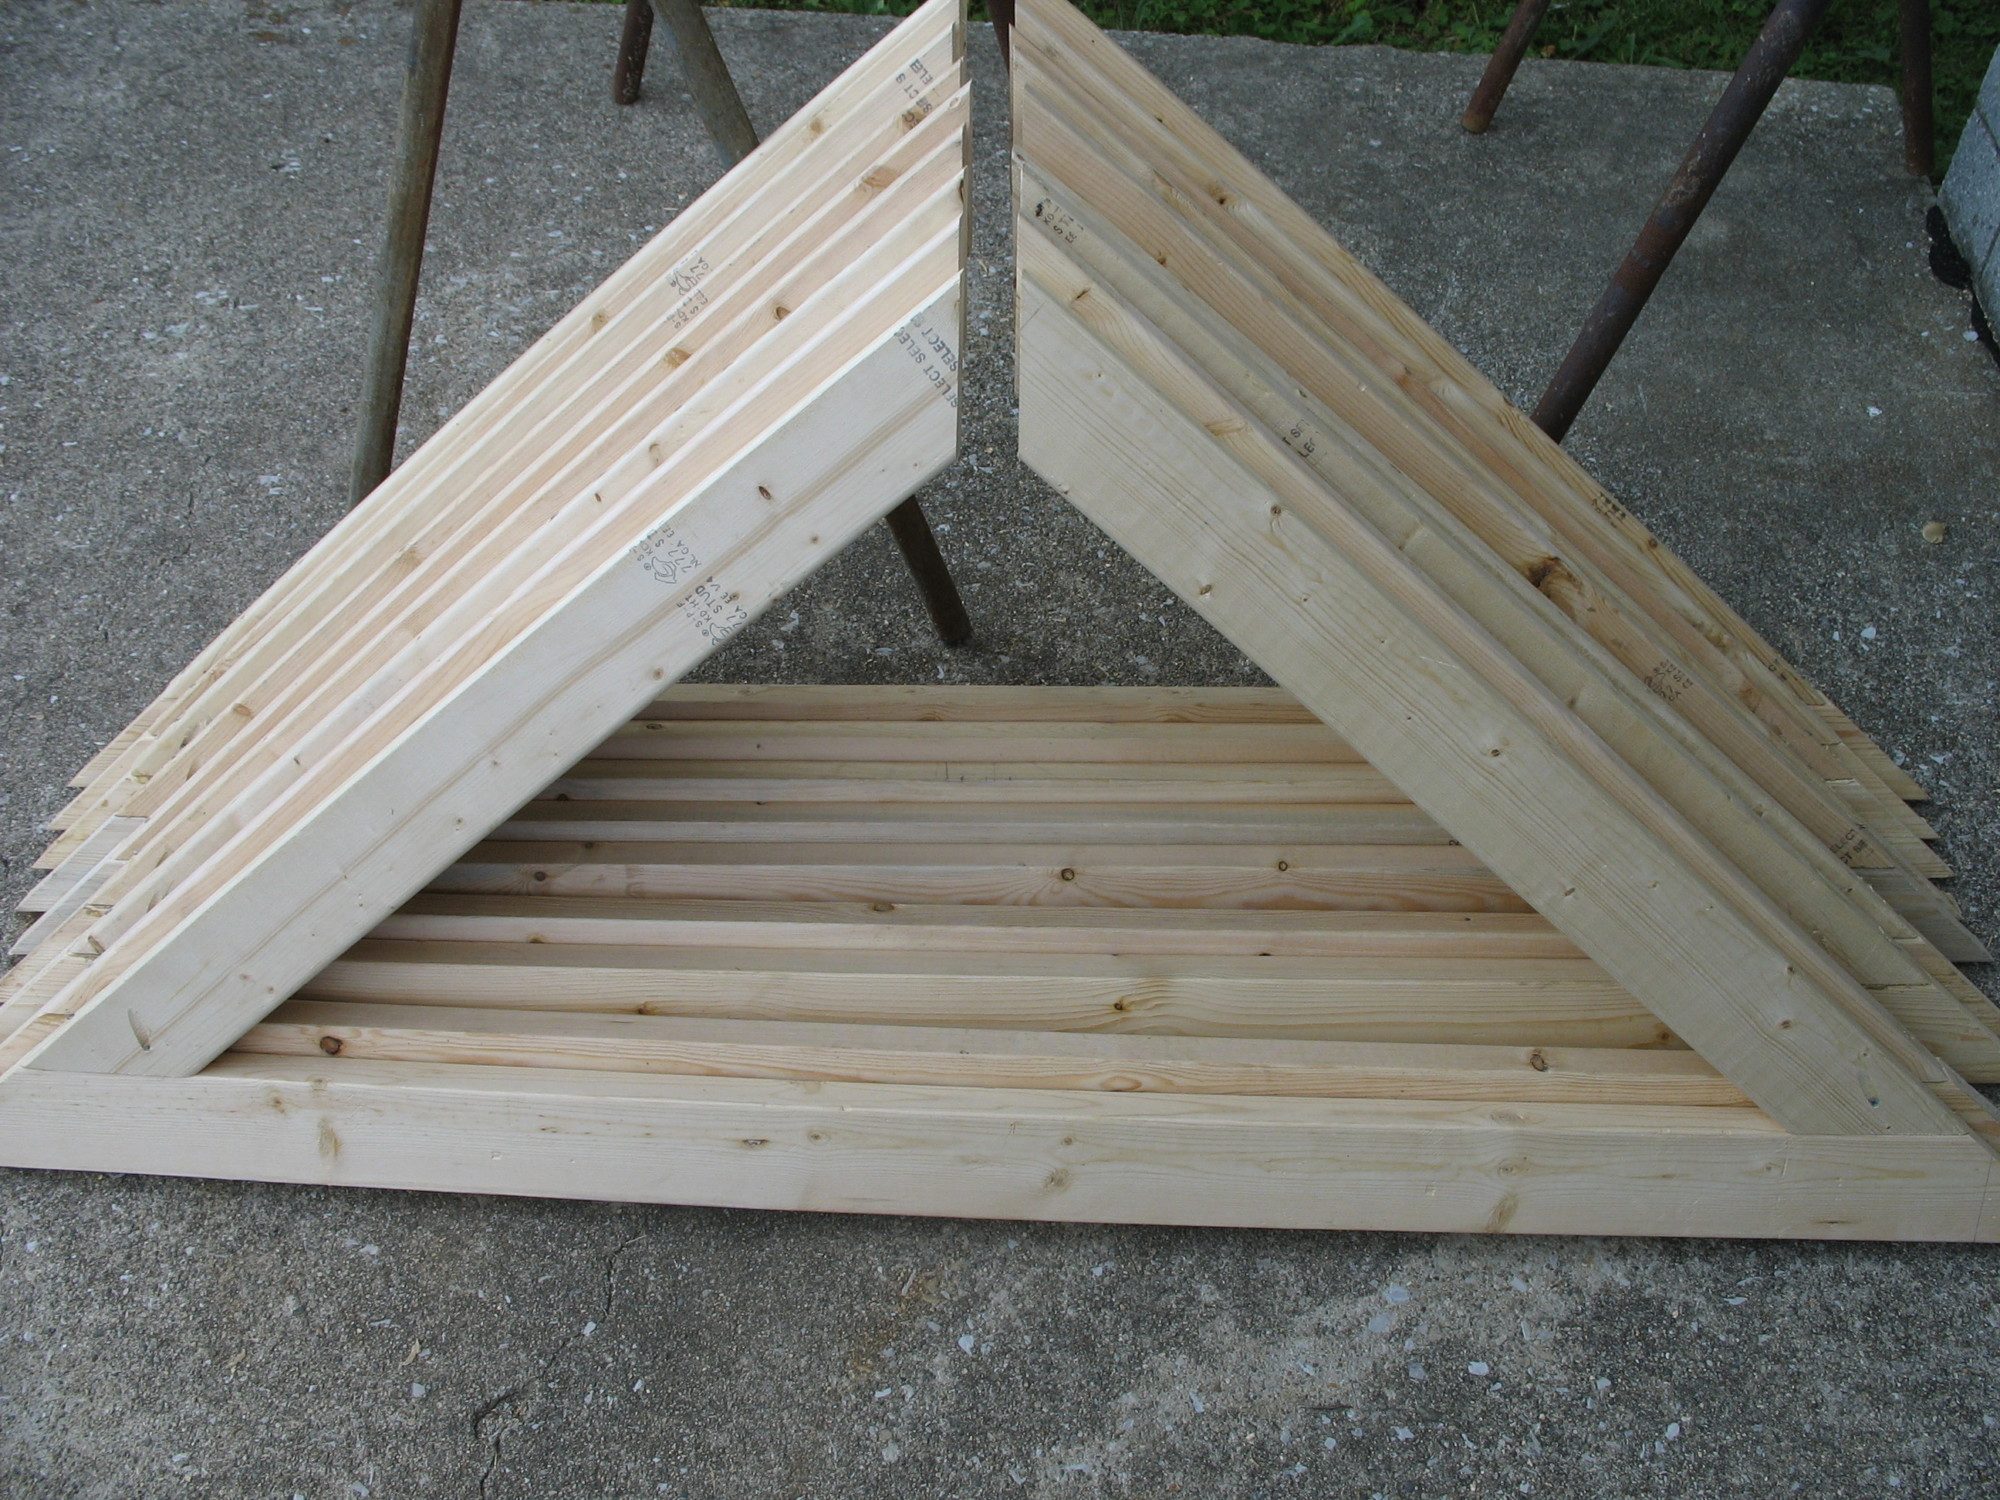
Now the easy part is over. Next I spent a long time calculating the size of the trusses to get the right overhang and slope of the roof. I build them so they could be attached, then one long 2x4 (16ft) could be placed through them all to link them together. You can see that gap there (1.5" for the thickness of the 2x4). They are made with 2x4s, I used a miter saw for the angled cuts, and I pocket holed them together.
Here is a view from underneath. I attached then trusses to the structure using hurricane ties (HEY! I remembered the name of that hardware piece). Then up went the 2x4 in between all the trusses. We had to bend and hammer it into place (because each of my trusses wasn't 100% identical). Next we had to cut the OBS for the roof to size and attach them to the trusses (I uses wood screws).
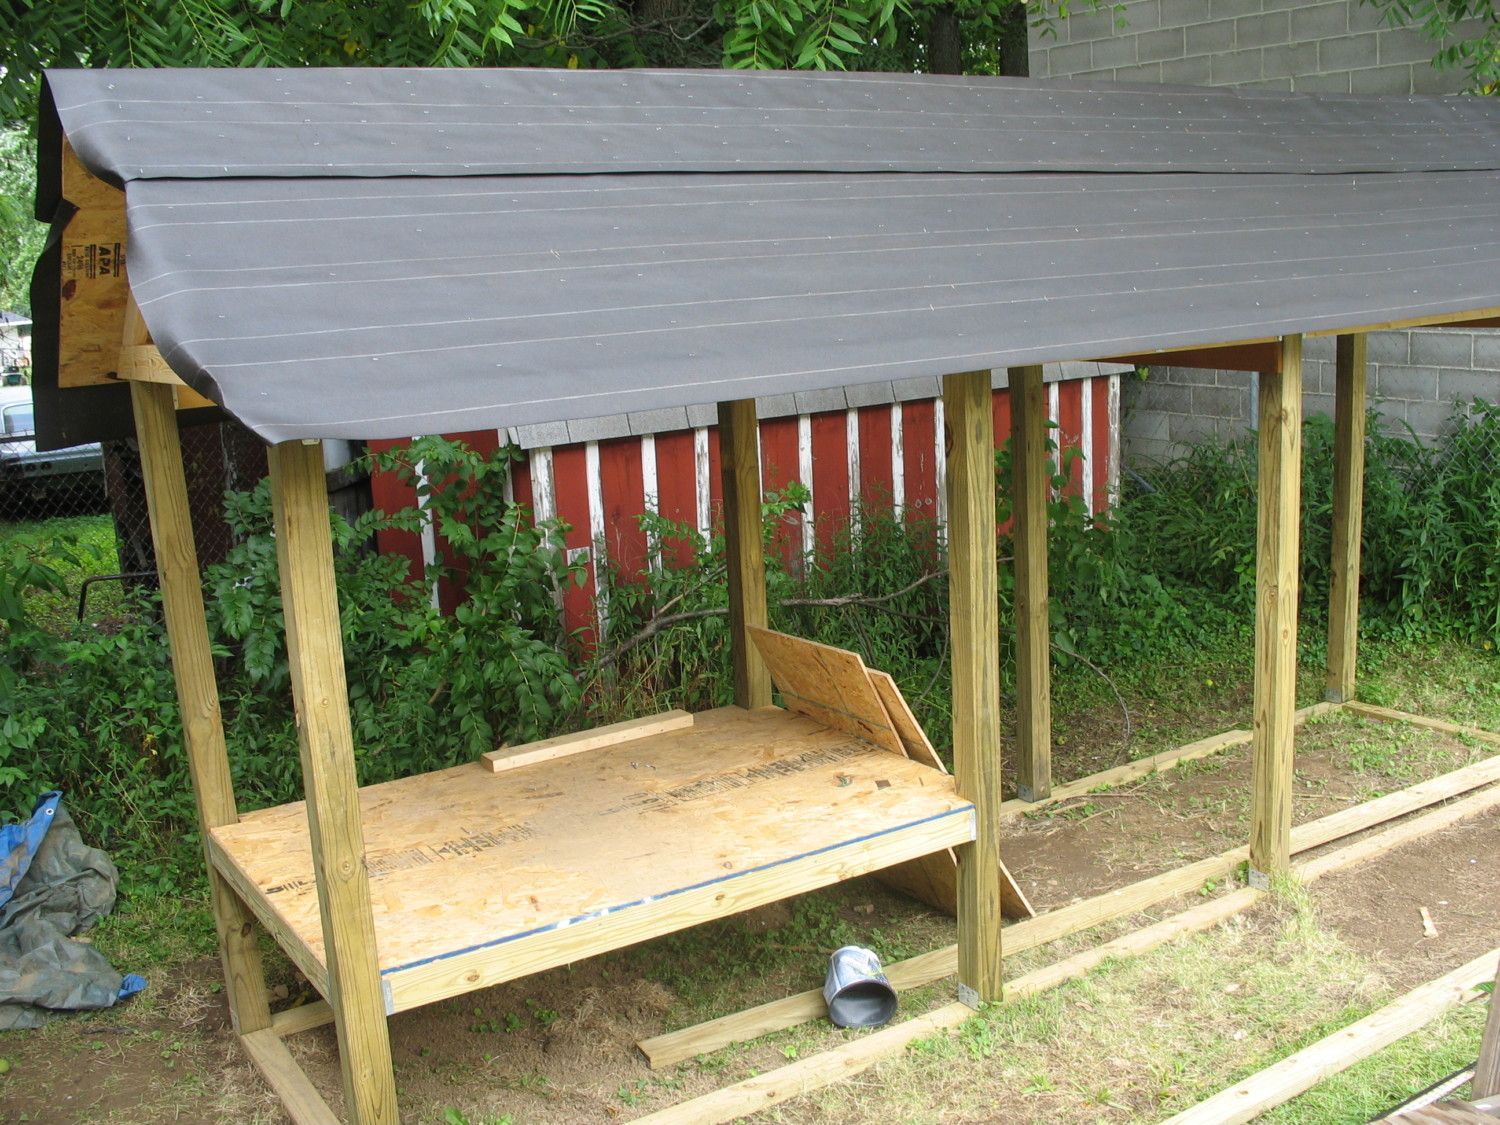
Next up was rolling out the roofing paper. Stapling it as we went. That roof went without shingles for quite some time.
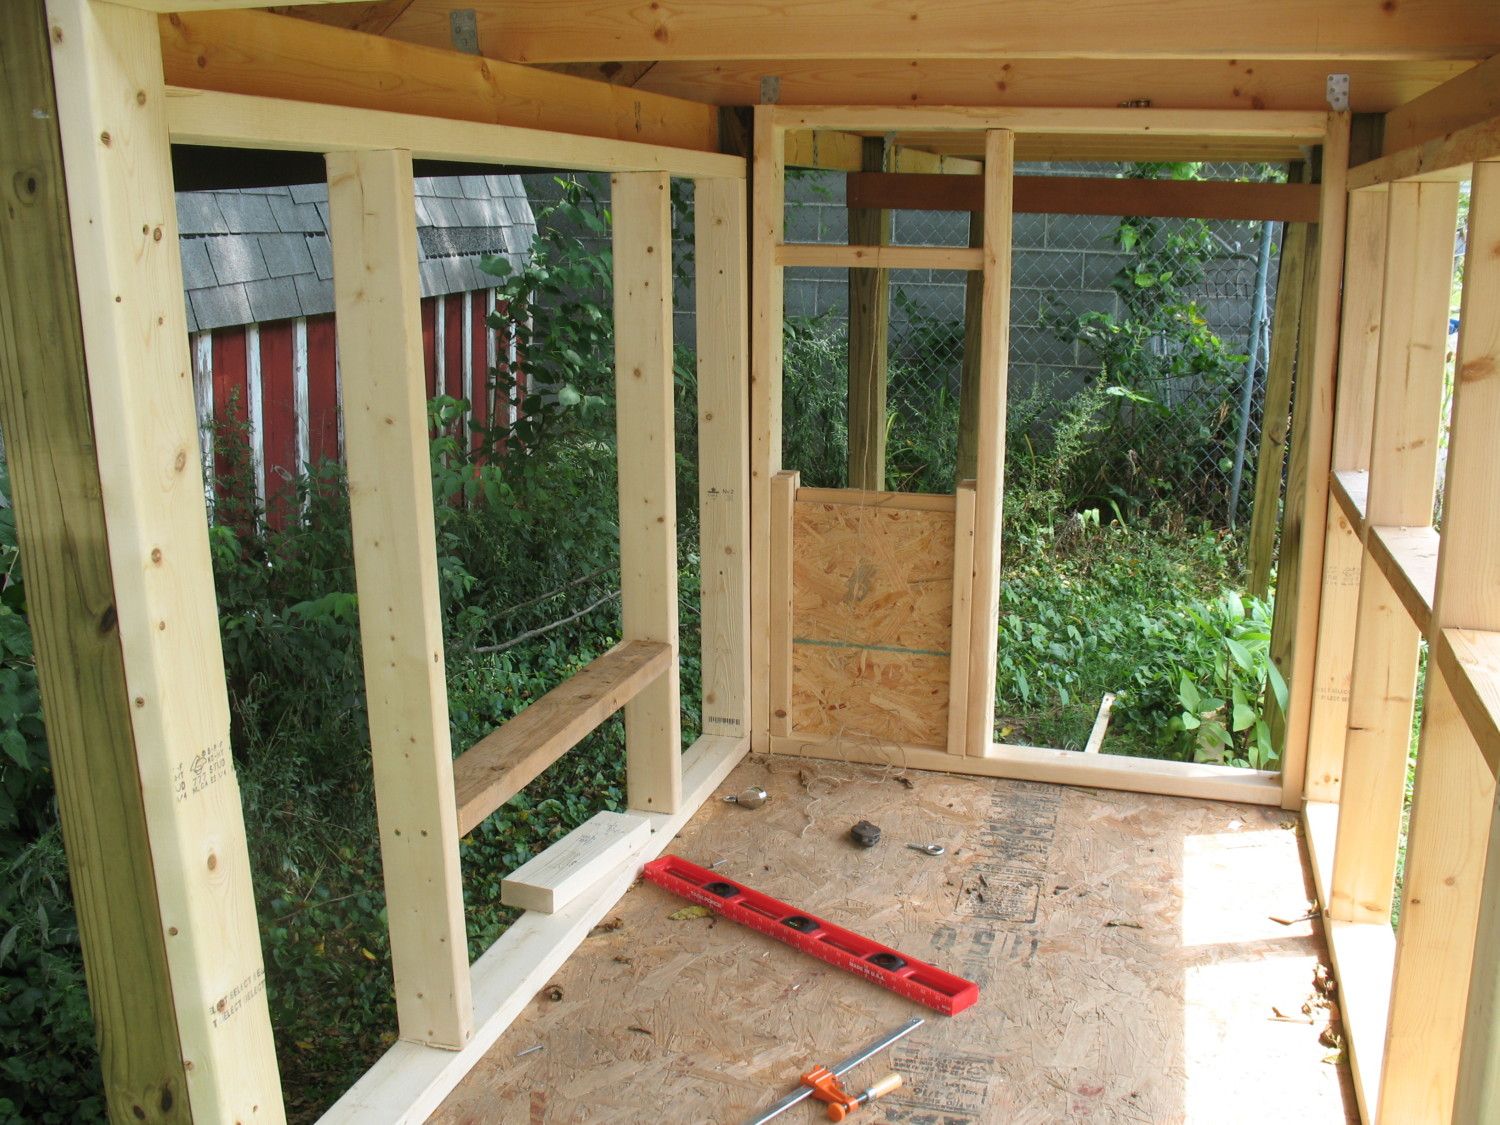
Now you can see I started framing the walls using 2x4s. this wall facing the camera will have 3 windows. more framing was required.
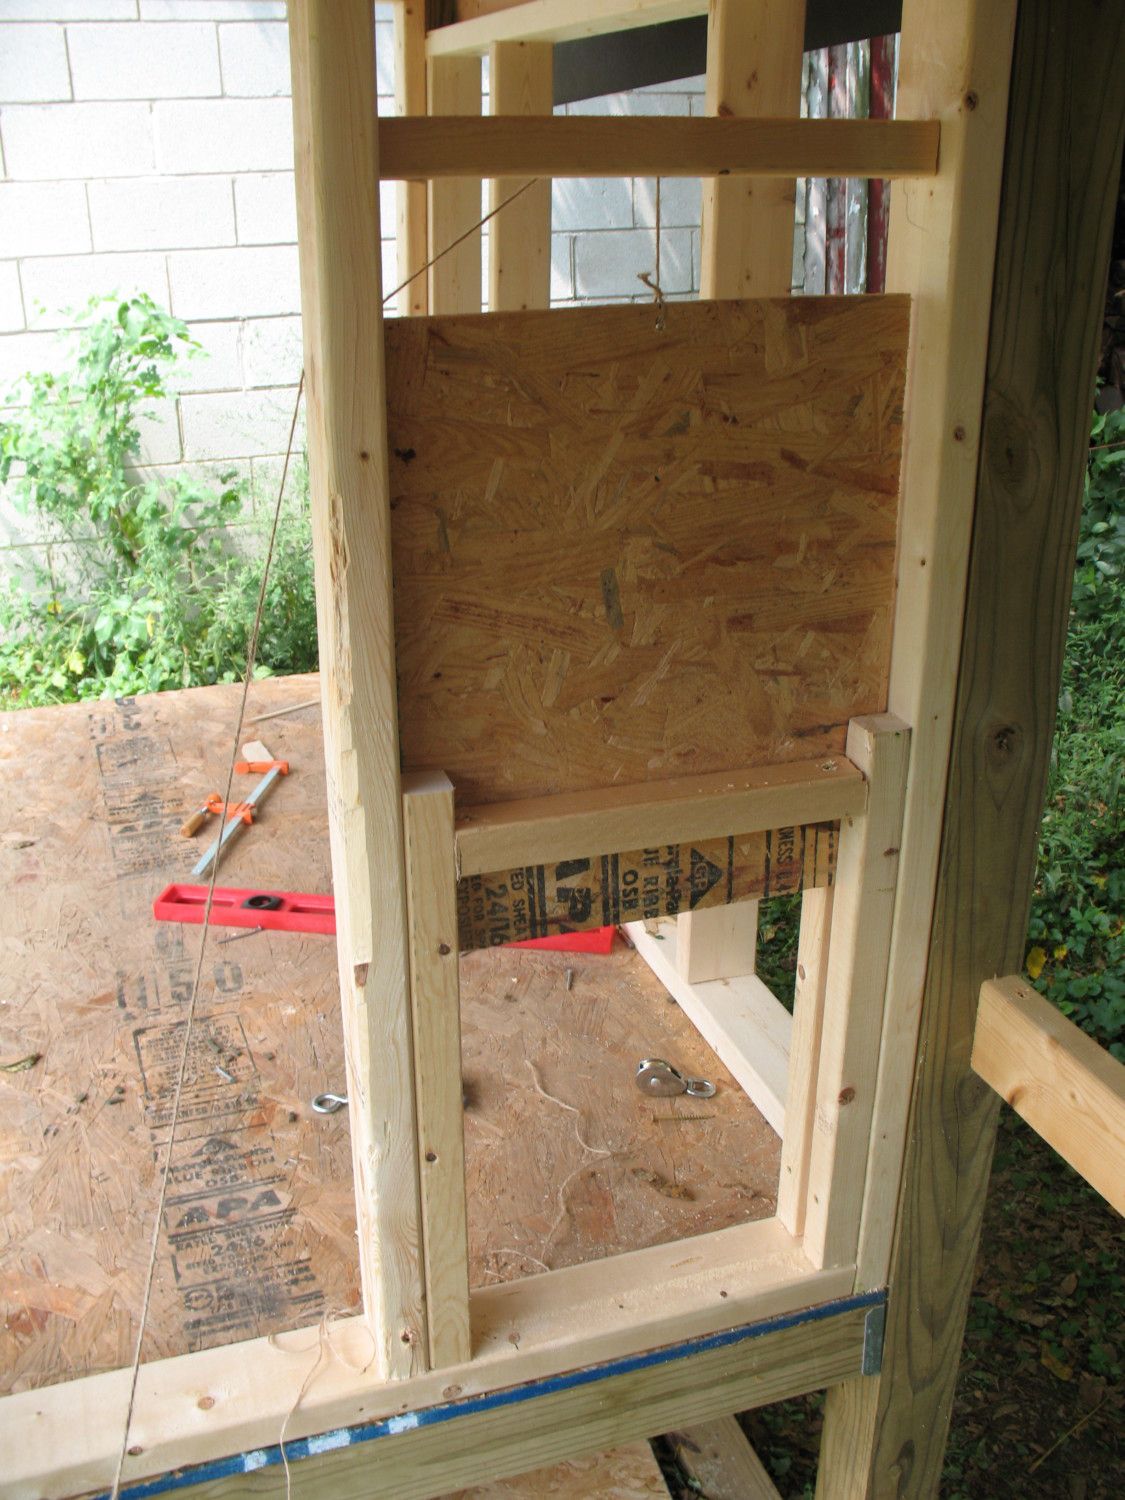
The left hand wall will be a solid wall. I started framing it so I could have an external nesting box. However I got impatient. That far wall you can see the pop door, made with some scrap 2x2s and OSB board. The wall I am taking this picture from will be the door to enter the coop.
There you can see a better shot of the pop door. it will be rigged to a rope pulley so we can open and close the door from outside the coop.
Now it is really coming together. I added some more horizontal 2x4s so I could attach the hardware cloth. On the right you can see the door (more on that next). Also I painted!
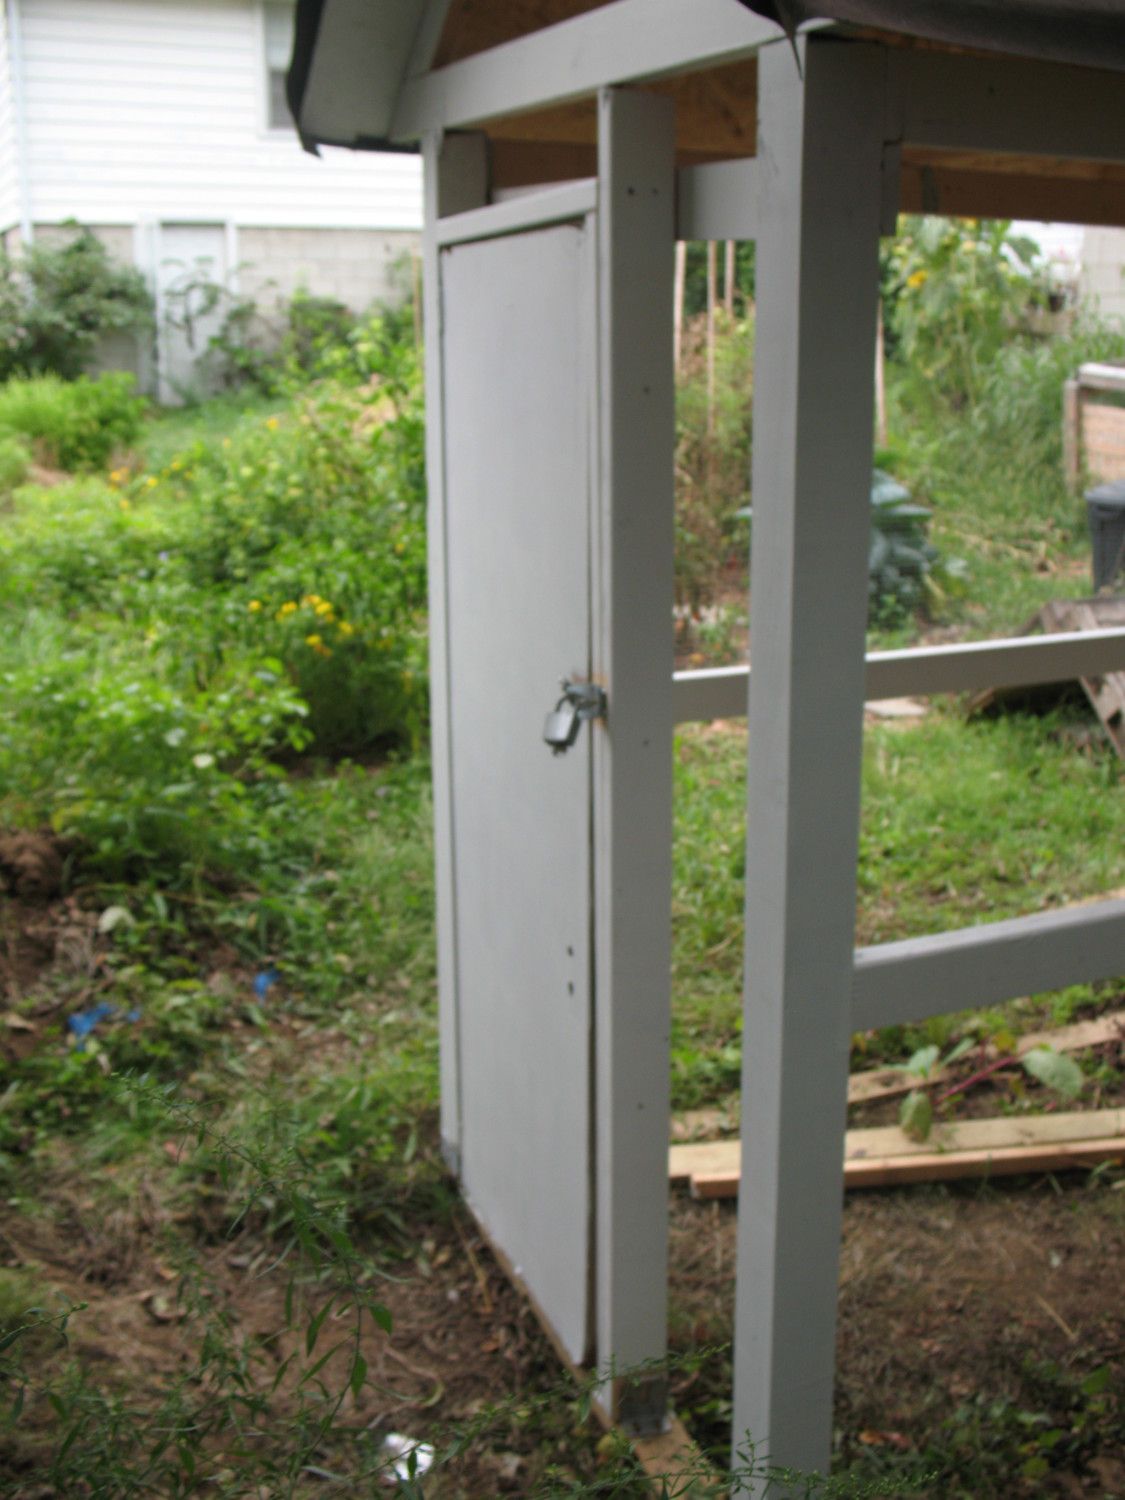
Here you can see the door to the coop run. I found this old door in the garage, left by the previous owner. It wasn't really perfect shaped, so I had to creatively frame it. It fit the project perfectly.
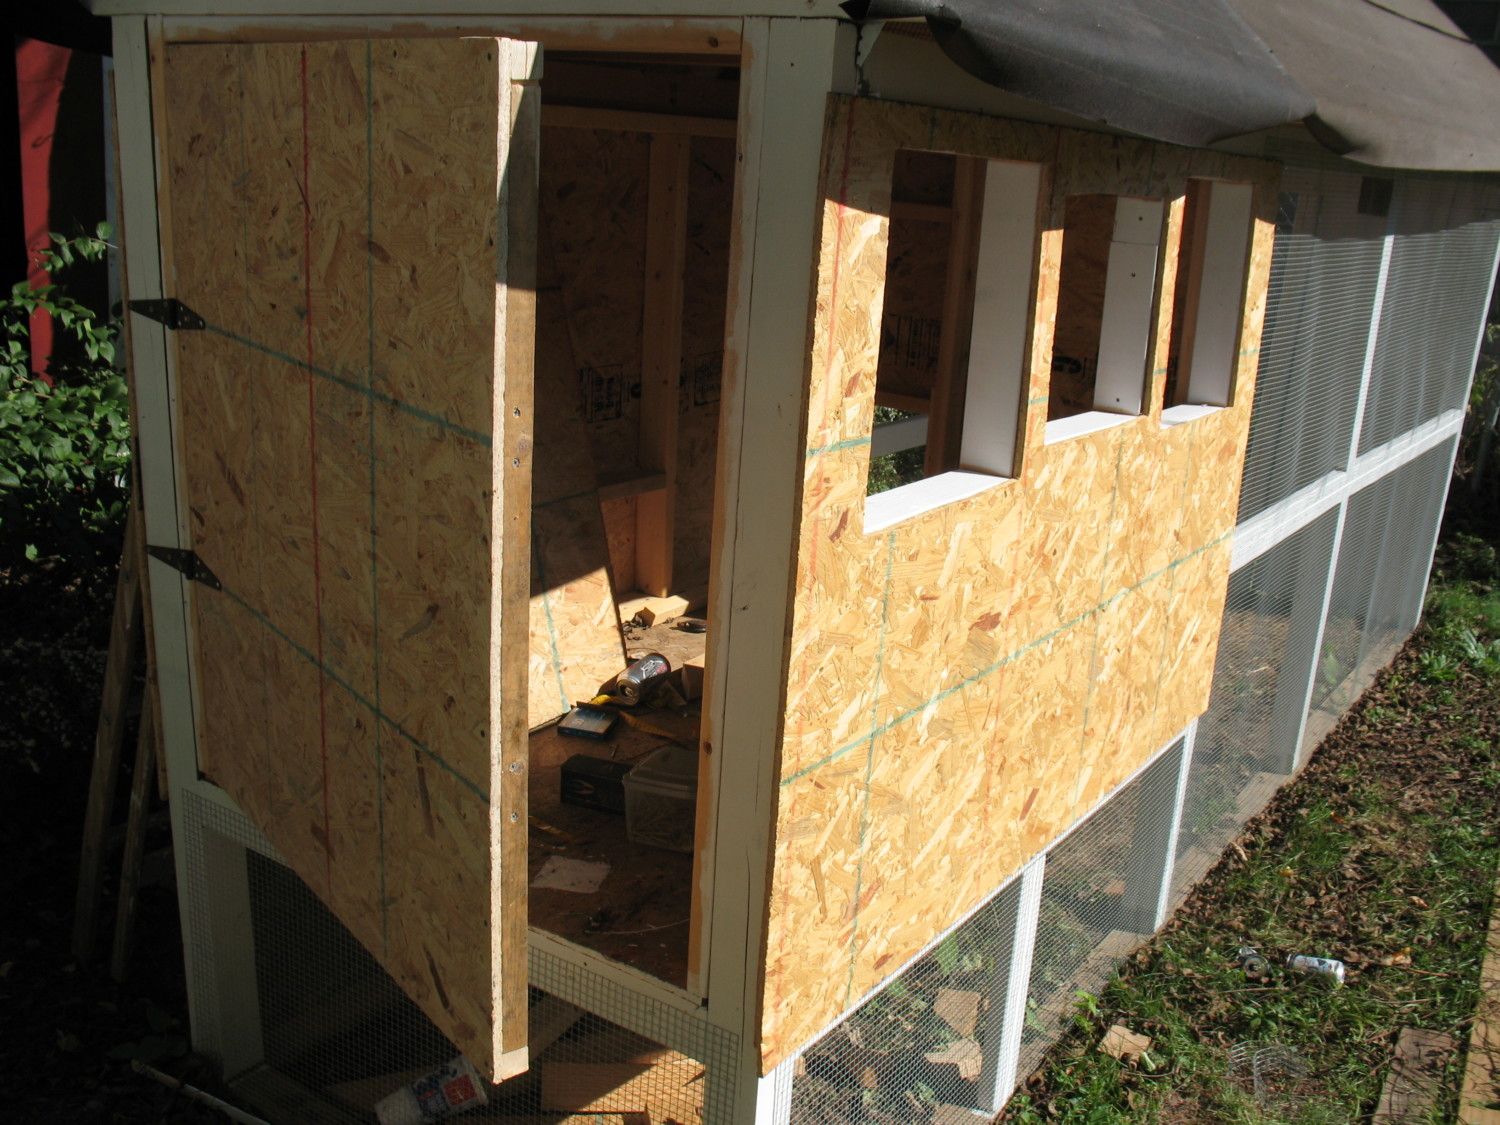
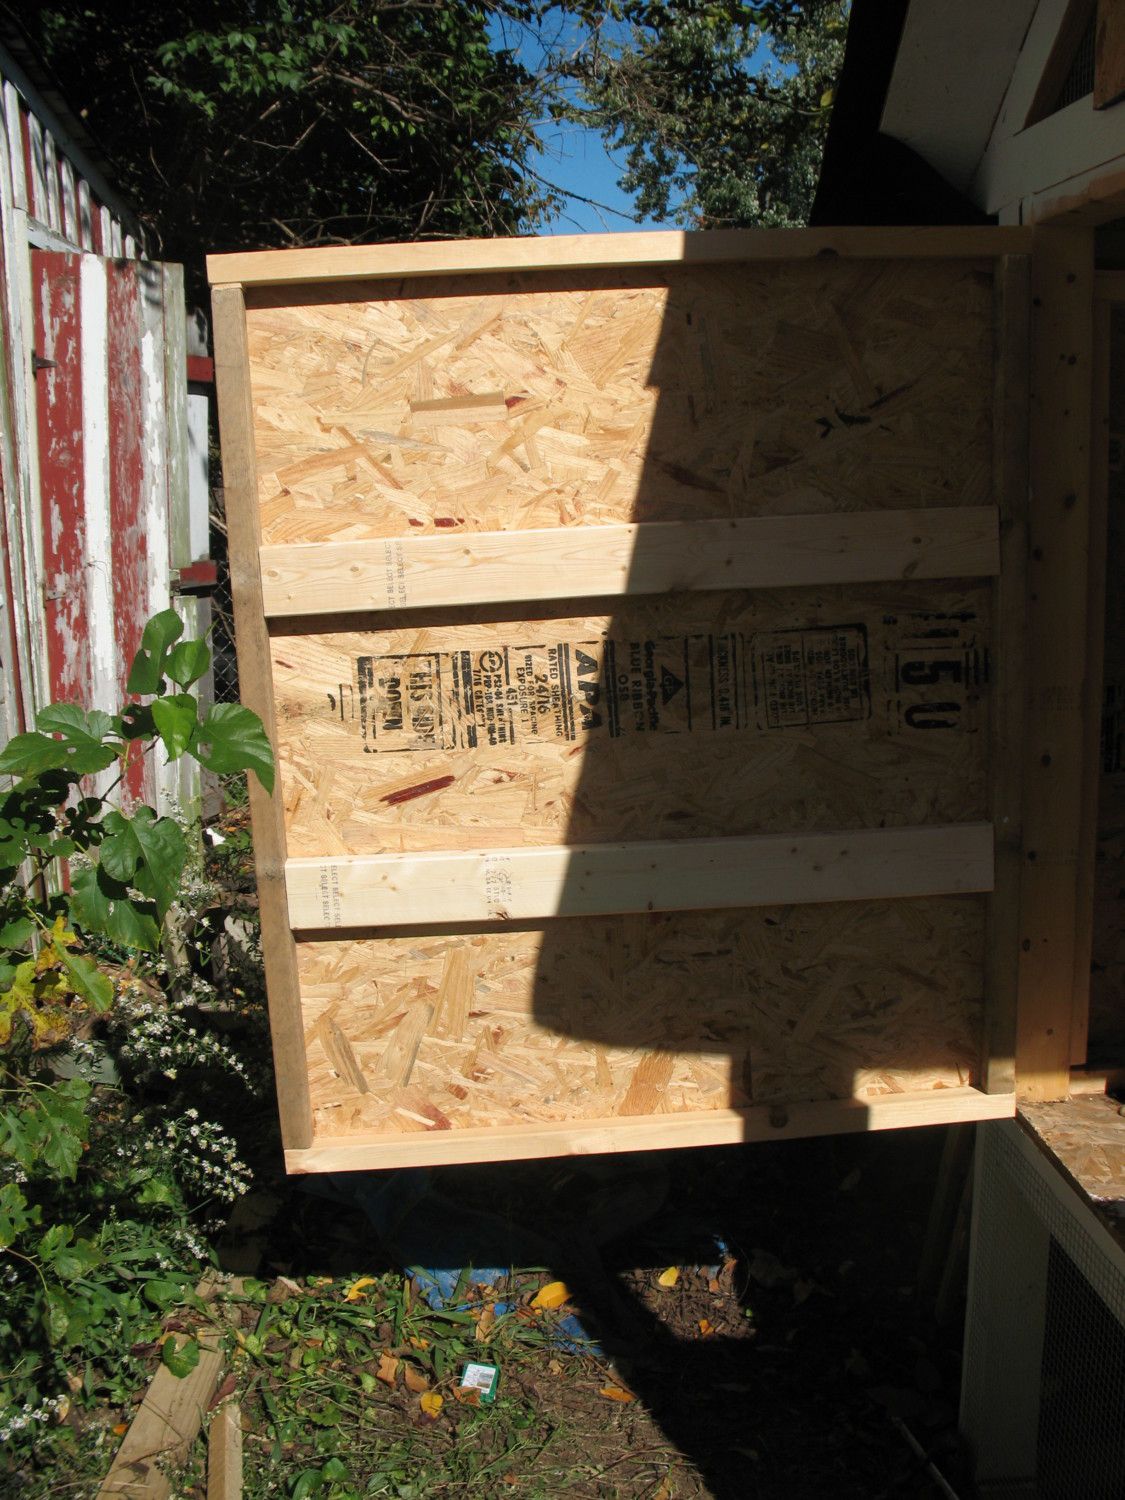
Almost done! You can see that I have put up the walls and build the door to the coop. I cut the windows out of the OSB using a jig saw. Also all the hardware cloth is up.
The door swings all the way open, it makes for easy cleaning of the coop. The door is build with 2x2s and 2x4s.
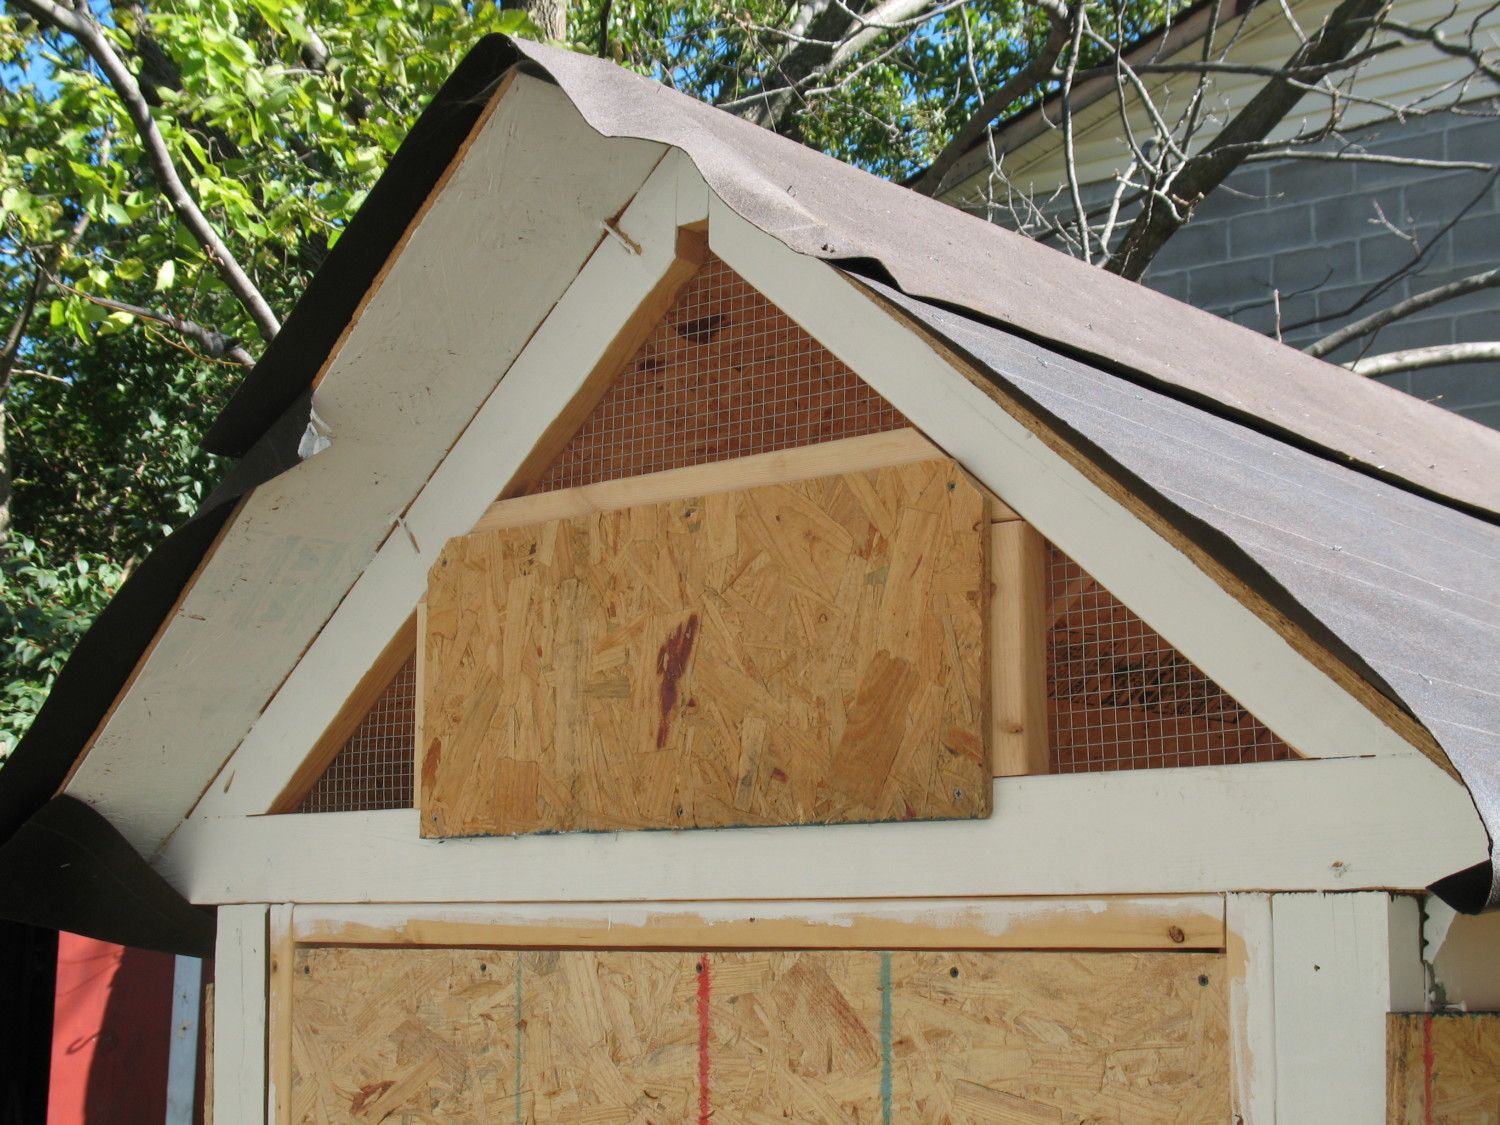
This is on the wall with the door to the coop. Framed a rectangle into the truss, then covered it, leaving those triangles for ventilation. The same is done on the side with the pop door. Don't mind those missed screws on the roof, and that its not even... it was starting to rain when we were getting the roof up, there was no time for perfection.
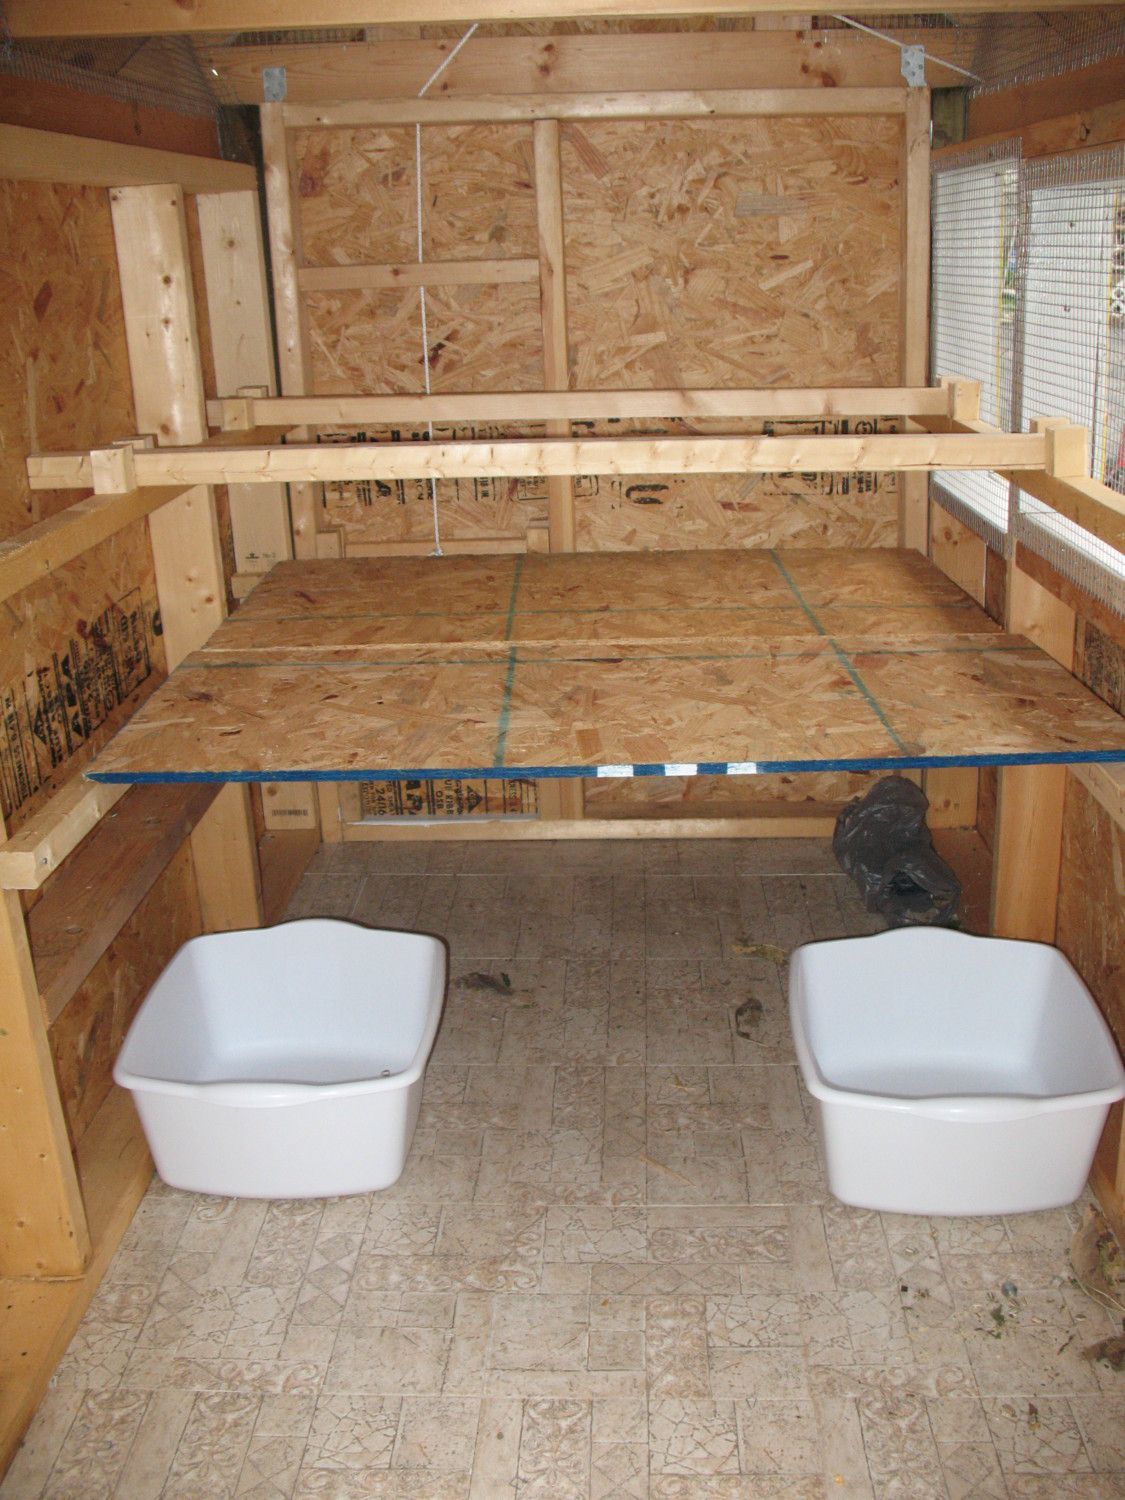
Here is the inside of the coop. I used vinyl floor tiles for easy clean up (there will be pine shavings on top of the floor). The white buckets are my nesting boxes. Above them is the poop boards. Above that is the roosts. In the end I removed the farthest roost and poop board because they weren't using it. Also you can see the rope and pulley for the pop door.
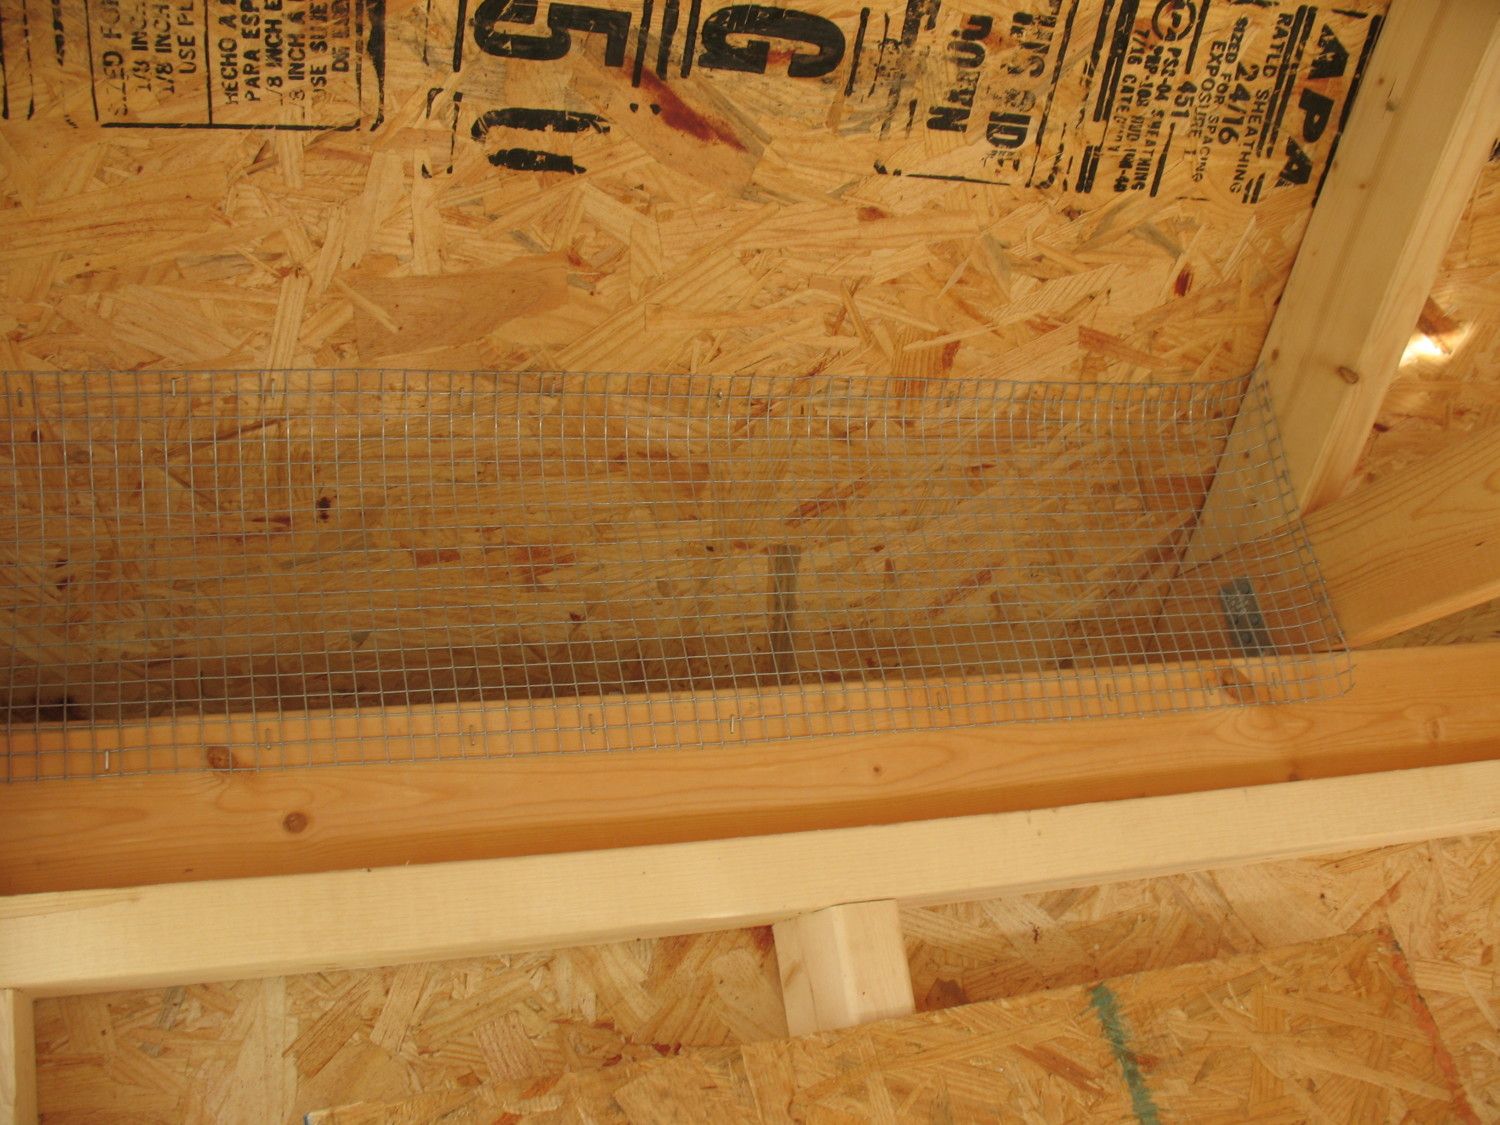
It may be hard to tell what this is, let me explain. This is inside the coop. the OSB board there is the roof. I attached hardware cloth from the roof to the wall inside. This is because the roof overhangs the wall. I did this on purpose, for ventilation. Now no critters can get in (I hope!).
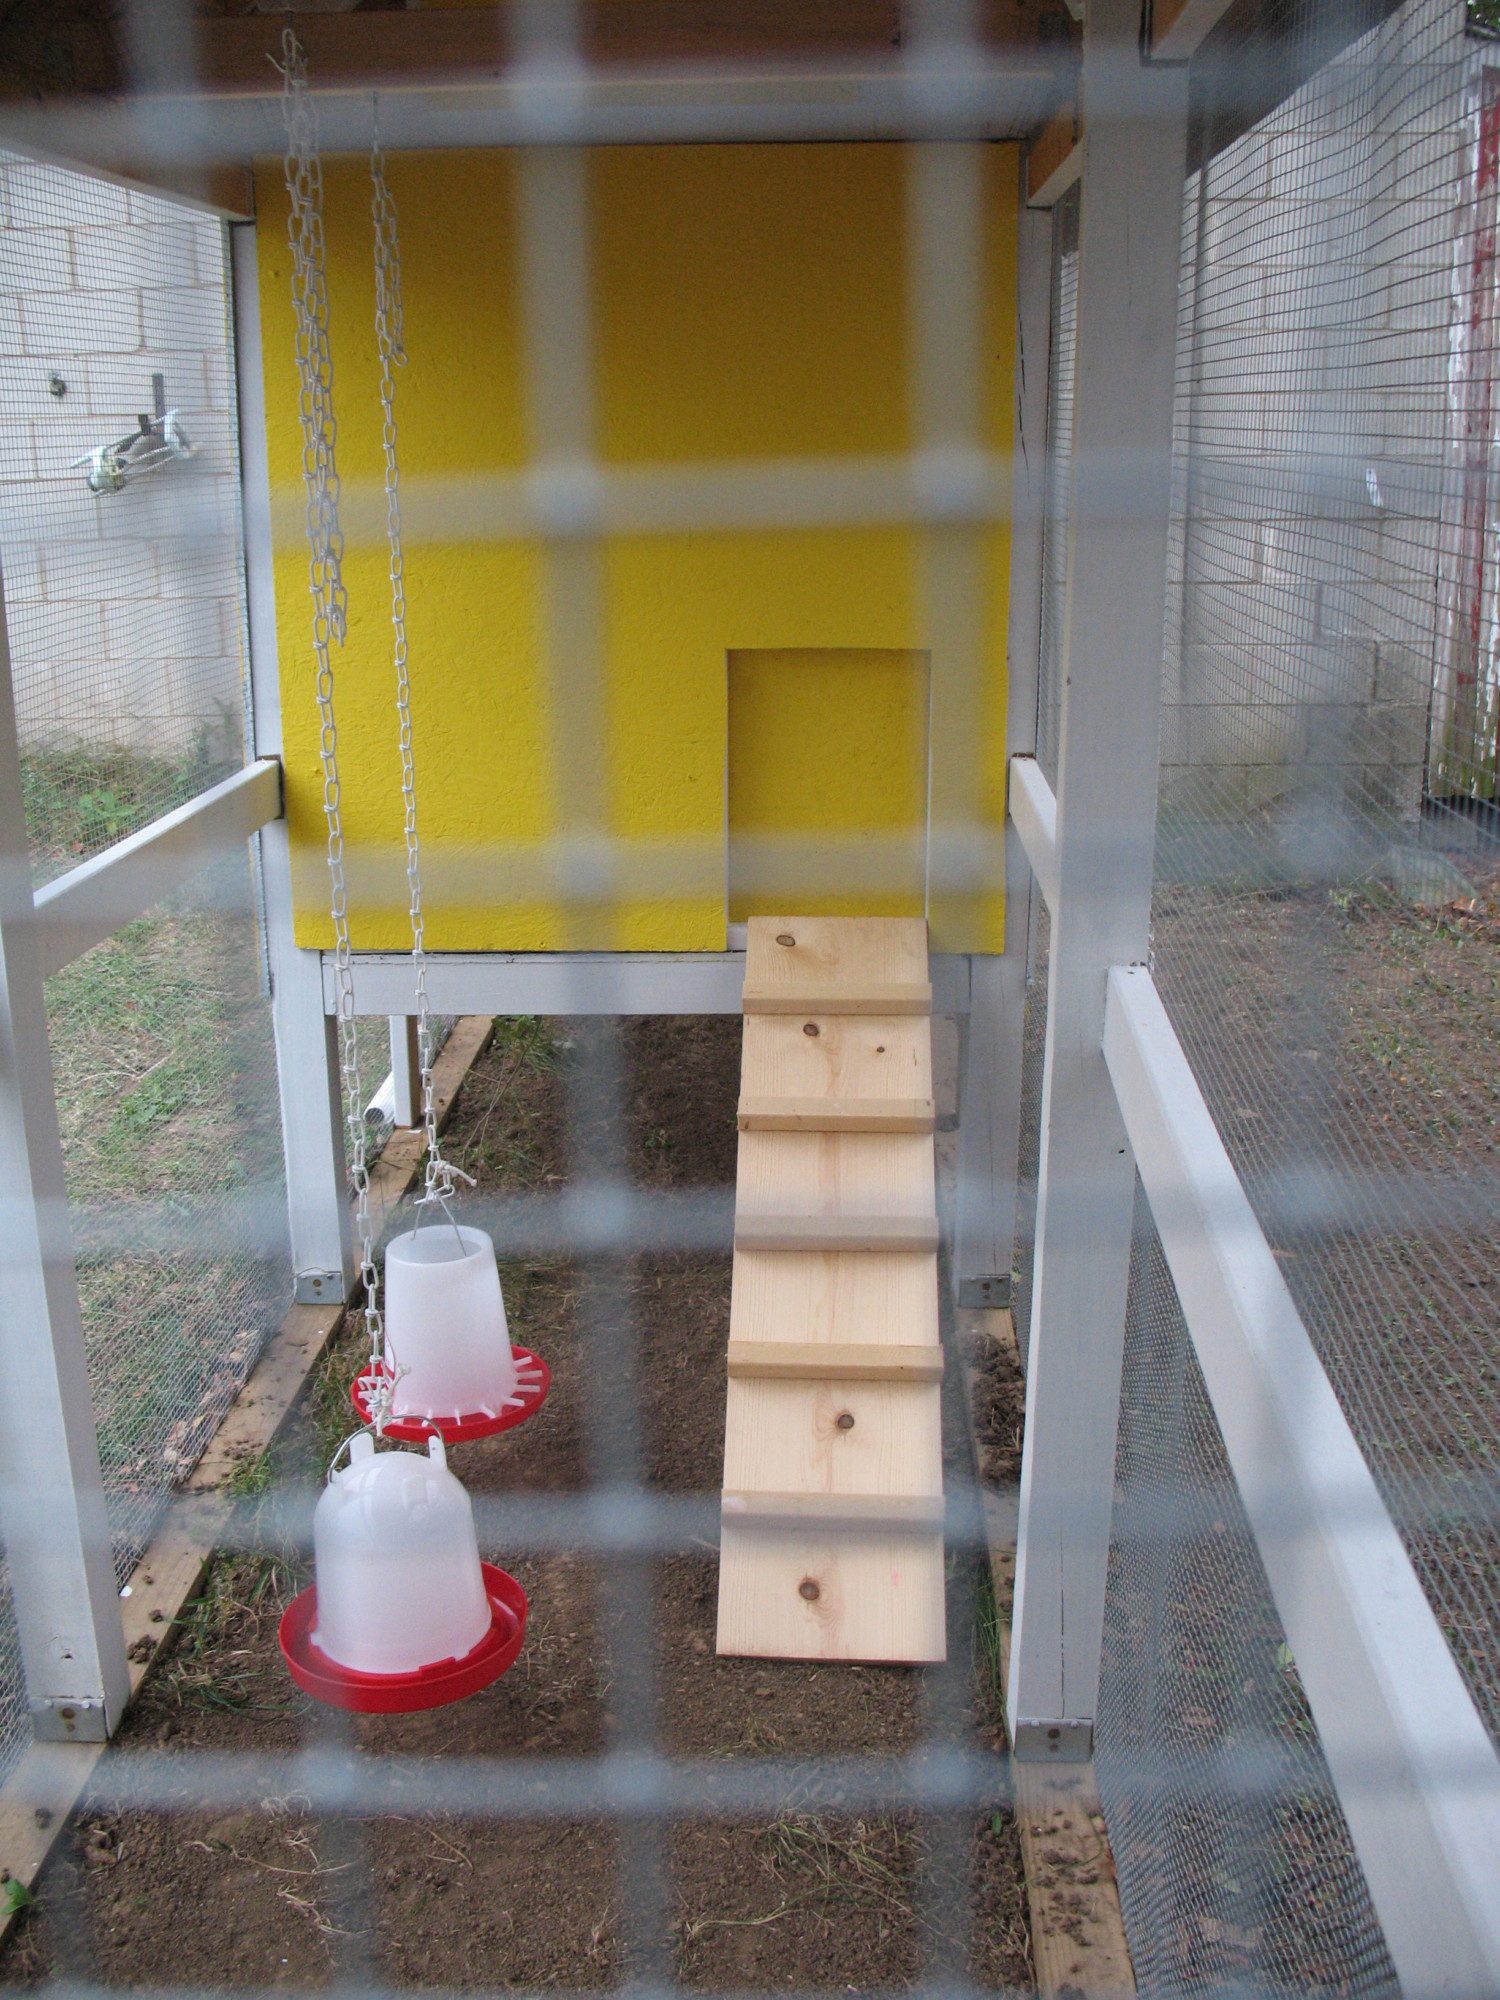
This is inside the coop. You can see the ladder (built with a 1x12, and 2x2s.) and the hanging feeder and waterer.
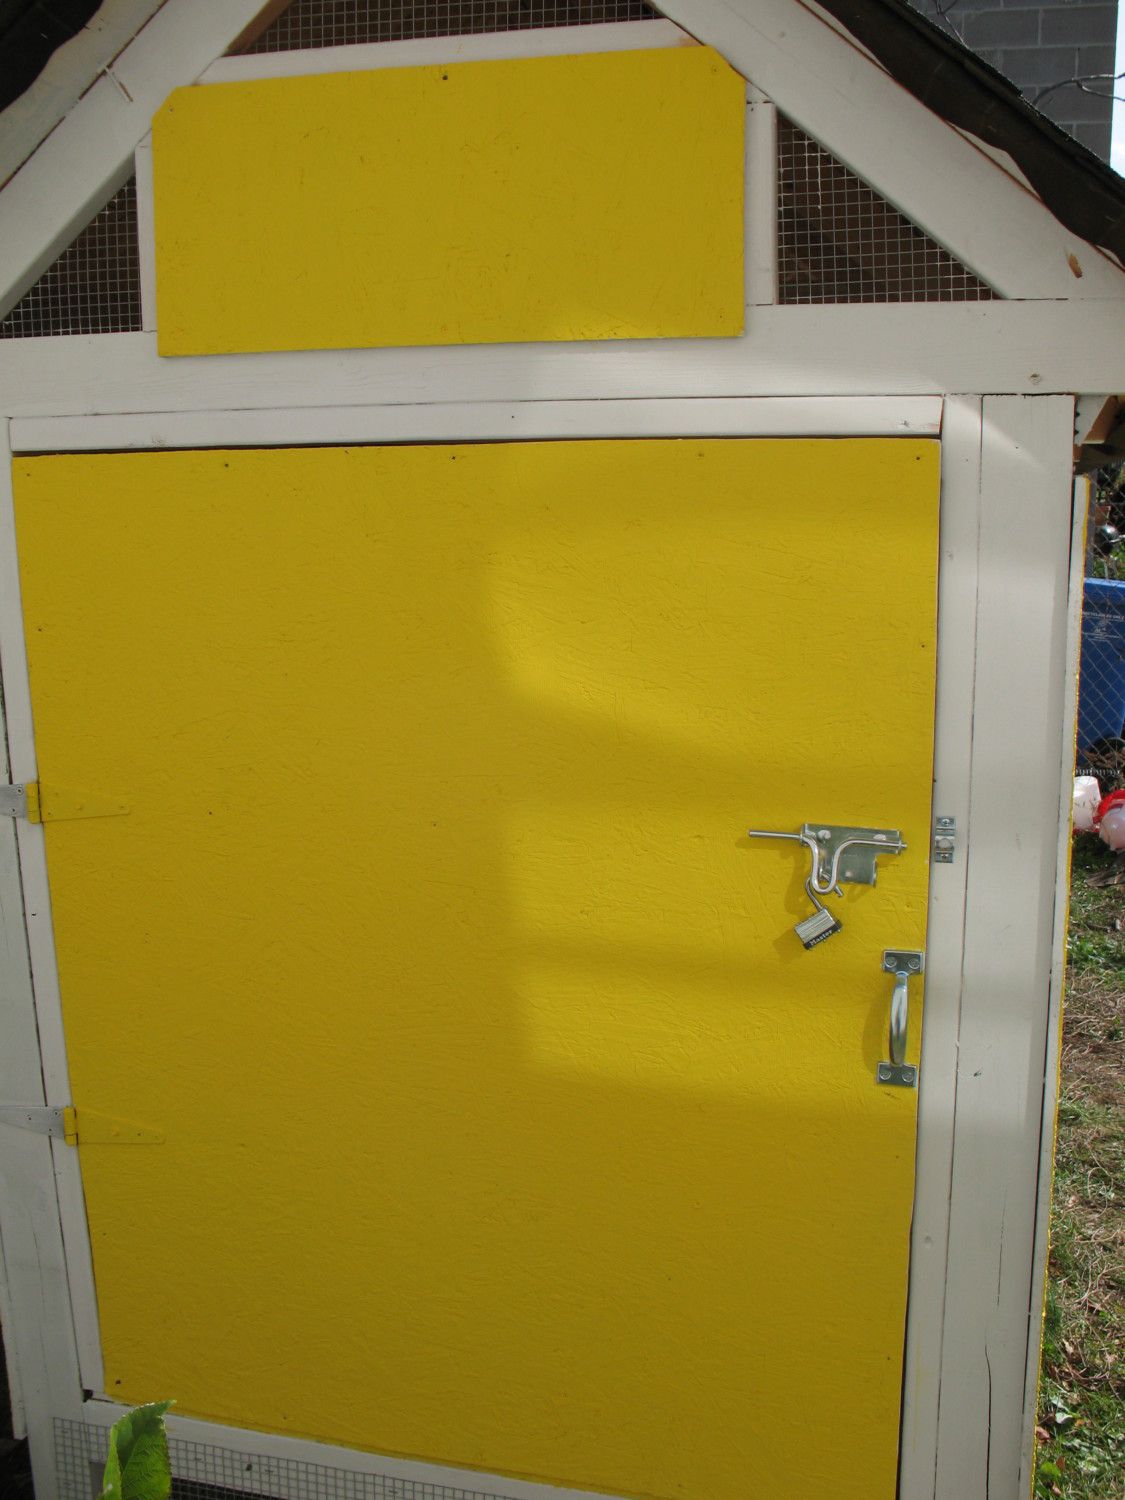
Freshly painted door and shiny new hardware. And... drum roll please...
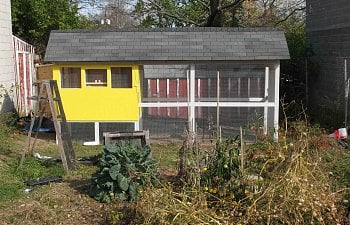
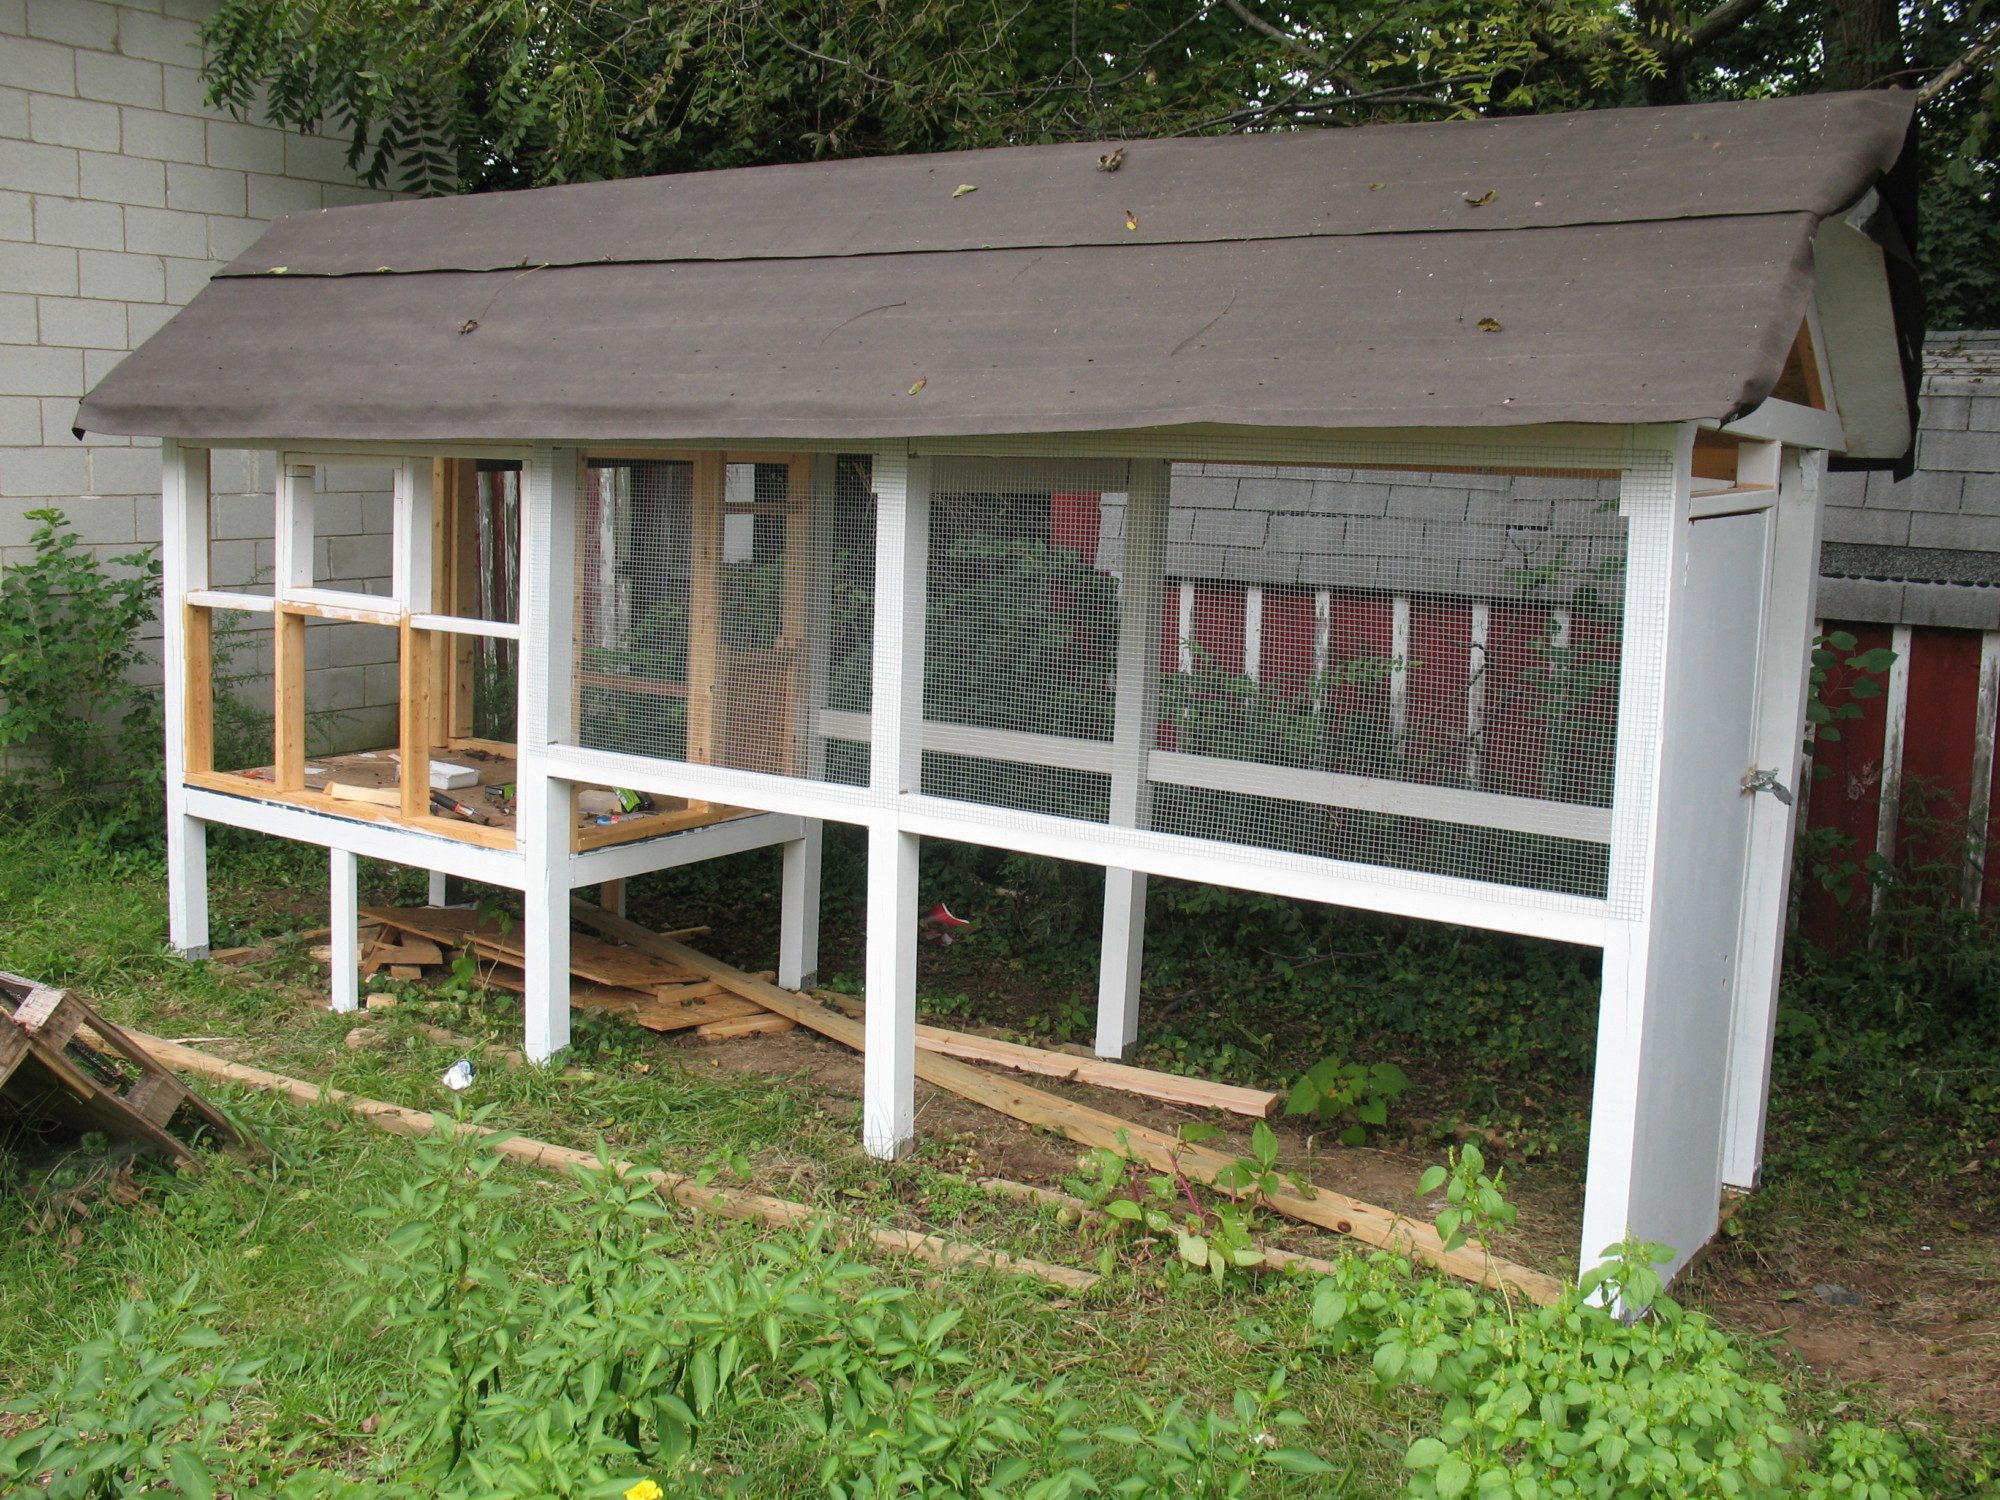
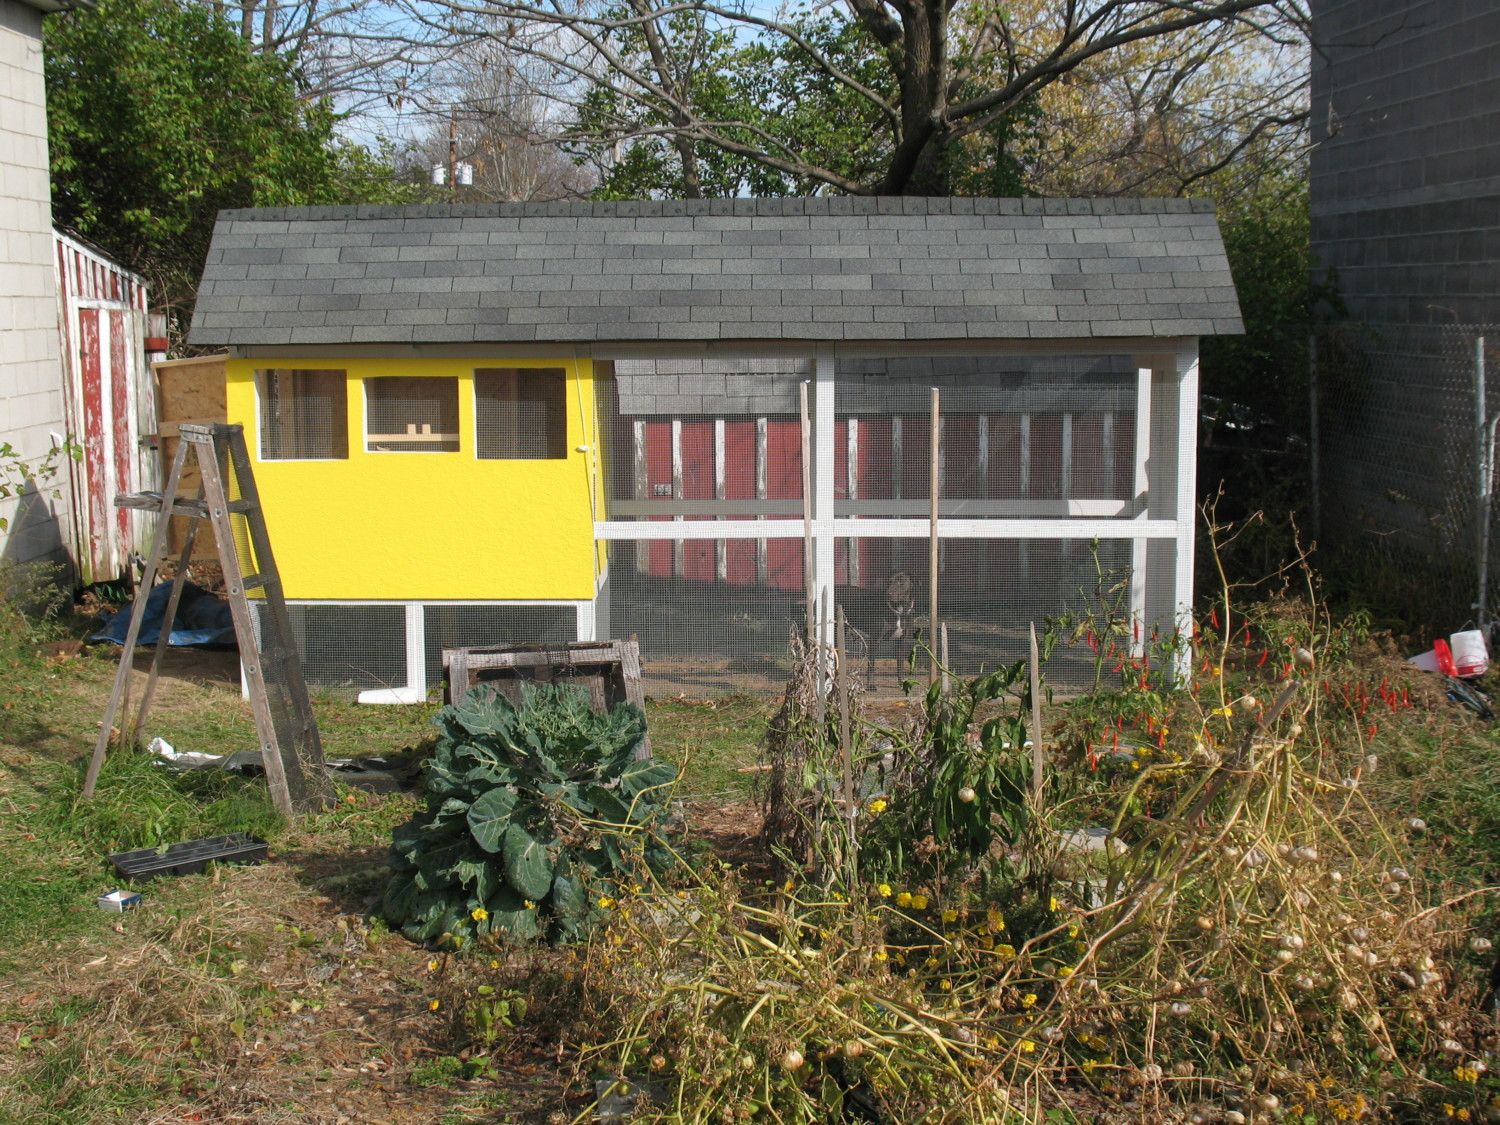
The finished product. Roofed and painted, chicken ready. This was taken in November, so please take no notice of our dieing garden. If you look closely, you can see my dog Daisy checking it out. We went with Yellow and white, kind of egg colored theme. Now where are the chickens? That came a couple weeks later (December, not ideal for getting chickens, but as I said earlier, I am impatient).
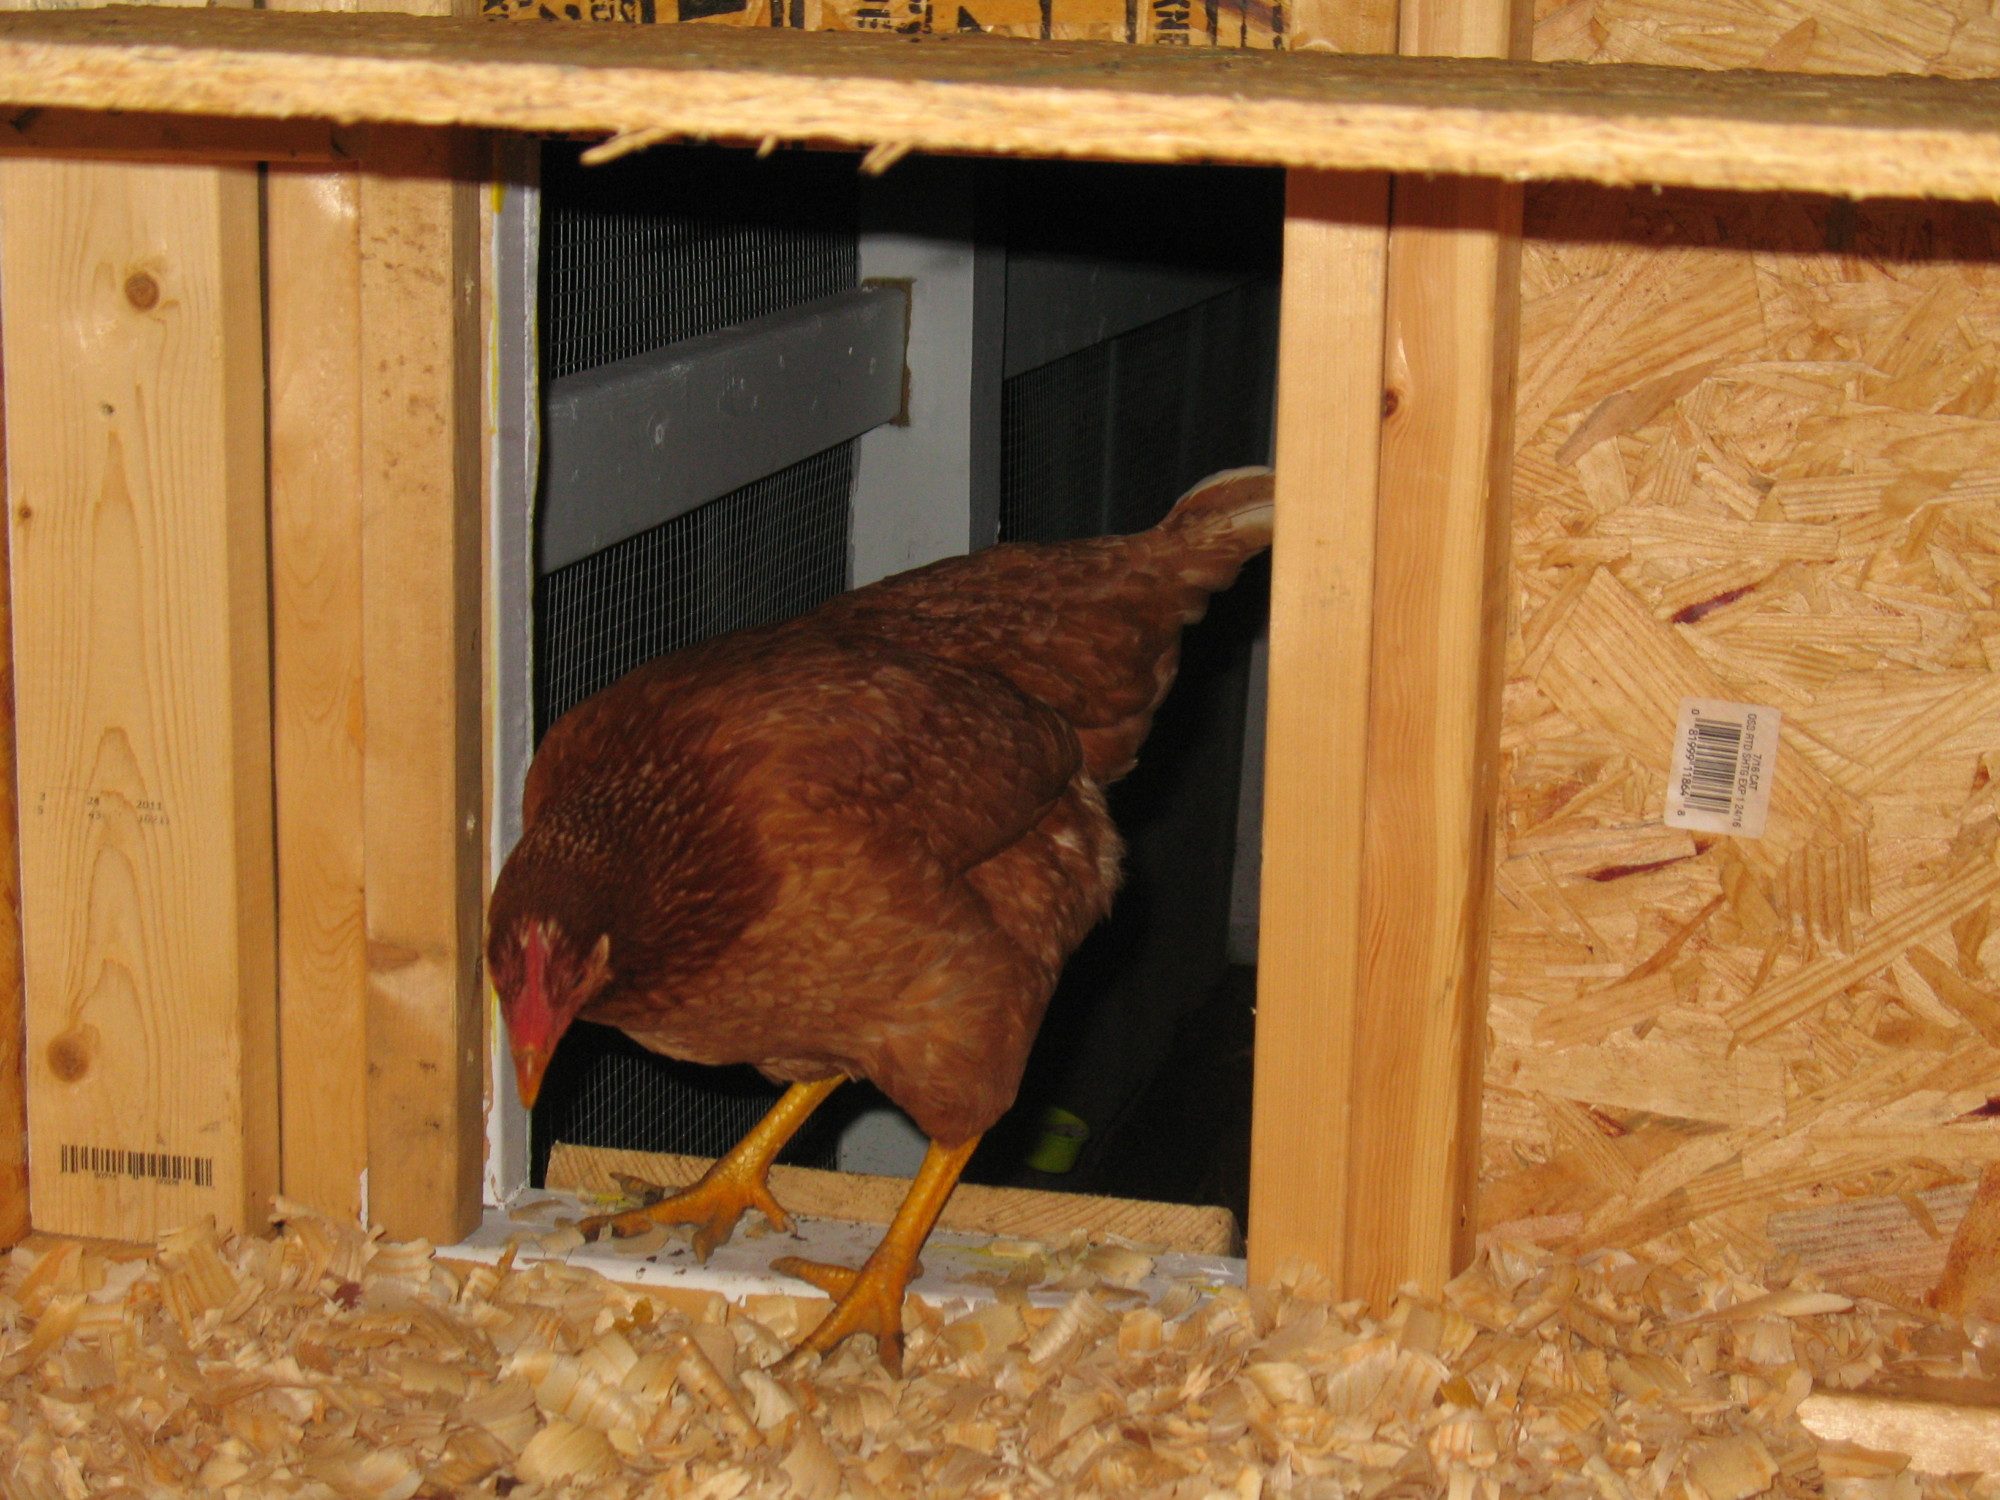
Here is Ginger checking the place out.
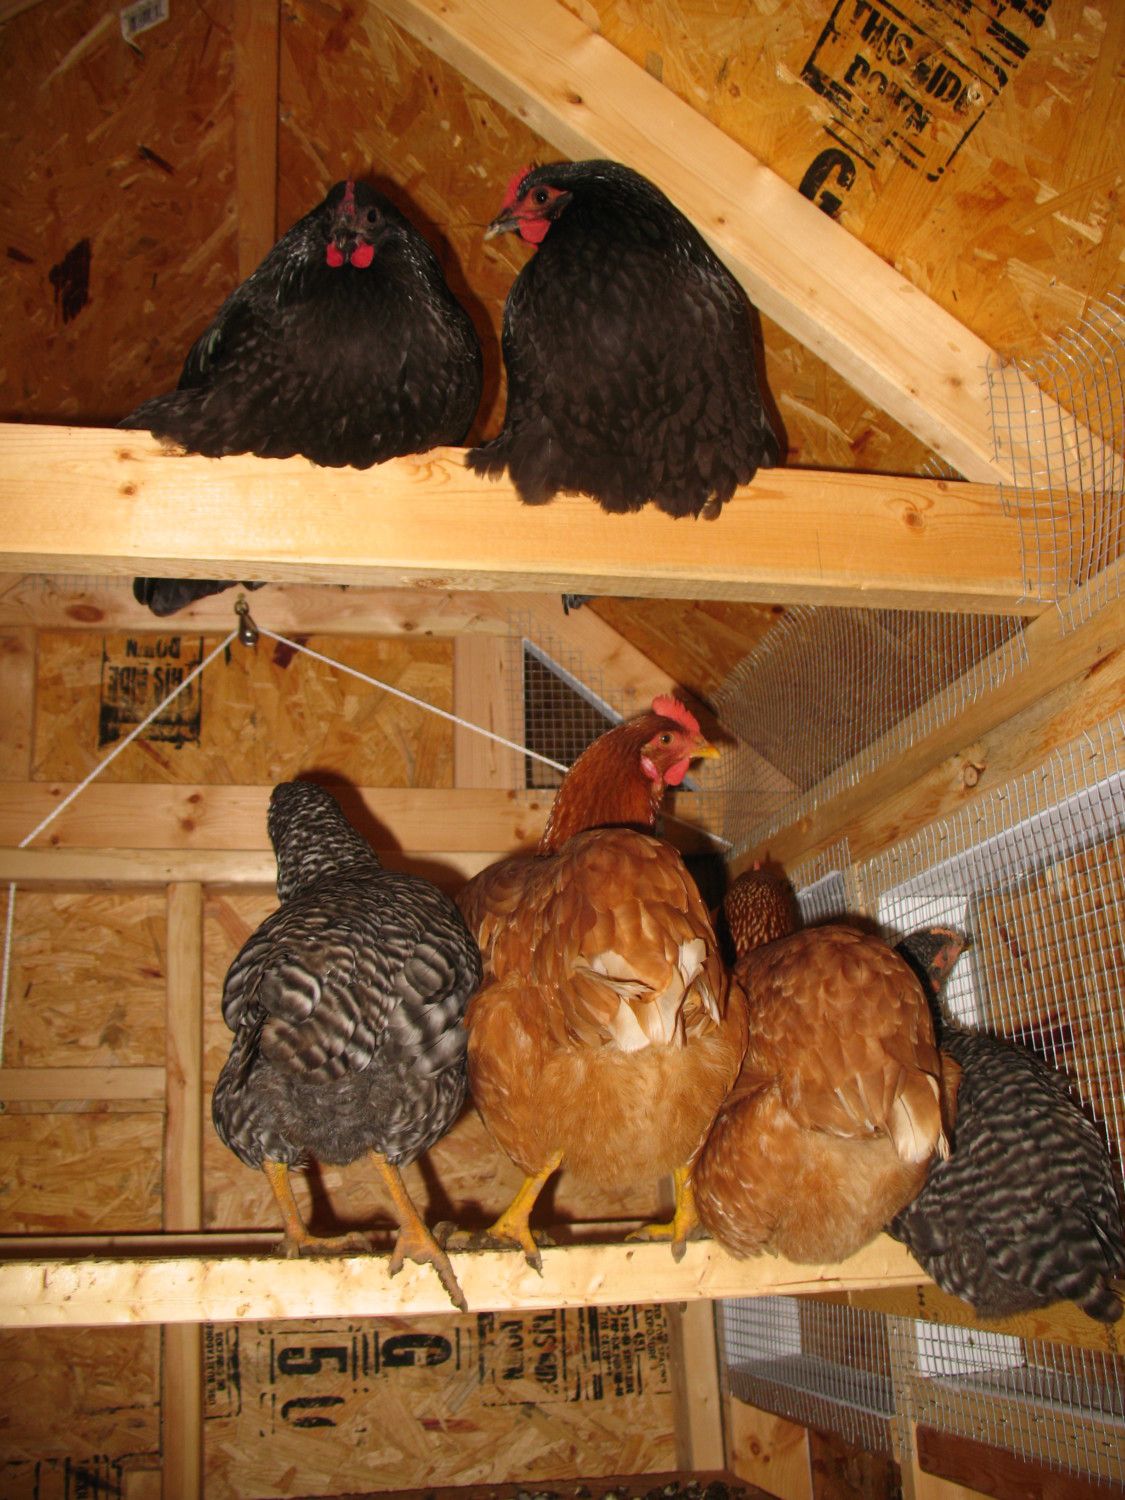
And this is all the girls. Starting from the top left, going clockwise, we have Snap, Poppy, Seed, Ginger (Ginger and Snap), Salt, and Pepper.
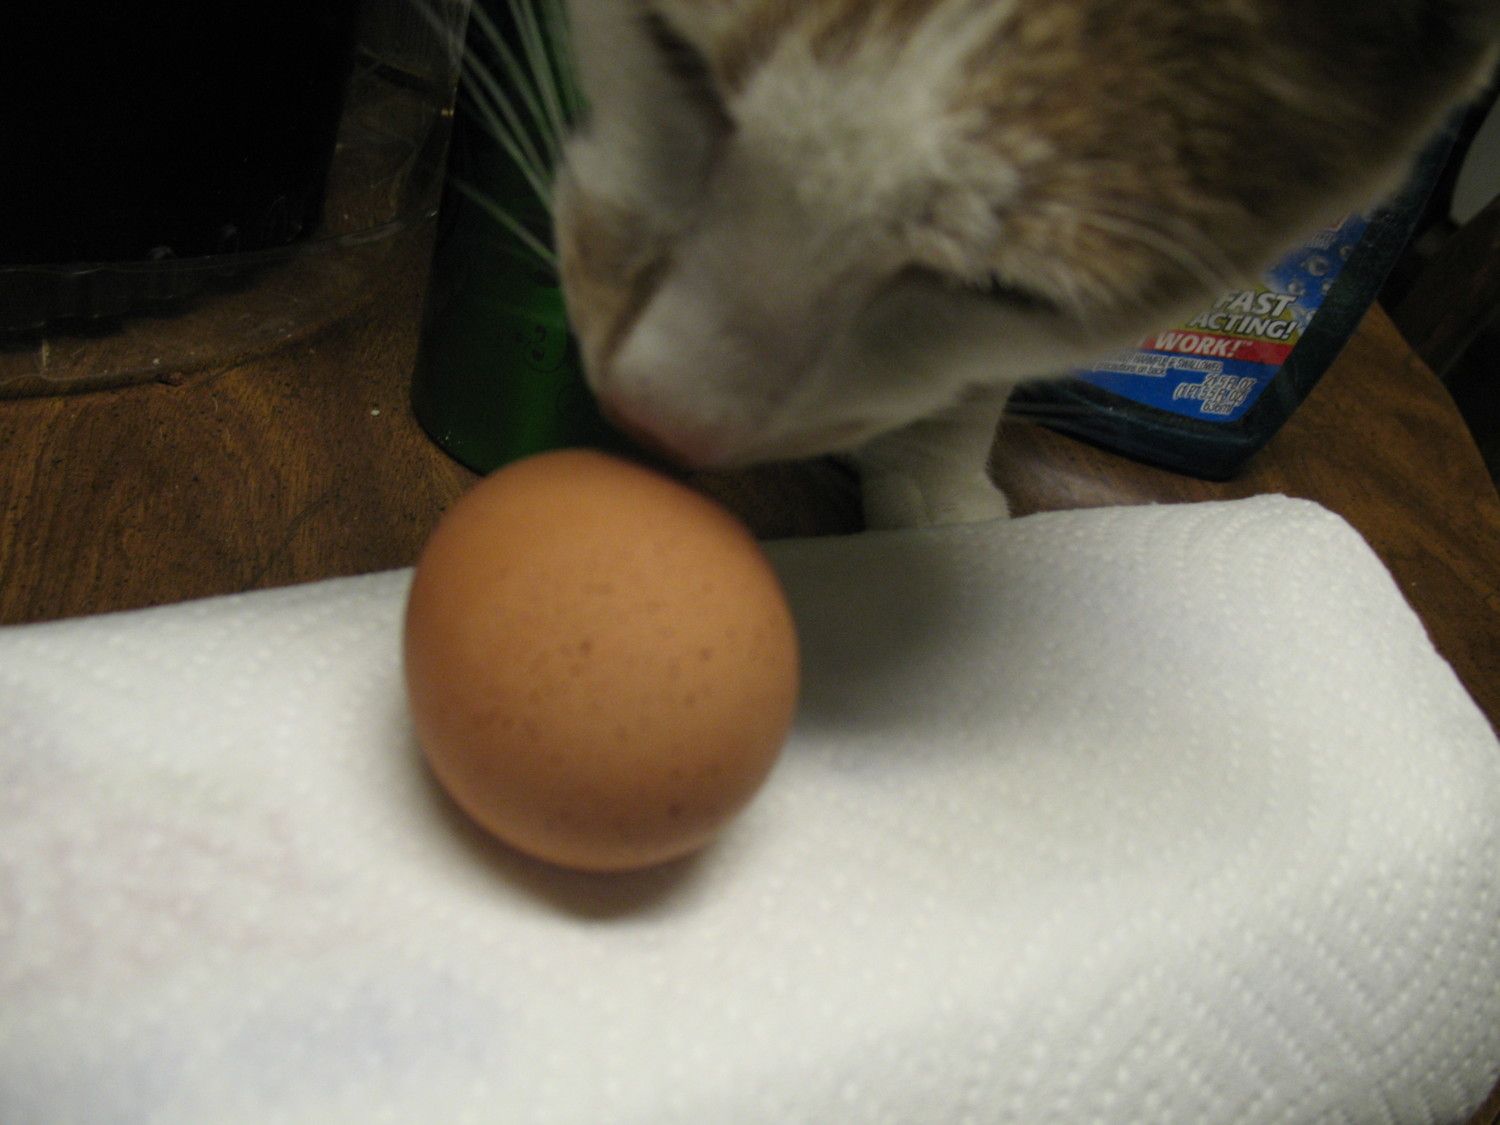
And not long after (a couple days) we got our hens, we got our first egg. That is our cat Luigi (yes he is skinny, and there is a chubbier cat Mario, and yes they are brothers) making sure this is safe for our consumption.
Here is what I made with our first eggs. It is a tomato sauce with chick peas and feta cheese, then eggs on top. Yum Yum.
Here are the the girls, enjoying there coop. The reason i took out the farthest roost, is because of Poppy and Seed up there. They didn't need the extra room, they used the roof truss.
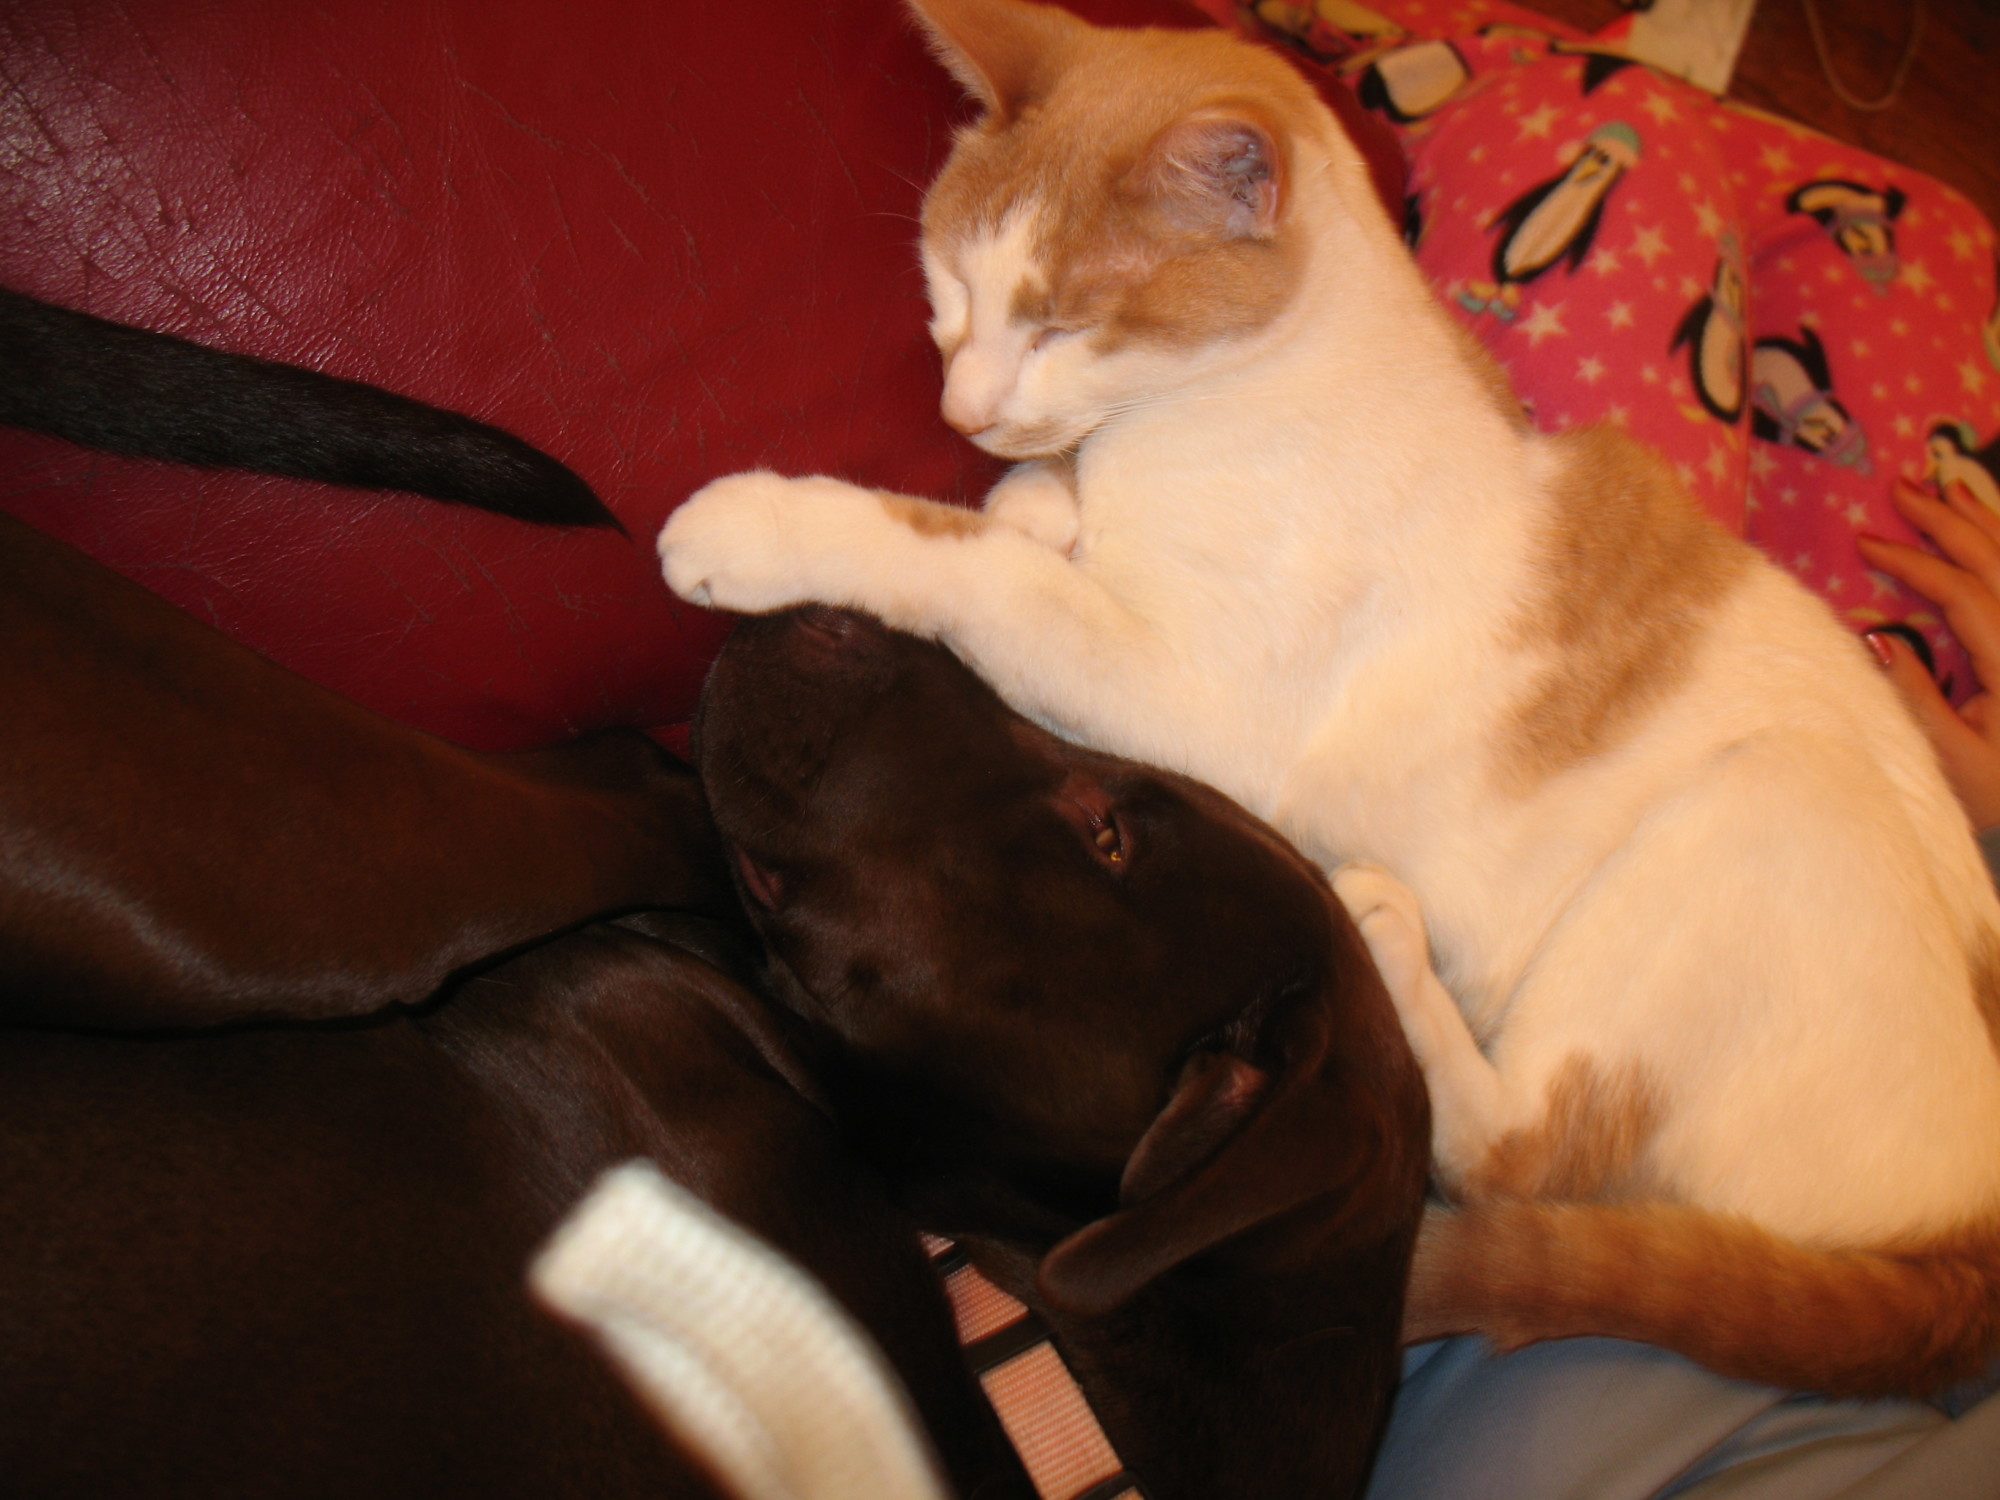
And just for some extra cute, here is Princess Daisy and Luigi cuddling up together. Thank you for reading. Feel free to message me with any comments or questions!
-Daniel
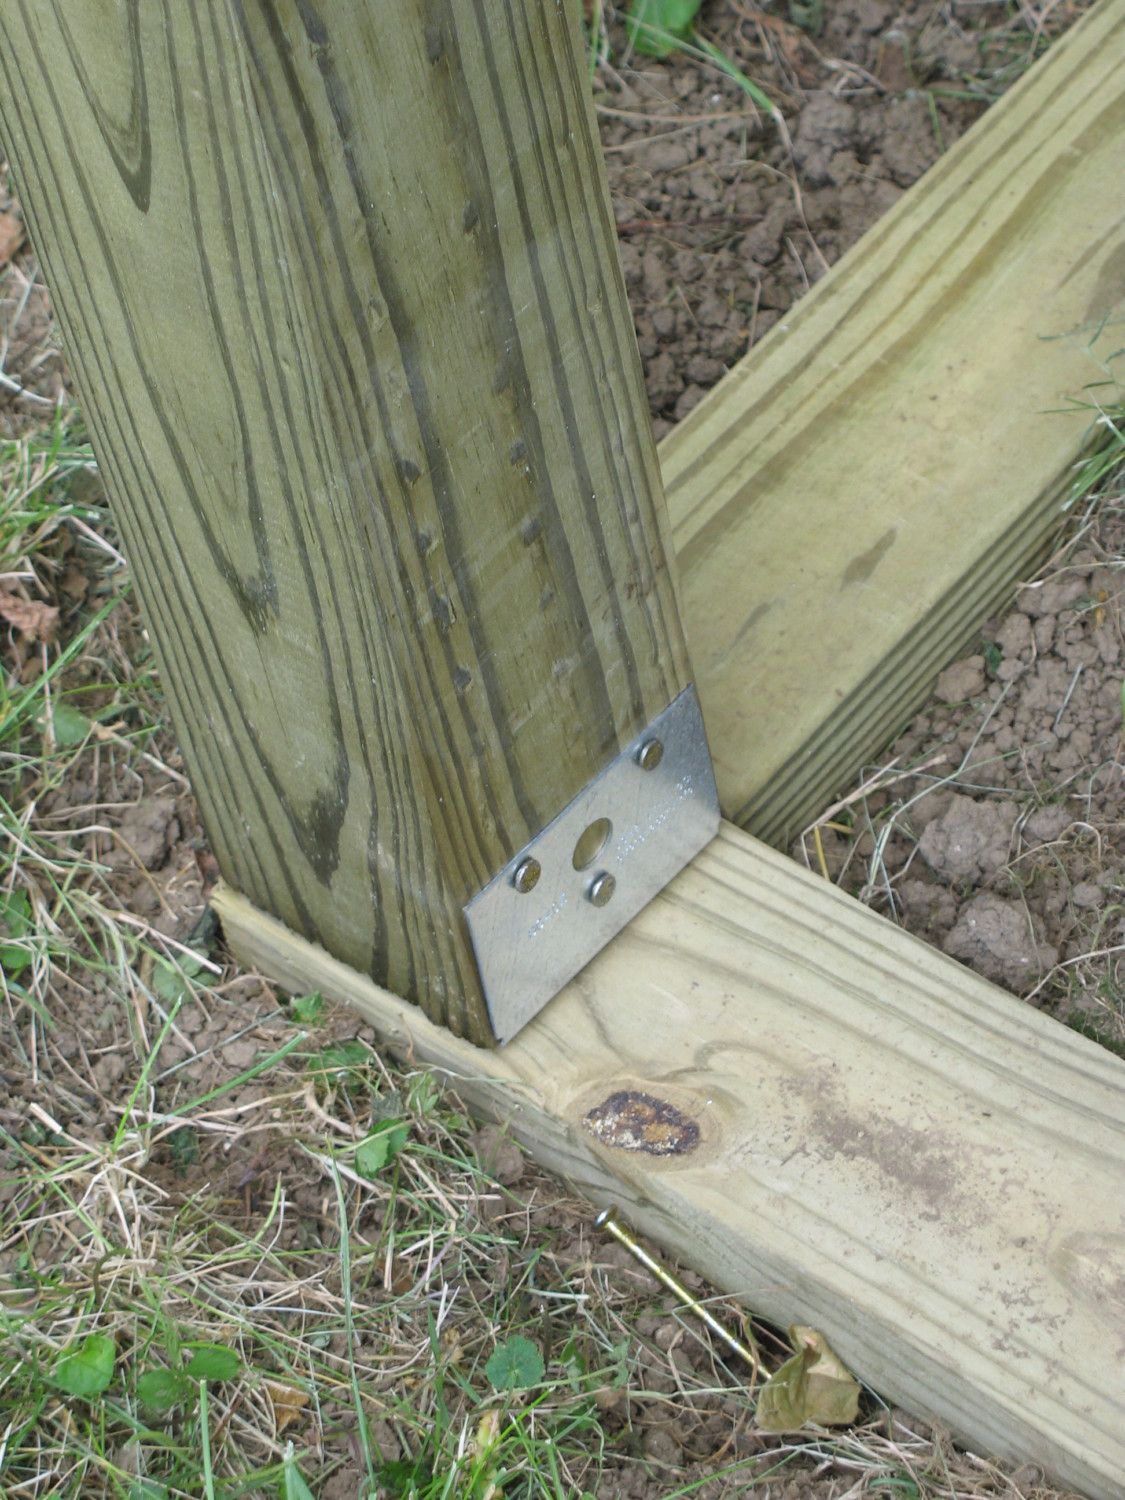
Here you see how the 4x4 vertical beam was attached to the base. That metal piece is under the beam as well. So it was nailed into the base boards, the beam placed on it, then it was nailed into the sides of the beam.
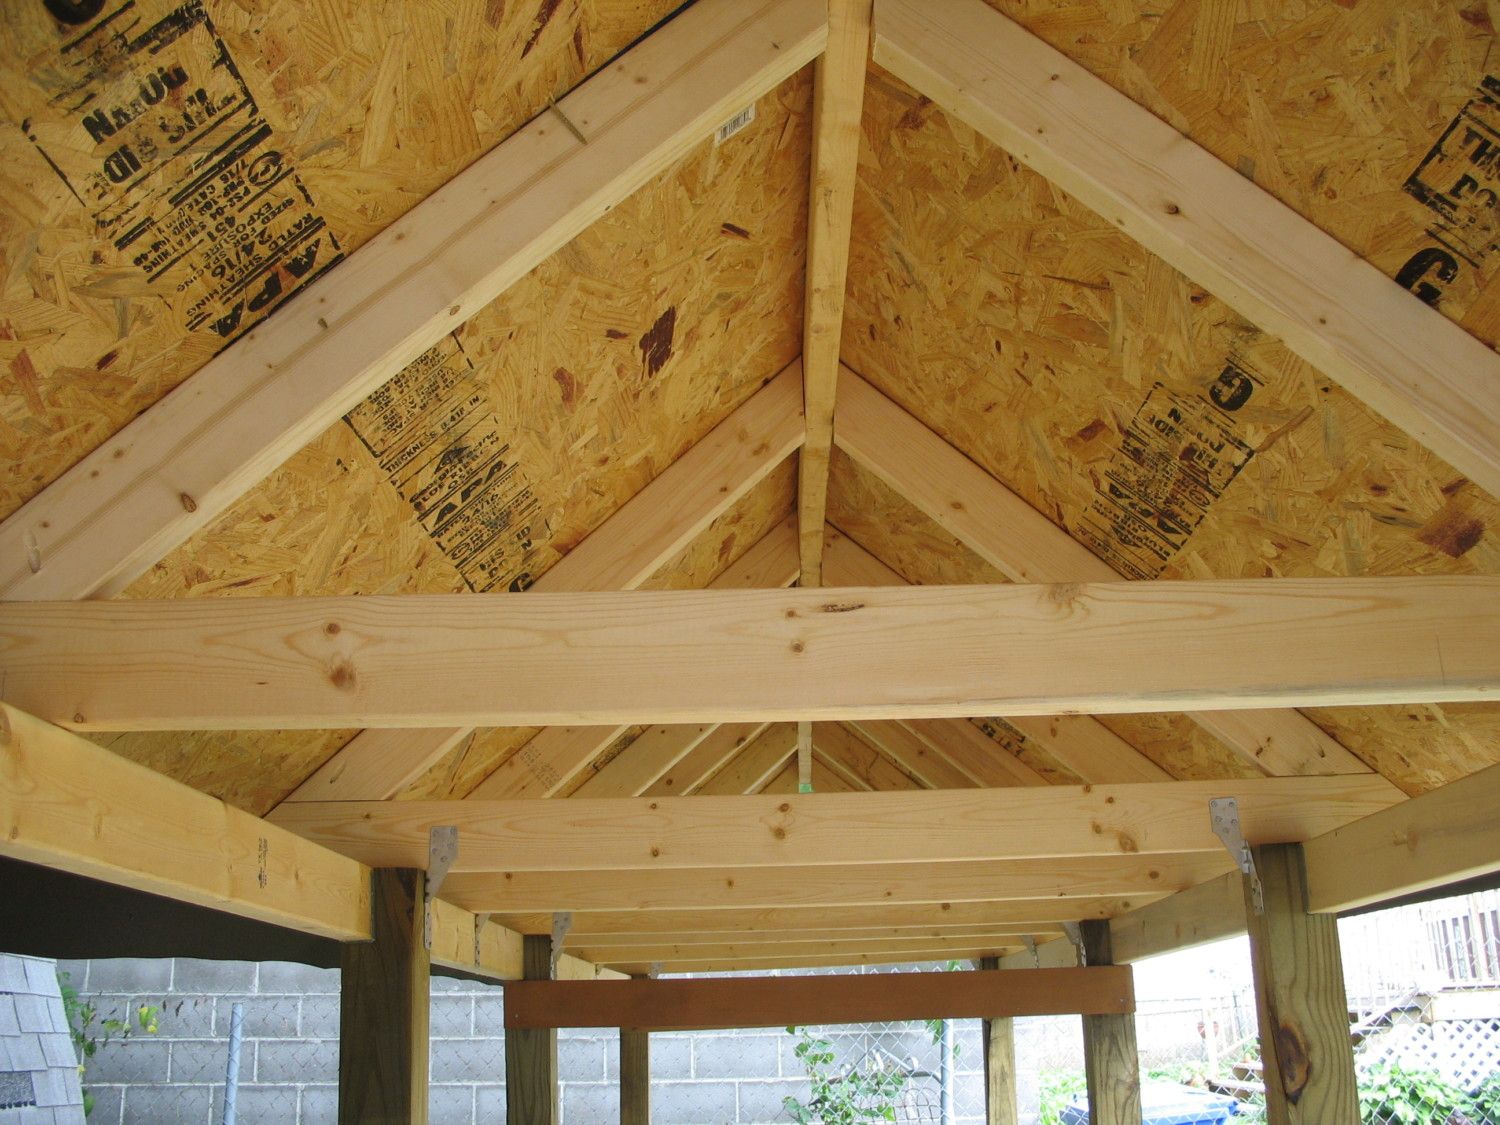
Here is a view from underneath. I attached then trusses to the structure using hurricane ties (HEY! I remembered the name of that hardware piece). Then up went the 2x4 in between all the trusses. We had to bend and hammer it into place (because each of my trusses wasn't 100% identical). Next we had to cut the OBS for the roof to size and attach them to the trusses (I uses wood screws).


-Daniel