I have gotten so many good ideas from you guys
I thought I would share the fruits of our labor

What do they always say,
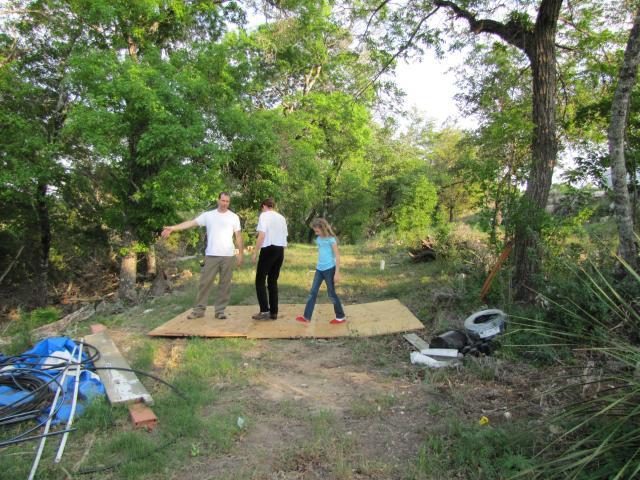
Location, Location, Location.
Well here is ours.
We chose an area that was shaded from the west sun
(important here in South Texas), close to the garden and near an area that
we are going to make our compost pile area.
We are going to be using mostly recycled, reclaimed, reused, renewed...
(you get the point) materials so we decided to layout the base size from
the material we have on hand.
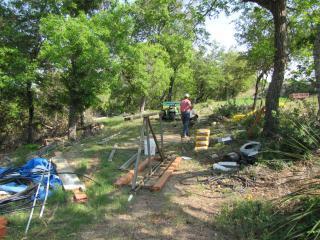
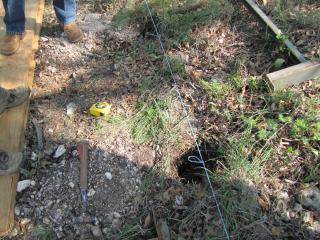
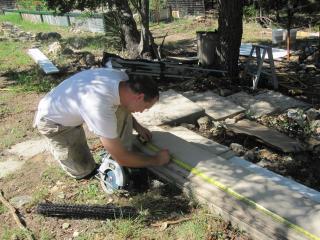
Our first official purchase (concrete for the building footings) and we started
digging our footings and making everything square. If you need an good way to
lay out an square up an area you can use the 3,4,5 triangle method out lined
at (http://www.wikihow.com/Use-the-3-4-5-Rule-to-Build-Square-Corners). Nail
some stakes about a foot or so past where you want your corner to go so that
you can work directly at the corner without messing up or having to move your
lines when you start building.
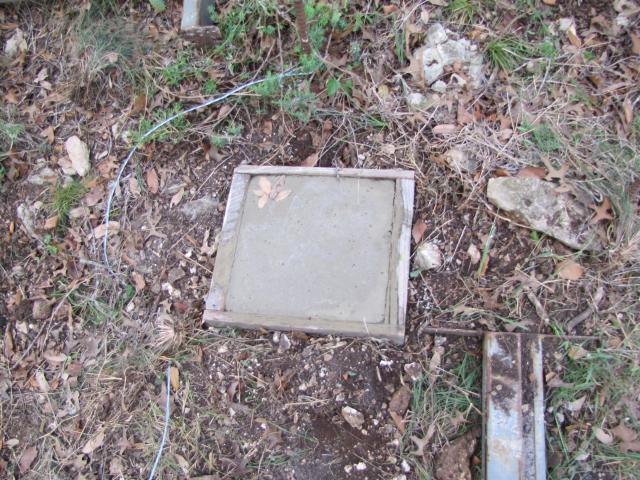
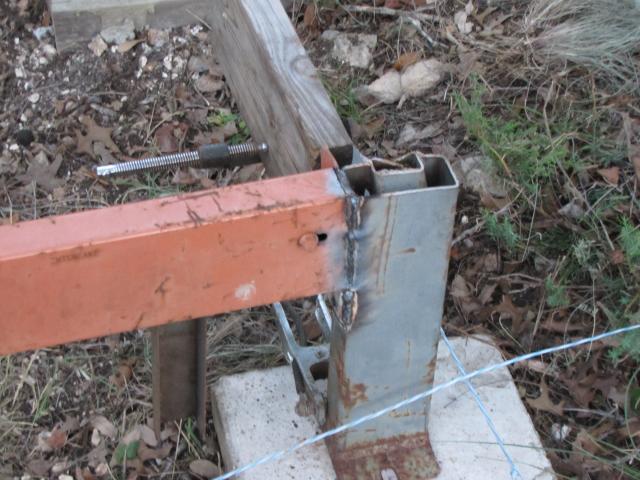
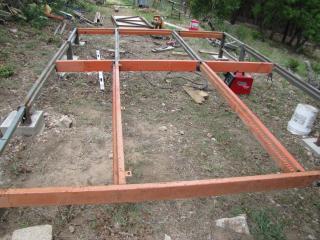
We reinforced the concrete holes with rebar and framed it out level and square
We will be using warehouse rack material for the base of the building.
We set the first corner and welded it in place. (I am not the best welder but
this corner is not coming apart either.)
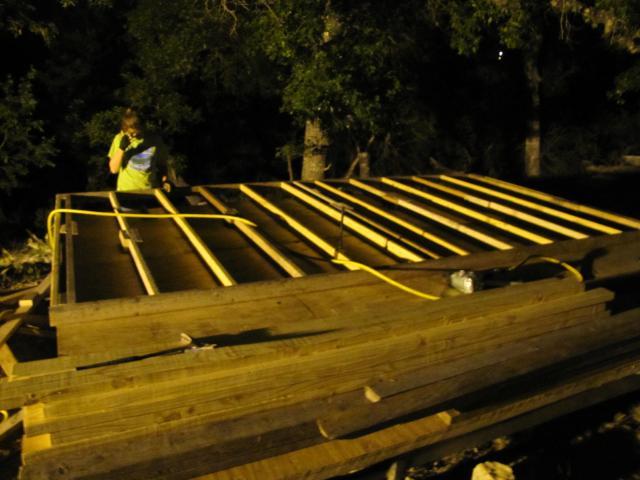
Cross bracing and more cross bracing.
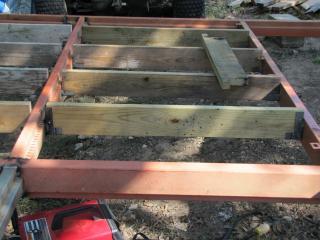
Floor rafters and more cross bracing
We have lots of scrap material so blocking was no problem.
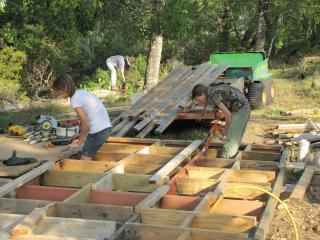
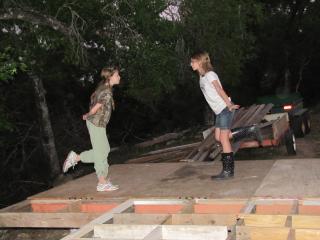
After caulking the rest of the subfloor,
my girls decided to do their version of the chicken dance.
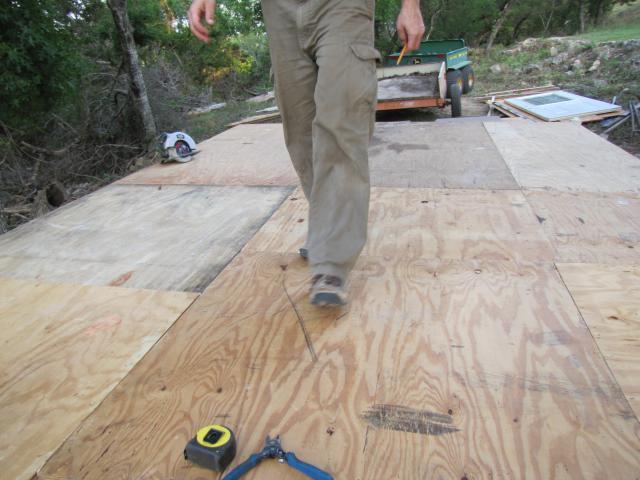
You can attach the deck material with screws, but some adhesive and a coil
nailer will speed the job along and that floor isn't going any where.
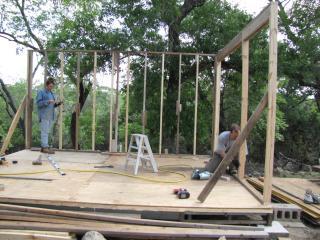
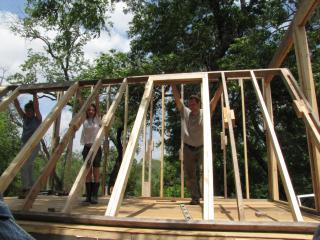
We finished the subfloor and couldn't wait to put up a wall.
So on with the Lights
I bought some 8ft studs to put between the ones I created by "scabbing" pieces
from my lumber pile (you can see the ones I sandwiched together with blocks).
If you need to know the basics of building headers for doors and windows try
this link. http://www.ehow.com/way_5626578_instructions-building-door-window-frames.html
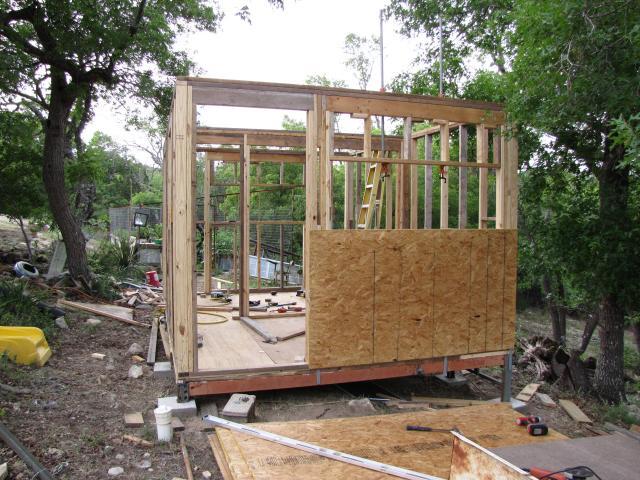
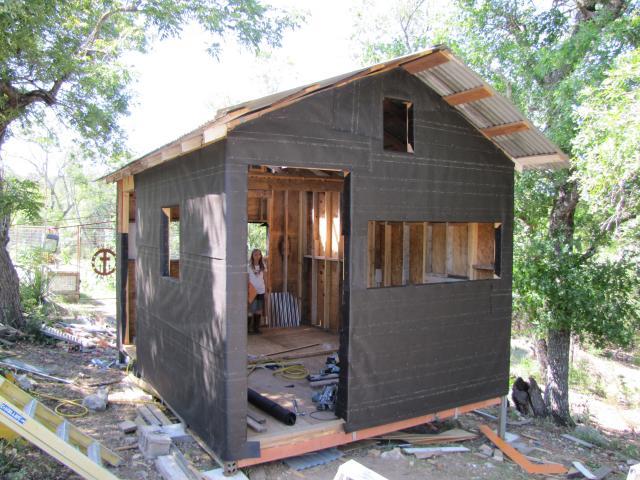
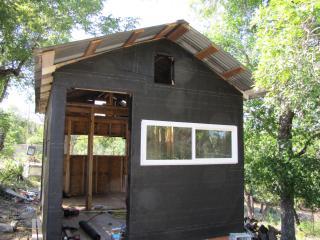
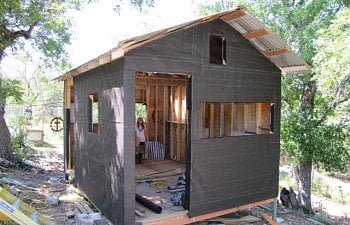
We started adding sheathing and framing the windows. Sheathing not only adds
strength behind your siding (we will be using some leftover cement fiber board
from building our house), but it also helps keep the building from racking side to side.
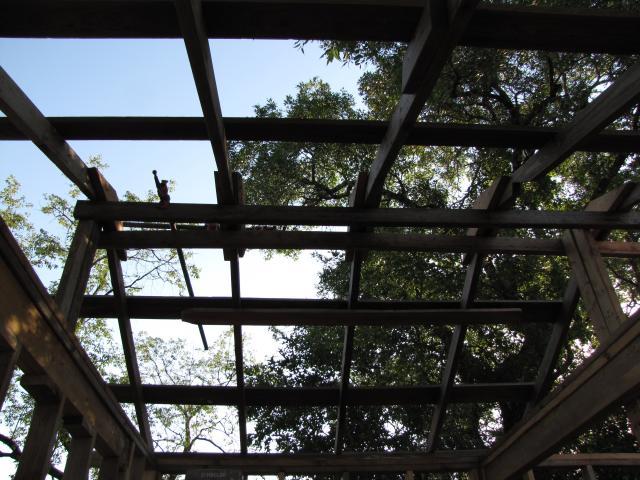
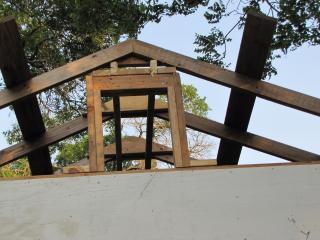
We were able to use the rafters and tin from a roof shed I took off from over a
mobile home several years back (thanks Duane).
Almost all of the ply wood used for sheathing and flooring came from a
privaite school drama production that I got about a year back.
It makes for some colorful and interesting sides.
There are great discussions throughout this sight on ventilation and I might
not have enough but I have put big windows and some vents up high along
with leaving a lot of the area under the roof for good ventilation.
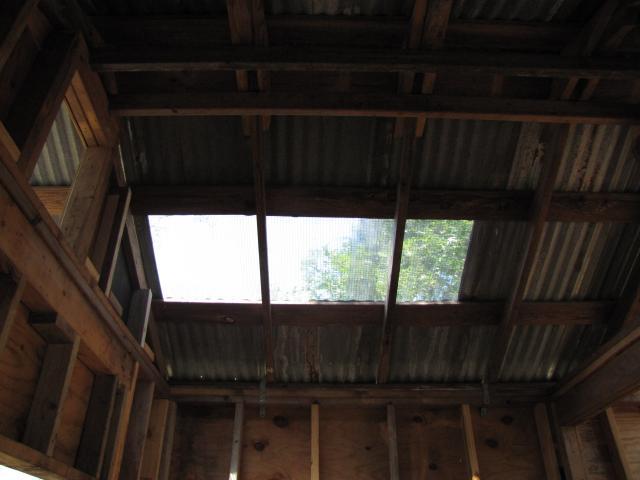
I decided to put in a skylight on my work side of the house so I used clear
corrugated plastic roofing and for a little extra protection I put 1/2 hardware cloth
on the inside of the skylight (just in case some critters try and go for a snack some evening).
By the way the curves of the plastic an tin don't match so you will have to work
with the fit if you are overlapping pieces in the middle and not just edges.
Roof and Ridge cap install.
(Because I used recycled tin I will have to a little caulking to do)
Finished roof caulking (purchased a gray/silver silicone that is made for metal roofs
and it seemed to work great)
I would have loved to have used a house wrap like tyvek or such but settled for
a 15lb felt to wrap the house in. This will keep out the drafts and rain that might
get around my siding. I started along the bottom and worked my way up overlapping
each sheet by a few inches. Make angled cuts at window and door openings and
fold over and staple everything tight
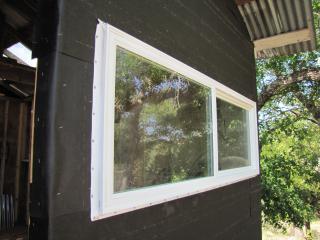
I put in my first window and secured it with 2” roofing nails. I tapped the nails
in place with a hammer and then used a 4” block of wood to drive them all the
way in as not to damage the window. If you are planning a future project and
have some room for storage you can look for clearance or returns at your local
home improvement store. I got these Pella, double insulated, low E, vinyl
windows for about $15-20 bucks each a while back and I have been waiting
for a project to use them on. Don’t forget to space the window with small gaps
(at least an 1/8 inch) on all sides to allow for expansion with temp changes.
Roofing nails work well because they are very flat, galvanized and cheap.
(I used a few screws to get the window set in place and then replaced them
as I went along)
OK it has been more than a few days since I was able to work on the coop
but me and the family got a lot of work done yesterday.
We have moved to working on the inside and will return to the exterior later.
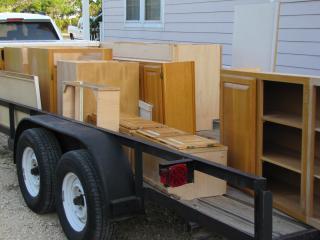
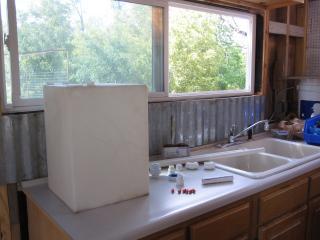
A friend was remodeling their kitchen and generously donated their cabinets
to the chicken cause (thanks James)
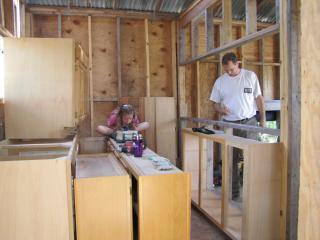
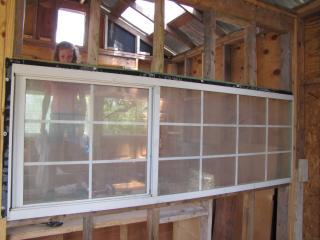
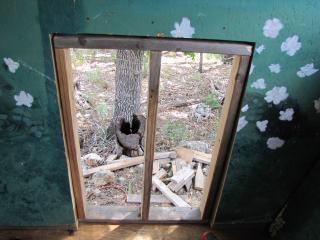
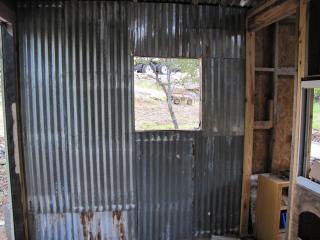
We have also added the interior wall and added a large window between
the work area for us and the living area for the peeps.
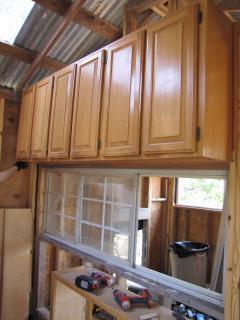
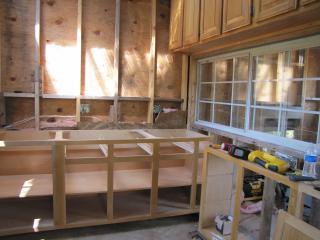
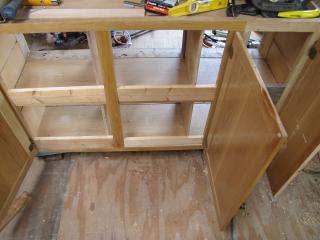
We added a long set of upper Cabinets and added the first set of base cabinets.
(tip on setting top cabinets. We used a long 2x4 to set the top cabinets on so we didn't
have to try and hold them in place and attach them to the wall while keeping them level.
Just level your 2x4 at the height you want the finished base to be at and screw it to the studs.
Then set your Cabinets on it and screw them securly to the wall and then remove the 2x4)
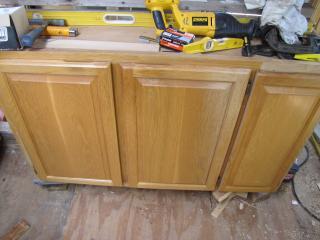
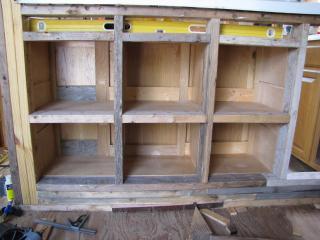
I took a break from the main cabinets and decided to build the nesting boxes.
I took one of the upper cabinets and removed the 2 shelves and re-centered one
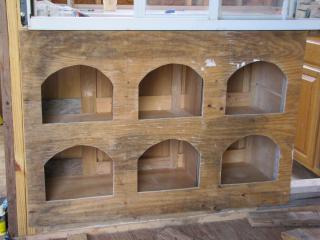
of them horizontally and then put in 2 dividers to give me a total of 6 nesting boxes.
The boxes ended up 15X15X16deep. I like the way that one of the other members
did the front of the boxes (thanks to “Barred Rocker”) so that’s what I patterned mine off of.
I will add a perch for easier entry latter.
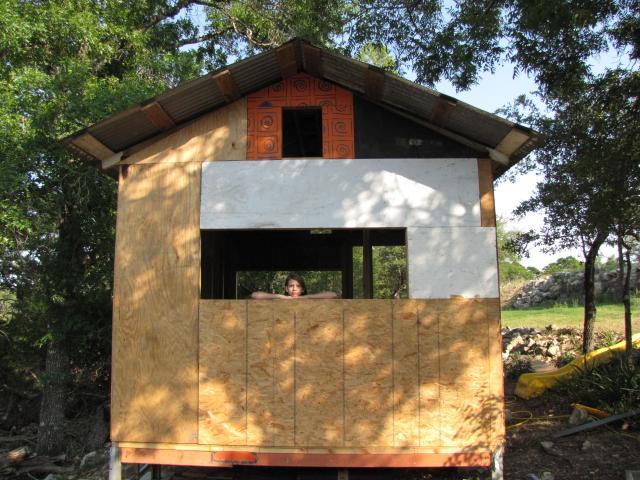
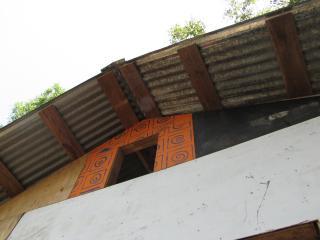
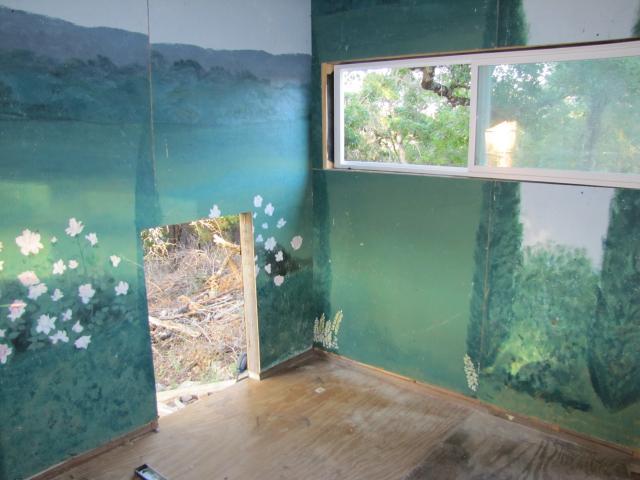
I wanted to surprise my girls with something special on the coop so I again
switched gears to work on that project. Remember all that lumber I talked
about from a drama production? Well I saved a couple of special pieces for the inside.
I am not sure but we think that the scenes might have been painted as a backdrop
for the sound of music production they did a few years back. Whatever they were from,
they are now a permanent part of the inside of the coop. They were suprised and said
that the chickens should really like it. I hope the chickens like it because, I keep telling
my girls that happy chickens are tasty chickens.
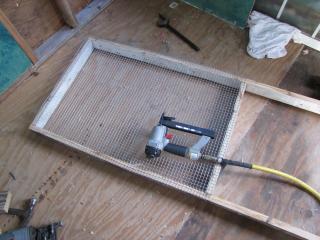
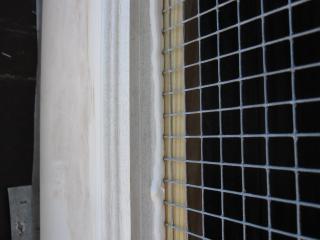
I got my order of Hardware Cloth in so I started securing the coop openings.
I built a frame for the inside of the windows and stapled on the wire.
I also closed in the fixed openings that will be left open year round and trimmed
them with the cement fiber board I am using for exterior trim.
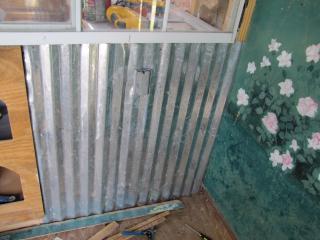
I finished framing out the "poop" door and closed it in. (you can hardly see the
door lines).
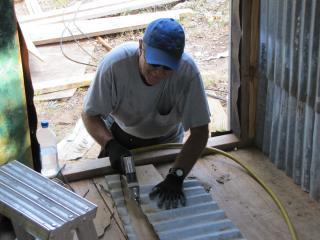
I decided to use some extra tin roofing on the inside walls to finish out the Chickens
living area. A friend from church came over and helped alot with the wall. (thanks Kent)
I added a plug on that side for a heater or whatever else is needed.
Our baby chicks are scheduled to be hatched on July 4th and be here on the 6th
so I switched to setting up the brooder. My neighbor (thanks Eric) already had one built
so I brought it down and made a few modifications. I offset the lid and added a shelf
for the watering system I wanted to use. I ordered some drinking nipples of the
internet and installed them in a 3/4in pipe and attached it to a 10gal container that
came out of an old pop up camper (thanks to the Craigs). I installed it on the side
platform and I will adjust the height by adding boards under its base as the chicks
get bigger.
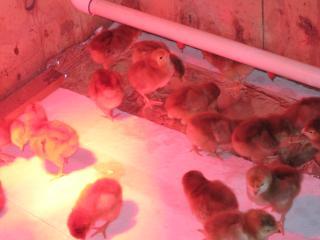
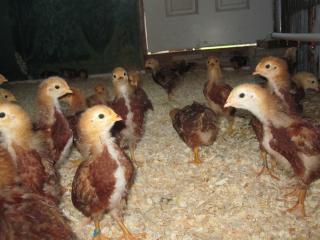
THE CHICKS HAVE ARIVED!!!!!!!!!!
We touched each one's beak to the water as we put them into the brooder and
they took to it perfectly. I thought that I could use some tin foil to catch the water
drips and keep the area cleaner but all of you experienced with chickens know that
that was one of the first thing they started to eat. So I removed it and tried several
different things until they were a week old and then just finally removed everything
and let it drip through to a piece of metal under the brooder and that worked great.
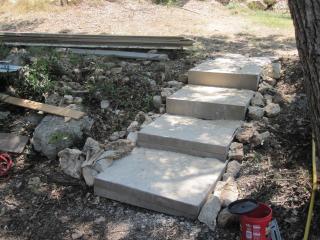
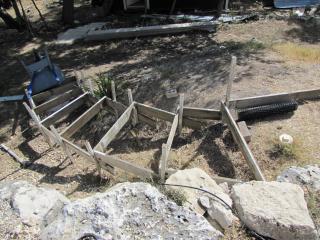
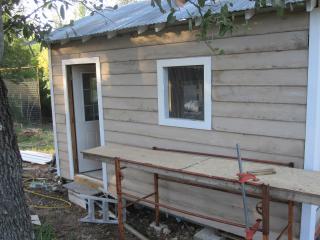
With the increased traffic to the coop my wife decided that we needed easier access
and so she added some steps down to the door. We are still working on another
set of steps a little higher up the hill.
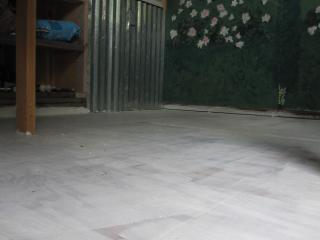
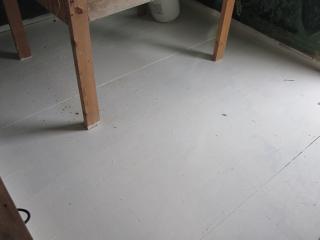
OK they have out grown the brooder so we prepared the floor with some garage floor epoxy paint
we had not used from my shop floor.
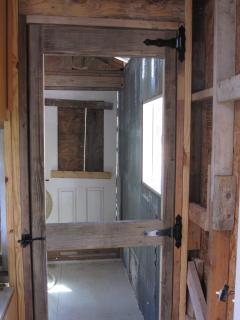
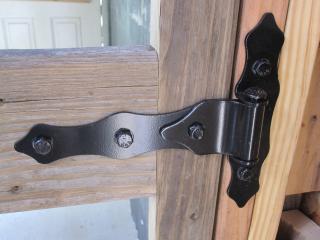
Then I made a screen door from some old deck material and used some fence gate hardware for hinges
and closure latch. (if you drill your hole for the latch opener at an angle to the other side it will easily
open and close from both sides of the door [see picture below])
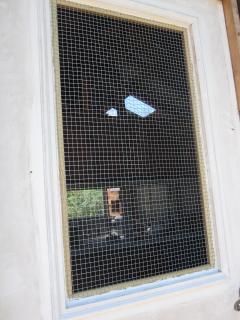
Our weather has been over 100 here in south Texas so I decided to replace the window
in the coop side with a screen of hardware cloth. Just unscrew the molding and remove the
window. Then use the window dimensions to make a wooden frame and attach your
hardware clothe to it and reassemble. I then calked the edges to keep the weather out
of the inside of the door.
Wow the Chicks are growing so fast. I looked at several ways to ID them and
I settled on using colored Zip Ties. We used red for the roosters and blue for
some of the hens. (put them on loose and keep an eye on how tight they are getting
we have already had to cut off the roos bands and replace them with ones that
are less tight).
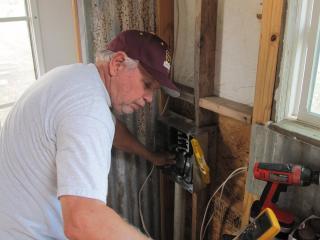
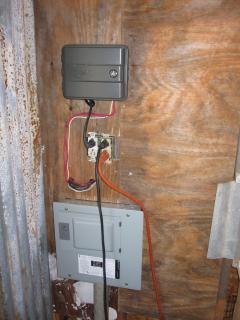
Dad came over and helped me finish up the electrical. We mounted a panel and then
boxed it in and I put my sprinkler controls above it as a convenient place to access it.
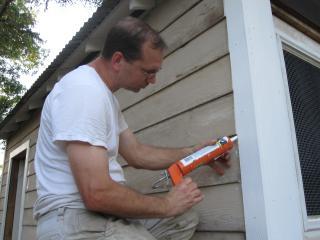
Its time to make the outside look a little better. We started with the leftover siding
from the house, cutting it to length and attaching it with the same nailer I put the
sheathing up with.
After we had it all in place we calked the edges and it is ready to be washed down and painted.
ONE side down 3 to go
MORE Progress coming SOON!
I thought I would share the fruits of our labor

What do they always say,
Location, Location, Location.
Well here is ours.

We chose an area that was shaded from the west sun
(important here in South Texas), close to the garden and near an area that
we are going to make our compost pile area.
We are going to be using mostly recycled, reclaimed, reused, renewed...
(you get the point) materials so we decided to layout the base size from
the material we have on hand.
Our first official purchase (concrete for the building footings) and we started
digging our footings and making everything square. If you need an good way to
lay out an square up an area you can use the 3,4,5 triangle method out lined
at (http://www.wikihow.com/Use-the-3-4-5-Rule-to-Build-Square-Corners). Nail
some stakes about a foot or so past where you want your corner to go so that
you can work directly at the corner without messing up or having to move your
lines when you start building.
We reinforced the concrete holes with rebar and framed it out level and square
We will be using warehouse rack material for the base of the building.
We set the first corner and welded it in place. (I am not the best welder but
this corner is not coming apart either.)
Cross bracing and more cross bracing.

Floor rafters and more cross bracing
We have lots of scrap material so blocking was no problem.

After caulking the rest of the subfloor,
my girls decided to do their version of the chicken dance.
You can attach the deck material with screws, but some adhesive and a coil
nailer will speed the job along and that floor isn't going any where.
We finished the subfloor and couldn't wait to put up a wall.
So on with the Lights
I bought some 8ft studs to put between the ones I created by "scabbing" pieces
from my lumber pile (you can see the ones I sandwiched together with blocks).
If you need to know the basics of building headers for doors and windows try
this link. http://www.ehow.com/way_5626578_instructions-building-door-window-frames.html
We started adding sheathing and framing the windows. Sheathing not only adds
strength behind your siding (we will be using some leftover cement fiber board
from building our house), but it also helps keep the building from racking side to side.
We were able to use the rafters and tin from a roof shed I took off from over a
mobile home several years back (thanks Duane).
Almost all of the ply wood used for sheathing and flooring came from a
privaite school drama production that I got about a year back.
It makes for some colorful and interesting sides.
There are great discussions throughout this sight on ventilation and I might
not have enough but I have put big windows and some vents up high along
with leaving a lot of the area under the roof for good ventilation.
I decided to put in a skylight on my work side of the house so I used clear
corrugated plastic roofing and for a little extra protection I put 1/2 hardware cloth
on the inside of the skylight (just in case some critters try and go for a snack some evening).
By the way the curves of the plastic an tin don't match so you will have to work
with the fit if you are overlapping pieces in the middle and not just edges.
Roof and Ridge cap install.
(Because I used recycled tin I will have to a little caulking to do)


Finished roof caulking (purchased a gray/silver silicone that is made for metal roofs
and it seemed to work great)
I would have loved to have used a house wrap like tyvek or such but settled for
a 15lb felt to wrap the house in. This will keep out the drafts and rain that might
get around my siding. I started along the bottom and worked my way up overlapping
each sheet by a few inches. Make angled cuts at window and door openings and
fold over and staple everything tight
I put in my first window and secured it with 2” roofing nails. I tapped the nails
in place with a hammer and then used a 4” block of wood to drive them all the
way in as not to damage the window. If you are planning a future project and
have some room for storage you can look for clearance or returns at your local
home improvement store. I got these Pella, double insulated, low E, vinyl
windows for about $15-20 bucks each a while back and I have been waiting
for a project to use them on. Don’t forget to space the window with small gaps
(at least an 1/8 inch) on all sides to allow for expansion with temp changes.
Roofing nails work well because they are very flat, galvanized and cheap.
(I used a few screws to get the window set in place and then replaced them
as I went along)
OK it has been more than a few days since I was able to work on the coop
but me and the family got a lot of work done yesterday.
We have moved to working on the inside and will return to the exterior later.
A friend was remodeling their kitchen and generously donated their cabinets
to the chicken cause (thanks James)
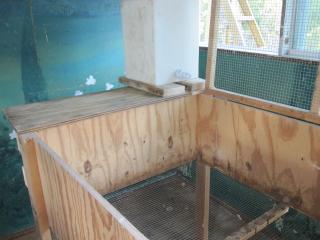
We have also added the interior wall and added a large window between
the work area for us and the living area for the peeps.
We added a long set of upper Cabinets and added the first set of base cabinets.
(tip on setting top cabinets. We used a long 2x4 to set the top cabinets on so we didn't
have to try and hold them in place and attach them to the wall while keeping them level.
Just level your 2x4 at the height you want the finished base to be at and screw it to the studs.
Then set your Cabinets on it and screw them securly to the wall and then remove the 2x4)
I took a break from the main cabinets and decided to build the nesting boxes.
I took one of the upper cabinets and removed the 2 shelves and re-centered one
of them horizontally and then put in 2 dividers to give me a total of 6 nesting boxes.
The boxes ended up 15X15X16deep. I like the way that one of the other members
did the front of the boxes (thanks to “Barred Rocker”) so that’s what I patterned mine off of.
I will add a perch for easier entry latter.
I wanted to surprise my girls with something special on the coop so I again
switched gears to work on that project. Remember all that lumber I talked
about from a drama production? Well I saved a couple of special pieces for the inside.
I am not sure but we think that the scenes might have been painted as a backdrop
for the sound of music production they did a few years back. Whatever they were from,
they are now a permanent part of the inside of the coop. They were suprised and said
that the chickens should really like it. I hope the chickens like it because, I keep telling
my girls that happy chickens are tasty chickens.


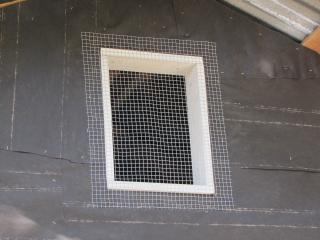
I got my order of Hardware Cloth in so I started securing the coop openings.
I built a frame for the inside of the windows and stapled on the wire.
I also closed in the fixed openings that will be left open year round and trimmed
them with the cement fiber board I am using for exterior trim.

I finished framing out the "poop" door and closed it in. (you can hardly see the
door lines).

I decided to use some extra tin roofing on the inside walls to finish out the Chickens
living area. A friend from church came over and helped alot with the wall. (thanks Kent)
I added a plug on that side for a heater or whatever else is needed.
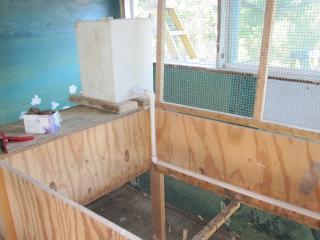
Our baby chicks are scheduled to be hatched on July 4th and be here on the 6th
so I switched to setting up the brooder. My neighbor (thanks Eric) already had one built
so I brought it down and made a few modifications. I offset the lid and added a shelf
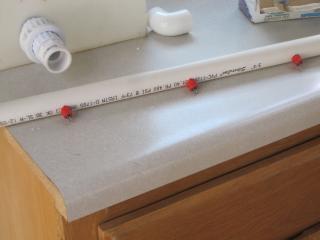
for the watering system I wanted to use. I ordered some drinking nipples of the
internet and installed them in a 3/4in pipe and attached it to a 10gal container that
came out of an old pop up camper (thanks to the Craigs). I installed it on the side
platform and I will adjust the height by adding boards under its base as the chicks
get bigger.
THE CHICKS HAVE ARIVED!!!!!!!!!!
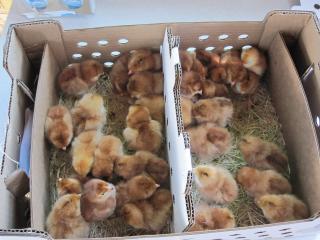
We touched each one's beak to the water as we put them into the brooder and
they took to it perfectly. I thought that I could use some tin foil to catch the water
drips and keep the area cleaner but all of you experienced with chickens know that
that was one of the first thing they started to eat. So I removed it and tried several
different things until they were a week old and then just finally removed everything
and let it drip through to a piece of metal under the brooder and that worked great.
With the increased traffic to the coop my wife decided that we needed easier access
and so she added some steps down to the door. We are still working on another
set of steps a little higher up the hill.
OK they have out grown the brooder so we prepared the floor with some garage floor epoxy paint
we had not used from my shop floor.
Then I made a screen door from some old deck material and used some fence gate hardware for hinges
and closure latch. (if you drill your hole for the latch opener at an angle to the other side it will easily
open and close from both sides of the door [see picture below])
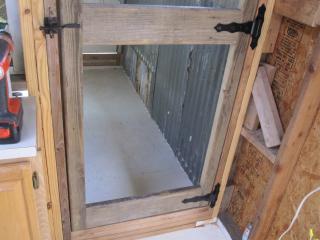

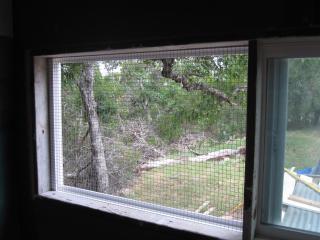
Our weather has been over 100 here in south Texas so I decided to replace the window
in the coop side with a screen of hardware cloth. Just unscrew the molding and remove the
window. Then use the window dimensions to make a wooden frame and attach your
hardware clothe to it and reassemble. I then calked the edges to keep the weather out
of the inside of the door.
Wow the Chicks are growing so fast. I looked at several ways to ID them and
I settled on using colored Zip Ties. We used red for the roosters and blue for
some of the hens. (put them on loose and keep an eye on how tight they are getting
we have already had to cut off the roos bands and replace them with ones that
are less tight).

Dad came over and helped me finish up the electrical. We mounted a panel and then
boxed it in and I put my sprinkler controls above it as a convenient place to access it.
Its time to make the outside look a little better. We started with the leftover siding
from the house, cutting it to length and attaching it with the same nailer I put the
sheathing up with.
After we had it all in place we calked the edges and it is ready to be washed down and painted.
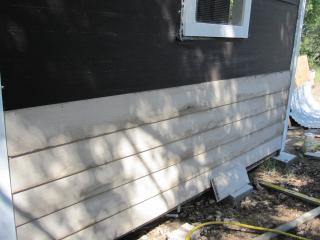
ONE side down 3 to go

MORE Progress coming SOON!
") Now...only concern...will it "rain" on the inside of your coop due to condensation with the the metal roof???
Now...only concern...will it "rain" on the inside of your coop due to condensation with the the metal roof???