Our First Chicken Coop!
Made from reclaimed materials, mostly pallets
Our Coop Build
We sourced our pallets from craigslist (free section) and we were lucky that a family member had access to really nice skids from their workplace (for free!). My hubby started off by cutting the boards off the pallets with his sawzall. The base of the skids was used to build the base of the coop. After the floor was framed we used some scrap plywood down for the subfloor. The rest of the frame was built with dunnage (basically 4 x 8 posts) that we also got for free.
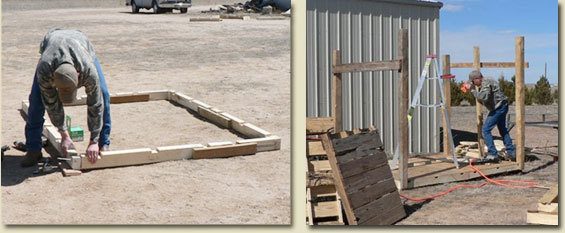
For the walls of the coop we used the tops of the skids that were cut off with the sawzall. The boards were very nice pine. The hubby framed openings for the door, pop door, windows and nest box (in the back). He used a nail gun to put the wall boards on with - we had tons of nails left over from a previous project so we didn't have to buy any.
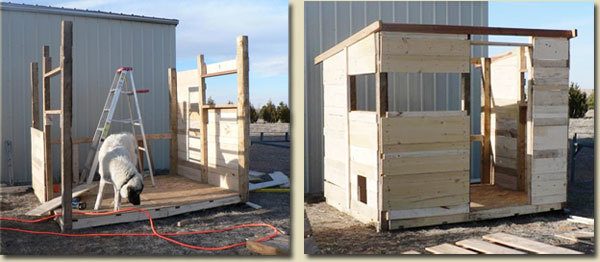
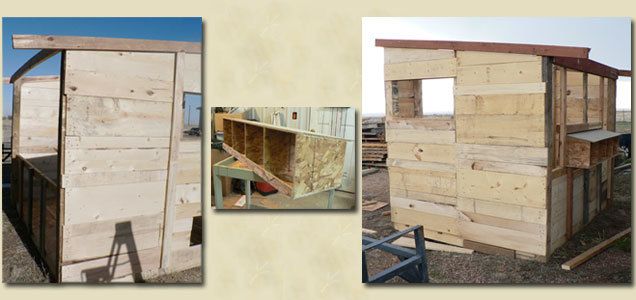
We get a lot of wind where we are, generally from the north, so we built the coop on the south side of our barn. Hopefully this will keep the coop a little warmer - plus it will get full sun. We found some left over insulation in the garage that the previous owners left so we put that on 2 sides of the coop - the ones that will get the most wind exposure. Since the boards gapped in some spots we used clear caulking to seal it. The caulking was the first supply purchase so far! We did have to buy a few more things for the next few steps: 1 sheet of plywood for the part of the roof, a few 2x4's from the scrap bin, plexiglass for the windows, linoleum remnant for the floor, hardware for the window/door locks and a door ($5 at the Habitat Restore Store!). Additional items used that were given to us or that we found in the free section of craigslist: flashing, formica countertop for the poop board, ramp, hinges, metal roofing, shelf and chain for the feeder.

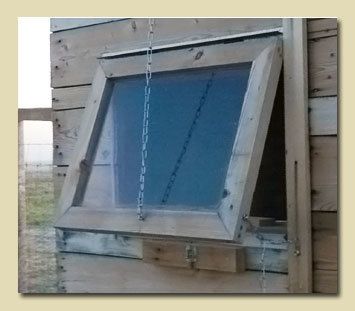
Since we used framed plexiglass for windows, attached with hinges, we needed a way to have them stay open. We came up with a chain hanging from above the window with a hook on the botton of the frame. To make sure the wind wouldn't pull the windows off we put another hook on the bottom side edge of the window frame. This hook can securely fasten to a chain on the coop. We've had some pretty good wind and so far our little system is working great!
Our run was framed out with landscaping timbers that the previous owners left. We used extra field fence we already had and a gate that was given to us. We did buy chicken wire to put over the field fence, along with hog rings to attach the chicken wire to the field fence.
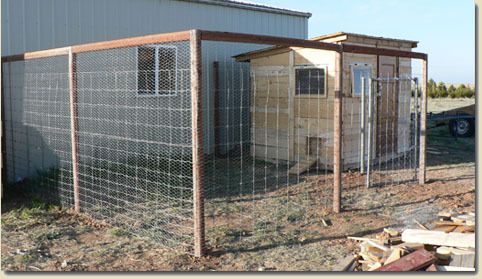
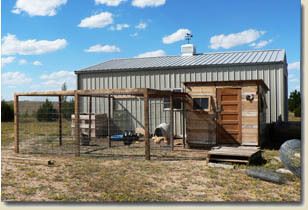
Originally the run was 14' x 14'; however we have since added on due to the addition of 3 ducks to our flock so it is now 14' x 21'. Below is how our coop looks now (9/5/10). We still have some finish work to do, like trim. Eventually we will add a little porch; the goal is to make the coop like an old western building.
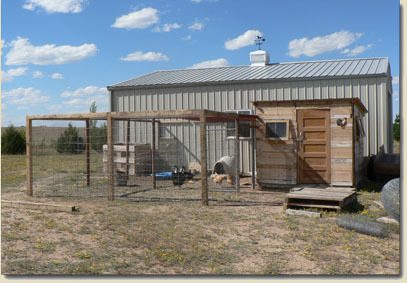
While we haven't added up the money we spent, we are estimating it was close to $300. Not too bad!
However, we now need to add on due to the additions of 6 pullets. Luckily they are days old so we have a bit of time to build.
The Girls
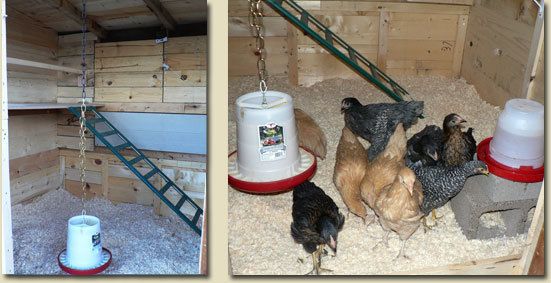
In March of 2010 we got our first pullets. We started off with 8 pullets, then a week later we picked up 2 straight run chicks. We knew we had 4 Buff Orpington's but the others were a mystery for a while. As they feathered out we discovered we had 4 sex links (black stars) and 2 Barred Rock (1 was a pullet the other a roo) in addition to the 4 Buff's. The Barred Rock roo didn't make it so now we have 9 hens. Below are a few pics of our flock.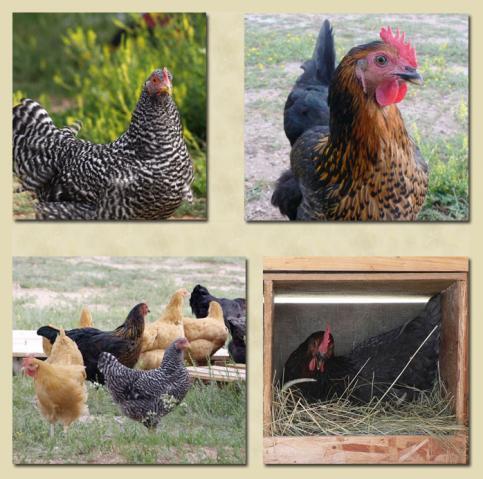
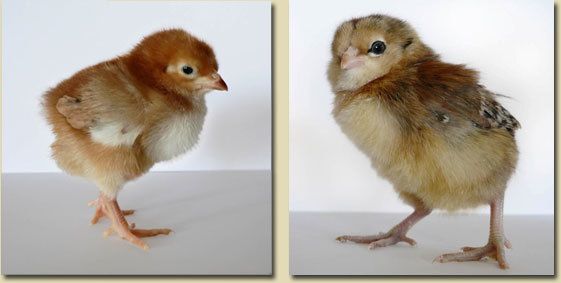
Below are our newest additions that we got Labor Day weekend, 2010. 3 Rhode Island Red's and 3 Easter Egger's. These 2 seemed to enjoy their 1st photo shoot!
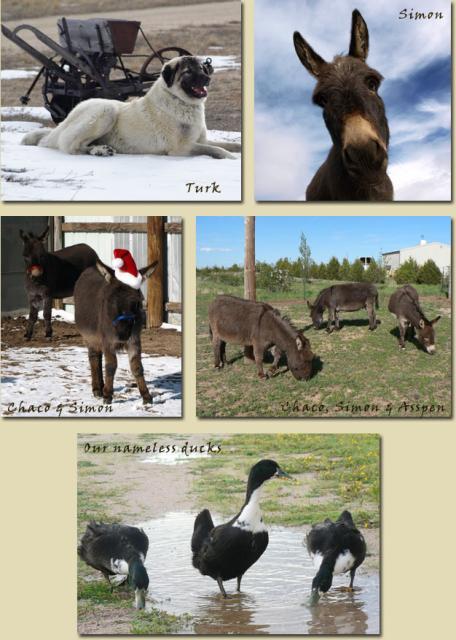
Additional Ranch Inhabitants
In addition to our chickens we also have 3 miniature donkeys, 3 ducks, 3 dogs and 2 cats.

In addition to our chickens we also have 3 miniature donkeys, 3 ducks, 3 dogs and 2 cats.
Thanks for stopping by!
