Here are pictures of my coop that I built for 3-4 hens. I tried to take pictures throughout the process, so hopefully most of it is pretty clear on how I built it.
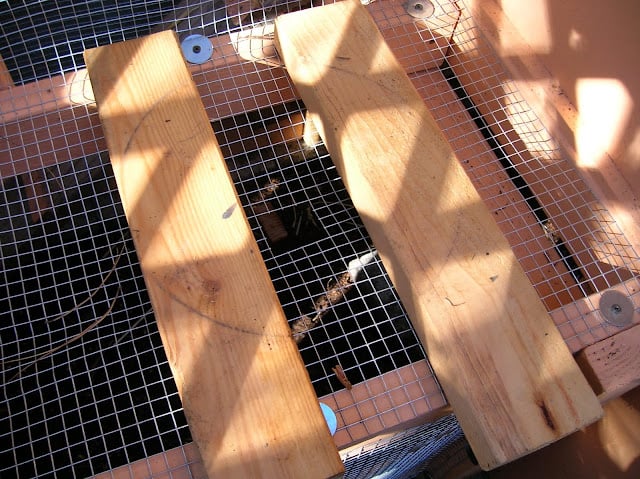
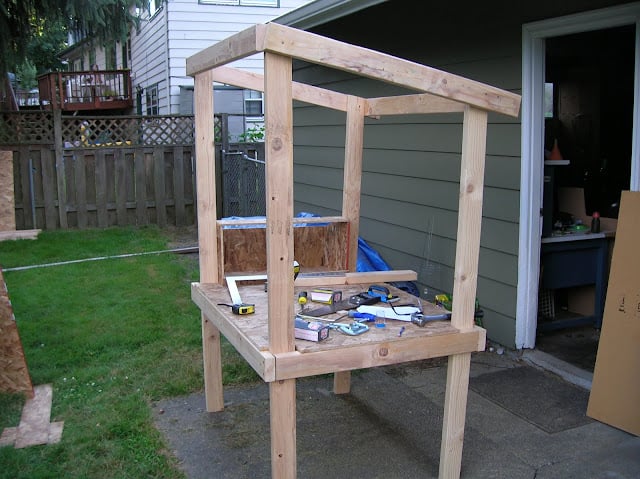
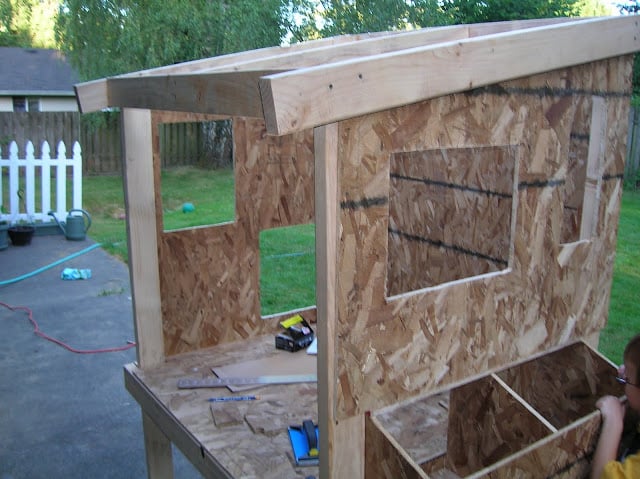
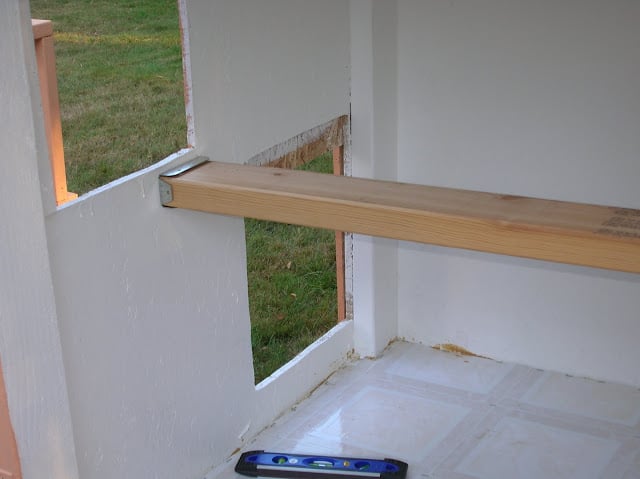
The main materials I started with were 2x4's and 7/16' OSB plywood. I wanted to make it light enough to move, but strong enough to keep predators out. I built the nest boxes right into the frame at the beginning, and that seemed to work out well. You can't see from the picture, but I put cross beams underneath to support the floor.

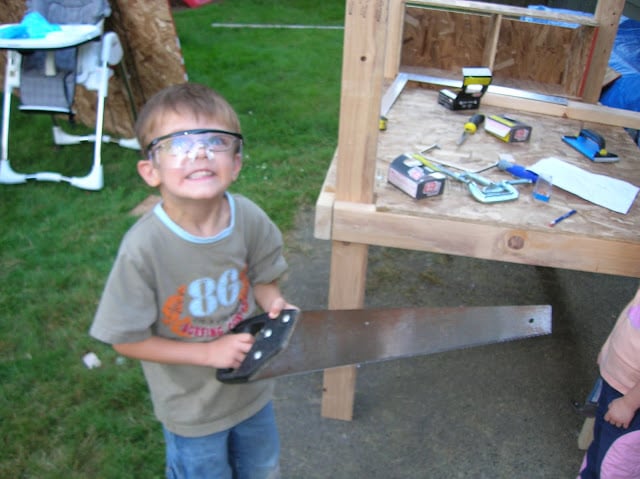
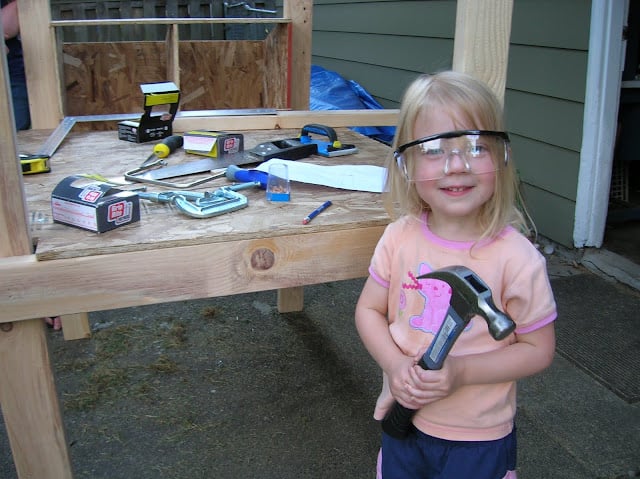
I had a little bit of help.
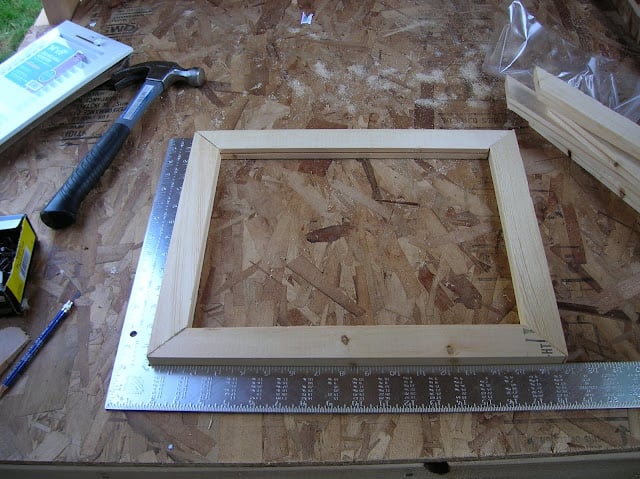
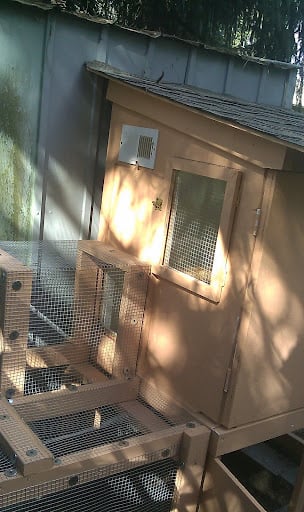
I made the windows custom by cutting the wood at a 45 and then just gorilla gluing and stapling them together. Plexiglass sheets purchased at hardware store worked perfect to fit in and will be shatterproof. I made the front doors the same way, then just put plywood over the top. I cut out holes for windows and vents before I nailed them to the frame.
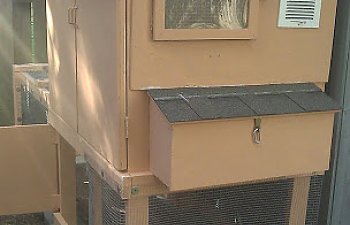
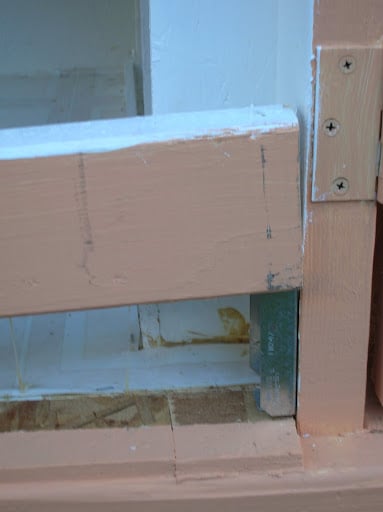
Here are some pictures of how I did my pop door. I sanded the edges of the door and frame, but after painting it still sticks a little- Which is fine because I don't have to use anything to hold it in place.
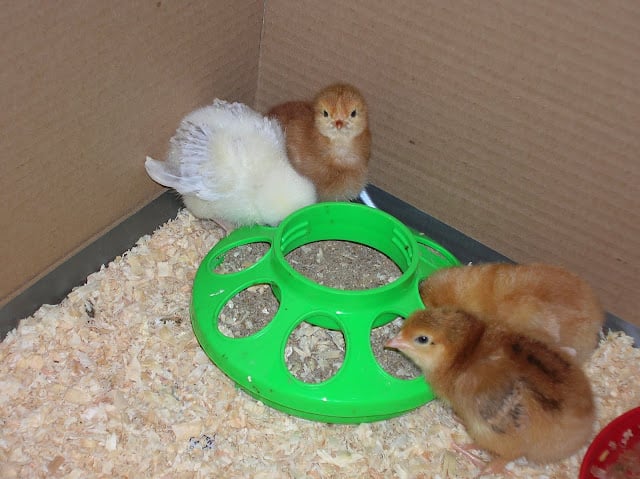
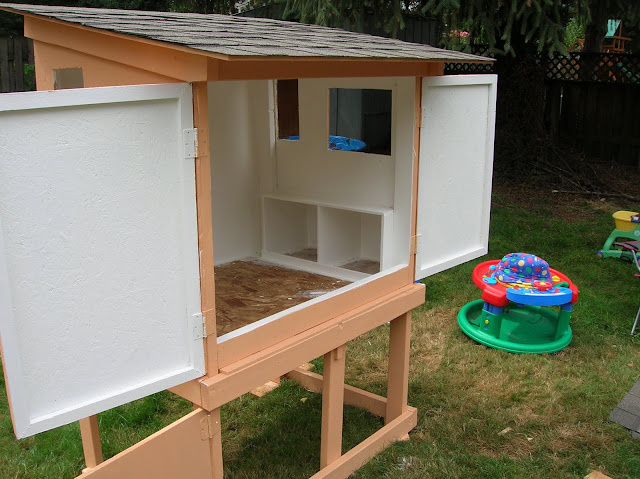
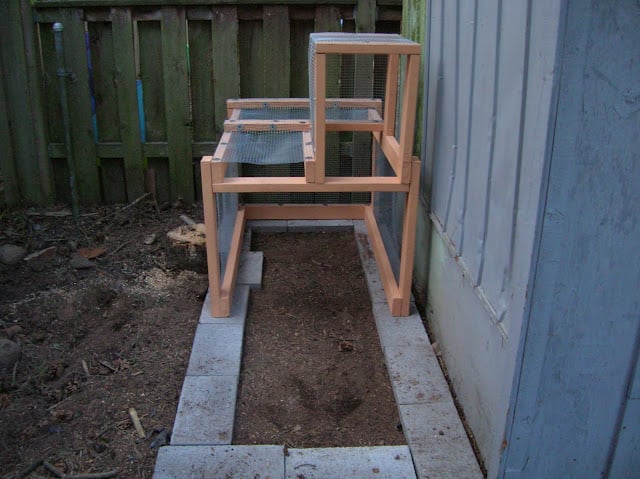
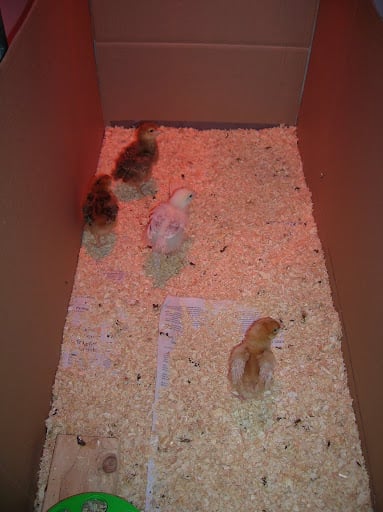
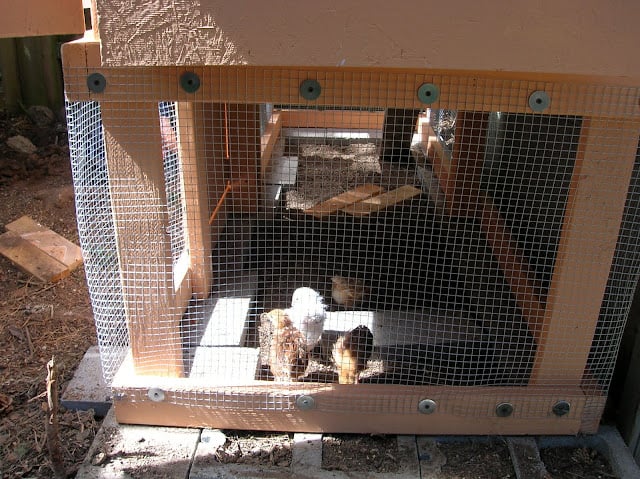
Here's the semi-finished product. I wavered between building a full-height run, but ended up building a shorter version. It has an opening that fits right up against the pop door, so I want to leave the pop door open during warmer weather (particularly in the summer, when I may not want to get up as early as the birds, they can let themselves in and out and be perfectly safe. The newly purchased chicks are oblivious to the whole process. Meet Alice and Rose (Rhode Island Reds), Ginger (Golden Comet) and Coconut or "Coco" (Delaware).
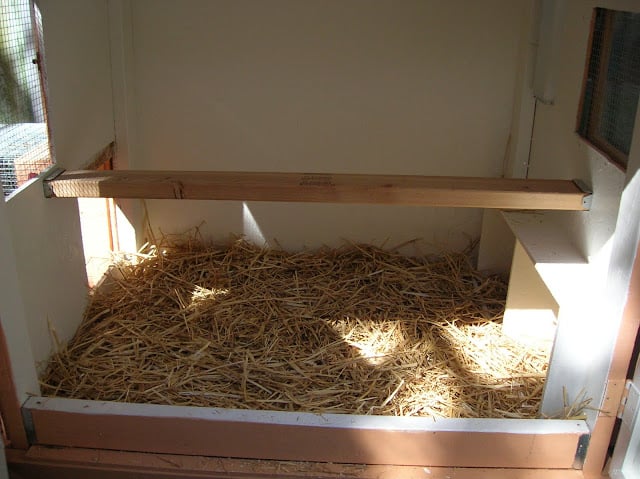
Put on a roof with leftover shingles from my house. I also went with linoleum for the floors (including in the nest boxes). Glued and stapled it down. Oh, and I also caulked around the edges and in all of the gaps/spaces around the coop to make it nice and tight.
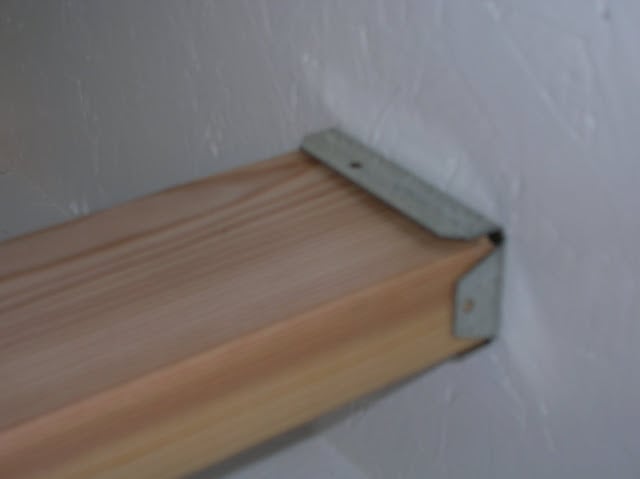
I got some brackets for 2x4's to make a roost that is removable, in case I wanted to remove it for cleaning, re-painting, etc. I also made the front lip on the floor of the coop removable for easy cleaning. I plan on putting a sheet of plastic over the linoleum, and be able to just pull it out to compost when its cleaning time.
Preparing the ground for the coop. I leveled the earth and put around a foundation of brick pavers to keep critters from tunneling. I'll be burying some old wonderboard cement backboard I have laying around on the exposed edges to further dissuade a persistent predator. I plan on putting a fence around the coop that will give about 120 square feet of room for when they are not allowed to free range. Girls are still clueless.
The vents on each side are floor vents I picked up at big box hardware store. Easy to open and close and provide adequate ventilation. The windows also have hardware cloth behind them, so the windows can be opened for extra ventilation on hot days (and as a second line of defense against coons should they maneuver the bolt locks on the windows). I added more hardware to lock everything up tight after I took these pictures.
They finally got a chance to try it out. They also love free-ranging (supervised, of course).
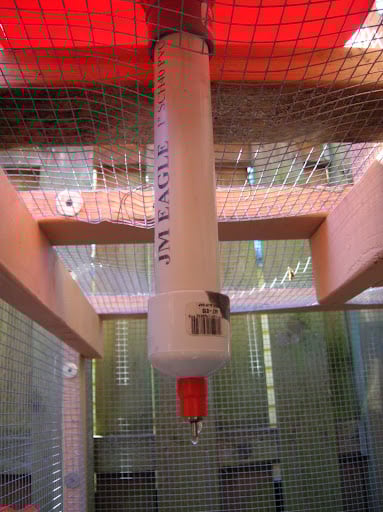
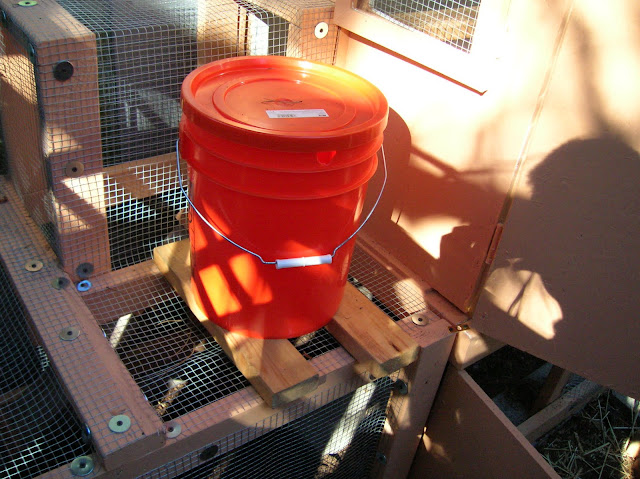
Here is my pvc nipple waterer. I originally made one that had a bend in the pipe that ran to a piece with two nipples in it. It had some leaks, so I had to take it apart. If I had cemented it, it would have been fine. I ended up deciding to just use a single nipple with this drop-down design, so I can pull the whole bucket out when necessary to clean. I figure one nipple is plenty for four chickens (one of which I suspect is a rooster, so probably three). I'll also be putting a smaller waterer inside the coop with a nipple design in case they get thirsty at night during the summer months. I used electrical conduit pvc fittings to make a homemade bulkhead fitting around the hole I drilled in the middle of the bottom side of the bucket. I just used a male and female adapter and found a rubber ring washer at Home Depot that made a nice seal on the inside of the bucket. The fittings aren't as tight as PVC fittings, but a little bit of PVC cement held it to the schedule 40 pipe nicely. I highly recommend this type of setup if you have a bucket with PVC coming out. It works great with no leaks and is cheap and easy to make. I bought the nipples at QC Supply and absolutely love them. I'll just be using a regular hanging feeder underneath the coop. I figure with this system, I can be gone for a week or more without having to worry about food or water. Just have the neighbors come over and get the eggs and make sure everyone is behaving. I plan on putting some kind of a bird bath or aquarium heater in to keep it from freezing in the winter. Portland winters are relatively mild, so I shouldn't need to use it too much.
The main materials I started with were 2x4's and 7/16' OSB plywood. I wanted to make it light enough to move, but strong enough to keep predators out. I built the nest boxes right into the frame at the beginning, and that seemed to work out well. You can't see from the picture, but I put cross beams underneath to support the floor.


I made the windows custom by cutting the wood at a 45 and then just gorilla gluing and stapling them together. Plexiglass sheets purchased at hardware store worked perfect to fit in and will be shatterproof. I made the front doors the same way, then just put plywood over the top. I cut out holes for windows and vents before I nailed them to the frame.

Here are some pictures of how I did my pop door. I sanded the edges of the door and frame, but after painting it still sticks a little- Which is fine because I don't have to use anything to hold it in place.


Here's the semi-finished product. I wavered between building a full-height run, but ended up building a shorter version. It has an opening that fits right up against the pop door, so I want to leave the pop door open during warmer weather (particularly in the summer, when I may not want to get up as early as the birds, they can let themselves in and out and be perfectly safe. The newly purchased chicks are oblivious to the whole process. Meet Alice and Rose (Rhode Island Reds), Ginger (Golden Comet) and Coconut or "Coco" (Delaware).


Put on a roof with leftover shingles from my house. I also went with linoleum for the floors (including in the nest boxes). Glued and stapled it down. Oh, and I also caulked around the edges and in all of the gaps/spaces around the coop to make it nice and tight.


I got some brackets for 2x4's to make a roost that is removable, in case I wanted to remove it for cleaning, re-painting, etc. I also made the front lip on the floor of the coop removable for easy cleaning. I plan on putting a sheet of plastic over the linoleum, and be able to just pull it out to compost when its cleaning time.
Preparing the ground for the coop. I leveled the earth and put around a foundation of brick pavers to keep critters from tunneling. I'll be burying some old wonderboard cement backboard I have laying around on the exposed edges to further dissuade a persistent predator. I plan on putting a fence around the coop that will give about 120 square feet of room for when they are not allowed to free range. Girls are still clueless.
The vents on each side are floor vents I picked up at big box hardware store. Easy to open and close and provide adequate ventilation. The windows also have hardware cloth behind them, so the windows can be opened for extra ventilation on hot days (and as a second line of defense against coons should they maneuver the bolt locks on the windows). I added more hardware to lock everything up tight after I took these pictures.


They finally got a chance to try it out. They also love free-ranging (supervised, of course).

Here is my pvc nipple waterer. I originally made one that had a bend in the pipe that ran to a piece with two nipples in it. It had some leaks, so I had to take it apart. If I had cemented it, it would have been fine. I ended up deciding to just use a single nipple with this drop-down design, so I can pull the whole bucket out when necessary to clean. I figure one nipple is plenty for four chickens (one of which I suspect is a rooster, so probably three). I'll also be putting a smaller waterer inside the coop with a nipple design in case they get thirsty at night during the summer months. I used electrical conduit pvc fittings to make a homemade bulkhead fitting around the hole I drilled in the middle of the bottom side of the bucket. I just used a male and female adapter and found a rubber ring washer at Home Depot that made a nice seal on the inside of the bucket. The fittings aren't as tight as PVC fittings, but a little bit of PVC cement held it to the schedule 40 pipe nicely. I highly recommend this type of setup if you have a bucket with PVC coming out. It works great with no leaks and is cheap and easy to make. I bought the nipples at QC Supply and absolutely love them. I'll just be using a regular hanging feeder underneath the coop. I figure with this system, I can be gone for a week or more without having to worry about food or water. Just have the neighbors come over and get the eggs and make sure everyone is behaving. I plan on putting some kind of a bird bath or aquarium heater in to keep it from freezing in the winter. Portland winters are relatively mild, so I shouldn't need to use it too much.