Our Backyard Coop(s)
We live in Southern Maine with our 1 remaining hen, See Yau (Barred Rock). We lost Squeak (Golden Comet) in November 2010 due to an impacted crop, Kung Pao (Buff Orpington) in October 2011, either Rhoda or Galena (Rhode Island Reds - they look alike) in September 2012 for unknown reasons and Bubble (Golden Comet) and the other Rhode Island Red in the winter of 2012/2013. We got them as newly hatched chicks in April 2010 and have been living in the coop since mid-June 2010. Our coop is an original design and we borrowed the cattle panel idea from this site.
Here is a list of features that we like about our coop:
- removable roosts (for easy cleaning of floor and replacement)
- sweep door (for easy cleaning)
- electricity for the heated water feeder, lights and IR Cam
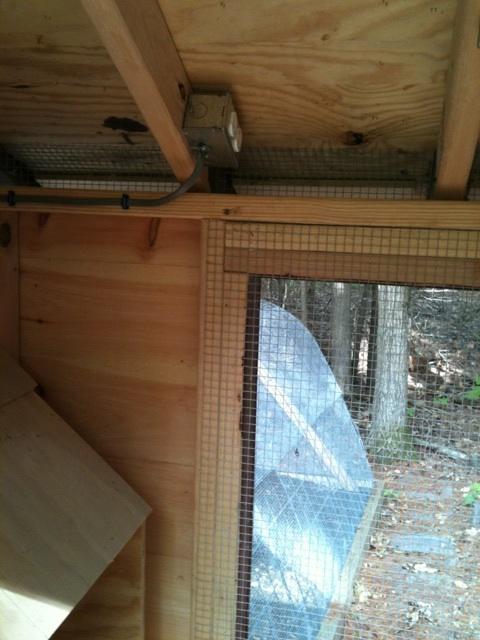
- good ventilation (windows, end vents and roof vents)
- IR Chick cam
Here is a sequence of pictures showing the coop as it was built.
Find and erect a suitable and level 8' x 4' platform made from 3/4" exterior grade plywood and 2" x 6" PT framing lumber
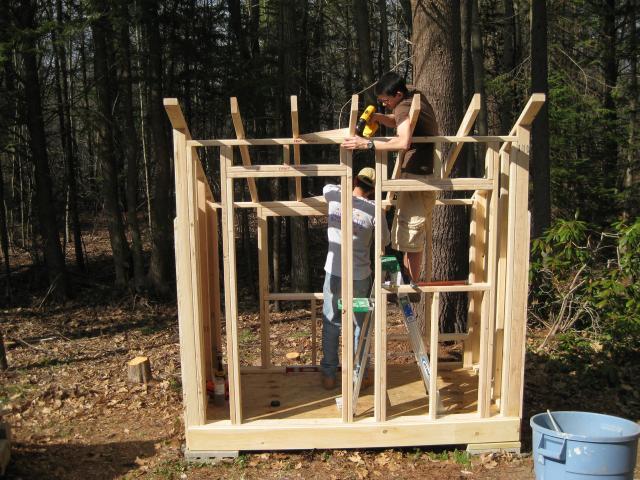
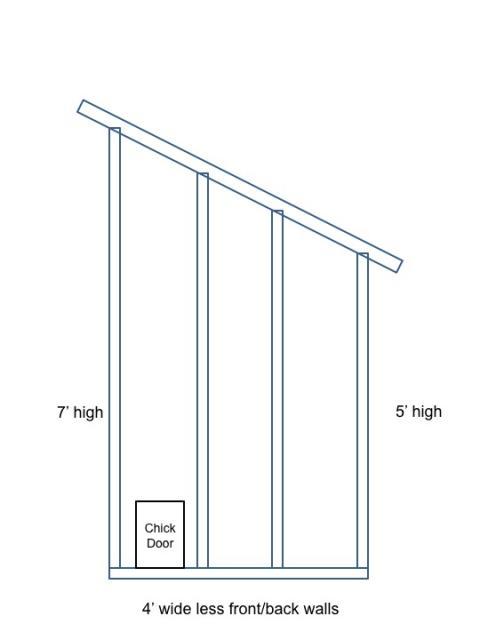
Erect back and side walls on platform, Coop is about 7' high in front, 5' high in the back.
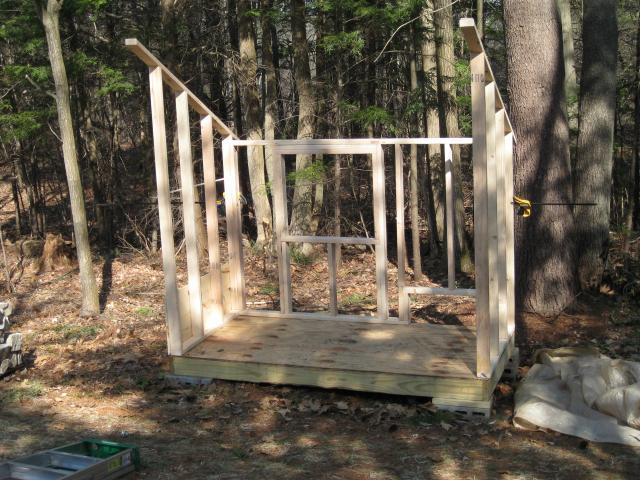
Attach front wall
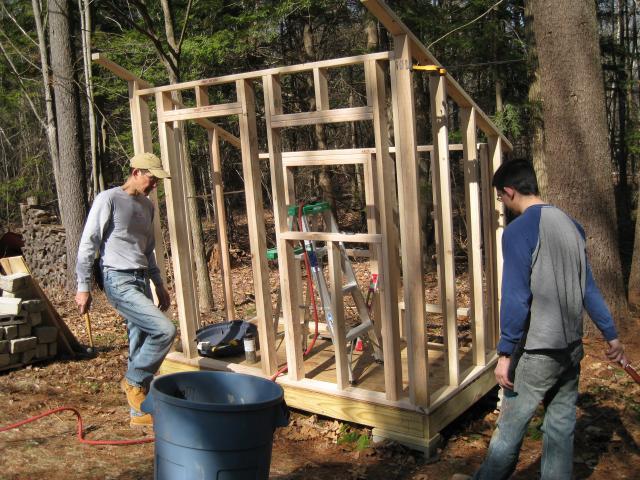
Attach shiplap siding
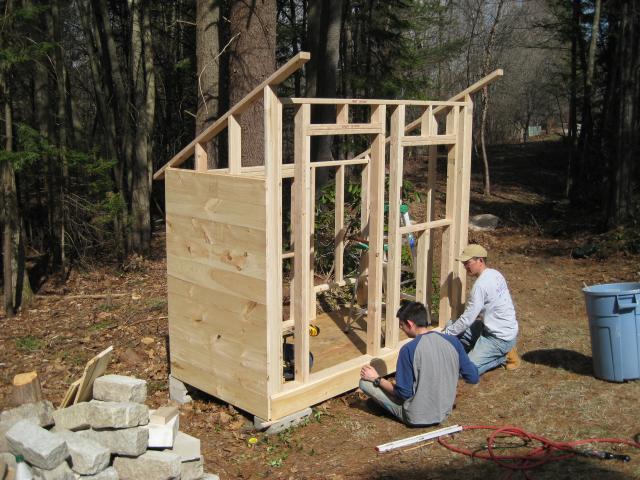
Attach roof rafters (2"x4")
Attach roof sheathing (1/2" exterior grade plywood, roof shingles followed)
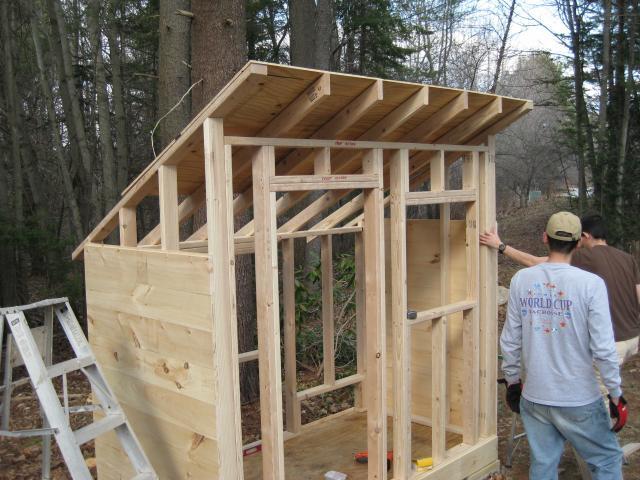
Complete shiplap construction in the front
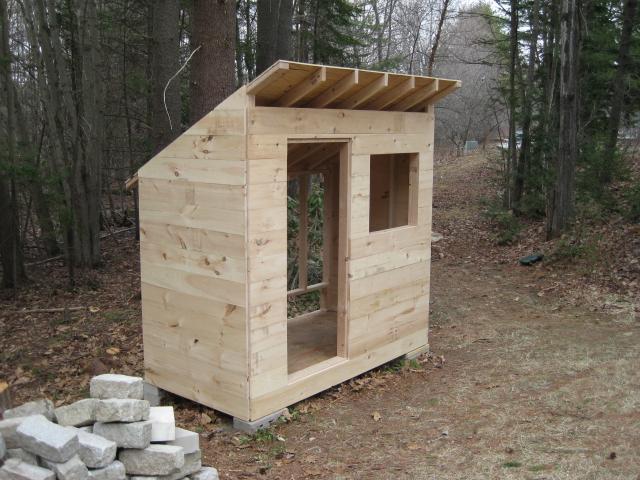
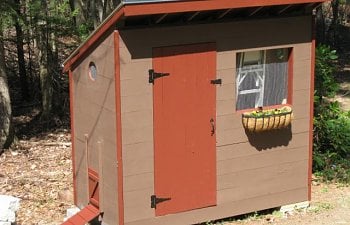
Paint, add doors, cut circular vents, add trim and window plants
In the winter, we'll attach windows in the front and rear walls. Ventilation will be sufficient with side wall round vents and eave vents.
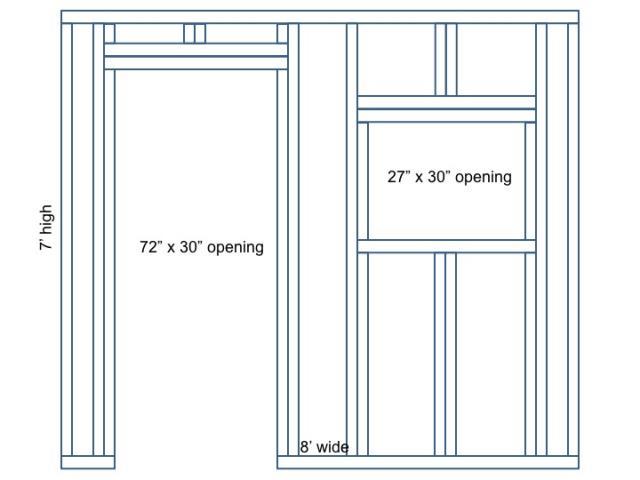
Here are some plans that fit a 4'x8' platform and windows and doors that we found at the dump.
Side walls: only one side has chick door
Front wall:
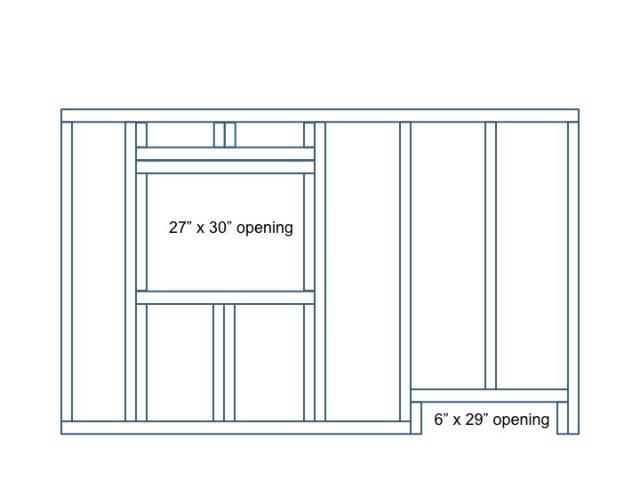
Back wall: Sweep door designed to fit the size of our push broom.
Next few pictures will show the interior coop construction.
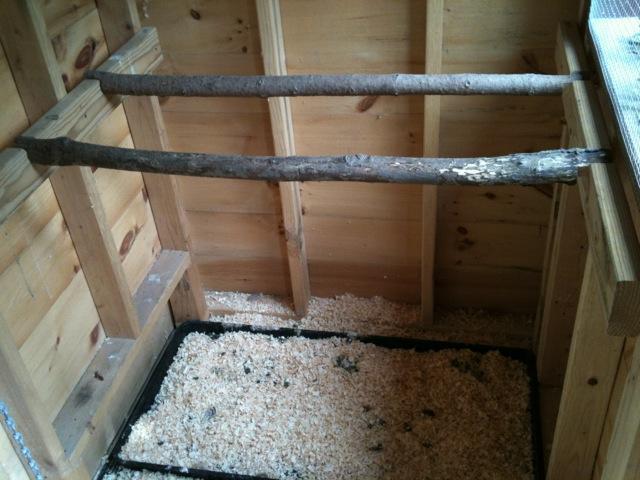
The roosts are made from tree branches that sit into a "V" notch in the 2" x 4" supports, the notches allows for easy removal and are reasonably stable. They are located in the right side of the coop with a great view through the front window. In the bottom left corner of the picture, you will see our sweep door that is sized to accommodate our push broom. A plastic pan collects the "droppings" from the roost which keeps the floor of the coop clean.
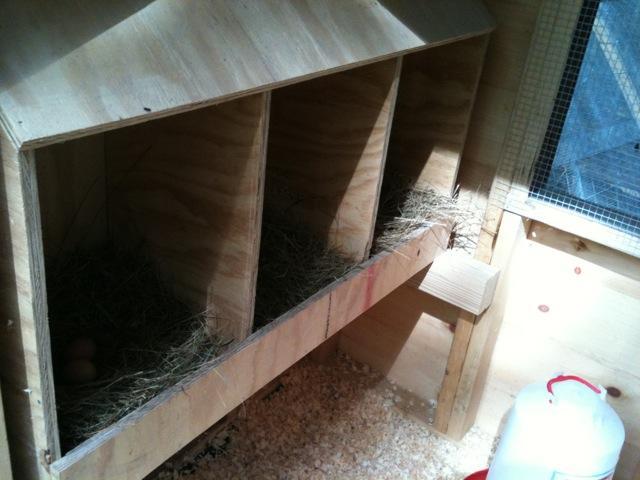
The nest boxes are located on the left hand side wall just above the chicken door. We have 3 boxes for our 6 hens.
We suspend our feed and rest our waterer on a cinder block which is at the right height and minimizes spillage (not floating on a chain). They are located right inside the people door which makes it easy to maintain.
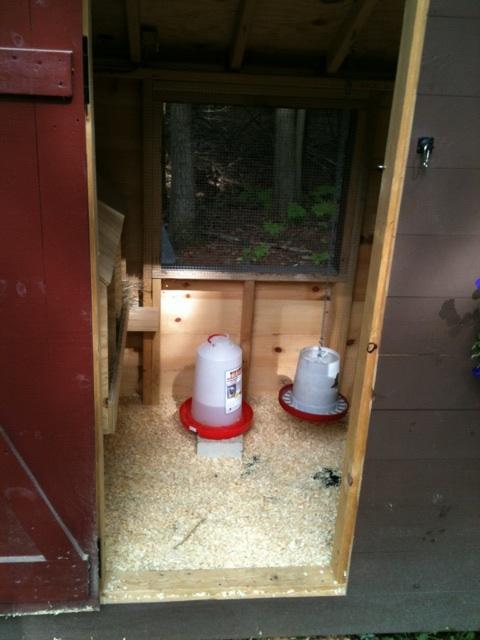
The coop is wired so that we can heat the waterer in the winter, as it definitely freezes in Maine. Along with the outlet we have an indoor light for evening visits. We added Christmas lights that adorn our coop during the Holiday Season. We decided to leave the lights on the whole year.
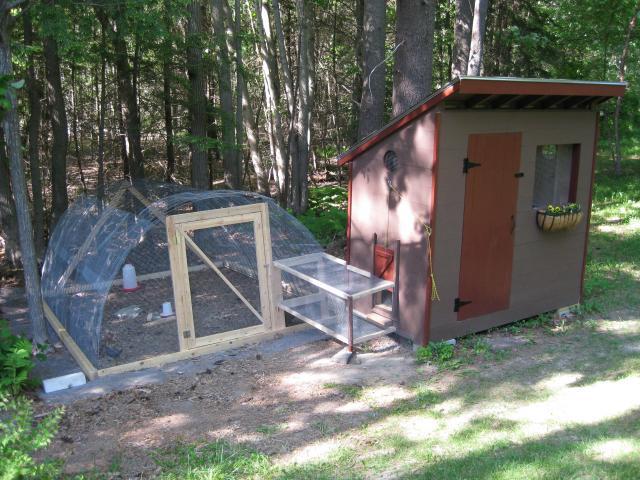
We are most pleased with our run. It totally encloses our hens from all predators such as eagles, unleashed dogs and foxes. This safely feature allows the hens to wander between the run and coop. It is constructed out of 3 - large cattle panels that form the structure. Hardware cloth is placed over the cattle panels which decreases the size of the openings. Door, back brace and run perimeter is made from stock 2"x4"s. The run has hardware cloth that extends 3 feet on the ground out from the base of the run that discourages digging animals from entering the run.

The "hallway" connects the coop to the run and is also totally enclosed. The hens enjoy sitting in the hallway, probably due to the airflow enabled by the hardware cloth floor.
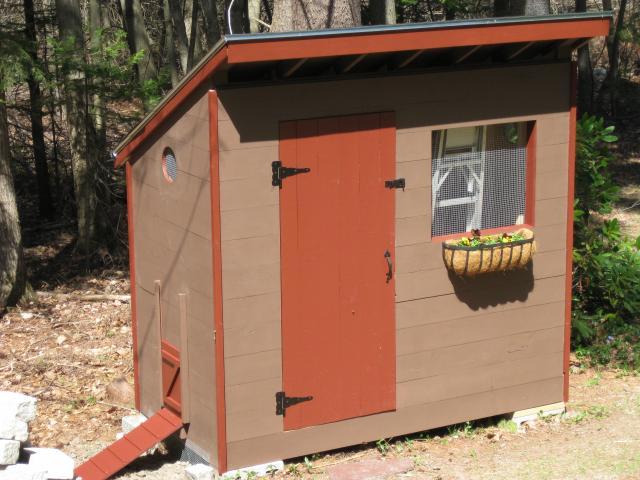
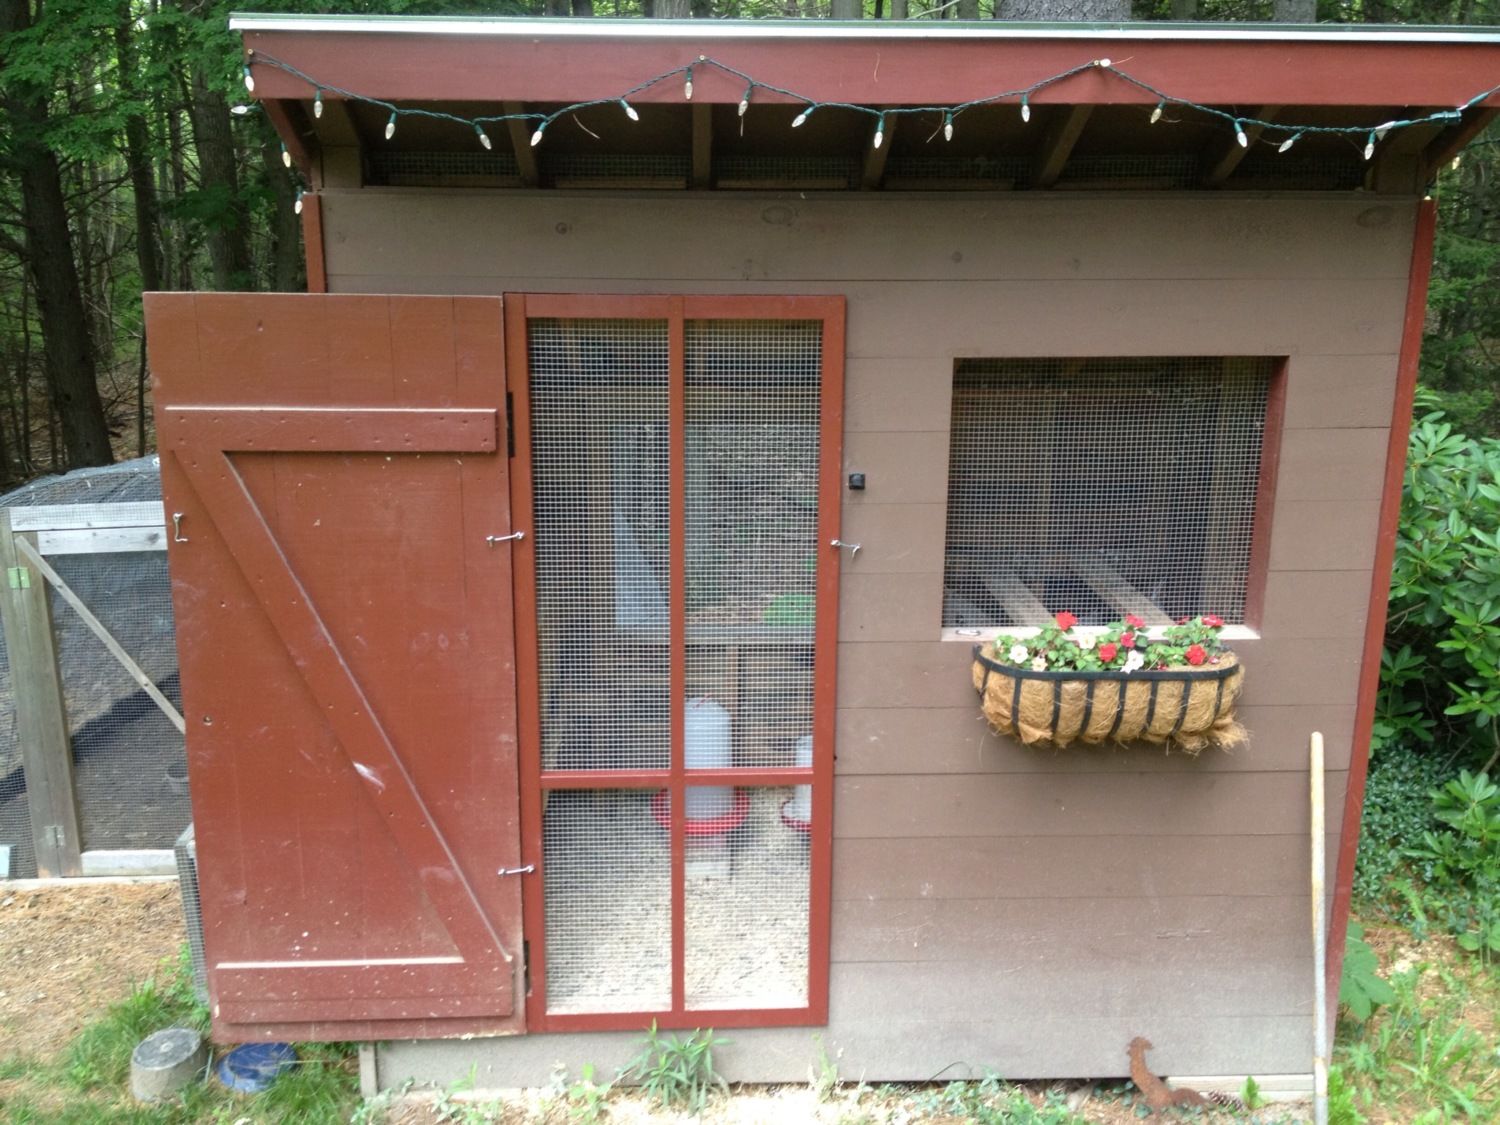
Here is a picture of the "final" product. We are very pleased with how everything turned out and thank the members of this site for their tips and guidance.
Added Oct 2010: A motion detector light that shines a path between our house and the coop and a rubber floor for the coop to keep the coop floor from getting wet. We built an outside waterer made from a 5 gallon bucket and a large plant pan.
Added - Dec 2010: 2" x 4" roosts for the winter time, 4" side up as well as a poop hammock (tarp) for collecting "droppings" under the roost. Since the chicks will be spending more time in the coop, we wanted to give them more clean floor space to hang out. Installed a large tarp over the run to keep out snow and makes the run a bit warmer during the winter months.
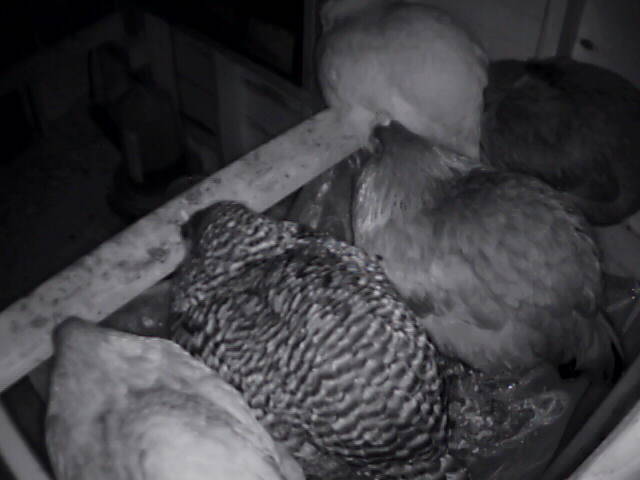
Added - Christmas 2010: Installed a Foscam IP camera (model FI8918W) in the coop (present from my computer savvy sons). It is a color wireless camera that has a $5 iPhone app, so I can watch the girls from anywhere in the world. It has IR capabilities which is great at night. You can remotely pan and tilt the camera (although the coop isn't that big). Here is a pic of the inside of the coop from the Foscam using IR. Mounting the camera upside down improves the viewing range.
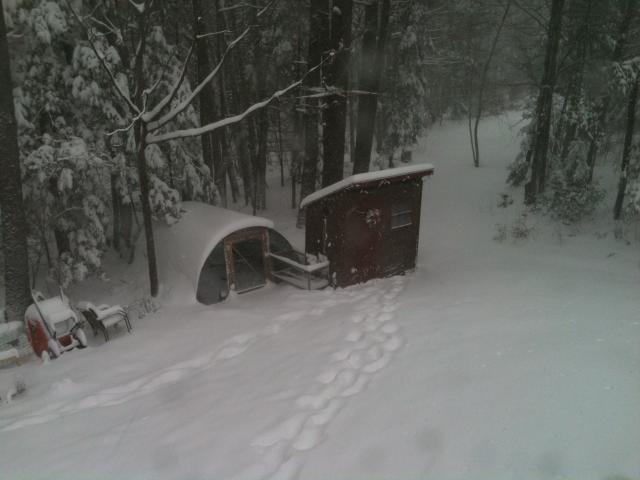
Added Jan 2011: A quick pic of our coop and run during a 15" Nor'easter in Maine. Chicks stay in the coop and not yet comfortable in the snow.
Added July 2012: Removeable screen door to allow for increase ventilation during the summer and a great view in and out of the coop. Door is made from stock 2x and hardware cloth.
Added April 2013: Our second generation of chicks have arrived and not a minute too soon. The first generation has dwindled down to only 1, See Yau the Barred Rock. She is in great health and reliably graces us with a beautiful egg every day.
Here is a picture of our new chicks. Gen-2 don't have names yet but will as soon as they develop a personality. They are in a converted dog pen in the basement with a heat lamp. They are all "roost" trained and by day 2 were sitting on the lower roost. We've added 1 Golden Comet, 1 Rhode Island Red, 1 Barred Rock, 2 Buff Orpingtons and 1 Australorp.

I am currently building a small coop and hallway to the existing run to allow both generations of hens to be outside but not integrated until the young'ins are bigger.
The first step found us a relatively flat area near the existing run. The most challenging part was to get the cinder blocks all parallel to each other. The 4x4 legs are all different lengths supporting a level platform. The platform has 2 layers of hardware cloth and is the floor of the coop. This should make cleaning easier and provide ample ventilation.
The footprint is 4' x 3' 6". The height of the platform was selected so the chicken-mom can easily reach into the coop without hitting her head on the header.
The next step secured the 4 walls to the platform. The front wall has a large people door for cleaning and food preparation. The left wall has external nest boxes and a window. The right wall will have a chicken coop door leading to a hallway (not yet built) that takes them to the run. The run will be partitioned so that See Yau can't intermingle with Gen-2.
This photo gives a better sense of the scale, the nest boxes and the roof. The next steps will form the nest boxes (plywood) and build an internal roost. Access to the nest boxes will be from the outside. We will be using distressed wood to give it a "lived-in" look.
Added May 2013: We made an addition to the inside basement chick condo, a double-wide (really a double-long) consisting of two dog pens with plastic chicken cloth. The doors are facing each other and gives the 6 chicks plenty of room. Heat lamps keep them toasty while they continue to grow feathers. The are already roost-trained.
We've started on the exterior of Coop-2 as well as some plywood for the nest box floor and a diagonal roost out of a stock 2x4. The distressed wood will be used for all walls and roofs.
The large opening will be a people door made from the same wood. The small door will be a chick door to the run via a chick hallway.
I've completed the exterior with roofs, doors and hardware. Here is the final coop. We used up all of the distressed wood and went with rough sawed hemlock for the roof with some copper flashing at the peak. It should age quite nicely and in a few months look the same as the rest of the exterior. The overlapped roof structure provides additional ventilation. I installed hardware cloth under the roofs to "predator-proof" the coop.
Here is a picture of the chicken door made from the same material as the roof. Pulley, cleat and rope will be installed soon.
Here are two views of the interior. The first one shows the main coop area with a diagonal roost made from a 2x4. We have found that the chicks' feet are warmer in the winter time with a flat roost.
This view shows the nest boxes (divider has not been installed). Access to the eggs are from the outside.
Let me know if you have any questions. I enjoyed building this coop. The distressed wood's condition made it impossible to build it with my usual tolerances. It was fun to build something "close enough".
Coop 2 is finally finished. Today I completed the enclosed hallway from the coop to the existing run and the cabling for the chicken coop. We are a bit concerned that the incline of the hallway is too steep for our small chickens. We'll find out tomorrow.
Here is a picture of the two hallways going into the run. We've constructed a run separator so that the Gen 2 chicks won't get pecked by the Gen 1 chick. We'll see how well this works. This was a fun project, but I'm glad that it is finished.
My son's girl friend painted this beautiful chicken on our new coop. It really makes the coop perfect. Thanks Kerrie!!!
Here are some hand written plans for the small coop. Please send me any questions you might have. The pics are not easily readable, sorry...