Rancho Soledad

[FONT=comic sans ms,sand]Alpine, CA [/FONT]
[FONT=comic sans ms,sand] 17 acres in the chaparral covered hills outside of San Diego, CA. Me, hubby, 3 indoor cats, 2 outdoor cats, 2 dogs, koi, and now chickens!
This page is dedicated to our wonderful burro we had for 10 years, George. We miss you.[/FONT]
After starting to buy fresh eggs at the local farmer's market, and reading Michael Pollen's In Defense of Food, hubby and I decided it was time for us to get chickens. Fortunately, we live in a rural area and have 17 acres, so we had plenty of options of where to build the coop. Our initial thought was to buy an eggloo, but I've always wanted to build my own house (and I hate plastic), so I figured this was the closest I was going to get. After doing lots of research (thanks BYC!) we decided to build on a concrete pad that would receive good morning sun in winter, was close enough to the house to be convenient and had a nice flat area next to it perfect for a run. Step 2 was drawing up plans.
The building plan would include a stem wall about 16" high (no wood on the ground to rot, easier to hose out) and then wood frame construction, with a slanted roof of corrugated metal. We chose the roof slant so that the prevailing winds (strong Santa Anas in the fall and winter) would not lift the roof off the coop. We also wanted a coop that would be comfortable for us to be in without having to duck or worry about hitting our heads. We decided on an 8'x12' plan, with the roof about 6' high on the short side and about 7.5' high on the high side.
I was smart enough to talk hubby into buying a compound miter saw, and he is now in love with it. I'm sure our coop would have ended up like something in a Tim Burton movie if I hadn't. After setting the stem wall, we framed it out with 2x4s and then used wood sheathing over that. Our plan included nest boxes built inside the coop, with an external door to be able to retrieve eggs without going in the coop. I also planned to have the roosting area enclosed in chicken wire underneath, with an exterior door, so the chicken poop would be easier to clean (got this idea off the internet - see below how this worked out). All the openings in the coop are covered in 1/2" hardware cloth. The size of the openings was dictated by where the 2x4 framing was and where we knew we wanted them. At this point we have no glass windows and may not need them, since we rarely get below 35-40 degrees at night in the winter (it has only snowed here 3 times in 10 years).
Coop Plans
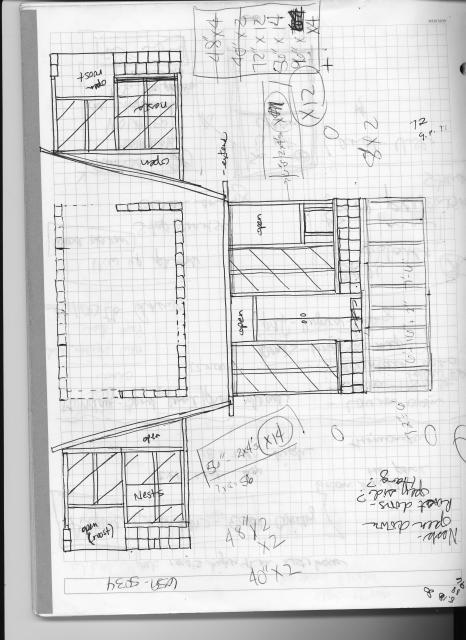
Here is a basic plan of what we built:
You can see my scribblings in my notebook - I drew plans and elevations of each side. I've reproduced the floorplan so it's easier to see on the right.
You can see my scribblings in my notebook - I drew plans and elevations of each side. I've reproduced the floorplan so it's easier to see on the right.

Construction pictures
Here are some pictures of construction. Our neighbor, who is a general contractor, came over occasionally to "inspect" and we passed! I think he was surprised considering neither of us has ever built anything before.
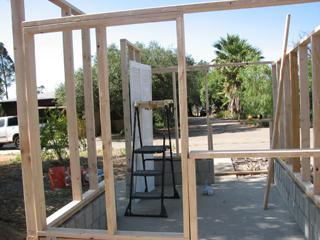
Here is once the framing was complete:
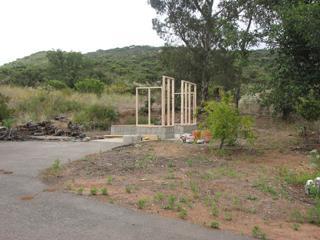
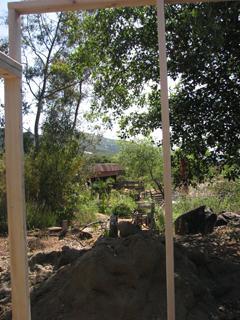
And the chickens future view out of the coop (the pile of DG will eventually be gone!):
Starting on the exterior sheathing (is that the right word?):
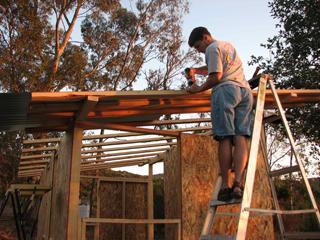
And here is hubby putting on roofing at sunset (yes I did help with all of this, but I'm also the one that has to take pictures):
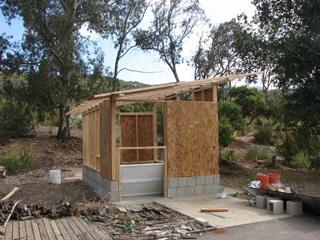
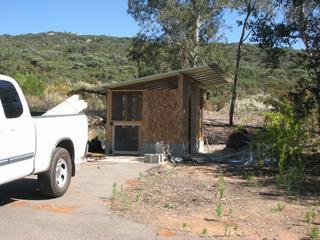
Almost done! Just needs chickens, and a run, and some trim, and paint, and...
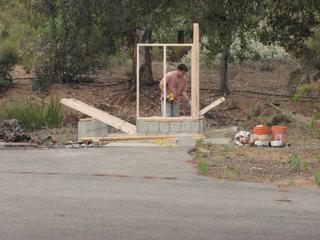
Here is once the framing was complete:
And the chickens future view out of the coop (the pile of DG will eventually be gone!):
Starting on the exterior sheathing (is that the right word?):
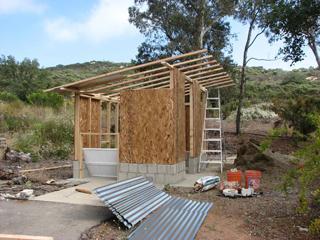
And here is hubby putting on roofing at sunset (yes I did help with all of this, but I'm also the one that has to take pictures):
Almost done! Just needs chickens, and a run, and some trim, and paint, and...
Chickens!
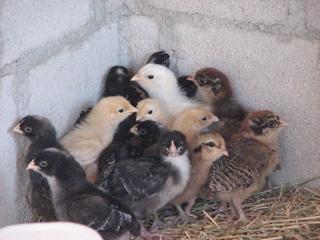
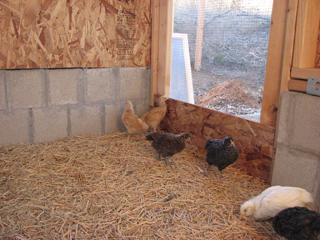
Some interior pictures: here are our chicks on their first day in the coop. We have 17: 4 buffs, 4 barred rocks, 4 marans, and 5 ameraucanas. Here they are huddled in the corner trying to stay as far from the big people as possible:
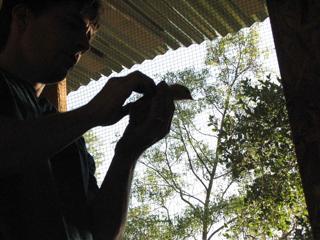
Hubby holding one and inspecting it:
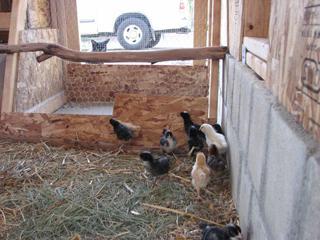
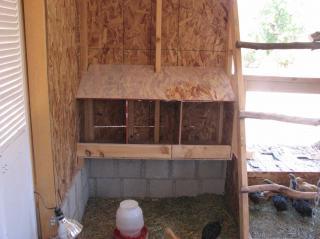
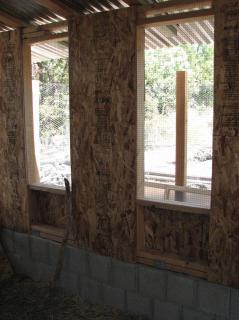
Here they are at about 1 month old, looking outside. This area you see was intended to have another roosting area like in the next picture, but it's funny how plans change as you start actually using the coop. This will eventually be a second people door. We intend to have a divider in the coop for times we have chicks, or to separate out meat chickens when necessary, so this way we will have easy access into both sides of the coop. We will build a second roost area in front of a different window opening.
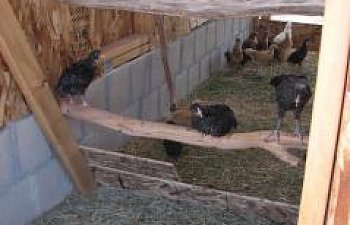
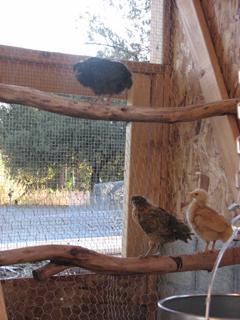
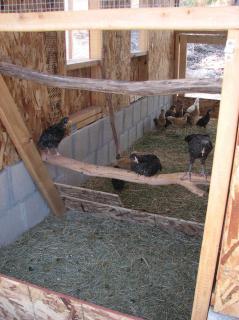
Here is the current roost. We used some eucalyptus branches from trees we had cut down. They already love sitting on them. Our original idea was to have the area beneath the roost "off limits" so they wouldn't mess around in the poop down there. We put in a small door so we could easily clean out this space more often. As it turns out, I decided the chicken wire was going to get in the way of their chicken butts when they roosted, and get covered with poop, so we just took it out. We can still clean out this area separately from the rest of the coop. We plan to do the deep litter method, so you can see in these pictures the pieces of plywood that will hold the straw and hay in as it gets deeper. These pieces are not screwed in, just held in place with a small piece of wood. There is also one by the door. Note the curious ears and eyes outside the coop in the picture on the right. So far the coop has been kitty proof, but the cats are very interested, as are the chickens.
Hubby holding one and inspecting it:
Here they are at about 1 month old, looking outside. This area you see was intended to have another roosting area like in the next picture, but it's funny how plans change as you start actually using the coop. This will eventually be a second people door. We intend to have a divider in the coop for times we have chicks, or to separate out meat chickens when necessary, so this way we will have easy access into both sides of the coop. We will build a second roost area in front of a different window opening.
Here is the current roost. We used some eucalyptus branches from trees we had cut down. They already love sitting on them. Our original idea was to have the area beneath the roost "off limits" so they wouldn't mess around in the poop down there. We put in a small door so we could easily clean out this space more often. As it turns out, I decided the chicken wire was going to get in the way of their chicken butts when they roosted, and get covered with poop, so we just took it out. We can still clean out this area separately from the rest of the coop. We plan to do the deep litter method, so you can see in these pictures the pieces of plywood that will hold the straw and hay in as it gets deeper. These pieces are not screwed in, just held in place with a small piece of wood. There is also one by the door. Note the curious ears and eyes outside the coop in the picture on the right. So far the coop has been kitty proof, but the cats are very interested, as are the chickens.
Some coop details...
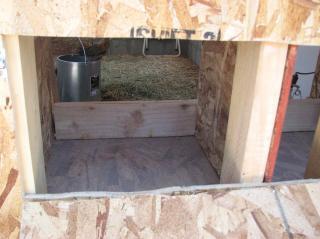
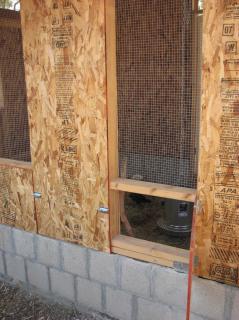
Nest boxes from the outside with the door open and closed, and from the inside:
Roost clean out door open and closed - the piece of plywood is not screwed in place so it can easily be removed for cleaning. This is after we removed the chicken wire that was under the roost area. The chickens love to hang out there now, and eyeball the cats:
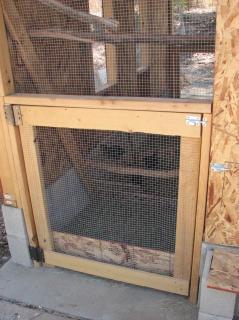
There are two doors to the run because we assumed there would be times we might have to separate the chickens. The run will also have two separate areas. However, both the coop and the run will be able to be opened so all chickens have access to all areas. This gives us a lot of flexibility. Doors to chicken run open (from the outside) and closed (from the inside):
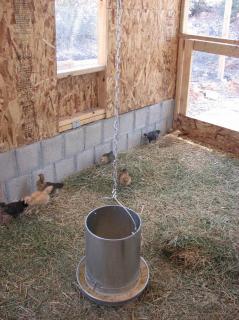
The chicken feeder hanging from the rafter. The chain is adjustable to raise the height. There will eventually be an automatic waterer (Little Giant I think) that will be hooked up to a water line just outside of the run. We will have one of these inside and out.
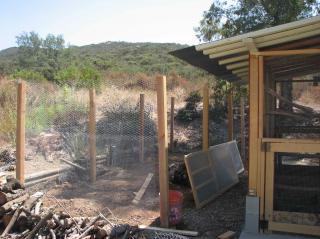
And the beginning of run construction:
There will be more pictures to come as the coop is painted and trimmed, and the run is complete. Eventually I will add another BYC page that will be all about the chickens!
Roost clean out door open and closed - the piece of plywood is not screwed in place so it can easily be removed for cleaning. This is after we removed the chicken wire that was under the roost area. The chickens love to hang out there now, and eyeball the cats:
There are two doors to the run because we assumed there would be times we might have to separate the chickens. The run will also have two separate areas. However, both the coop and the run will be able to be opened so all chickens have access to all areas. This gives us a lot of flexibility. Doors to chicken run open (from the outside) and closed (from the inside):
The chicken feeder hanging from the rafter. The chain is adjustable to raise the height. There will eventually be an automatic waterer (Little Giant I think) that will be hooked up to a water line just outside of the run. We will have one of these inside and out.
And the beginning of run construction:
There will be more pictures to come as the coop is painted and trimmed, and the run is complete. Eventually I will add another BYC page that will be all about the chickens!
Ideas, suggestions, what I would do differently
We took a lot of time deciding where to build the coop, and all the details of construction. I used paper with a grid on it to draw up several plans before deciding on this one. I tried to do as much research as possible about coop design, and the BYC coops pages were invaluable. However, no matter how much research you do, I'm sure once built there's always something you would change. As you can see above, I ended up deciding the idea about separating the roost area wasn't really a good one. If I had known that we might have done the layout a little differently. We also didn't plan how we are going to build a center divider in the coop, but we'll cross that bridge when we come to it.
I'm really glad we built the coop as large as we did. Everyone is right when they say build it bigger than you think you should (we learned that the hard way when building our pond, for which the same rule applies). Our neighbors call it the "Coopdiminium" and we call it "Pollo Palace" but haven't decided on an official name yet.
We used screws (as opposed to nails) in all our construction and that came in handy several times when we needed to "undo" something. I also feel it's a lot sturdier. We do get fierce Santa Ana winds (sometimes 70-80 miles an hour) and we really wanted to make sure it would hold up. We'll see this winter if it does! The roof has not been tested for water tightness yet, since we don't get rain in Southern California very often. I figured we could use silicone if there are any bad leaks.
I can't wait to get the run done and let the chickies out to play! More pictures will be posted here as we get more done. Eventually it will be painted and all the "stuff" will be cleaned up. Then we can wait for our first eggs, which should arrive around winter solstice!
[FONT=comic sans ms,sand]Stay tuned... [/FONT]