Our coop isn’t beautiful or even artistic. While I love the beautiful coops I see here, we were faced with time constraints and more importantly, financial considerations. We needed to create the sturdiest coop and run we could with a limited budget and no degree in architecture.
So, we started our journey at Lowe’s.

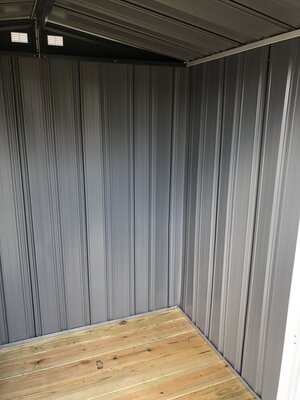
We bought a 5‘ x 6’ aluminum shed, and lumbar. We ordered our hardware fencing online at Amazon.
We first built the platform, then we put the shed together. That was no day at the beach!


I think putting the shed together was the hardest part! Getting all the panels to stay together while we put the braces on and all the little screws and nuts in was a challenge.
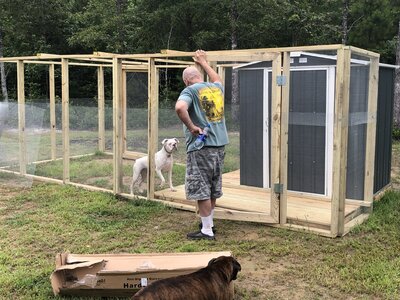
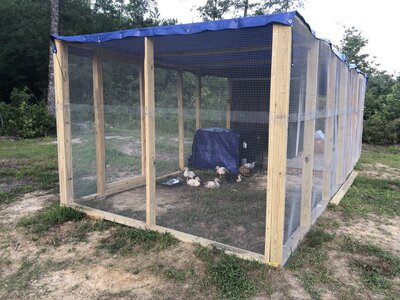
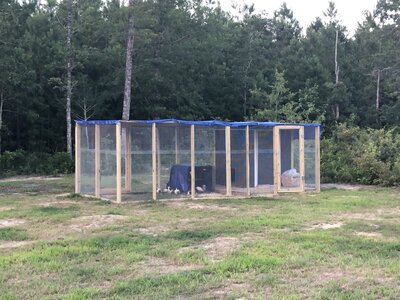
The next thing we did was begin building the framework for the run, and we finished the platform, which of course was the floor of the coop, and a little “porch” area. We bolted the shed to the wood platform all the way around.
Putting on the hardware cloth was a lot of fun, too! We had a thousand “paper cuts” on our hands and arms by the time we were done. And that was WITH wearing gloves. But we got it on and it was beginning to look like a suitable home for chickens.
We also put the doors on. We made very basic wood frame doors with the hardware cloth screening. We put one at the front entrance and one in the back.
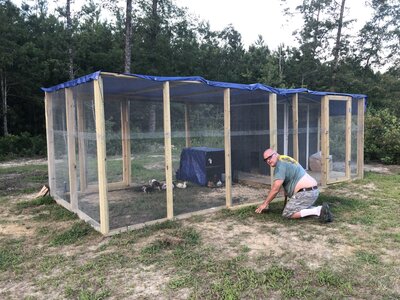
Meanwhile our little family of chicks and ducklings had graduated from their brooders, and were living in their temporary housing which we made from large dog crates, while they patiently waited for their new home to be completed.

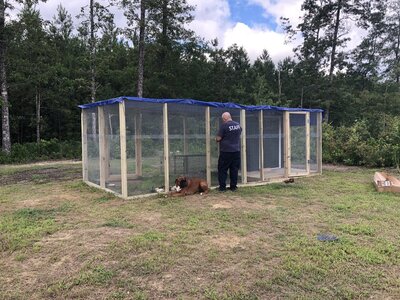
We put a chicken door in, and also two small shed windows (also from Lowe’s) for light and ventilation. We put hardware cloth over the windows on the inside.
We used tarps for the roof until we could get the supplies to put our metal roof on.
So, we started our journey at Lowe’s.
We bought a 5‘ x 6’ aluminum shed, and lumbar. We ordered our hardware fencing online at Amazon.
We first built the platform, then we put the shed together. That was no day at the beach!


I think putting the shed together was the hardest part! Getting all the panels to stay together while we put the braces on and all the little screws and nuts in was a challenge.


The next thing we did was begin building the framework for the run, and we finished the platform, which of course was the floor of the coop, and a little “porch” area. We bolted the shed to the wood platform all the way around.


Putting on the hardware cloth was a lot of fun, too! We had a thousand “paper cuts” on our hands and arms by the time we were done. And that was WITH wearing gloves. But we got it on and it was beginning to look like a suitable home for chickens.


We also put the doors on. We made very basic wood frame doors with the hardware cloth screening. We put one at the front entrance and one in the back.
Meanwhile our little family of chicks and ducklings had graduated from their brooders, and were living in their temporary housing which we made from large dog crates, while they patiently waited for their new home to be completed.


We put a chicken door in, and also two small shed windows (also from Lowe’s) for light and ventilation. We put hardware cloth over the windows on the inside.
We used tarps for the roof until we could get the supplies to put our metal roof on.