The Drummonds Chicken Coop
We are very unexperienced when it comes to building anything, but the prices for a coop and run of this size would have been very expensive if bought brand new in kit set form. I had been looking around at various other coops and runs and came up with a plan of what I thought would be a simple and easy to build coop and run.
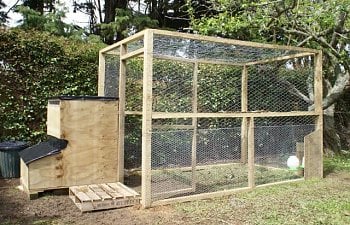
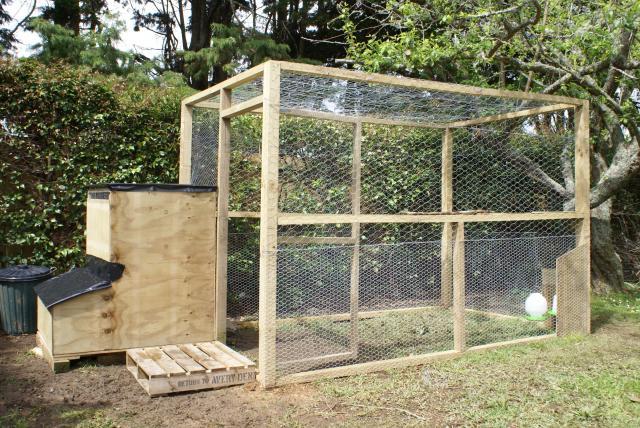
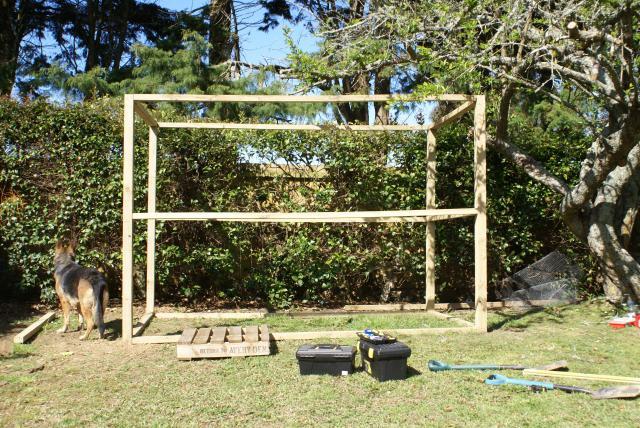
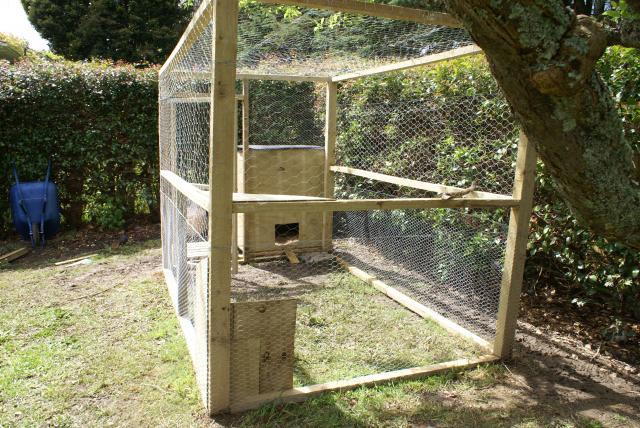
The run itself is 3m long by 2m wide and 2m in height.
The run itself is 3m long by 2m wide and 2m in height.
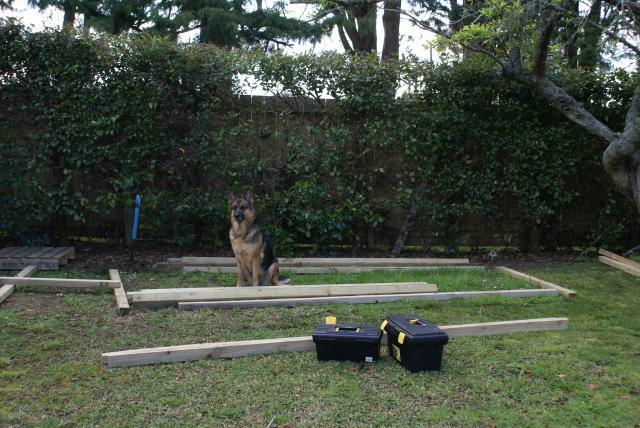
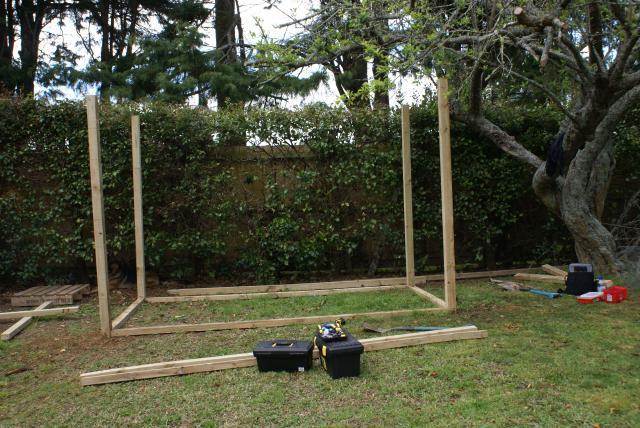
We used H3 treated timber - 4 x 100x75 posts and dug them into the ground about 500cm down into the ground. We didn't want to concrete them in, just to make it easier if we wanted to move the structure one day. We then used 50x75 rails and cut them to 3m and 1.8m lengths. We used decking nails. The ground was uneven, so the structure isn't perfect. But we just went ahead with it and did the best we could with limited skills!!
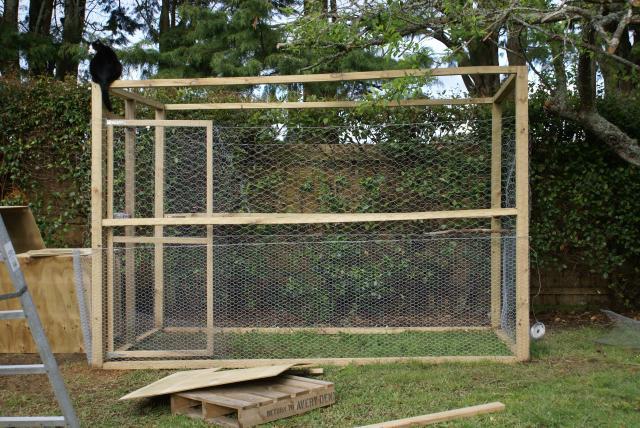
We wrapped the lower half of the coop with galvanised wire netting - hexagonal 25mm. And the upper portion including the roof we used the same - but hexagonal 50mm. As you can see, our cat and dog loved hanging
around to help out!
around to help out!
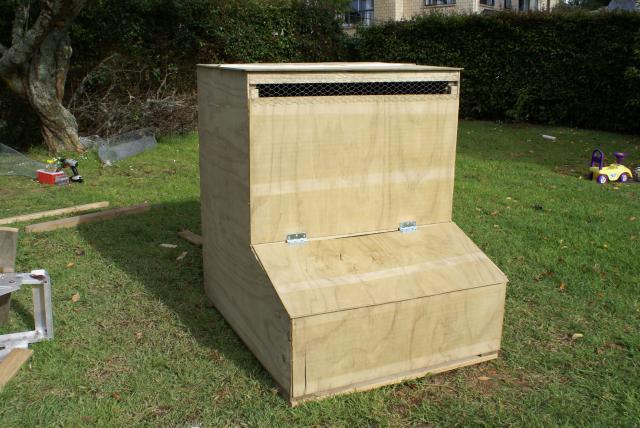
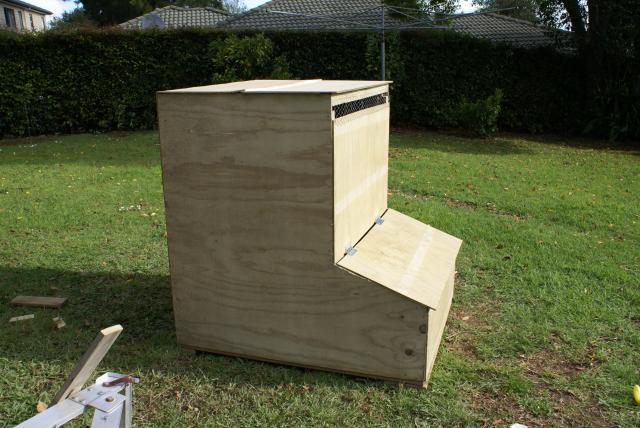
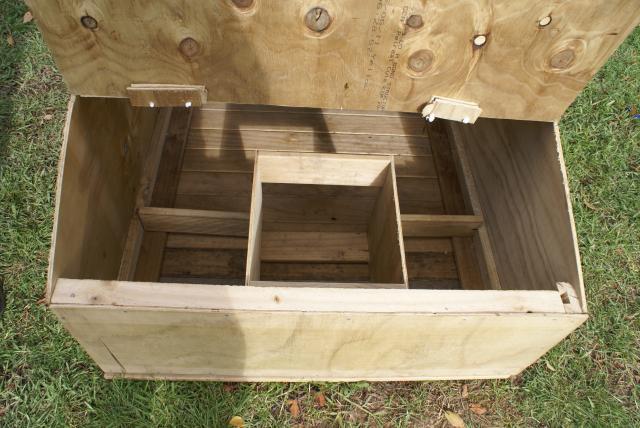
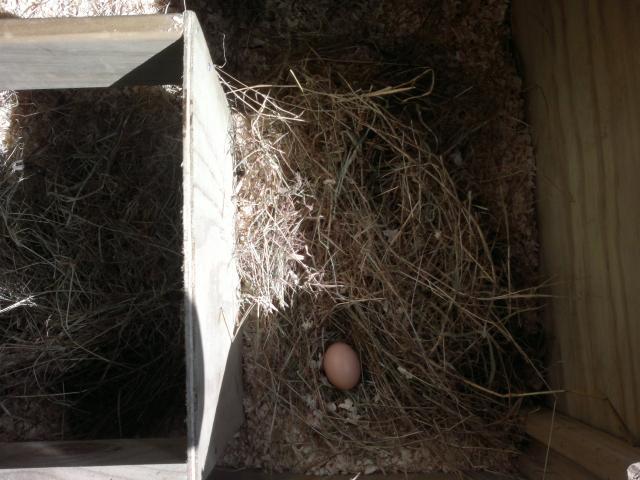
For the coop we used off cuts and bits of decking wood we had lying around the place to build the internal structure. And on the outside, treated plywood - 7mm. The dimensions of the chicken house is 1.2m in height, 1m in width and 1.2m in length (including the nest box area) For the nest boxes, again we used offcuts and designed a rudimentary 3 boxed nest box. Inside the coop we put pine shavings all over the floor and hay in the nest boxes. We placed 2 roosting bars made out of 2x4s 1m in length, at the height of 45cm high and 60cm high in the middle of the coop. We made a ladder which rests on the first roost to help them climb up as theres not much space inside to fly upwards.
For ventilation we just left a gap up high and covered it with chicken wire from the outside. So far, I'm not sure if thats enough ventilation for them, but I might ask around to see what other people think. We had a problem with water leaking from the roof inside so we have placed black plastic material over the top of the structure. This hasn't worked as well as I'd hoped so I've added some plastic roofing material on top and we shall see how that goes in preventing water leakage. It has been raining a bit lately (Our spring right this moment - Oct 11)
Outside we hung the feeder and waterer off of an offcut triangle peice of plywood, which we placed in the corner. We used other scrap bits around to build up a sheltered area for the feeder and waterer to protect them mostly from the rain and wind.
Our next project will be to place some roofing tin on top and maybe something on the sides to reduce water coming in. The run has already become very muddy. The chickens have brought out some of the pine shavings from inside the coop and spread it on the floor of the run - which has improved the mud, and they thought of that all by themselves! We will soon be getting some gravel and sand to place on the floor of the run as I've seen and heard that that will improve the mud.