"It's people!"
Disclaimer: No people were (intentionally) harmed in the making of this coop. And by harmed I mean turned into "new, delicious Soylent Green."
Our chicken adventures began a year and a half ago when my mom & her boyfriend decided they were no longer going to raise chickens. They asked me if I wanted a few before they all went into the freezer. I curb-rescued a Rubbermaid mower shed that was being thrown out and with some inspiration from BYC (https://www.backyardchickens.com/a/prairiepearlss-chicken-coop), I made a functional coop. We had 6 hens for almost a year, until we moved a couple streets over. We planned to move the hens the weekend after our furniture, but during the week a raccoon wiped them out.Disclaimer: No people were (intentionally) harmed in the making of this coop. And by harmed I mean turned into "new, delicious Soylent Green."
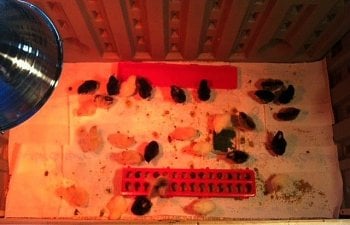
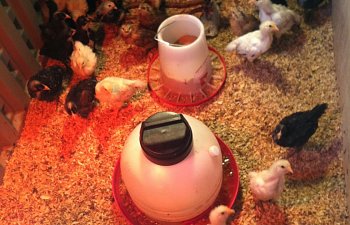
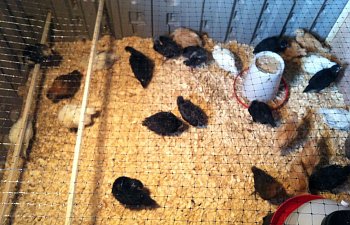
Well after a few months of no eggs or entertainment from chickens, we decided we HAD to get some chicks and start over. I ordered some chicks for July 8th and started designing a coop for 25. We recycled the Rubbermaid mower shed into a brooder after a thorough disinfecting and assembled it in our downstairs area, unconnected to the living area upstairs - thank goodness! Having never raised chicks we had no idea how much dust they produce! My mom told me I was nuts for brooding them indoors, but it worked out okay.

Day 1 Week 2 Week 4
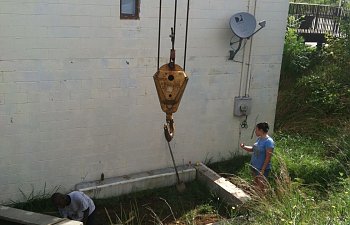
Meanwhile, we got caught up in work and building the coop kept getting delayed. In hindsight, we should have started the coop BEFORE getting the chicks - life and weather will always interfere with the best laid plans. On August 5th, we laid the foundation for the coop. It had managed to not rain for a few days, but the ground wasn't exactly dry. After nearly getting the Bobcat bogged down pretty bad, we gave up on leveling the area and brought in the heavy equipment, a 20 ton crane. The perks of living at work!
Foundation: $0
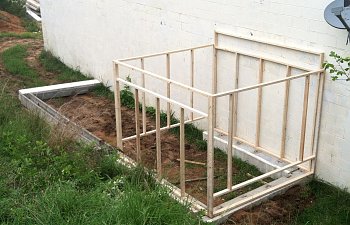
With the help of some guys from work, we laid six concrete planters as the coop foundation. The planters were recycled from a parking deck our company renovated downtown about a year ago. Four were laid upside down and two were laid right side up so I could possibly grow some plants along the run fence for shade and for the chickens to snack on. I spent the next week tearing apart old molds from our workshop to frame the coop. Here's where my designs really went out the window. I had planned on assembling the frame with the studs the 'flat' way instead of the normal way. However, we had a bunch of 3" screws, so we turned all the studs the 'right' way. After we assembled the wall sections, I then remembered the foundation wasn't level. So we flipped the front and back panels upside down since the openings wouldn't line up.
Framing: $0
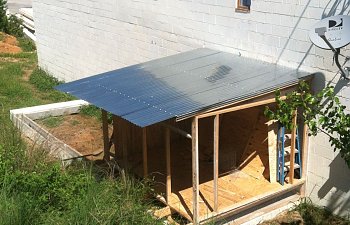
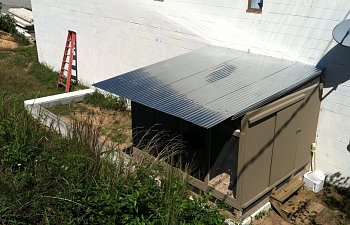
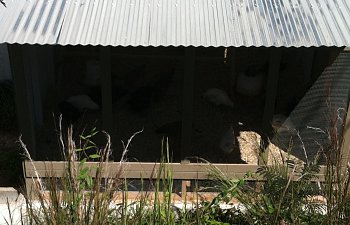
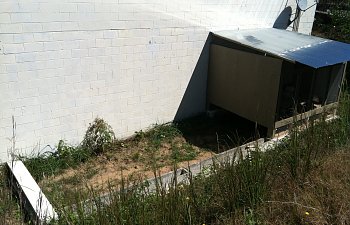
More rain and two weeks later, we finally get the roof and floor in. The floor joists are 2x6's with 1/2" plywood on top, the roof is just standard corrugated sheets from Lowes, and the walls are 1/4" plywood. The coop vents and the gap between the floor and top of the footing is 1/2" hardware cloth. The coop is high enough so that the chickens have almost 2 feet clearance to go under it to get out of the sun or rain.
Roof, Sheathing, and Flooring: $250
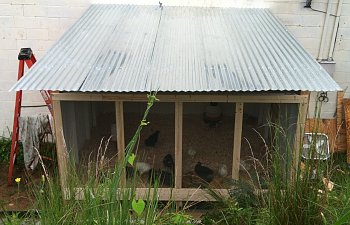
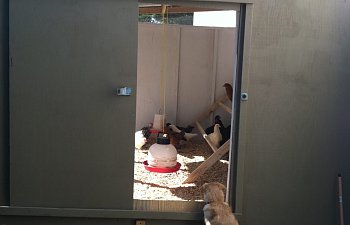
Nearly two months from when the chicks arrived, September 2nd, we had the coop 95% finished - enough to move the chicks in. At seven weeks, the poor things really needed out of the brooder! At the last minute I decided to make the whole south wall out of hardware cloth. I painted the inside with some leftover interior paint we had and put in a sheet of vinyl flooring I bought from Surplus Warehouse. Topped the floor off with a couple bales of compressed pine flakes from TSC and hung the feeder & waterer. Couldn't decided how I wanted to do the door, so we just screwed a piece 1/4 plywood up as our temporary door.
Our dogs inspecting our handy work before the chickens moved in.
Vinyl floor, hardware cloth, and furring strips: $120
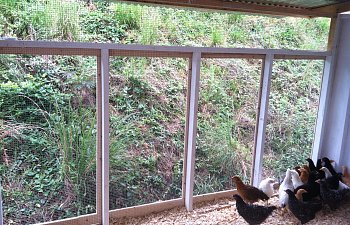
The chickens have the best view on the property. From inside the coop, you would never know that we lived on a sea of asphalt and concrete in an industrial area.
First to use the new roosts!
After battling the sheet of plywood/door for about two days, I replaced it with a piece of 3/4" plywood I found in the shop and some nifty pocket(less) door hardware I picked up from Home Depot. We also picked up a gallon of exterior paint to seal the plywood on the outside. We wanted a color that would blend in to the surroundings year-round and ended up with a gray-brown called "Wild Hawk", LOL! Eventually the block will be painted the same color.
Pocket door hardware, combination hasp, interior handle, & paint: $50.00
(Dog that I thought could NEVER be trusted around chickens behaving herself: Priceless.)
Southeast (Stairs: $32.00)
South
Southwest
We still have to build the run, install an automatic pop door ($70 Add-A-Motor), and ramp. Hoping to get it done soon so our chickens can FINALLY get some dirt between their toes. I have ordered a mini-ceiling fan for the coop for next summer as well ($12). I have a feeling this coop will always be work in progress, but we love it!