Raising chickens is a rewarding and educational experience. Whether you're homesteading, farming, or just starting a backyard flock, understanding how to hatch chicks and raise them properly will lead to healthy birds and successful egg or meat production. In this guide, I'll go over how to hatch chicks, how to raise them into adulthood, and which breeds are best for your goals—whether it’s eggs, meat, or dual purpose.How to Hatch and Raise Chicks: A Complete Guide to Breeds, Care, and Growth
 Hatching Chicks: The Beginning of Life
To start you'll need to have fertile eggs. Fertile eggs come from hens that have been mated with a rooster. You can purchase fertile eggs from sites such as eBay, Etsy, Greenfire farms, and many more! You can also purchase fertile eggs from local egg dealers or markets.
Collect eggs daily, storing them pointed side down at 55–65°F (13–18°C) and 60–70% humidity.
Store for no more than 7 days before incubating for the best hatch rate.

Incubation Options
A) incubator
When choosing the right incubator you need to think about the following: most reliable, allows control over temperature, humidity, and turning.
B) broody hen
You could also put your eggs under a broody hen. it's natural and effective if you have a reliable hen who wants to sit.
C) DIY incubator
You can come up with your own incubator at home! Below is a link to DIY incubator ideas

The $3, 30-Minute Egg Incubator : 8 Steps (with Pictures) - Instructables https://share.google/5DvnnhKUJaRAGktB8

Incubator Setup
Temperature: keep your incubators temperature at 99.5°F (37.5°C) for forced-air; and 101.5°F (38.6°C) for still-air.

Humidity: keep your incubators humidity between 40–50% during days 1–18; increase to 65–70% for the final 3 days (lockdown).
Turn eggs at least 3–5 times daily until day 18, then stop turning for hatching.
Hatching
Chicks typically hatch on day 21. Some bantam breeds such as silkies tend to hatch on day 19-20.
Do not open the incubator during hatching to avoid humidity loss.
It's crucial to let chicks dry off fully before moving them to a brooder to avoid them getting too cold


 Brooder Setup and Chick Care
Once hatched, your chicks need warmth, food, water, and safety.
Brooder Essentials
Heat Source: Before your chicks hatch it's important to decide what your going to use for heat. Some popular options are: heat lamps, brooder plates, or ceramic heaters.
Temp: it's important to keep you brooder at 95°F (35°C) for week 1, decreasing 5°F each week. Make sure not to make your brooder too hot. I recommend using a thermostat.
Bedding: Pine shavings (never cedar), straw, or paper towels. Avoid using news paper or puppy pads until they are around 4-8 week old. This makes sure they don't get leg injuries suck as splay leg. Below is a link to help cure splay leg
https://share.google/TfaLVQBOdzGOqdP4V
Enclosure: Secure sides, ventilation, and easy access.
Space: About 0.5 sq ft per chick for the first few weeks.
Food and Water

Chick Starter Feed (medicated or non-medicated):
18–20% protein.
Medicated feed helps prevent coccidiosis.
Fresh water: it's important to change your chicks water daily. Add chick electrolytes in the first 3 days if your chick seems lethargic or drowsy.
Health Monitoring
Check for “pasty butt” pasty butt is when dried poop blocks the chicks vent. It is very common with chicks. Below is a link to prevent pasty butt
Pasty Butt in Baby Chicks: Causes, Treatment and Prevention https://share.google/yjgELxnZpHd2KlCoj

Look for lethargy, crooked toes, or abnormal growth.
Keep brooder clean and dry to prevent disease.
 Transitioning to the Coop
Chicks can move to the outdoor coop around 6–8 weeks when they are fully feathered and weather is mild.
Coop Must-:Haves
Dry, draft-free shelter.
Secure fencing against predators.
Perches for roosting.
Nest boxes (1 for every 3–4 hens).
Run space: Minimum 4 sq ft per bird inside, 10 sq ft outside.
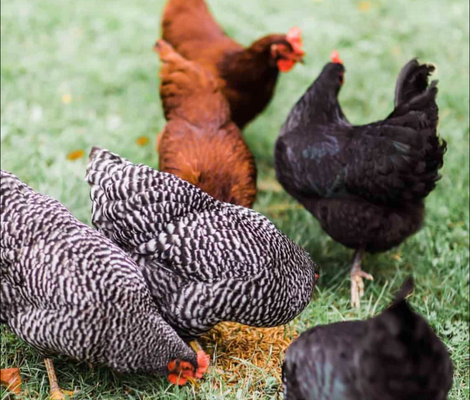
 Best Chicken Breeds by Purpose
Not all chickens are equal—some are bred for eggs, some for meat, and others for both.


 Tips for Raising Happy, Healthy Chickens
Socialize chicks early on—handle them gently daily to make them people-friendly. I personally put some chick food in my hand and let them peck at it.
Keep water clean—dirty water spreads disease fast. Would you drink dirty water?
Feed quality—don’t cut corners on feed, especially early on. If you don't spend money on the correct feed, there's a good chance your chicks will die young. Not to mention it could cause pasty butt due to poor nutrition.
Observe behavior—huddling = too cold; spreading out = too hot. You want your chicks to be all over the brooder. Thanks s is another reason to think about buying a thermostat.
Provide grit—once they eat anything other than crumbles (bugs, grass, treats). This helps their digestive system.
Transition feed--at 6–8 weeks, switch to grower feed; at 16–18 weeks, move to layer feed for hens.

Fresh air & sunshine—helps prevent illness and boosts overall health. I let my chicks go in the yard in a playpen at least twice a week.
Raising chicks is an incredible journey that teaches responsibility and connects you with your food source. Whether you're focused on gathering dozens of eggs, raising meat for your table, or enjoying the best of both worlds, the key to success is careful planning, attention to detail, and daily care. Start with a solid brooder, choose the right breeds for your goals, and enjoy watching your fluffy babies grow into productive, happy hens (and maybe a few roosters!).