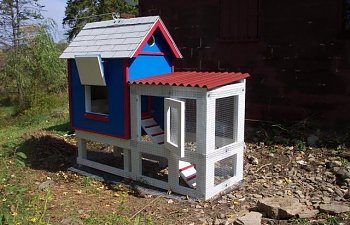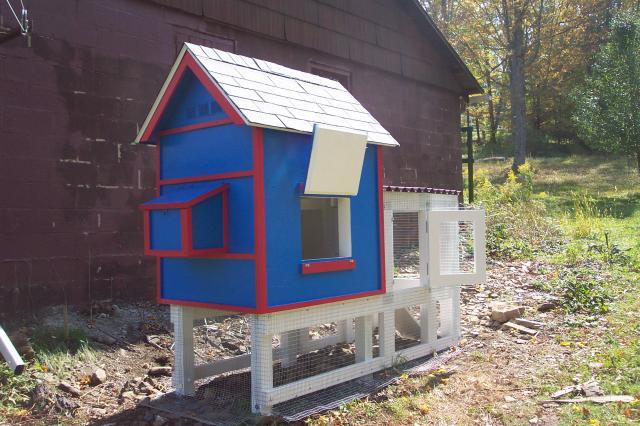
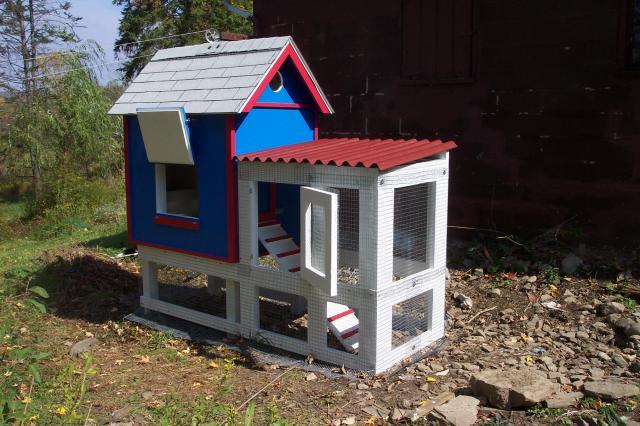
This is my little coop! Before putting in the chickens, I added more fence (two feet) extending outward from the bottom, and weighed it down with large rocks. I also put in about four inches of crusher-run gravel to raise the level for good drainage. I think it's predator-proof, but I still lock them inside at night.
I am not an expert builder. This was my first 'framing' project. Still, my construction order went well, with no unexpected problems, so I'll share it for those who may want some building ideas.
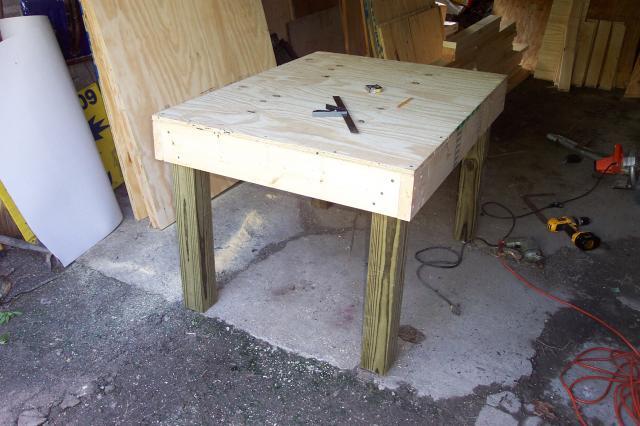
I glued linoleum to the floor to make it waterproof.
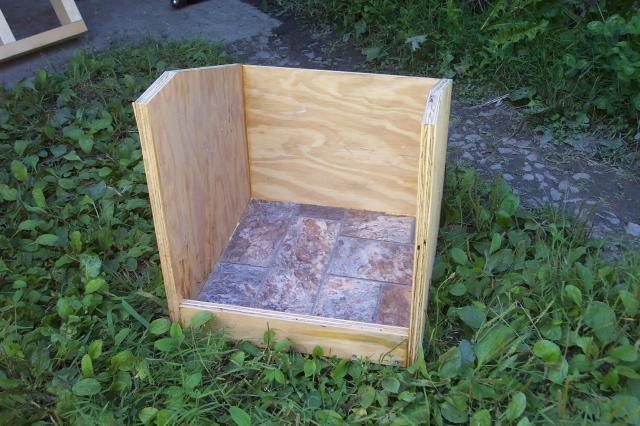
I made the nest box a little larger than usual, and lined the bottom with the same linoleum that I used for the main floor.
Cut the four bottom pieces (2x4) of the wall frame. Mark their lengths by laying them on the floor shown above. Cut the four top pieces to match the lengths of the bottom pieces.
Cut the 15 uprights. If possible, use a jig to easily make them all exactly the same length.
Assemble all four wall frames and lay aside.
For the cleanout, space the two uprights far enough apart that you can crawl inside the coop when you need to. Put the bottom horizontal close to the floor, but up a little to prevent litter spillout when you open the door.
For the nest box, do the left upright first. Hold the nest box in position against the left upright and use it to position the right upright. Fasten in the bottom horizontal. Again hold the nest box in place to properly position the top horizontal. You want a snug fit.
Temporarily clamp the four side frames to the base. Make sure everything lines up. Plane if needed to make sure all joints are snug. An electric plane and/or electric belt sander are wonderful for this step!
With help as needed, temporarily clamp one of the long side walls in place. Run a few (I used 6) temporary screws through the wall into the wall's frame. Verify everything fits, and plane as needed.
Mark along the length of the top of the wall so it can be cut to height later. Mark the cleanout door if it's that wall. Remove that wall and set aside.
Cut to height by following the pencil line marked in the prior step. For the wall with the cleanout door, cut the door hole. Repeat for the other long side.
Because the short walls are end caps, you don't need to do that trial mount for them. Just lay each of them on the floor, outside down, and lay its frame on top. Measure up from the bottom to make the skirt overhang the same as for the long walls. Clamp some scrap wall plywood to the sides of the frame as proxies for the long walls. Align the frame to exactly center it in the wall. If you followed my recommendation to cut the walls a fraction of an inch too large, you will have a tiny overhang on both sides that you will sand flush after assembly later. Temporarily run a few screws through the wall into the frame to keep everything stable for now and (more important) to let you line things up later exactly as they are now..
Decide how much of a roof peak you want and mark it. I used 45 degrees at the peak. Also mark cutouts for the nest box and chicken door.
Unclamp/unscrew the wall from the frame. Cut the nest box or chicken door. Cut the roof peak as marked above.
Screw each wall to its frame using the same screw holes that were made a few steps ago.
Cut roof trusses to match the roof peak and screw them in place. I also used exterior-grade glue for these critical joints.
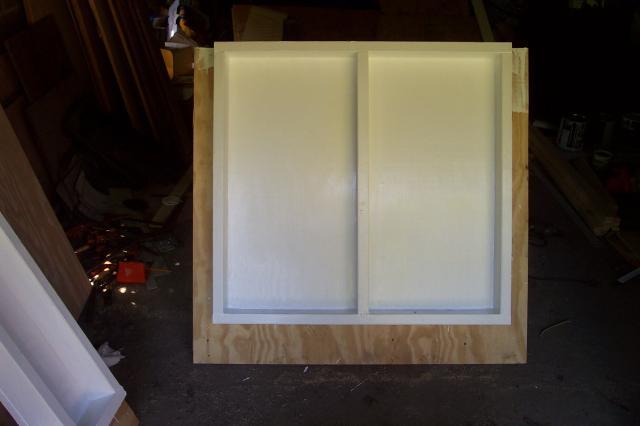
Here are photos of the four walls, screwed into the frame. I painted the inside because it's easier now. Note how the walls overhang at the bottom where they cover the skirt. Also note the overhang on the two long walls where the short walls will fit later.
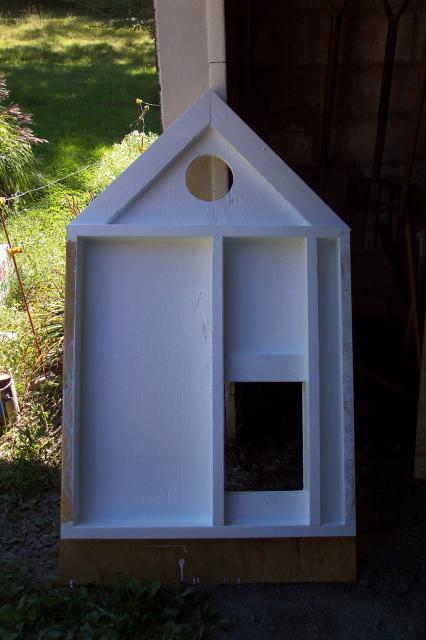
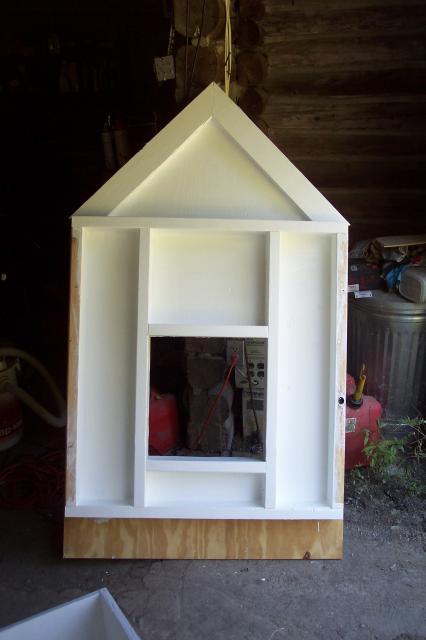
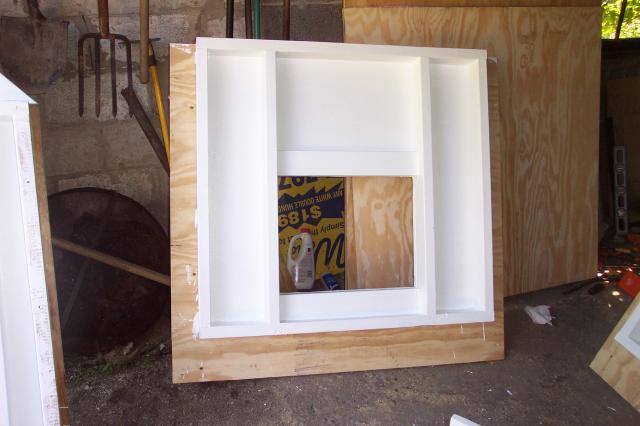
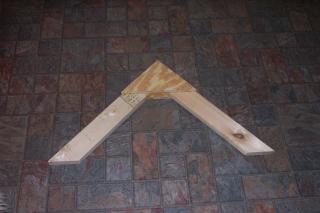
Make a third roof truss, which will be used for the center. Use a pair of plywood triangles (glued and screwed) at the peak to align it properly. Be sure the width of the truss at its base is exactly the same as the other two trusses that are already glued to the walls.
Using help, mount the two long walls to the base. Then mount the two short walls. If you prepared well earlier, they will snap right in place.
Mount the center roof truss, then cut and mount the roof. Use an overhang all around. If you are more clever than I am, you will size the roof so that shingles line up nicely.
Paint everything, and mount the doors.
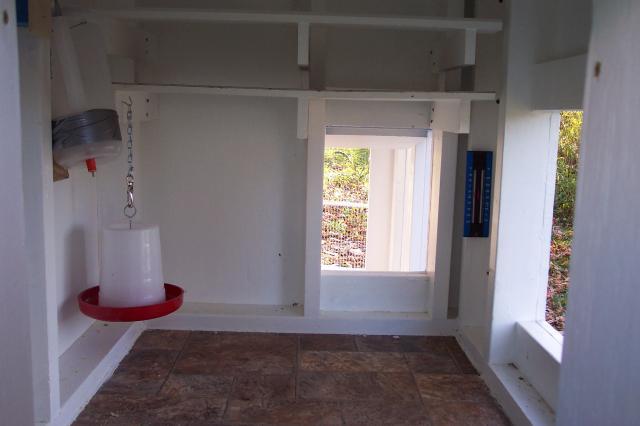
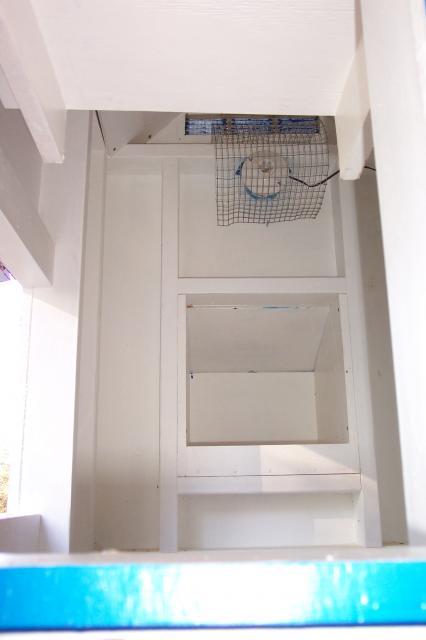
The left picture below was taken from inside the nest box, looking toward the chicken door side. Note the poop shelf under the roosting bar. The bar is 3 1/2 inches wide to help keep their feet warm on cold winter nights. The picture on the right is taken from the chicken door, looking toward the nest box. Note the protective wire mesh over the light to prevent unfortunate accidents.
My three Golden Buffs seem to be happy here. They are laying like crazy, and surprisingly tame. They eat out of my hand. What fun!

