
How to became a chicken owner...and master chicken coop builder in less than 30 days!!
...no prior experience needed!!!
I located BYC online, and began a crash course on chicken raising, coop building, feeding, how to care for day old chicks, etc. I spent untold hours reading and digesting. Being originally from Wisconsin, I'd been around chickens on my friends & families farms most of my growing up years. But I didn't own a big barn or hay loft, or anything remotely like a big farm yard where they could run free all day. Thank goodness for BYC!!! I found nearly everything I needed to know on the boards...anything I could possibly ask, had already been asked by someone, somewhere. ...lucky me!!!
The babies lived in my spare bathroom for the next 4 weeks, in a homemade brooder. I spent tons of time with them, and soon was officially their "Mommy"...they were SOOO CUTE! However, I was also in a mad rush to design and build a chicken coop before they outgrew the brooder, which I knew would be VERY SOON! I scoured BYC for days & days, to come up with a design that felt right. I live in Florida, and in '92 I lived on Homestead AFB...ground zero for Hurricane Andrew. We lost nearly everything, including several much love pets. Chickens posed a problem for me. How to keep them safe in a CAT 2-3 hurricane. (CAT 4-5 they're in the garage & we're outta here!) My coop couldn't be as simply built as many on BYC were...it needed to be firmly attached to the ground, openings that could be sealed securely against high winds and rain, and strong enough to keep them safe. I eventually decided to build a raised coop, to give the chickies as much shade and shelter as possible, and to prevent coop flooding in case of excessive rains. I put together a "plan"...a mish-mosh of ideas I had gotten from other BYC member coops...and it looked really good drawn on paper.
Here's how it turned out in "real life"....remember, we're not building contractors or carpenters! This was a "learn as you go" project done in panic mode!!!
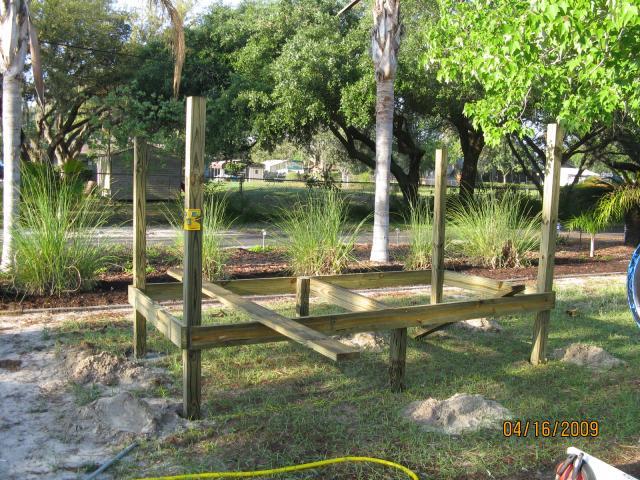
We started with 4 X 4 X 8's buried & concreted 2' in the ground, and 2 X 6's for the base..presure treated of course. The center supports were cut level with the floor joists. The corners were pre-cut to correspond with the planned slope of the roof. Everything was securely attached, especially to the 6 concreted posts. If a hurricane was going to take it, it would have to take the entire coop...not just pieces of it. The finished coop dimensions were to be 5' X 10'.
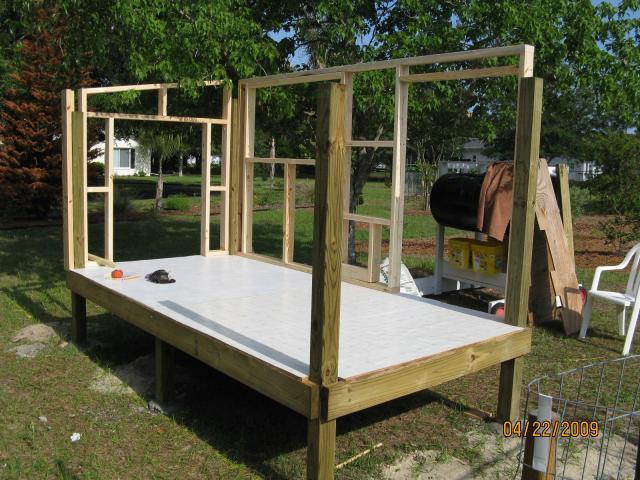
Then we added the floor joists, plywood floor, and glued down 2 scrap pieces of vinyl flooring. From there, we built each wall frame separately, and secured them between the corner posts. Amazingly, only one wall didn't fit properly! Pretty good for a novice blue-print drawer...pencil & ruler only! The bad wall was a bit too tall...easy fix. - When all 4 walls were installed, we added headers across the front & back lengths to support the roof, and then added the roof. We used course thread screws for construction (exterior & interior) as screws hold MUCH better than nails. We also used hurricane straps on the outer rafters, & rafter brackets (no sure of the exact technical name for those) In the 2nd pic you can see the rafter brackets on the outside of the coop...these were later moved inside to allow the sheeting to lay completely flat. There were also other "tweeks" we did as we went along, mostly little adjustments to this or that...things that come up as paper plans & the actual building part ways!!
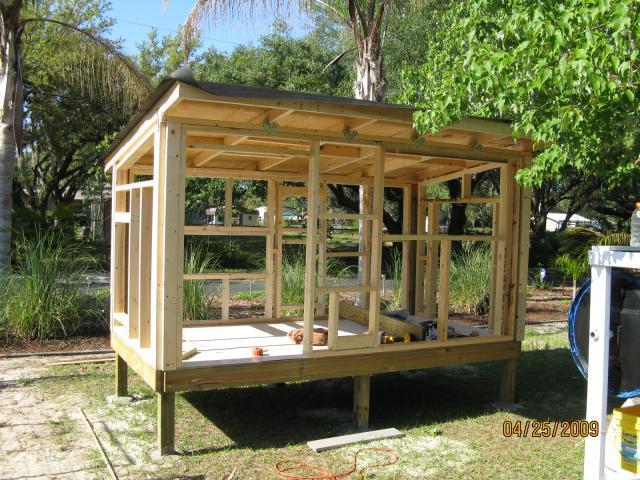
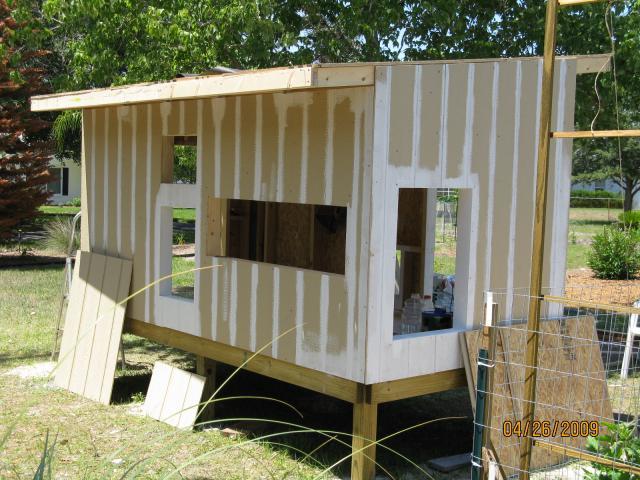
...and a little farther along. The sheeting is on, and partially painted. (I couldn't wait to see what it would look like painted!) To cut the openings in the sheeting, we first snapped a chalk like along the base frame (all the way around the coop) where we wanted the sheeting bottom to be. Then we hammered in nails on the line...to hold up the sheeting. We measured and cut one sheet at a time. (chalk line to rafters) Then one person held the sheeting in place (resting on nails!), and the other climbed inside and traced the openings. These were then cut out with a circular saw. We worked our way around the coop one sheet at a time to be sure each fit properly.
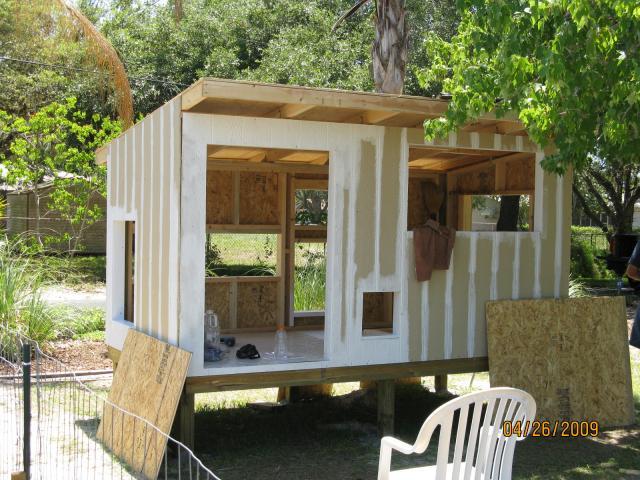
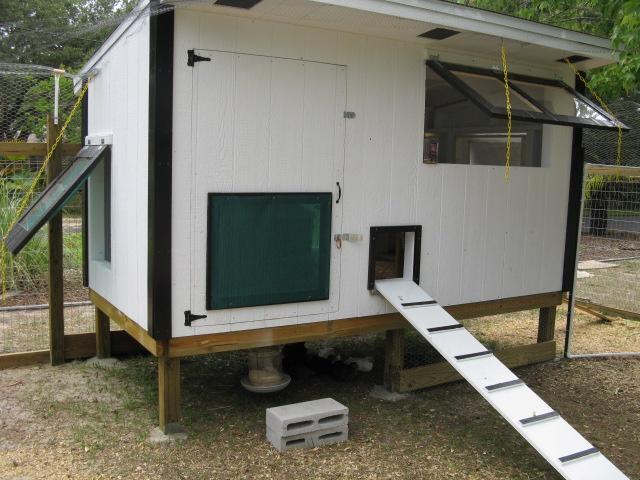
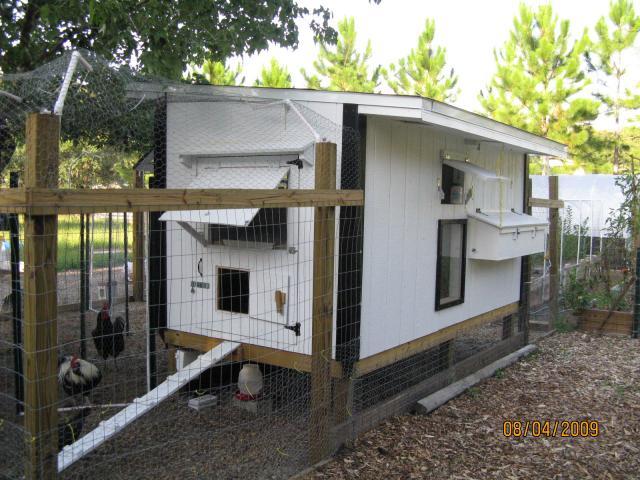
This pic is actually 2 weeks later...the fencing is up & chickens are finally OUT OF THE BATHROOM!! The windows were made over sized to overlap the openings by at least 1' all the way around. They consist of a 1 X 4 frame overlaid with sheeting. The windows are lexan panes I had from another project, and the window sizes were planned based on the pane sizes. They were caulked and sandwiched between the sheeting and 1 X 4 frame, making them watertight. The windows can be dropped and locked into place using hurricane straps (screwed to the coop) and nails pushed through the strap holes into drilled holes on each side of the windows. This makes for very quick and secure locking. When not in use, the nails remain in the window frames...always ready when needed. I've since added a small awning over the side window to deflect rain & water dripping. There is also shade cloth over the door window & side window that faces East...which will be removed during the winter months. The pop-door is inside secured by rails, and operates from outside the coop via pully's. It drops about 5" below the opening to the floor...preditor prevention.
The back side... The chickens LOVE their window!! When I open the door in the A.M., it's filled with little chicken faces. The nest box is all that's missing. I was originally going to put a gutter up, but decided it was an un-needed expense. Instead I made a rain diverter out of an extra piece of vinyl facia and just tucked it up under the drip edge where the pop door rope is...no more soaking wet arms when opening or closing the coop in the rain!!
'
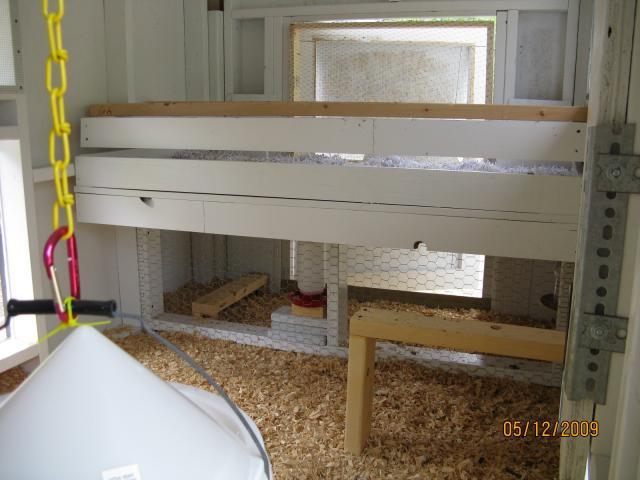
This was planned as my "storage area". Just a small cubby under the roost area. It actually ended up becoming a mini-coop when I needed emergency chicken space. I'm SOO glad I built it this way (hollow space under the roost's)...though not large, nor used for storage, it's been a life-saver several times in the past few months!! It's divided from the main coop by a 2 X 4 frame covered with chicken wire, and screwed into the wall studs. It can be very easily moved (larger or smaller space), or removed completely. I also later built a small awning over the door to stop water/rain issues.
A better view of the separate area under the roosts. When I used it for chickens, I made a small 1 X 2 frame covered with bird netting and installed it at the back of the roost area. I made it easy (no tools needed) to install/remove by drilling 4 oversized holes in the frame and into the coop frame...and inserting 4 nails to hold it in place. You can see it in the pictures (below) of the roost area.
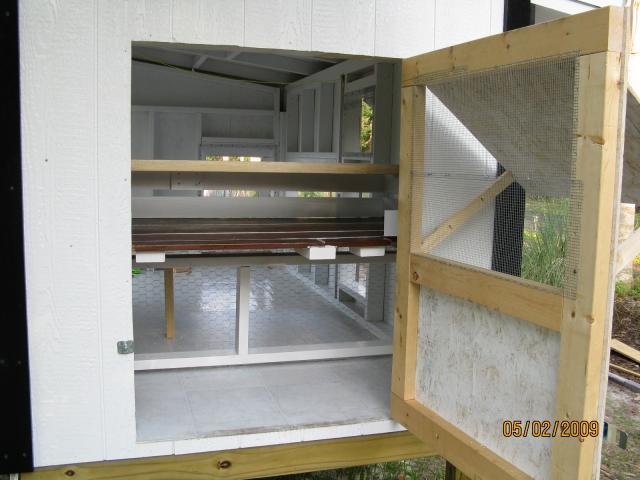
Inside the coop. The nest box was built and installed a month later. You can see the upper roost area & lower mini coop to the right. The homemade feeder...thanks to folks at BYC!...works great!
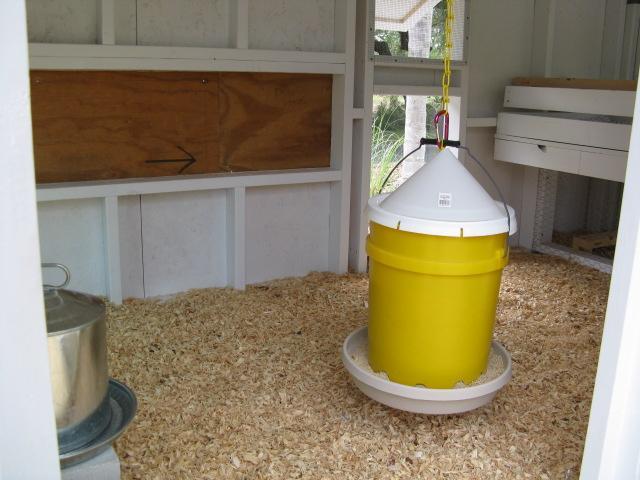
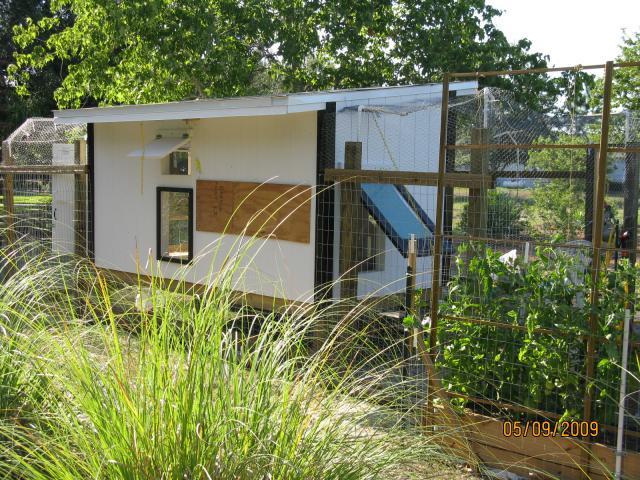
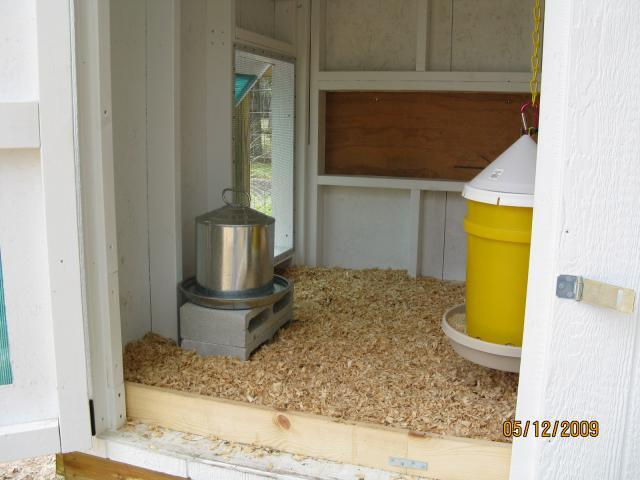
This window ended up (unplanned!) being large enough for a small box fan, which I've since installed (outside the wire). The hens & pullets truly appreciate it when it's 90 degrees, humid, and sunny...keeps the air moving while they lay. I've also replaced the metal waterer with a plastic one...after about a week of use. It was beginning to etch below the water level, and I just wasn't comfortable with the idea of anything (metal) leaching into their water. Plastic isn't perfect either, and it's more work to keep clean, but I'm more comfortable with it.
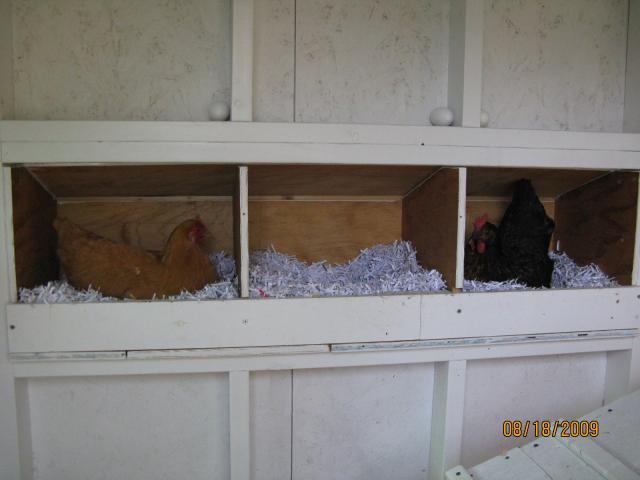
Next boxes finished, installed...and in use!! This is their first week of laying. I use shredded paper, and my girls seem to really like it. Tried pine needles per several BYC member suggestions in 1 box...the girls outright refused to lay in that box until I replaced them with paper. (shrug?!) I didn't install a perch in front of the boxes. I planned to, but my girls don't seem to have a need for one. They just hop up and in. Saved me a little work.
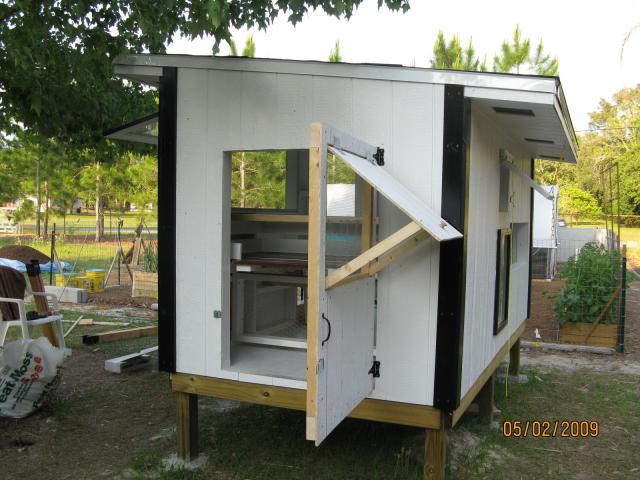
The totally finished coop. The end storage was converted into a small coop area...had to cut a chicken door in the door. I framed it with 1 X 2's inside, and use a simple wooden latch inside to secure it. I also added an awning over the door to keep the rain out...works beautifully! I also put the same type awing over the window on the other end of the coop.
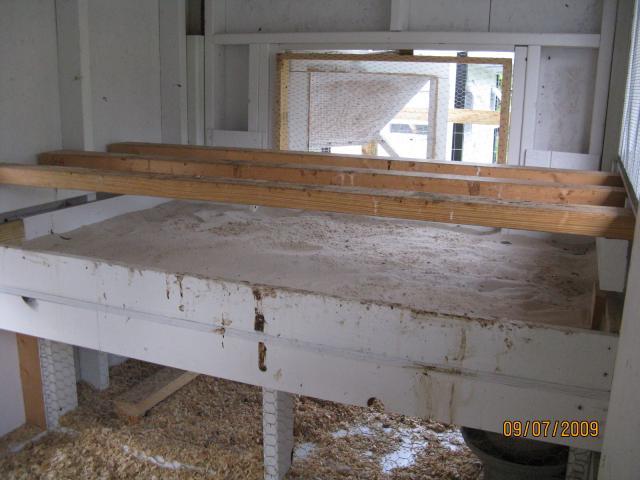
This is my original droppings board/area. I filled it with shredded paper, which worked well, and could be composted, but was a pain to clean out each day. (If I didn't clean it out each morning, I ended up with maggots, flies, and awful smell) Sooo. after 3 months (2nd pic), I came up with a better idea...from reading at BYC!! I removed the top face board, added another perch, caulked the cracks/seams, and filled the box with play sand. I now use a cat scoop to clean it out each day...piece of cake!! Wish I had done this from day one!!! - You can also see my storage area that was turned into a small coop area. It will comfortably house several young birds, or 2 roosters in an emergency. (started building a 2nd coop in 8/09!!) The small perch on the floor (right) was for several chickens until they learned to fly up to the roost area. They used it as a step...has since been removed.
The new and improved roost area. I try to keep my coop as "poop free" as possible, but chickens are just plain MESSY!!
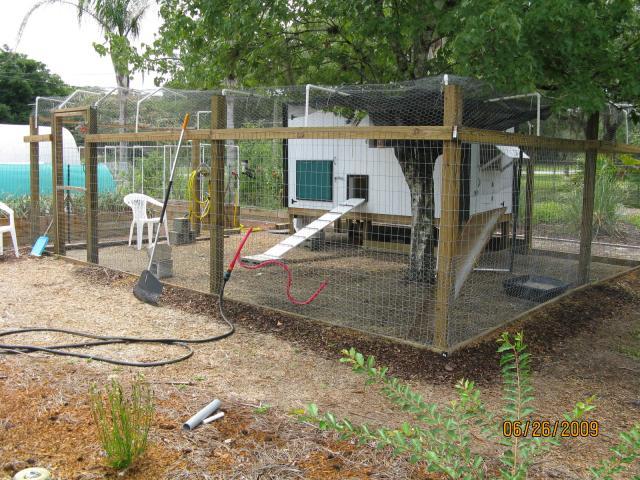
And here we have the finished coop! The enclosure roof was added due to very aggressive red shoulder hawks. I had to improvise... I used PVC arms to raise the height, covered these with 3' chicken wire, and then stretched bird netting across the opening over to the coop. (wire ties...LOTS of wire ties!!) The hawks have perched on the PVC with me only 20' away. Sooo happy I covered the top! There's still a small open area just below the maple tree branches, but no outside birds can fly directly into the enclosure...they have to navigate the branches getting in and out. (a neighbor 75 yards away has chickens. She's lost 9 in the past 6 weeks...I witnessed it take her young rooster a few weeks back...I was too far away to help...HEARTBREAKING. She still has no overhead protection. )
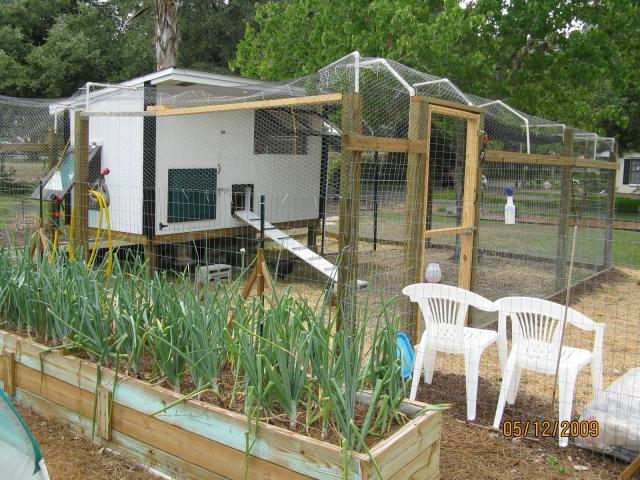
I built it next to the garden area, and it works out GREAT!! ...for both me and my chickies!
...Today is 9/13/09...my second coop is nearly finished. Chickens are definitely an ADDICTION!!!