- Feb 10, 2011
- 88
- 0
- 39
DH finally got me chickens!
They will be three weeks old in a couple of days, and I wanted to post our progress on our coop for our four girls- 2 EE's, a Delaware and BA.
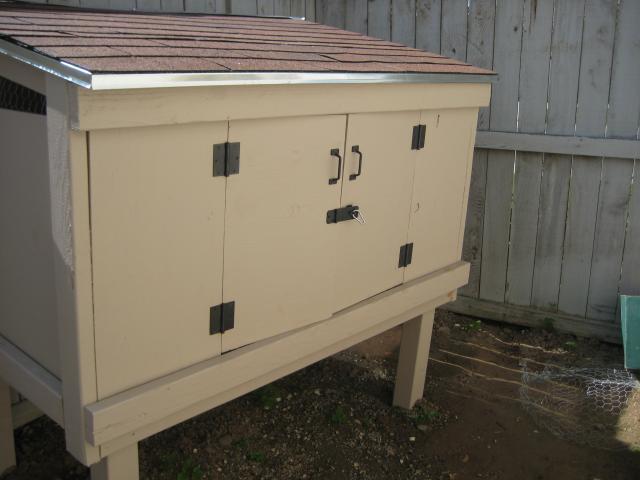
Bear with my explaination of what we used to build the coop so far, my husband would shame me for my lack of knowledge on terminology, lol. The coop is setting on 24" off the ground on 4x4 posts, and the coop floor plan is 3.5'x5' (3.5' tall) We have so far built the frame for the coop (took us seriously a day to finish that, I was quite proud!) and put the back wall as well as the front panels. The opening on the front will have 2 access doors opening up 36" wide for easy access. Found some scrap vinyl at lowes and installed that on the floor to make cleaning easy. We also went to our local "special waste facility" where people dump their old paint, and they recycle it all- and ended up getting a FREE 5g bucket of a tanish color that I think does not look to bad for the price
 Using old milk crates for the nest box, and I (yes me, a powertool using woman! lol) build their roost that will have a droppings board beneath it (also lined with the vinyl floor) so I can slide it out once a week to hose the sucker off.
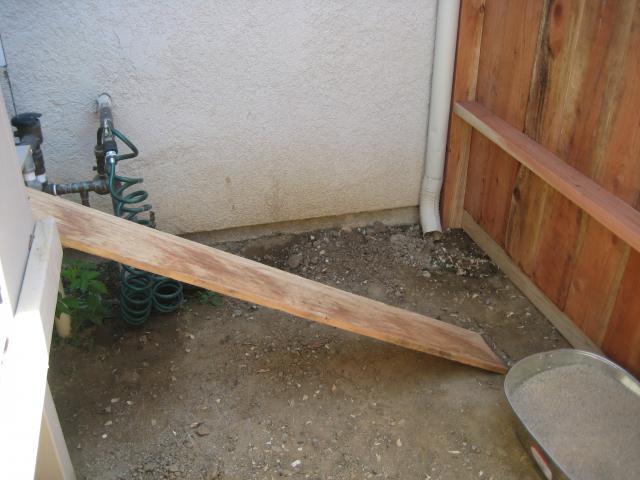
The run will be 3.5'x8', and the side yard that is shown in the picture will be their area to "free range" as it is fenced off from the rest of the yard. It also has the nasturtiums, raspberries, and squash plants for them to dig through when they are let out. We live in the most of urban areas in town (seriously, off the golf course in the middle of town!) and have thankfully read through our bylaws in the neighborhood, and are prepared to fight any neighbor who has complaints (or bribery with eggs... haha)
View of the coop frame/location (I have a feeling the girls will be all over those nasturtiums!!) Sorry, couldnt figure out how to make it not sideways
Front view- the opening will be for the 36" human access door... We also found some matching foster farms milk crates for nest boxes- free
My carpentry contribution. For my first time building anything, I think that the roost turned our darn good!! There are 2 roost poles (closet rods) 24" long, front one 18" high, back one 22" high.
I will post more pictures as we continue the build. I seriously could not have done this without all the amazing coops on this website to look at for example. I've been designing this before I even HAD the chickens... so I'm pretty excited that its finally happening!!!
Let me know what you think!!
They will be three weeks old in a couple of days, and I wanted to post our progress on our coop for our four girls- 2 EE's, a Delaware and BA.
Bear with my explaination of what we used to build the coop so far, my husband would shame me for my lack of knowledge on terminology, lol. The coop is setting on 24" off the ground on 4x4 posts, and the coop floor plan is 3.5'x5' (3.5' tall) We have so far built the frame for the coop (took us seriously a day to finish that, I was quite proud!) and put the back wall as well as the front panels. The opening on the front will have 2 access doors opening up 36" wide for easy access. Found some scrap vinyl at lowes and installed that on the floor to make cleaning easy. We also went to our local "special waste facility" where people dump their old paint, and they recycle it all- and ended up getting a FREE 5g bucket of a tanish color that I think does not look to bad for the price

The run will be 3.5'x8', and the side yard that is shown in the picture will be their area to "free range" as it is fenced off from the rest of the yard. It also has the nasturtiums, raspberries, and squash plants for them to dig through when they are let out. We live in the most of urban areas in town (seriously, off the golf course in the middle of town!) and have thankfully read through our bylaws in the neighborhood, and are prepared to fight any neighbor who has complaints (or bribery with eggs... haha)
View of the coop frame/location (I have a feeling the girls will be all over those nasturtiums!!) Sorry, couldnt figure out how to make it not sideways


Front view- the opening will be for the 36" human access door... We also found some matching foster farms milk crates for nest boxes- free

My carpentry contribution. For my first time building anything, I think that the roost turned our darn good!! There are 2 roost poles (closet rods) 24" long, front one 18" high, back one 22" high.

I will post more pictures as we continue the build. I seriously could not have done this without all the amazing coops on this website to look at for example. I've been designing this before I even HAD the chickens... so I'm pretty excited that its finally happening!!!
Let me know what you think!!