Many of you have gotten my plans for a 2 unit rollout nest box and I have talked with several others about how to modify the plan to make it even larger. I have been using a box that has 6 nests and for the past year it has worked beautifully. Recently I have noticed several birds trying to pull eggs back inside their nest and even though it's hard to believe that they can reach under the partition to get the eggs, several birds have managed it and have turned into egg eaters. After much thought I have redesigned the nest box so that the eggs travel much further and hopefully this will eliminate their ability to get their head and neck far enough under the partition to reach the eggs.
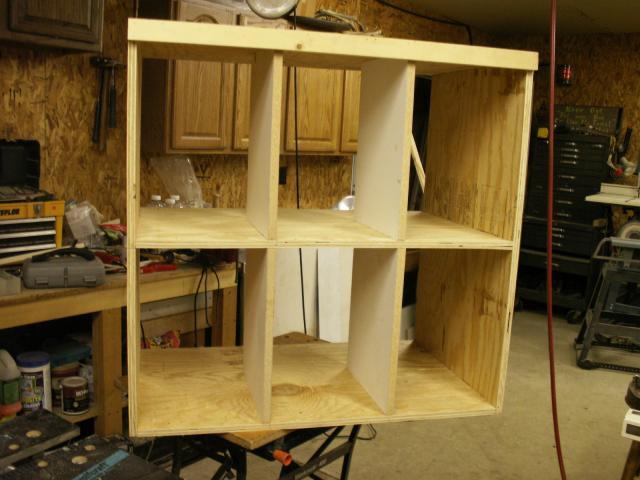
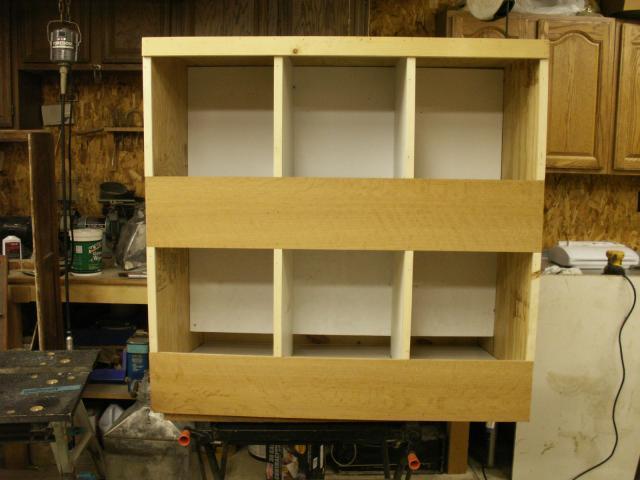
The nest box shell view from chickens entrance side with partitions installed

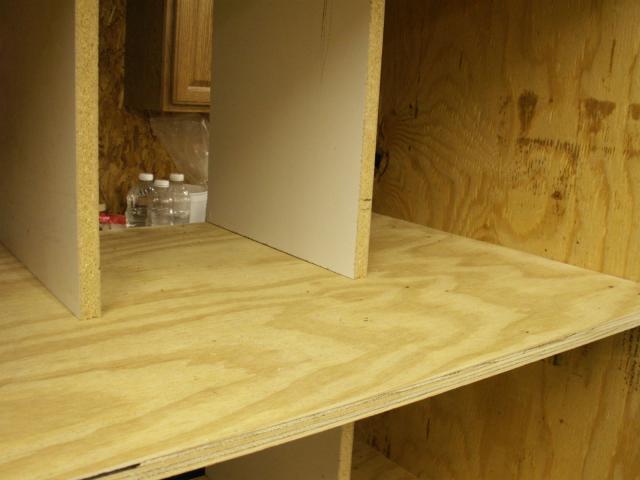
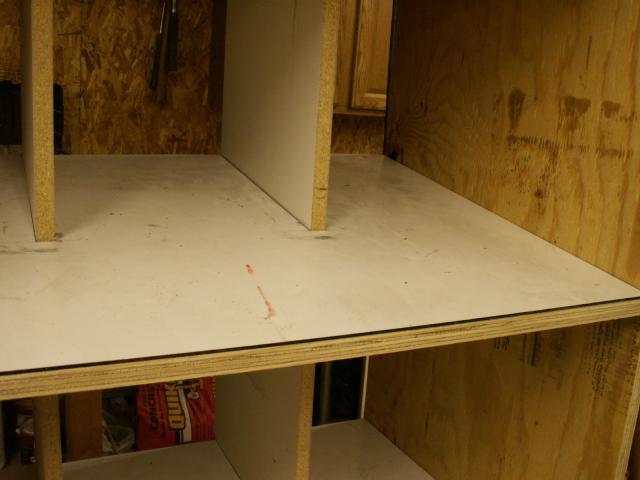
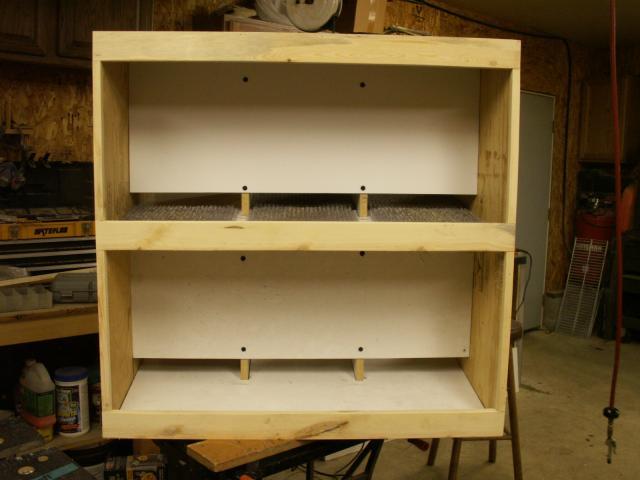
Nest box shell view from access side
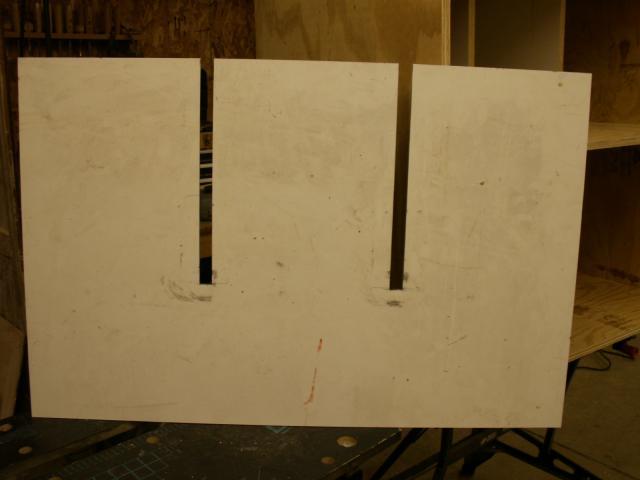
Egg ramp platform slotted to fit around partitions
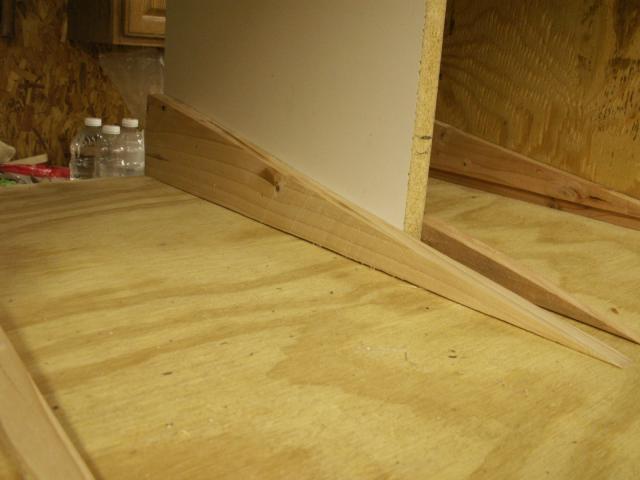
Wedges to hold egg ramp 3 1/2" high
Egg ramp installed
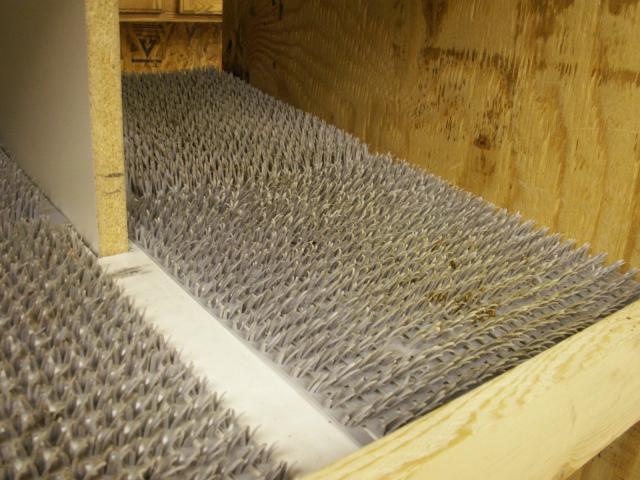
Nestpads installed requires 2 per nest
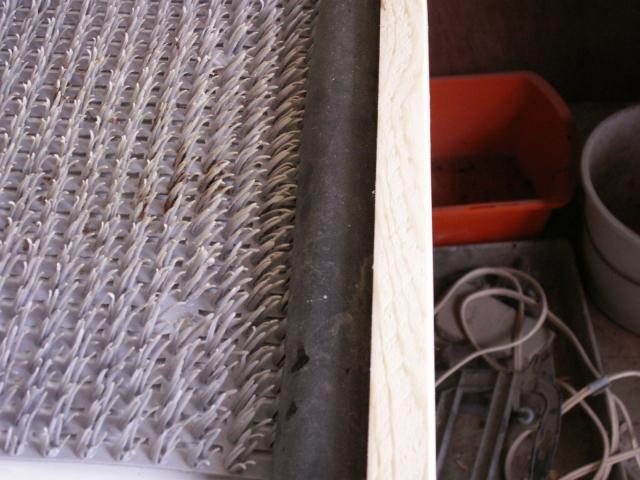
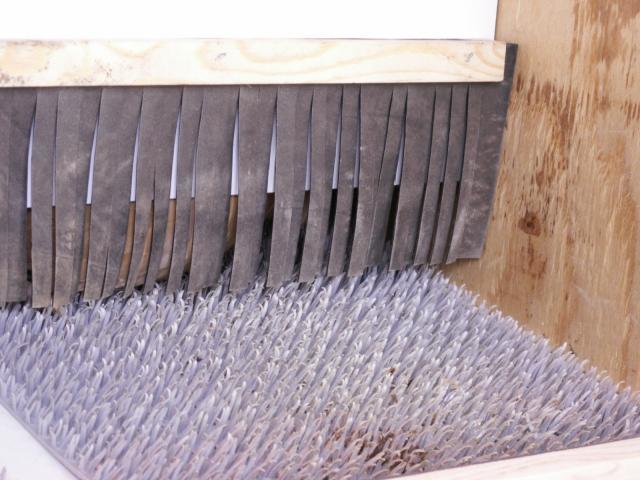
View from nest to access area showing bumper (1/2" foam pipe cover split)
View showing bumper
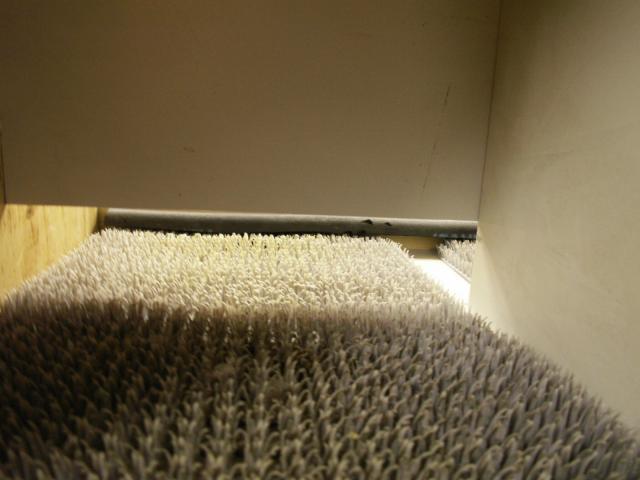
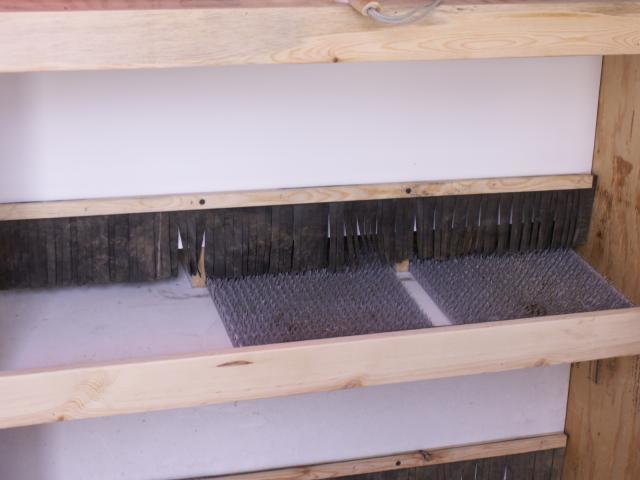
Access side with back partitions installed with 2 1/4 gap above ramp
Nest entrance view with front installed edges of plywood trimmed
Where the previous design has a 12" ramp and the eggs were close to the partition sitting in a 4" tray section, the new ramp is 24" and the eggs wind up sitting 10" from the back partition. I've added a curtain to further discourage the birds from reaching under back partition. The curtain is made from rubber that I've slit.
Material list
2 sides - 3/4x24x36 2 bottoms - 3/4x24x36 1 top - 3/4x24x37 ½ Note: these pieces can be cut form one sheet of plywood
4 partitions - 3/4x14x17 ½ 2 ramp platforms - 1/4x24x36
12 ramp wedges - 3/4x3 1/2x24 cut tapering to 0
2 back stops - 3/4x3 1/2x37 ½ 1 bottom nest front - 3/4x5 ½ x37 1/2
1 top nest front - 3/4x7 1/4x37 ½ 2 back partitions - 1/4x14x36
2 trim board for edge of ply at top - 3/4x1 1/2x37 1/2
10? ¾ x ¾ use to cap plywood between nest fronts and access side back stops
3? ½ foam pipe insulation cut in half for bumpers
2 pieces of 4? rubber for curtain trap rubber between 2 pieces of 3/8x3/4x36 stapled together
The nest box shell view from chickens entrance side with partitions installed
Nest box shell view from access side
Egg ramp platform slotted to fit around partitions
Wedges to hold egg ramp 3 1/2" high
Egg ramp installed
Nestpads installed requires 2 per nest
View from nest to access area showing bumper (1/2" foam pipe cover split)
View showing bumper
Access side with back partitions installed with 2 1/4 gap above ramp
Nest entrance view with front installed edges of plywood trimmed
Where the previous design has a 12" ramp and the eggs were close to the partition sitting in a 4" tray section, the new ramp is 24" and the eggs wind up sitting 10" from the back partition. I've added a curtain to further discourage the birds from reaching under back partition. The curtain is made from rubber that I've slit.
Material list
2 sides - 3/4x24x36 2 bottoms - 3/4x24x36 1 top - 3/4x24x37 ½ Note: these pieces can be cut form one sheet of plywood
4 partitions - 3/4x14x17 ½ 2 ramp platforms - 1/4x24x36
12 ramp wedges - 3/4x3 1/2x24 cut tapering to 0
2 back stops - 3/4x3 1/2x37 ½ 1 bottom nest front - 3/4x5 ½ x37 1/2
1 top nest front - 3/4x7 1/4x37 ½ 2 back partitions - 1/4x14x36
2 trim board for edge of ply at top - 3/4x1 1/2x37 1/2
10? ¾ x ¾ use to cap plywood between nest fronts and access side back stops
3? ½ foam pipe insulation cut in half for bumpers
2 pieces of 4? rubber for curtain trap rubber between 2 pieces of 3/8x3/4x36 stapled together
Last edited by a moderator:


