We moved into a new house in Feb of last year (2013) I got drunk at a St. Paddy's day festival weeks later, and they had a petting zoo... Hours later I had 12 chicks in a kiddie pool in my kitchen ") Guess it's time to build a bigger coop than the small A-Frame we have.
Guess it's time to build a bigger coop than the small A-Frame we have.
Note- I am a chemist and NOT a contractor. I made this up as I went, used as little as possible, and learned as much as I could. It took me almost 6 months. I would hit points where I absolutely had no clue how to proceed next. I learned to make roof rafters, lay metal roofing, mend wire fencing, custom build doors and measure twice before cutting once. I made nesting boxes, perches, and doors on pulleys It was stressful and rewarding and at times it was the elephant in the room between me and my wife and the dozen chickens that slept in the kitchen at night.
My Plan- 10x10 chicken structure, half coop/half storage inside, and a covered 10x10 run extending from the back.
Exterior
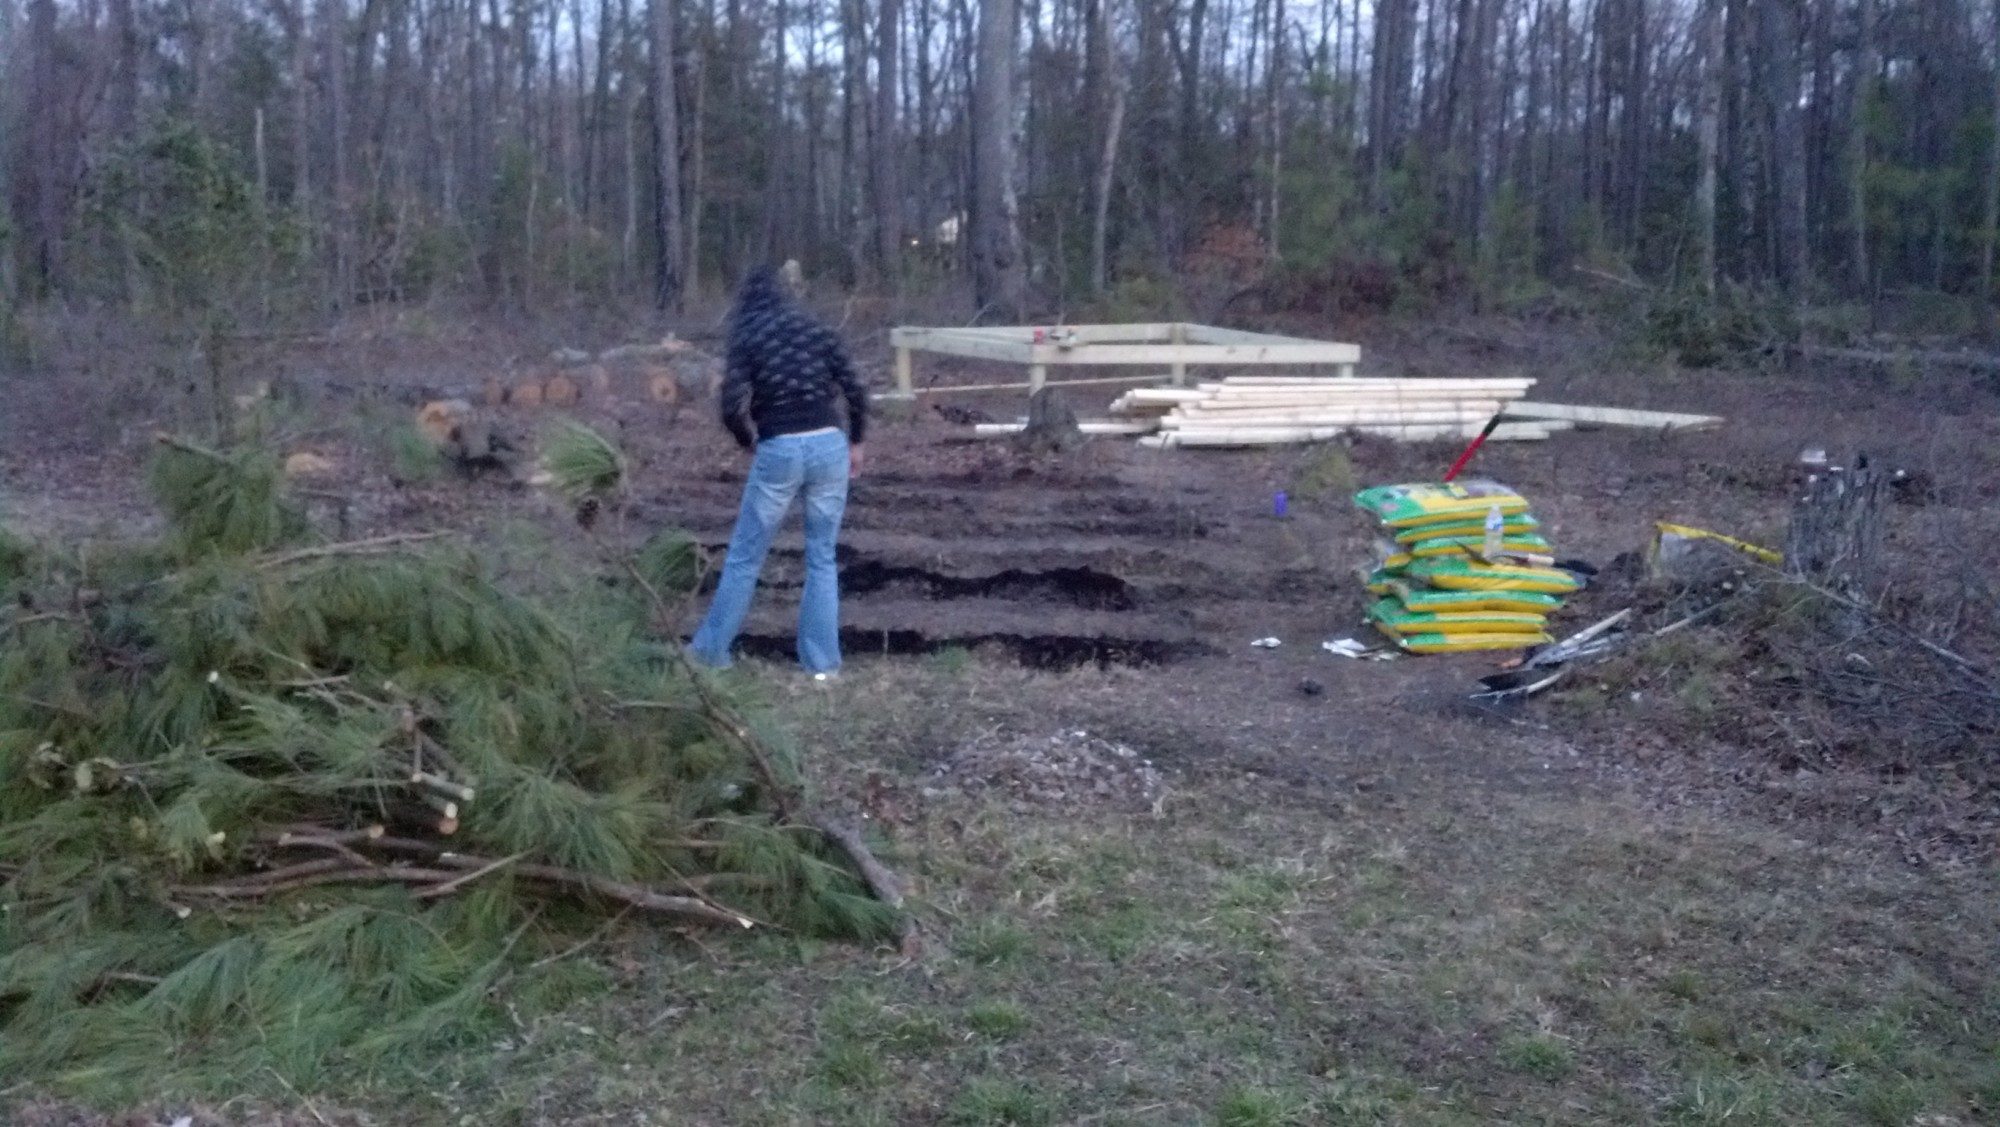
Cleared the land by chainsawing down 6 trees and removing the undergrowth. Put down bricks under the legs of the structure, leveled them and built the 10x10 base out of 4x4 treated lumber. I decided to go 24" above ground level with the coop to double the outside run space and provide shade in the hot summer sun.


We decided to build our gardens in front of the coop. You can see the progression of both coop and garden as we go.
Built the bottom base, lay the floor. I decided that I wanted 4ft high walls with the roof peak at 6 feet. Time to do the math and cut rafters.

I played around with a few different rafter overhang lenghts and decided that I wanted them to extend 2 feet past the sides of the coop. This would provide ample runoff for rain so it would not flood into the run, and would also cover me from rain as I walk around the coop tending to them in fowl weather.


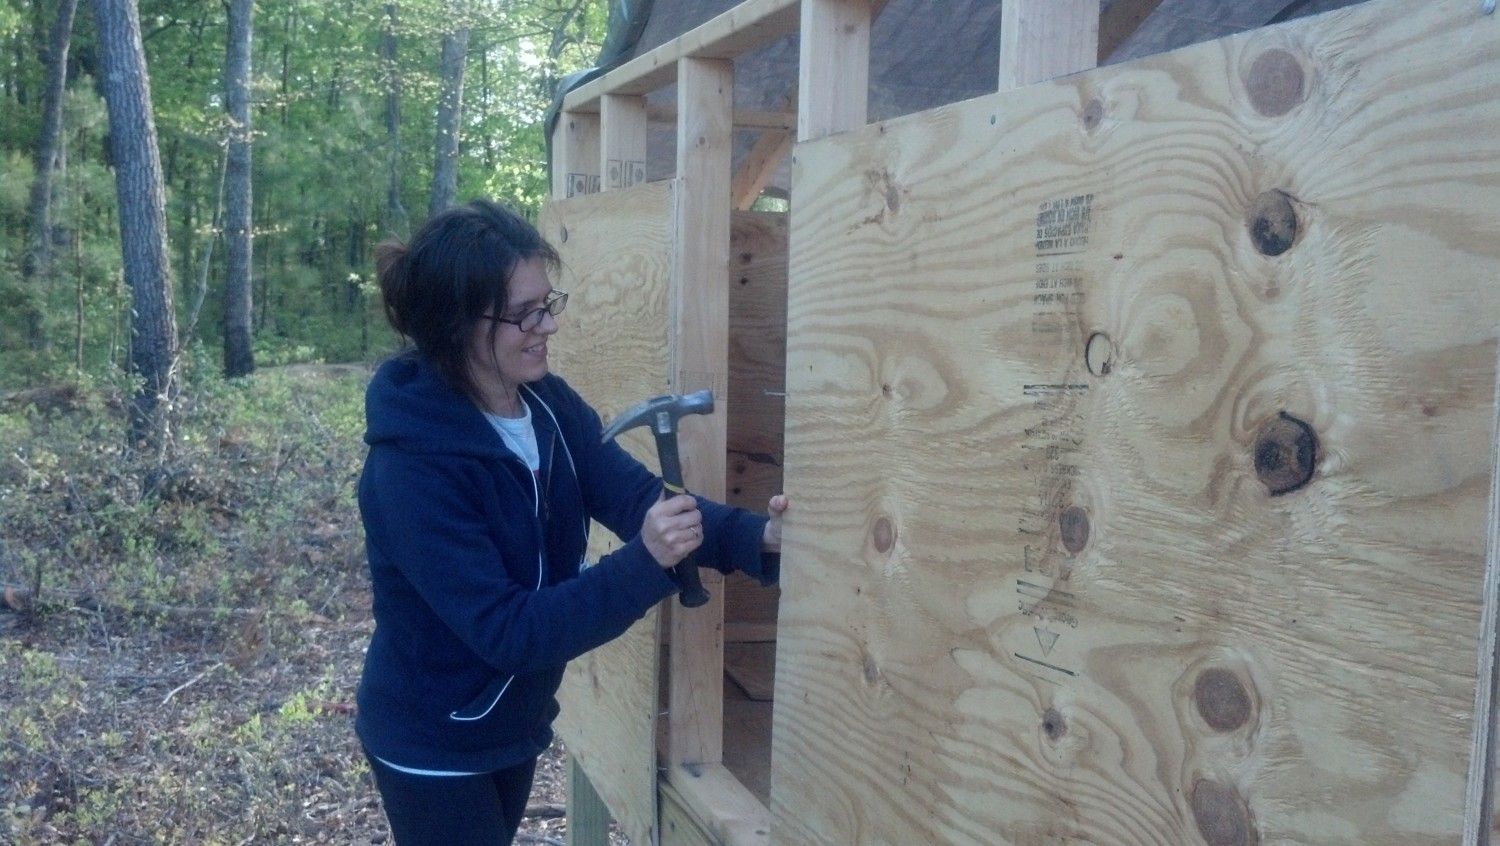
Got the rafters up and wife helped me get the sides put on. She's a pro!
Notice in the picture with my wife that there is about a 1 foot gap above the plywood. We left a gap like this on the left and right sides of the coop and covered it with welded wire mesh. Its for ventilation. the 2 feet of roof overhang protects from rain entry and allows for additional light entry.

I decided on metal roofing. Shingles are a lot of extra work and add additional cost. I like the look of the metal and am happy with it.
I added 2 sheets of clear corrigated plastic roofing sections over the storage section of the coop, which are the sole light source so that the coop is not dark and I can see what I am doing.


Finished the homemade door, added a latch and self-closing hinges. On to the outside covered run.


I didn't take many pictures of building the outside run. Just a few posts in the ground and the roof was built continuously from over the structure side. We dug a 2 foot deep trench around the entire perimeter of the coop and burried welded wire fencing down because of the abundance of Coyotes, fox, weasels, racoons, possums, skunk etc. It's getting to be colder out now so I will finish the exterior trim and paint it in the spring.

I bought this screen door at home depot for $12 dollars because it was damaged. I lined the back side with metal mesh for strength and protection. You can see the hatch door that the chickens come out of. It has a string and a few pulleys and is operated from the outside by pulling on the string and clipping a carabiener to an eyelet to keep it open. I ran an extension cord for the heated waterer.

There is welded wire fencing up to about 4 feet at which point we switched to chicken wire. I threw a few pieces of miscellaneous lumber in there as perches, and built their ladder out of scraps.

Interior
Looking in from the main door. It is partitioned inside so that you enter into a storage area. On the left side will be yard tools and chicken stuff storage, the right side will be hay and feed.There is a quick access wall into the nesting boxes. It is that panel to the right of the door. The interior door is custom cut to length. I got it for $6 because it was broken. Luckily it broke where I was going to cut it! Like the outside screen door, it is lined with wire for protection.

I guess I should have knocked before entering...

Left side tool storage/ right side food and hay


COOP Interior

9 nesting boxes. 12'x14" I think. I used scrap plywood so however it worked out easiest with the least cuts was what I did
*Please ignore the peahen. She felt photogenic today apparently.*

The left side of the coop is very open, which I may either use for broody hens, turkey nesting, or more perching as the flock grows. I overbuilt it so I have an excuse to acquire more birds! MOAR BIRDS!!!!!!!!!

Inside coop looking out to the storage area.

Hope you enjoyed the progression and tour!
Brad
Guess it's time to build a bigger coop than the small A-Frame we have.Note- I am a chemist and NOT a contractor. I made this up as I went, used as little as possible, and learned as much as I could. It took me almost 6 months. I would hit points where I absolutely had no clue how to proceed next. I learned to make roof rafters, lay metal roofing, mend wire fencing, custom build doors and measure twice before cutting once. I made nesting boxes, perches, and doors on pulleys It was stressful and rewarding and at times it was the elephant in the room between me and my wife and the dozen chickens that slept in the kitchen at night.
My Plan- 10x10 chicken structure, half coop/half storage inside, and a covered 10x10 run extending from the back.
Exterior
Cleared the land by chainsawing down 6 trees and removing the undergrowth. Put down bricks under the legs of the structure, leveled them and built the 10x10 base out of 4x4 treated lumber. I decided to go 24" above ground level with the coop to double the outside run space and provide shade in the hot summer sun.
We decided to build our gardens in front of the coop. You can see the progression of both coop and garden as we go.
Built the bottom base, lay the floor. I decided that I wanted 4ft high walls with the roof peak at 6 feet. Time to do the math and cut rafters.
I played around with a few different rafter overhang lenghts and decided that I wanted them to extend 2 feet past the sides of the coop. This would provide ample runoff for rain so it would not flood into the run, and would also cover me from rain as I walk around the coop tending to them in fowl weather.
Got the rafters up and wife helped me get the sides put on. She's a pro!
Notice in the picture with my wife that there is about a 1 foot gap above the plywood. We left a gap like this on the left and right sides of the coop and covered it with welded wire mesh. Its for ventilation. the 2 feet of roof overhang protects from rain entry and allows for additional light entry.
I decided on metal roofing. Shingles are a lot of extra work and add additional cost. I like the look of the metal and am happy with it.
I added 2 sheets of clear corrigated plastic roofing sections over the storage section of the coop, which are the sole light source so that the coop is not dark and I can see what I am doing.
Finished the homemade door, added a latch and self-closing hinges. On to the outside covered run.
I didn't take many pictures of building the outside run. Just a few posts in the ground and the roof was built continuously from over the structure side. We dug a 2 foot deep trench around the entire perimeter of the coop and burried welded wire fencing down because of the abundance of Coyotes, fox, weasels, racoons, possums, skunk etc. It's getting to be colder out now so I will finish the exterior trim and paint it in the spring.
I bought this screen door at home depot for $12 dollars because it was damaged. I lined the back side with metal mesh for strength and protection. You can see the hatch door that the chickens come out of. It has a string and a few pulleys and is operated from the outside by pulling on the string and clipping a carabiener to an eyelet to keep it open. I ran an extension cord for the heated waterer.
There is welded wire fencing up to about 4 feet at which point we switched to chicken wire. I threw a few pieces of miscellaneous lumber in there as perches, and built their ladder out of scraps.
Interior
Looking in from the main door. It is partitioned inside so that you enter into a storage area. On the left side will be yard tools and chicken stuff storage, the right side will be hay and feed.There is a quick access wall into the nesting boxes. It is that panel to the right of the door. The interior door is custom cut to length. I got it for $6 because it was broken. Luckily it broke where I was going to cut it! Like the outside screen door, it is lined with wire for protection.
I guess I should have knocked before entering...
Left side tool storage/ right side food and hay
COOP Interior
9 nesting boxes. 12'x14" I think. I used scrap plywood so however it worked out easiest with the least cuts was what I did
*Please ignore the peahen. She felt photogenic today apparently.*
The left side of the coop is very open, which I may either use for broody hens, turkey nesting, or more perching as the flock grows. I overbuilt it so I have an excuse to acquire more birds! MOAR BIRDS!!!!!!!!!
Inside coop looking out to the storage area.
Hope you enjoyed the progression and tour!
Brad
Last edited:
