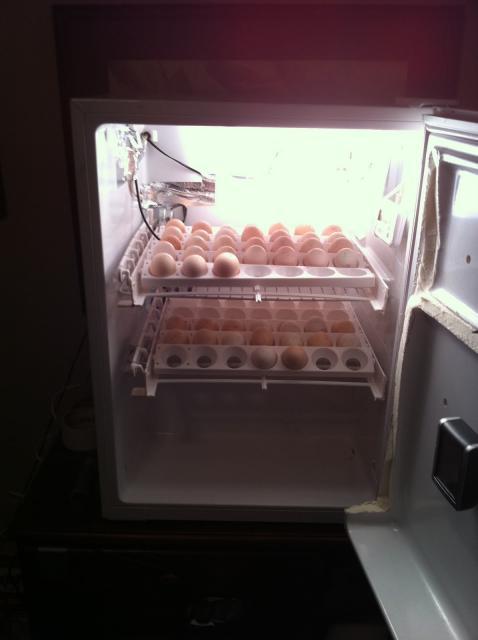
I have had at least 5 different incubators in the last 3 years. I started with a Miss Prissy cooler bator, went to a Hovabator (hated that and sold it), then to two Rcom Suro King bators (malfunctioned many times), borrowed a Dickie (like it fine but just too big...and you can't see the eggs hatching) and finally decided on building my own out of a mini-fridge. Edited to give credit to Bat Cave Silkies for the idea!!
I did have to take a rail out of each of the turners as I couldn't find a fridge that was deep enough for them to fit. But overall, I'm very impressed with the way it is holding temp and humidity.
The total cost was around $150 because I had to buy the turners. The thermostat is awesome...purchased from incubatorwarehouse.com. It has a probe to place on top of the eggs and the temp is controlled from there. The temp between the top and bottom shelves was running about 0.4 degrees but it seems that the longer it runs, the more equal the temps are. This morning the temp was exactly the same on both shelves.
I know you can't see it in the pics, but I put a lightbulb inside the "ice compartment" with the fan on the back blowing over the lightbulb and a container of water just in front of the lightbulb. I'll get pics with the light off and post them on this thread.
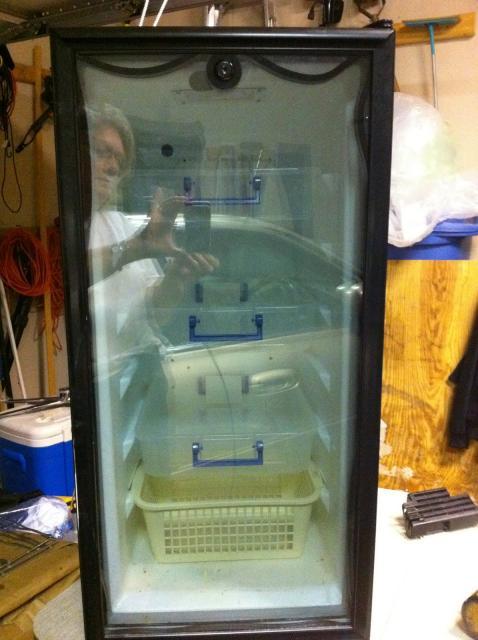
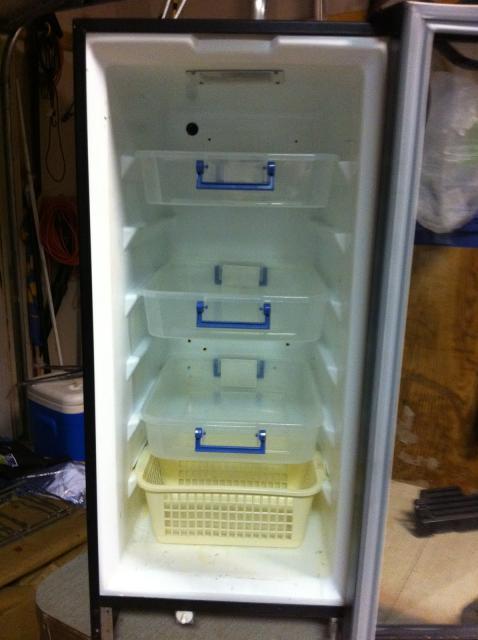
I will not be hatching in this...just incubating. I'm working on a hatcher using a wine cooler that I got for $15 off Craigslist. It is going to ROCK!! I'm using the same thermostat and it will have 3 hatching trays. I've included some pics of it, but it isn't finished yet. The three trays are separated in the picture but they won't be after the light (heat source) and fan are installed. It will be virtually installed just like the incubator. Hope to have it completed by the end of the week.
Edited to add that you could put more eggs in the incubator by using a carton on the bottom shelf and turning by hand. You never know
 !!!
!!!
I did have to take a rail out of each of the turners as I couldn't find a fridge that was deep enough for them to fit. But overall, I'm very impressed with the way it is holding temp and humidity.
The total cost was around $150 because I had to buy the turners. The thermostat is awesome...purchased from incubatorwarehouse.com. It has a probe to place on top of the eggs and the temp is controlled from there. The temp between the top and bottom shelves was running about 0.4 degrees but it seems that the longer it runs, the more equal the temps are. This morning the temp was exactly the same on both shelves.
I know you can't see it in the pics, but I put a lightbulb inside the "ice compartment" with the fan on the back blowing over the lightbulb and a container of water just in front of the lightbulb. I'll get pics with the light off and post them on this thread.
I will not be hatching in this...just incubating. I'm working on a hatcher using a wine cooler that I got for $15 off Craigslist. It is going to ROCK!! I'm using the same thermostat and it will have 3 hatching trays. I've included some pics of it, but it isn't finished yet. The three trays are separated in the picture but they won't be after the light (heat source) and fan are installed. It will be virtually installed just like the incubator. Hope to have it completed by the end of the week.
Edited to add that you could put more eggs in the incubator by using a carton on the bottom shelf and turning by hand. You never know


Last edited:

