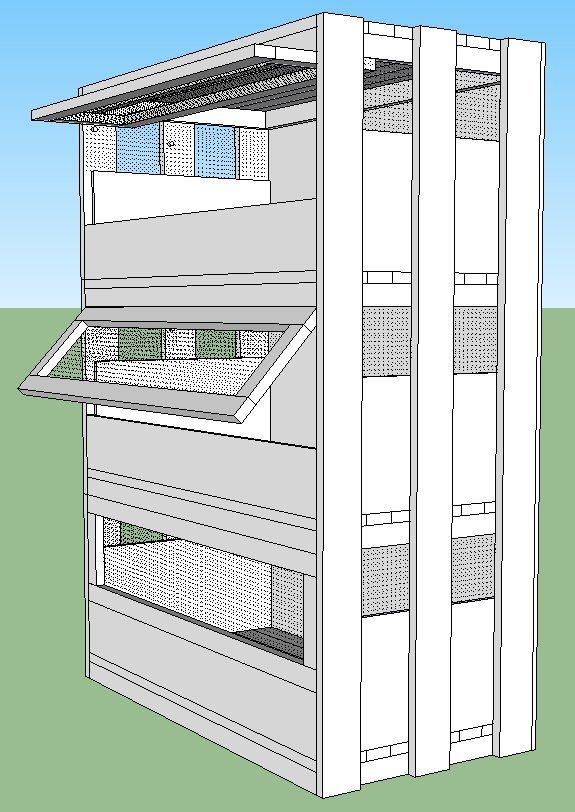
it'll be 3 shelves, with 18" interior height, and i'm building it to have removable plywood 'boxes' so i can take them out to clean between broods... here's the google sketchup screenshot. the doors will work like barrister bookcases, swing up and slide into the top part of the brooder compartment. wire on the sides & back where the box doesn't go all the way up. 12" tall on back and sides, and 6" at the front to allow for easy access, 12" tall door. roughly 4' wide, 2' deep, and just over 5' tall
Mine is very similar. It is about 16 tall and 4 brooders. I put legs on it because I have a bad back. We made it so I have a door with a window to look in through and another door so I can open both to clean. We lined the bottom with metal flashing so I can just rack it all out and wipe it down if needed. I am not creative enough to use sketchup... played with it some. I have some pics I can put up later. We used some free shipping crate panels that is how we came up with the dimensions. It is about 22 inches deep and 45 inches wide. I need a bigger space now that I have the mega bator and mega brooder.
What are you going to use for feeders and waterers? I am going to build a troth feeder on one wall, that may be down the road since we are pushed for time. I don't know what to use for waterers. I usually use nipples but not sure they are a great idea in the brooder with that many little ones. They make a big water mess. May use some nipples so they will play with them and get used to the idea.
I will need that fix in a couple weeks as my incubator will be finished then....just finished the one I had on order along with a stand for it and 2 matching tables....went to take pics and batteries were dead have them charging but he already picked everything up so will take several pics of the one im building now, of the building process.
Wow, what great skteches of a brooders, may have to revamp my idea a little.
Donna--my chicks are doing fine on the nipples. Hang one per 10 birds. AND place a pan under to catch occasional drips which add up to yucky bedding. Perhaps one in each of the front corners. I added the nipple waterers when the chicks were about 2 weeks old, for my peace of mind I left in the tradtional types until then. SOme people give the chicks nipple waterers immediately.
Mine is very similar. It is about 16 tall and 4 brooders. I put legs on it because I have a bad back. We made it so I have a door with a window to look in through and another door so I can open both to clean. We lined the bottom with metal flashing so I can just rack it all out and wipe it down if needed. I am not creative enough to use sketchup... played with it some. I have some pics I can put up later. We used some free shipping crate panels that is how we came up with the dimensions. It is about 22 inches deep and 45 inches wide. I need a bigger space now that I have the mega bator and mega brooder.
What are you going to use for feeders and waterers? I am going to build a troth feeder on one wall, that may be down the road since we are pushed for time. I don't know what to use for waterers. I usually use nipples but not sure they are a great idea in the brooder with that many little ones. They make a big water mess. May use some nipples so they will play with them and get used to the idea.
I have stainless bowls with brackets that attach thru the wall, so they come in and out easily. these are raised up enough that bedding doesn't get in easily, and chicks need to perch to eat. i have a wire mesh for the top of the food bowl that keeps then from tossing all the food out too, but they can get their heads down in to eat. for younglings, i use plant pot bottoms that are about 1" deep for the first week, and deal with the mess. usually by a week they're figuring out the perch thing.
i have the small bowl-style waterers, but haven't got around to using them yet. figured i'd get around to using them this summer for the outside baby-pens.
ok up date on the quail... nothing hatched overnight, so i figured they were done. went down to greensboro today to meet someone at the rabbit show and pick up some dorking girls. i hear 'peep peep' and think... rabbits? peep? and followed my ears. found some cute black and white bantam cochin chicks LOL took 2 home, and a frizzle chick. get home (with 3 adults, 3 chicks, and 48+ eggs for hatching) to find round 2 in the incubator LOL. 8 more quail hatched, took them out and the incubator was still cheeping! so i'm waiting on the stragglers to pop out.36 hours from the start of the hatch, and still going.
and the red dorkling cockerel that i had to help yesterday is up on his feet and moving around just fine. giving the quail a run for their money, so to speak LOL. may have to design an indoor quail cage. they don't like outdoors and haven't laid in 2 days. either that or something's eating the eggs but leaving the birds alone...
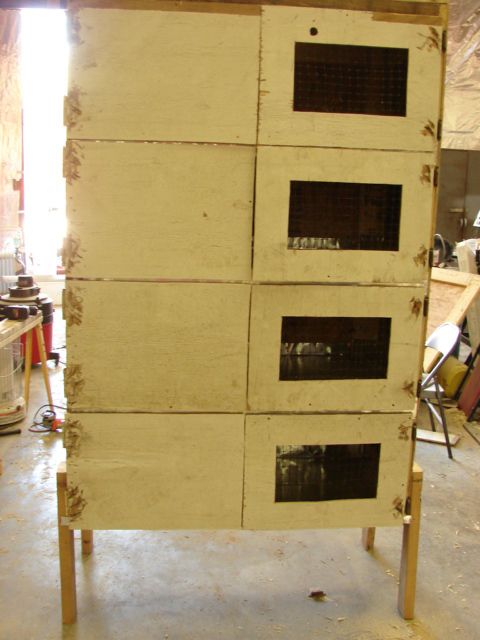
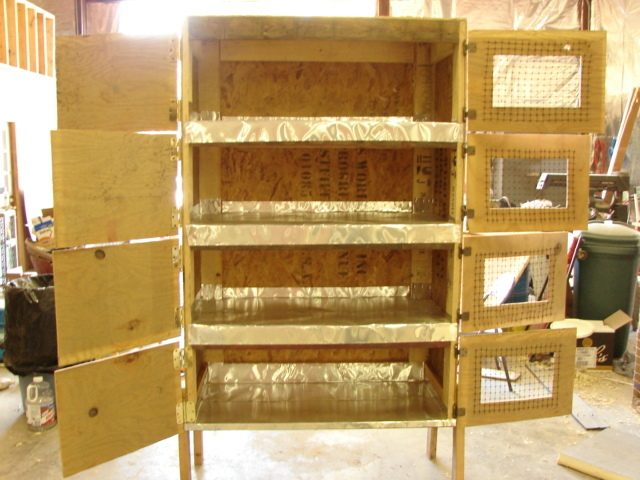
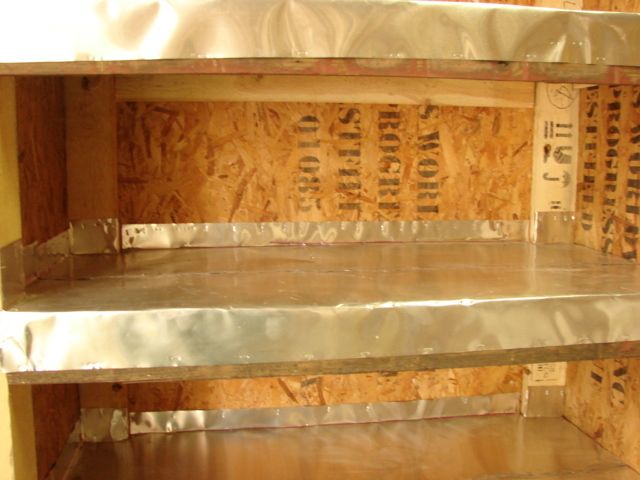
Here is my brooder... it still needs the lights added and locks.... but basically done.... maybe some paint one day.
The window side I want to add the feeders so I can see them. The solid side is where the light will go. I put some insulation over were the light is going just to make sure it does not get too hot for the wood. We made this out of some salvaged shipping crate (back and sides it already had the 1 x 4's so the frame was already there) the floor is made of scrap wood from pallets and the doors are made from some thin plywood we had on some pre built walls we bought they were built sideways for some reason so we just pulled them apart for materials. Legs are made of the 2 x 4's from the wall panel. Hinges came off some old cabinets and from habitat for humanity. We did cut the legs about 6 inches shorter... it was just too tall. I didn't want any barriers in the front so I could just scrape everything out when it needs cleaning. That is why we lined it with flashing.