Now that I can post pictures, I'll try to post the construction of my daughter all in one coop and run.
My daughter, Jenni, is into eating natural and has started her backyard garden and acquired 4 chicks for eggs. She bought an online hen house with run, but it was far from what the pictures led you to believe, very shoddy material and workmanship, and just big enough for 1.59 chickens. So I decided to attempt building a chicken coop and run for her 4 chicks.
We got together in her back yard and discussed her needs as we understood them.
Weather: We live in Northern California where hard freezes and snow is not a problem. Winters may see a few days at or below 32 F and, summers, a few days over 100 F, so being able to close up the coop so the cold and rain cant penetrate in the winter, and ventilation in the summer are considerations. Prevailing wind and rain would come from the back side. We agreed on ventilation holes at the top of the front and back walls, with windows on three sides that can be opened for ventilation, but still keep the rain out.
Sized for 4 chickens. We decided on a 4 X 4 coop with 4 X 8 run, which includes ground space under the raised coop.
External access for collecting eggs. We decided on an externally mounted nesting box with hinged lid.
Standing room in the run for easy cleaning. Jenni is 56, so we decided on a sloping roof, with a 6 front wall and 5 back wall.
Easy access to the coop for cleaning. She wants to do the deep litter method. We decided on a 6 litter depth, and, since weather conditions dont dictate when she can clean the coop, she can clean it out when the litter needs to be replaced. I will make the door as wide as possible so she doesnt have to clean a lot of corners.
Roosts, with a poop board, should be easily accessible for cleaning.
Relatively predator proof. She lives in the suburban San Francisco East Bay, with an enclosed yard. The main predators would be cats, raccoons, possums and skunks, with other considerations: her 2 year old son and her Yellow Lab. We decided to use ½ galvanized hardware cloth for under the run walls and floor (under sand).
Aesthetically pleasing and unobtrusive: She would like it to look somewhat finished, a light tan in color. Darn, that means no Barn Red with white trim.
One of my considerations is to be able to transport it from my garage to her back yard, which means it would probably have to be broken down into manageable sizes and weights, to be able to be carried it into their back yard. After measuring their front gate, Ill make it 46 wide rather than 48, to fit through their 47 wide gate opening.
She told me about the Backyardchickens.com website, and I spent hours studying the coops there and picked up a lot of good ideas. I particularly liked baldessariclans Wichita Cabin Coop (http://www.google.com/search?source...&rlz=1T4SKPB_enUS370US371&q=backyard+chickens) and will borrow some of his ideas. I purchased the Building Chick Coops for Dummies (Wiley Publishing, 2010) which gave excellent instructions on basic construction.
Thu 5/26/11
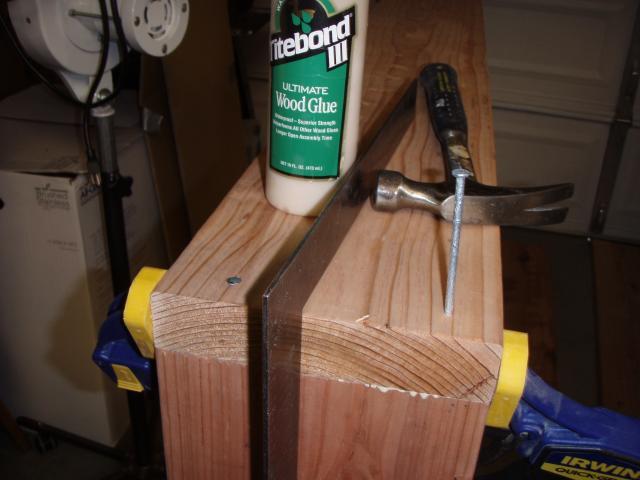
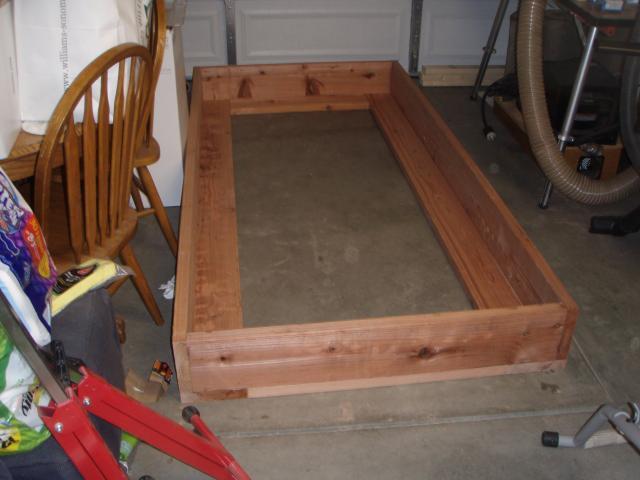
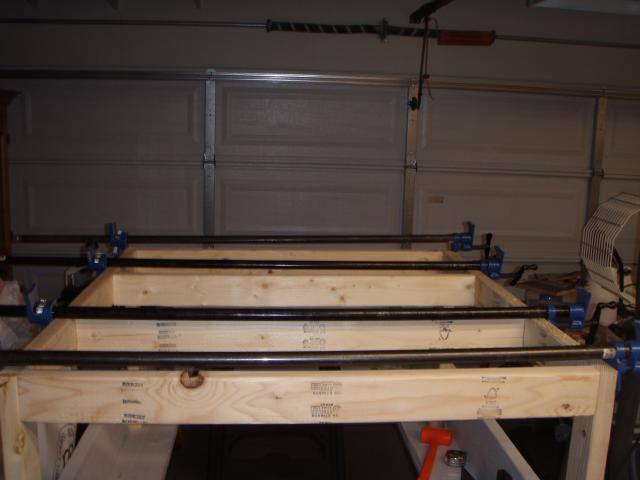
I purchased Redwood 2 X 8s for the run base. I meant to get 2 X 6s but I was paying too much attention to the length to notice the width. I got redwood since the frame will be placed on the ground and will be partially filled with sand. Redwood is resistant to rot and insect infestation. The frame was glued with Tightbond III (waterproof) wood glue, and nailed together using 16d hot dipped galvanized nails.

I glued and nailed 2 X 8s to the run frame so I can attach hardware cloth to prevent varmints from digging under the frame.
The coop will be 48 wide by 46 deep and will be 2 off the ground, to give the hens room to roam underneath the coop.
Fri 5/27/11
The coop subfloor framing, of 2 X 4 kiln dried fir, was set flush with the legs, because, after the hardware cloth has been attached, it will be faced with 1 X 4s, and the whole thing still needs to be 46 wide. The subfloor framing was attached to the legs with glue and 2 ½ pocket-hole screws using a Kreg pocket-hole jig.
I installed two floor joists on 16 centers to give the floor better stability. These were attached with glue and 3 stainless exterior screws.
Sun 5/29/11
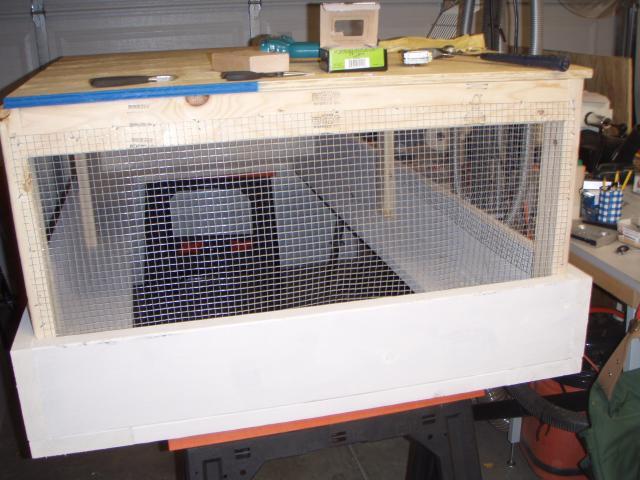
Started attaching 1/2 galvanized hardware cloth between the coop base and the run framing to keep the furry ones out and feathery ones in. I originally used screws and fender washers but I wanted to face the exposed wire edge, and there was just too large of a gap, so I pulled the washers and used ¾ hot dipped galvanized poultry net staples.
Mon 5/30
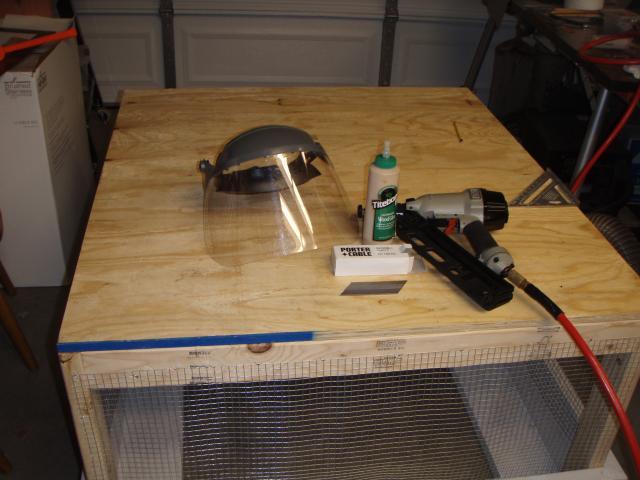
I finished attaching the hardware cloth underneath the coop. I attached the coop floor, 23/32 sheathing, with glue and 2 pneumatic nails.
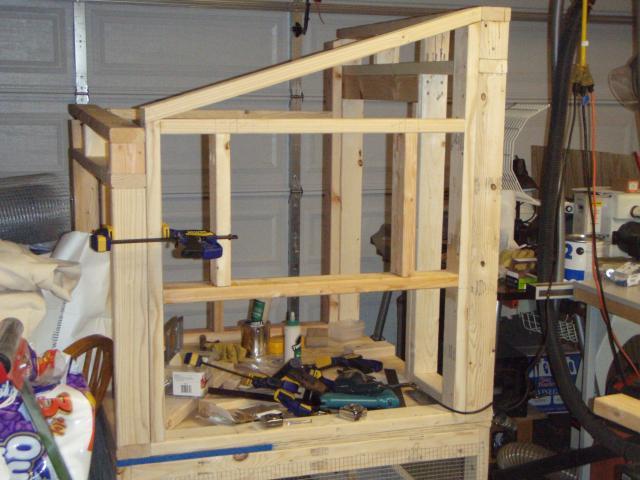
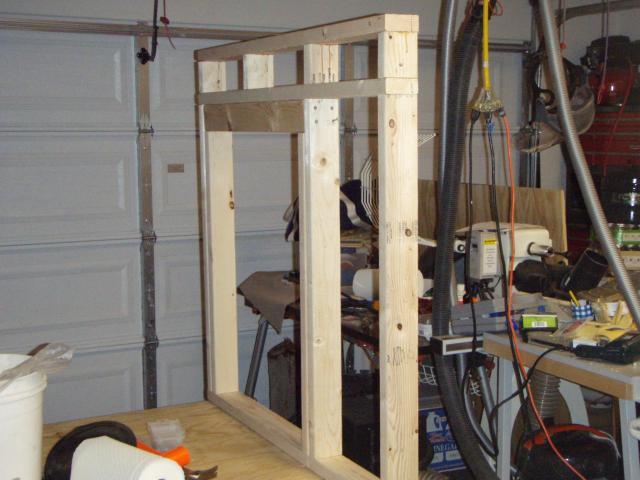
I then framed the front wall. The holes at the top of the wall are covered with hardware cloth for ventilation. The large hole is for the people door.
Tue, 5/31
Cut the lumber for the back wall frame and started thinking how Im going to design the left side wall. This will have the nest boxes and a window. Before I can complete the back wall framing, I need to figure out where the left wall window will be, so I can place the other windows at the same height (for esthetic reasons). Too much thinking and too little construction today. I need to get more 2 X 4s, some trim and T1-11 exterior siding, so I can cut and paste to figure this out.
My daughter, Jenni, is into eating natural and has started her backyard garden and acquired 4 chicks for eggs. She bought an online hen house with run, but it was far from what the pictures led you to believe, very shoddy material and workmanship, and just big enough for 1.59 chickens. So I decided to attempt building a chicken coop and run for her 4 chicks.
We got together in her back yard and discussed her needs as we understood them.
Weather: We live in Northern California where hard freezes and snow is not a problem. Winters may see a few days at or below 32 F and, summers, a few days over 100 F, so being able to close up the coop so the cold and rain cant penetrate in the winter, and ventilation in the summer are considerations. Prevailing wind and rain would come from the back side. We agreed on ventilation holes at the top of the front and back walls, with windows on three sides that can be opened for ventilation, but still keep the rain out.
Sized for 4 chickens. We decided on a 4 X 4 coop with 4 X 8 run, which includes ground space under the raised coop.
External access for collecting eggs. We decided on an externally mounted nesting box with hinged lid.
Standing room in the run for easy cleaning. Jenni is 56, so we decided on a sloping roof, with a 6 front wall and 5 back wall.
Easy access to the coop for cleaning. She wants to do the deep litter method. We decided on a 6 litter depth, and, since weather conditions dont dictate when she can clean the coop, she can clean it out when the litter needs to be replaced. I will make the door as wide as possible so she doesnt have to clean a lot of corners.
Roosts, with a poop board, should be easily accessible for cleaning.
Relatively predator proof. She lives in the suburban San Francisco East Bay, with an enclosed yard. The main predators would be cats, raccoons, possums and skunks, with other considerations: her 2 year old son and her Yellow Lab. We decided to use ½ galvanized hardware cloth for under the run walls and floor (under sand).
Aesthetically pleasing and unobtrusive: She would like it to look somewhat finished, a light tan in color. Darn, that means no Barn Red with white trim.
One of my considerations is to be able to transport it from my garage to her back yard, which means it would probably have to be broken down into manageable sizes and weights, to be able to be carried it into their back yard. After measuring their front gate, Ill make it 46 wide rather than 48, to fit through their 47 wide gate opening.
She told me about the Backyardchickens.com website, and I spent hours studying the coops there and picked up a lot of good ideas. I particularly liked baldessariclans Wichita Cabin Coop (http://www.google.com/search?source...&rlz=1T4SKPB_enUS370US371&q=backyard+chickens) and will borrow some of his ideas. I purchased the Building Chick Coops for Dummies (Wiley Publishing, 2010) which gave excellent instructions on basic construction.
Thu 5/26/11
I purchased Redwood 2 X 8s for the run base. I meant to get 2 X 6s but I was paying too much attention to the length to notice the width. I got redwood since the frame will be placed on the ground and will be partially filled with sand. Redwood is resistant to rot and insect infestation. The frame was glued with Tightbond III (waterproof) wood glue, and nailed together using 16d hot dipped galvanized nails.
I glued and nailed 2 X 8s to the run frame so I can attach hardware cloth to prevent varmints from digging under the frame.
The coop will be 48 wide by 46 deep and will be 2 off the ground, to give the hens room to roam underneath the coop.
Fri 5/27/11
The coop subfloor framing, of 2 X 4 kiln dried fir, was set flush with the legs, because, after the hardware cloth has been attached, it will be faced with 1 X 4s, and the whole thing still needs to be 46 wide. The subfloor framing was attached to the legs with glue and 2 ½ pocket-hole screws using a Kreg pocket-hole jig.
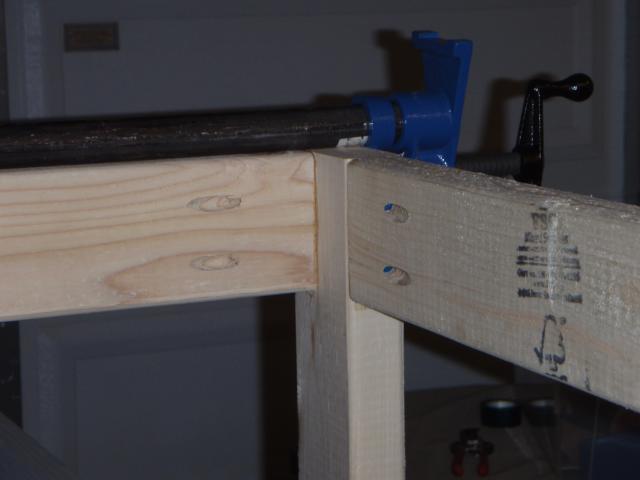
I installed two floor joists on 16 centers to give the floor better stability. These were attached with glue and 3 stainless exterior screws.
Sun 5/29/11
Started attaching 1/2 galvanized hardware cloth between the coop base and the run framing to keep the furry ones out and feathery ones in. I originally used screws and fender washers but I wanted to face the exposed wire edge, and there was just too large of a gap, so I pulled the washers and used ¾ hot dipped galvanized poultry net staples.
Mon 5/30
I finished attaching the hardware cloth underneath the coop. I attached the coop floor, 23/32 sheathing, with glue and 2 pneumatic nails.
I then framed the front wall. The holes at the top of the wall are covered with hardware cloth for ventilation. The large hole is for the people door.
Tue, 5/31
Cut the lumber for the back wall frame and started thinking how Im going to design the left side wall. This will have the nest boxes and a window. Before I can complete the back wall framing, I need to figure out where the left wall window will be, so I can place the other windows at the same height (for esthetic reasons). Too much thinking and too little construction today. I need to get more 2 X 4s, some trim and T1-11 exterior siding, so I can cut and paste to figure this out.
Last edited: