I have been wanting to build a new coop for my chooks for a couple years. Money for materials has never been high on the priorities list...we do like to eat and pay the bills. Times are tough for sure, but the old coop ark I slapped together in haste 5 years ago and never water sealed, is falling apart...and it is much to small for the 4 hens it was built for, much less the 8 girls we have now. I decided that it was time to scour the local lists for some free wood and hopefully find some decently sized pieces...enough to build the coop I have been picturing in my mind for months...a 4x4 A-frame...ok, well HALF an A-frame anyway.
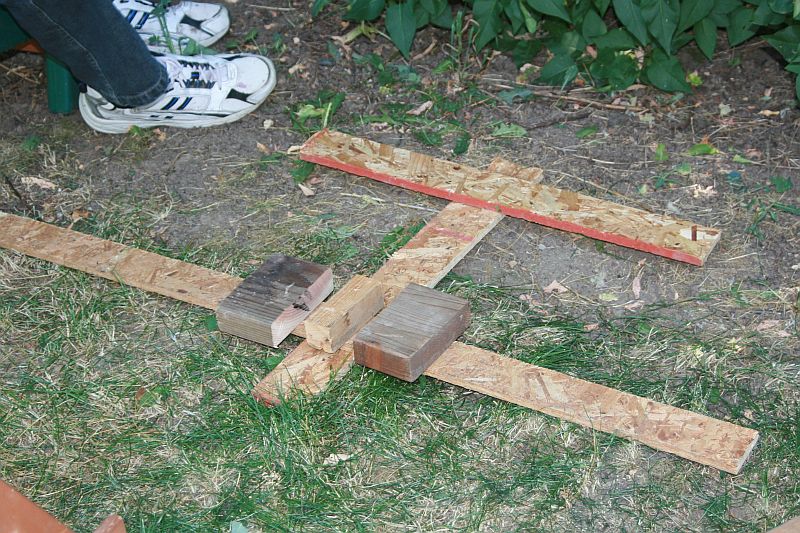
I found a lady tearing apart some plyboard cabinets in her garage so that she could have a concrete floor poured. The cabinets were large and she had most of the dismantling done by the time I arrived which is a shame cause I would have helped her in exchange for the wood. I eyeballed the stacks and just knew I would have plenty to work with and leftovers to boot. Thanks Jean!!
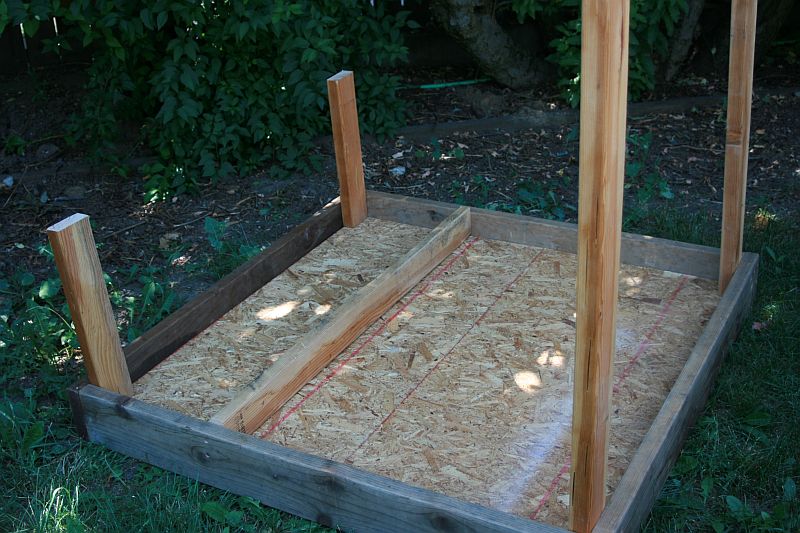
I started with the base...four 2x6 redwood deck boards. Remnants of our deck building endeavor 5 years ago. I just KNEW they would come in handy some day! haha I attached a 'frame' of 2x2s to that so I could have a drop plyboard floor. I am going to eventually (next payday) add a piece of linoleum to the floor to make clean up easy and protect the plyboard.

You can see the base with the drop floor which is 2 separate pieces, 2'x4'
My youngest son helped quite a bit with holding pieces for the saw and being my gopher. He spent his 'off' time playing with scraps. My little future aviator...in the footsteps of his oldest brother!
Once I had the floor in, I added a single 2x4 across the floor to separate the nest box area from the rest of the coop. Then came the four corner supports. When I want to remove the flooring pieces, I just have to unscrew the one across the floor and both base pieces will be able to slide out and drop down below the coop for cleaning.
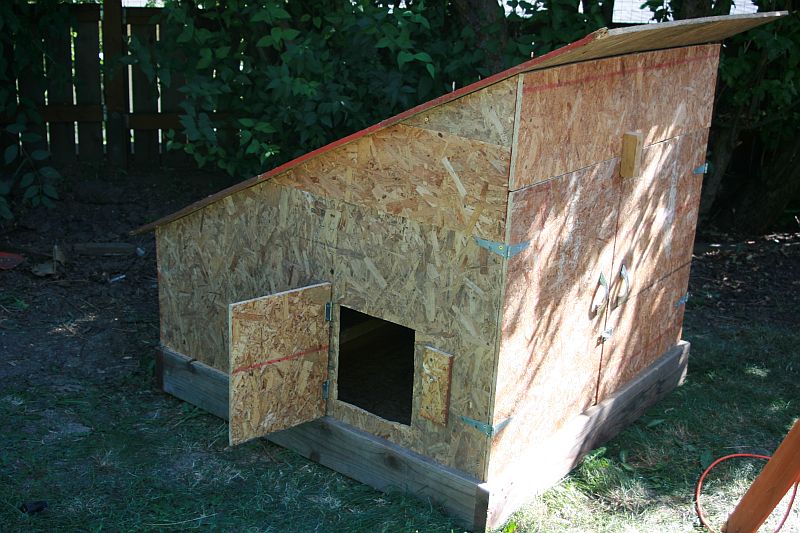
Floor and side supports are in. I wanted big wide doors for cleaning the coop, and added them to the high side.
Front doors on the high side of the coop.
The sides are in now as well as the roof supports which are 2x2's. I cut a nice sized opening for the girls to go in and out of the coop.
Roof supports and sides are finished
An inside view showing the roosts which are 2x4s, wide side up. I used joist hangars for these.
The front, low side is where the nesting boxes are. I wanted a small, wide door to access this area. It opens down and since the floor is sunken, we won't have to worry about eggs falling out.
Front side with next box door.
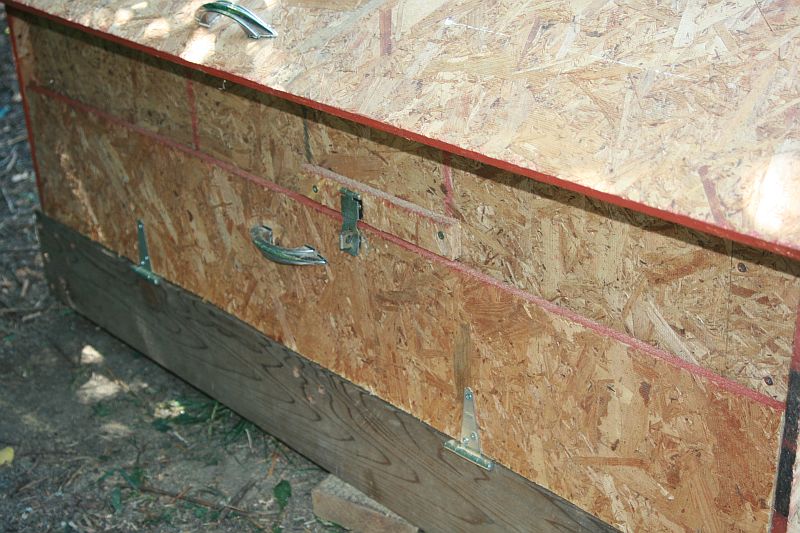
I have the roof attached here as well as the door for the girls' coop entrance. It has a simple varmit proof latch...hopefully my son can operate it.")
Side coop door.
Roof and side coop door.
We moved the coop into place...I built it close to the house in the shade so I wouldn't have to trek back and forth to the house each time I forgot some tool or needed some water. It is heavy, but not as heavy as it could be since I just used 2x2s for the roof supports. My husband thanked me for removing the 2x4 roosts as well. Every little bit helps! haha We put it up on some block stacks about thigh high, and 3 of the chickens hopped right in to check it out.
One of the girls...this one is 'Bacon'...checking out the new coop.
You might notice the nest box area...I made it with two separate sections of flooring and side walls so that they can be easily removed for cleaning. This is where being a skilled carpenter might come in handy, as I thought I would have 4 equally spaced sections but mis-measured and wound up with one section being much smaller. Of course, THAT is the one 'Bacon' chose to lay her first egg in. Before I even added the sand to the nesting area! I thought about using pine bedding but was afraid they would kick too much out into the sand under the roosts making it harder to scoop with the litter scooper.
Bacon lays an egg to christen the coop!
Here is an interior shot with nesting area in the background and the roosts in the foreground.
Roosting area with nest boxes behind.
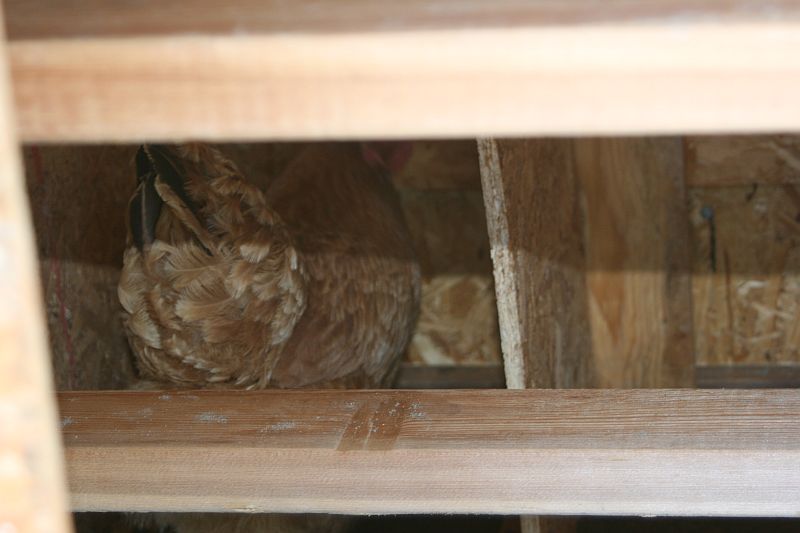
Our New Hampshire Red, Buttercup (or Goldielocks depending on which kid you are talking to...they never could decide on a name) checking on her buddy, Bacon, as she lays her egg.
Buttercup checks out the new digs.
Buttercup was next up and picked the spot next to Bacon and laid her egg. My girls aren't a bit shy!
Buttercup lays her egg.
Over all, I think I did a pretty good job considering I am no carpenter and everything was basically eyeballed with only the picture of what I wanted in my head. And I built it by myself in one day, then we moved it and I built the nest boxes the following day.
I know some of you might wonder about venting. I am going to add hinges to both the upper and lower roof sections (that pesky wait til payday thing again) and build simple props so that they can be opened to vent if it gets too hot, but the entire coop sits beneath a large, side-less, covered shed with a wood floor, so I am not too worried about it getting too hot...and I made the sides of the coop out of three separate sections of plyboard and the very top piece on each side can be removed and hardware cloth installed if venting become necessary. I am also going to waterproof it, paint, then put that corrugated/wavy roofing stuff on the upper two sections even though it won't get wet sitting under the shed roof.
When it starts to get colder, I am going to install the wiring and some ceramic light sockets for heat bulbs on the center roof section. Other than buying the sand for $5...and whatever the light fixtures will cost me (unless I can find some used)...I spent NO money building this coop. Even the hardware was all salvaged from the dismantled cabinets and I have hinges already that I can use for the roof sections, and watersealer and paint left from other projects.") I am a happy girl, and so are my hens (my husband was pretty happy about the 'no money' part as well)!!
I am a happy girl, and so are my hens (my husband was pretty happy about the 'no money' part as well)!!
I found a lady tearing apart some plyboard cabinets in her garage so that she could have a concrete floor poured. The cabinets were large and she had most of the dismantling done by the time I arrived which is a shame cause I would have helped her in exchange for the wood. I eyeballed the stacks and just knew I would have plenty to work with and leftovers to boot. Thanks Jean!!
I started with the base...four 2x6 redwood deck boards. Remnants of our deck building endeavor 5 years ago. I just KNEW they would come in handy some day! haha I attached a 'frame' of 2x2s to that so I could have a drop plyboard floor. I am going to eventually (next payday) add a piece of linoleum to the floor to make clean up easy and protect the plyboard.

You can see the base with the drop floor which is 2 separate pieces, 2'x4'
My youngest son helped quite a bit with holding pieces for the saw and being my gopher. He spent his 'off' time playing with scraps. My little future aviator...in the footsteps of his oldest brother!
Floor and side supports are in.
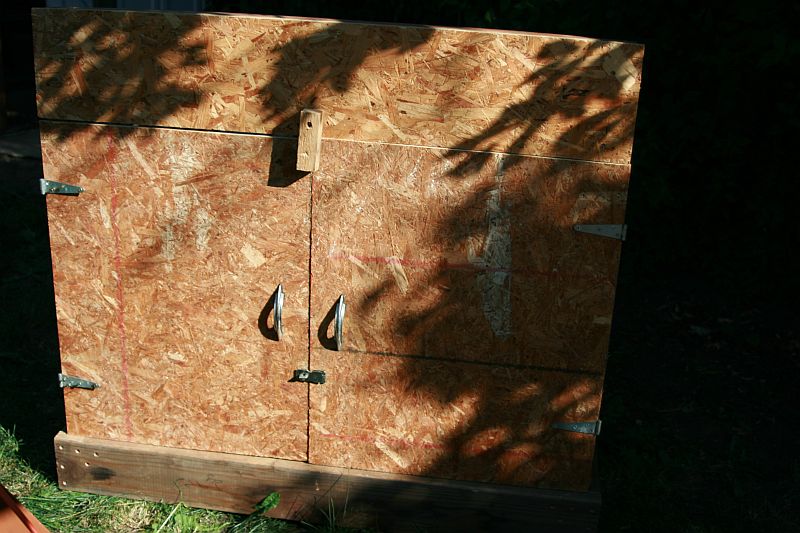
Front doors on the high side of the coop.
The sides are in now as well as the roof supports which are 2x2's. I cut a nice sized opening for the girls to go in and out of the coop.
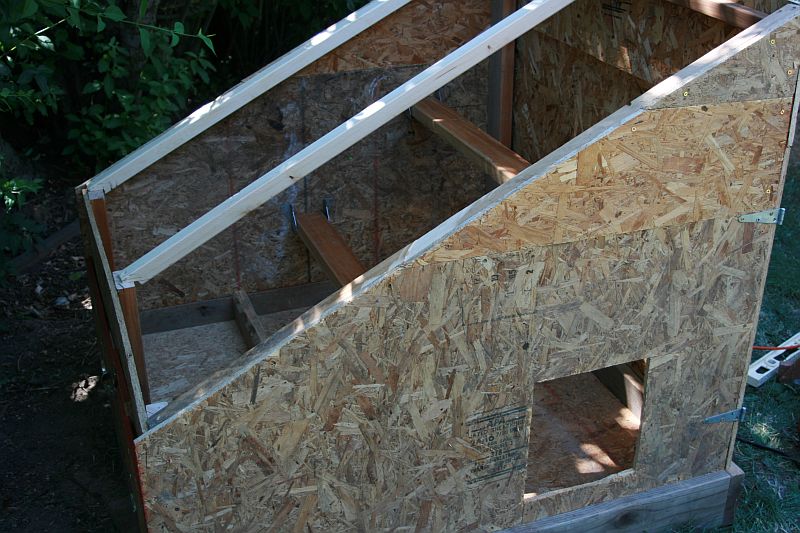
Roof supports and sides are finished
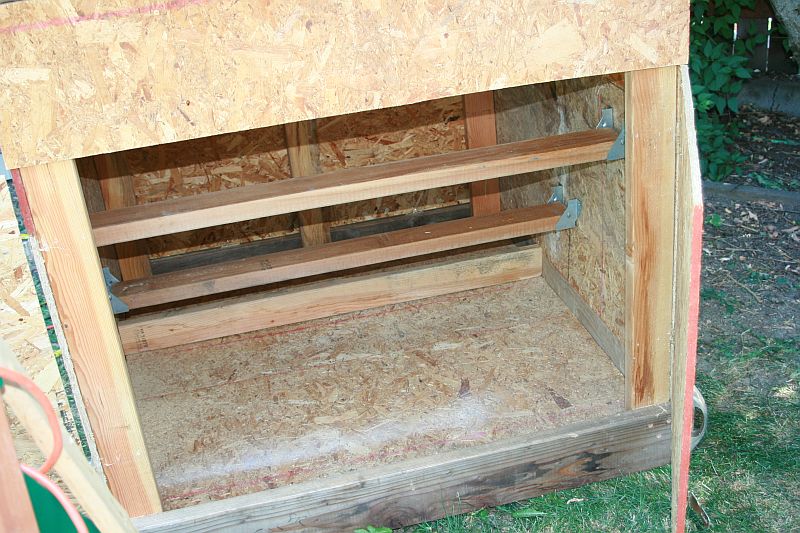
An inside view showing the roosts which are 2x4s, wide side up. I used joist hangars for these.
The front, low side is where the nesting boxes are. I wanted a small, wide door to access this area. It opens down and since the floor is sunken, we won't have to worry about eggs falling out.
Front side with next box door.
I have the roof attached here as well as the door for the girls' coop entrance. It has a simple varmit proof latch...hopefully my son can operate it.
Side coop door.
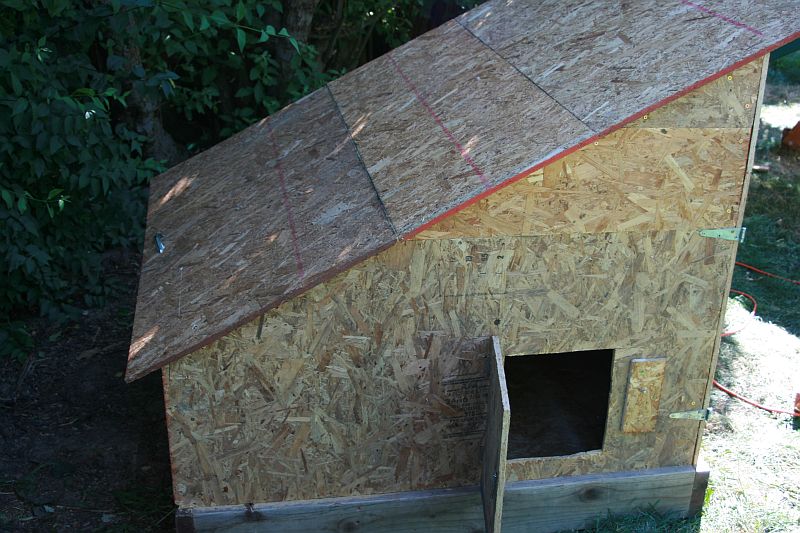
Roof and side coop door.
We moved the coop into place...I built it close to the house in the shade so I wouldn't have to trek back and forth to the house each time I forgot some tool or needed some water. It is heavy, but not as heavy as it could be since I just used 2x2s for the roof supports. My husband thanked me for removing the 2x4 roosts as well. Every little bit helps! haha We put it up on some block stacks about thigh high, and 3 of the chickens hopped right in to check it out.
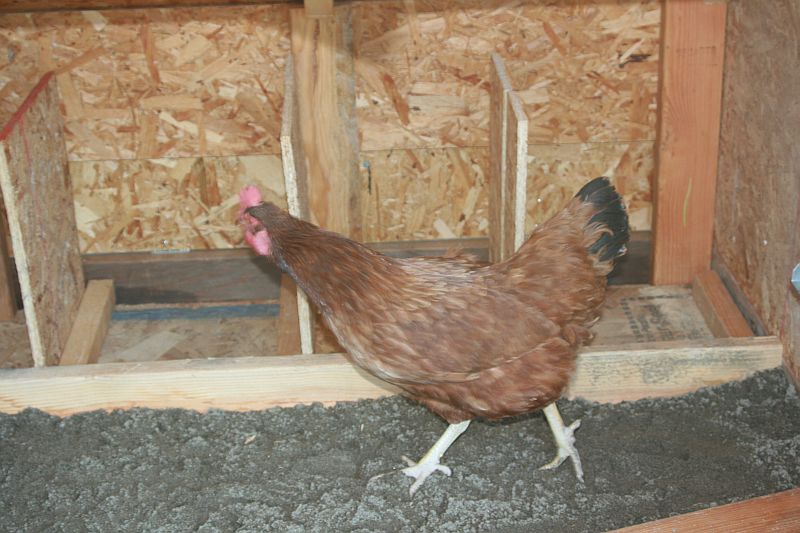
One of the girls...this one is 'Bacon'...checking out the new coop.
You might notice the nest box area...I made it with two separate sections of flooring and side walls so that they can be easily removed for cleaning. This is where being a skilled carpenter might come in handy, as I thought I would have 4 equally spaced sections but mis-measured and wound up with one section being much smaller. Of course, THAT is the one 'Bacon' chose to lay her first egg in. Before I even added the sand to the nesting area! I thought about using pine bedding but was afraid they would kick too much out into the sand under the roosts making it harder to scoop with the litter scooper.
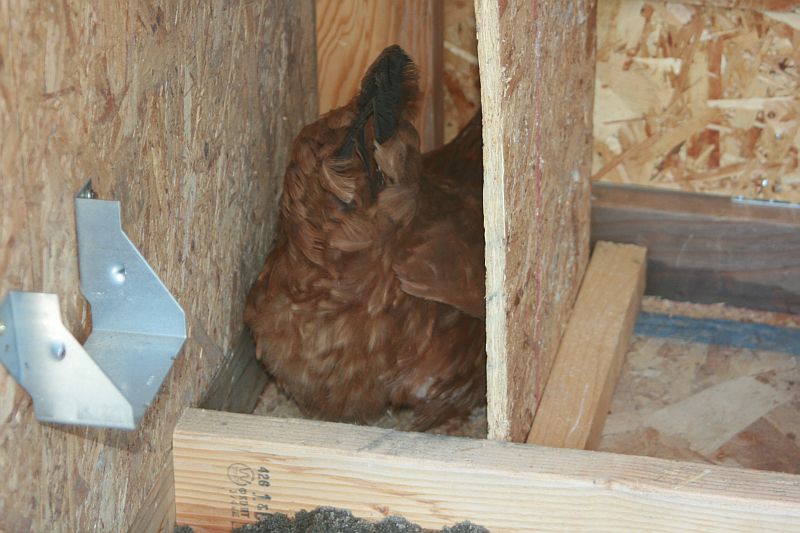
Bacon lays an egg to christen the coop!
Here is an interior shot with nesting area in the background and the roosts in the foreground.
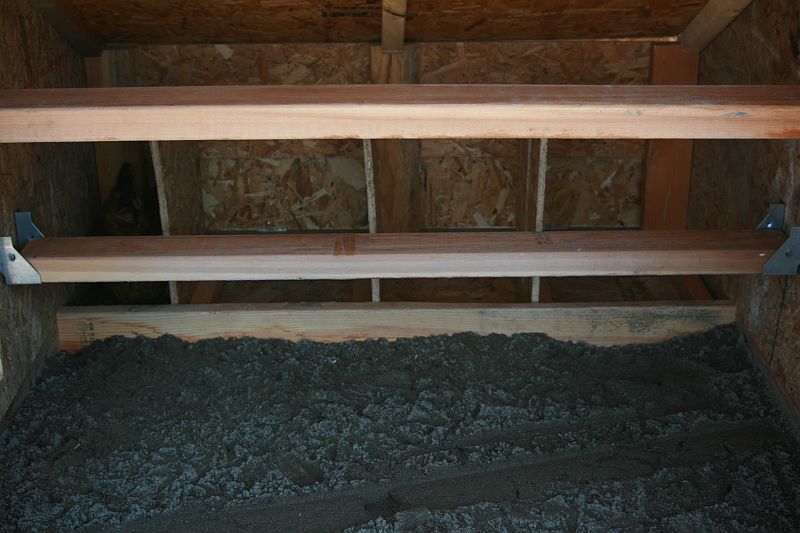
Roosting area with nest boxes behind.
Our New Hampshire Red, Buttercup (or Goldielocks depending on which kid you are talking to...they never could decide on a name) checking on her buddy, Bacon, as she lays her egg.

Buttercup checks out the new digs.
Buttercup was next up and picked the spot next to Bacon and laid her egg. My girls aren't a bit shy!
Buttercup lays her egg.
Over all, I think I did a pretty good job considering I am no carpenter and everything was basically eyeballed with only the picture of what I wanted in my head. And I built it by myself in one day, then we moved it and I built the nest boxes the following day.
I know some of you might wonder about venting. I am going to add hinges to both the upper and lower roof sections (that pesky wait til payday thing again) and build simple props so that they can be opened to vent if it gets too hot, but the entire coop sits beneath a large, side-less, covered shed with a wood floor, so I am not too worried about it getting too hot...and I made the sides of the coop out of three separate sections of plyboard and the very top piece on each side can be removed and hardware cloth installed if venting become necessary. I am also going to waterproof it, paint, then put that corrugated/wavy roofing stuff on the upper two sections even though it won't get wet sitting under the shed roof.
When it starts to get colder, I am going to install the wiring and some ceramic light sockets for heat bulbs on the center roof section. Other than buying the sand for $5...and whatever the light fixtures will cost me (unless I can find some used)...I spent NO money building this coop. Even the hardware was all salvaged from the dismantled cabinets and I have hinges already that I can use for the roof sections, and watersealer and paint left from other projects.
I am a happy girl, and so are my hens (my husband was pretty happy about the 'no money' part as well)!!
