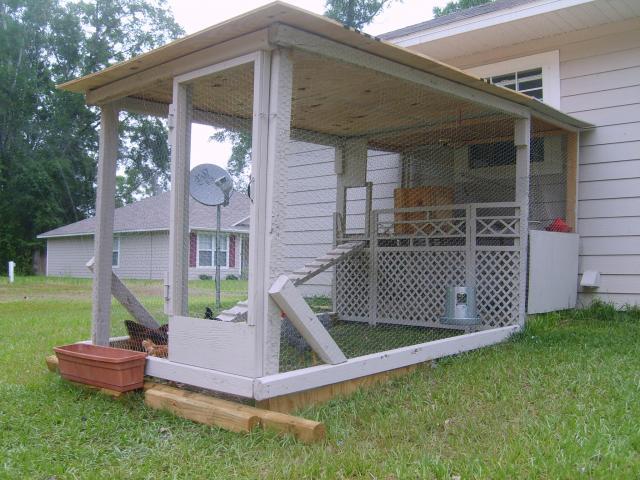
This is the coop I built for around $150.00!!! I used NON-pressure treated landscape timber I picked up at Lowes for $1.97 each! and a 50' roll of 48" chicken wire with 1" holes. 3 sheets of 3/4" plywood. The coop is 3'high, 4'deep and 7' wide. The run measures 7' wide, 8' deep and 6' high. We keep 3 hens, 2 roos and a mallard duck. I have just added automatic waterers and electricity.
This is a shot from the side. This side has the doors. The top door allows access to the nesting boxes, and the one on the bottom lets me access the poo(to shovel out)...

Here are 2 shots from 2 different angles....
The unpainted wood at the bottom was just temporary. It has been cut to fit and screwed to the posts. We also are building up the ground around the base to add some small shrubs or plants of some kind.(whatever my wife picks out)
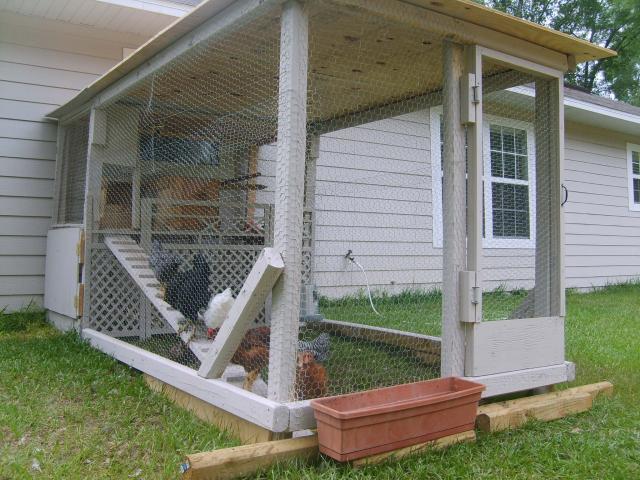
And here is a shot of the run, notice the garage window is right against the coop, this is where we place a fan for them when it's hot....
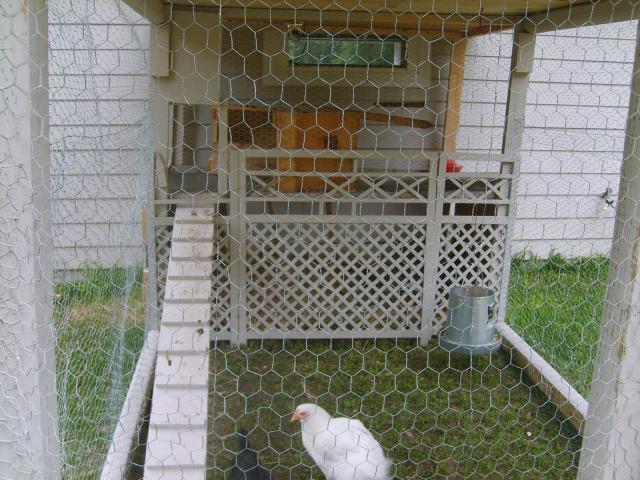
Two residents of "The Poop Coop"(Gracie the duck and Col. Sanders)...

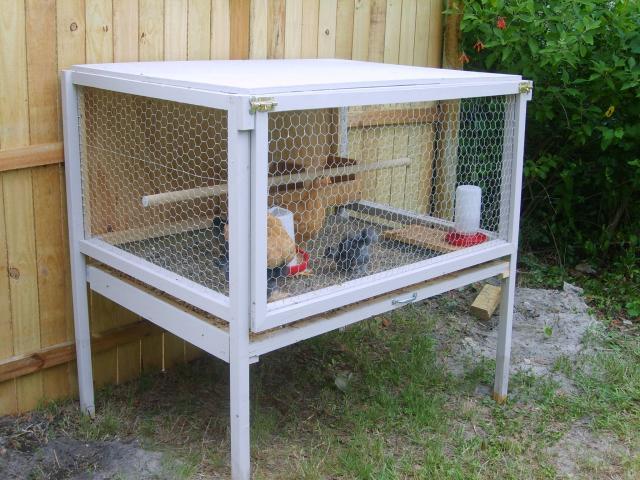
And here are sum pics of the hutch I built for our Silkies and Cochins. It si 3'x4'x2' and is about 4' tall from the ground...total cost was $78.00, including hardware. This houses our 3 Silky chicks and our 2 Buff Cochins.
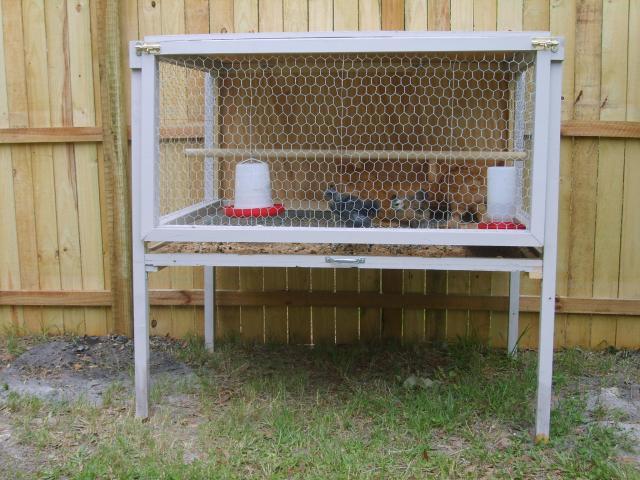
I added a 2" liter tray that slides out to be cleaned. I also built in two 10"x12" nesting boxes and a adjustable roosting pole(a 1" dowel rod) that I haveset about 10" from the bottom and runs the length of the hutch...
And here are three of the residents of the Chicken Hutch(Zsa Zsa, Eva and Magda)...

Thanks for checking out my coops. Any suggestions or ideas is appreciated.
This is a shot from the side. This side has the doors. The top door allows access to the nesting boxes, and the one on the bottom lets me access the poo(to shovel out)...
Here are 2 shots from 2 different angles....
The unpainted wood at the bottom was just temporary. It has been cut to fit and screwed to the posts. We also are building up the ground around the base to add some small shrubs or plants of some kind.(whatever my wife picks out)
And here is a shot of the run, notice the garage window is right against the coop, this is where we place a fan for them when it's hot....
Two residents of "The Poop Coop"(Gracie the duck and Col. Sanders)...
And here are sum pics of the hutch I built for our Silkies and Cochins. It si 3'x4'x2' and is about 4' tall from the ground...total cost was $78.00, including hardware. This houses our 3 Silky chicks and our 2 Buff Cochins.
I added a 2" liter tray that slides out to be cleaned. I also built in two 10"x12" nesting boxes and a adjustable roosting pole(a 1" dowel rod) that I haveset about 10" from the bottom and runs the length of the hutch...
And here are three of the residents of the Chicken Hutch(Zsa Zsa, Eva and Magda)...
Thanks for checking out my coops. Any suggestions or ideas is appreciated.
Last edited:

