my cheap design. any ideas?

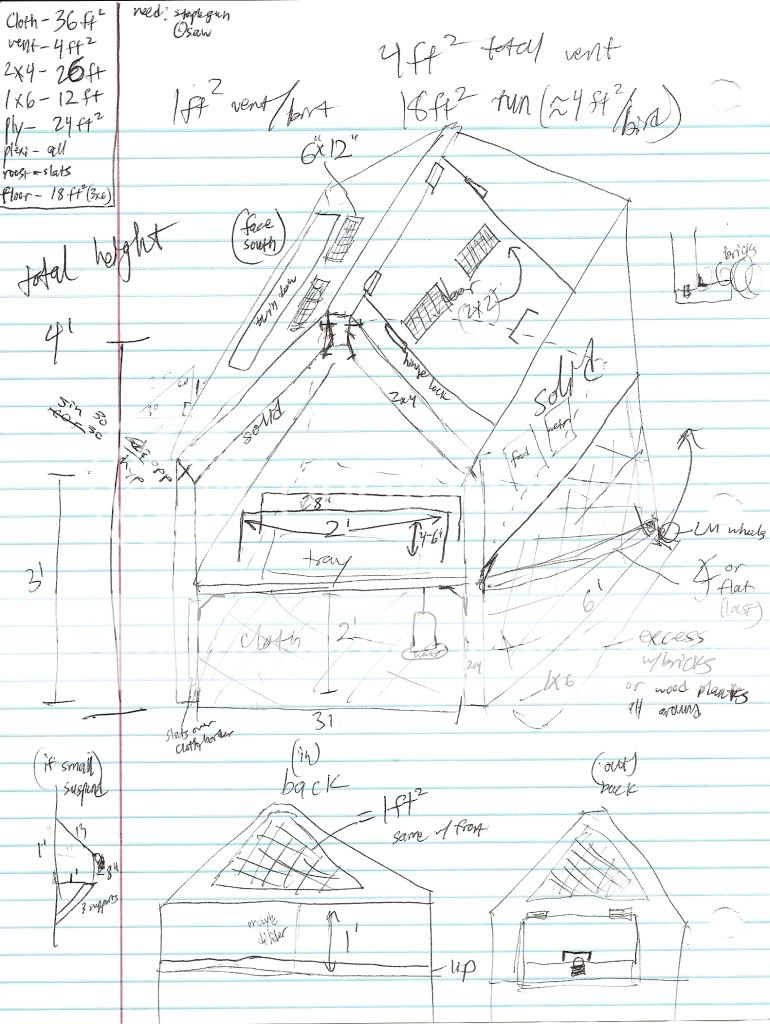
ok i have new plans now, taking into account what everyone's being saying. I'm making 4 sq f of ventilation, 18 sq ft in the run (3'x6'), there will be 6 sq ft of free space in the coop (free meaning no feeders, nesters, roosts, etc).
I may suspend the nesting boxes out if I see that the space is not quite enough.
Also, since everyone has been saying their chickens share boxes, I'm gunna make the entire end of the coop the nesting "box" so it'll be 3' long, 1' high, and 1' deep. I might put a divider in if they fight over space.
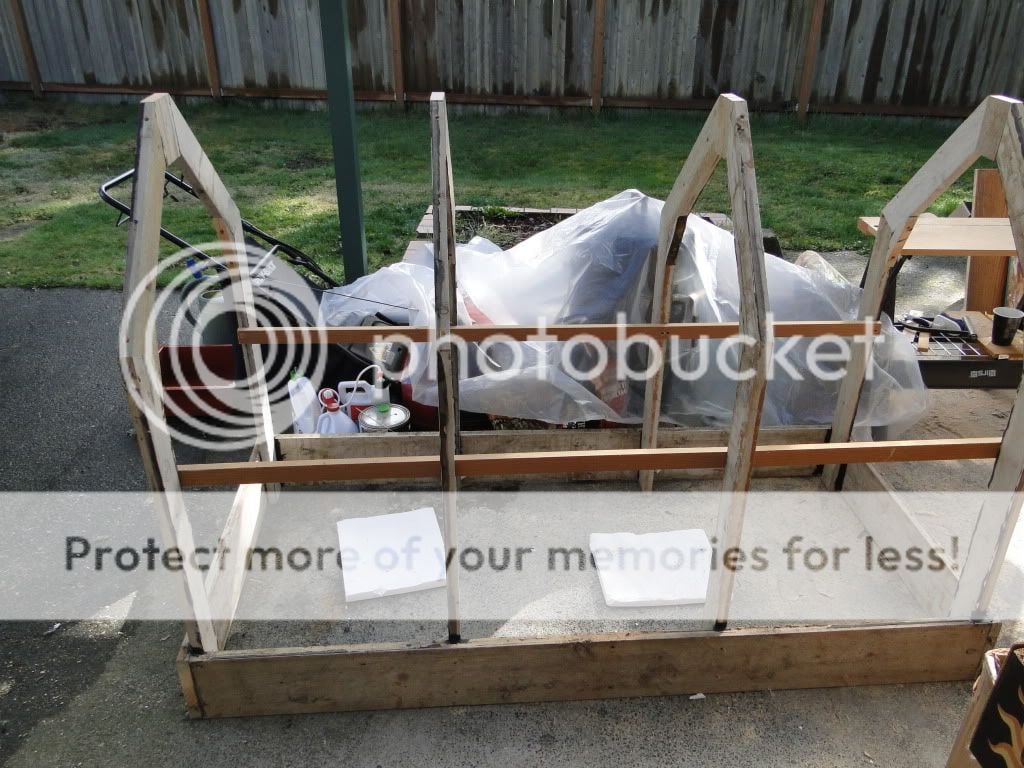
I was doodling some more today and came up with this design to solve the A frame problems of ventilation, predators digging under, roosting space, etc.
scan0003.jpg

scan0004.jpg

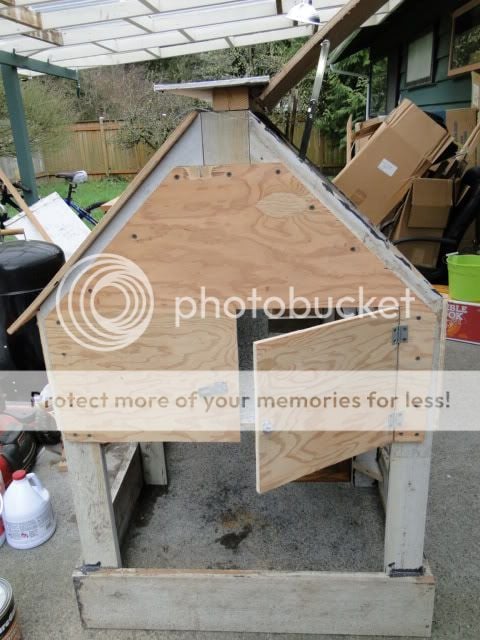
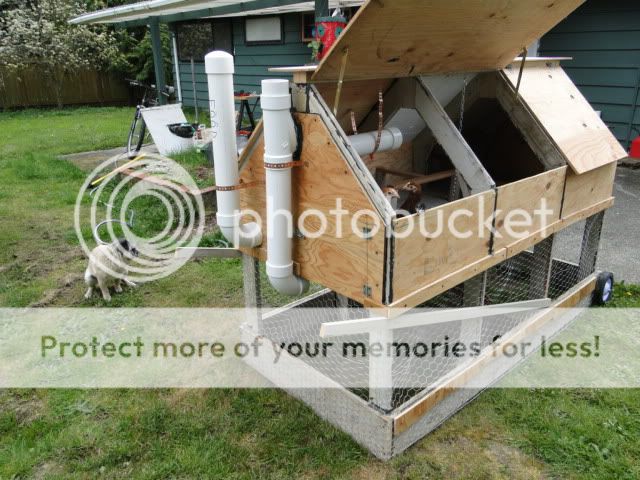
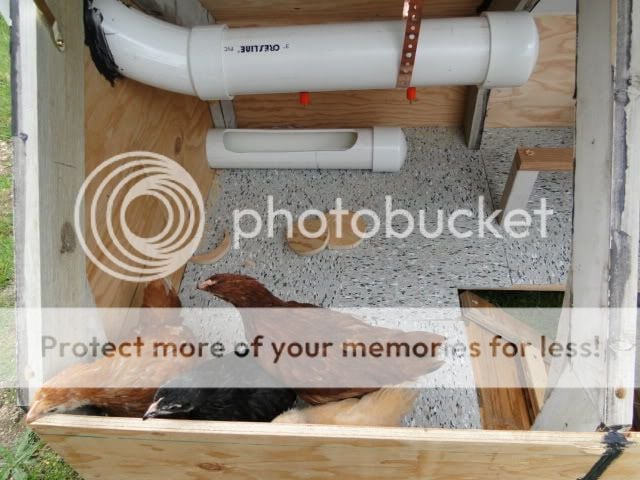
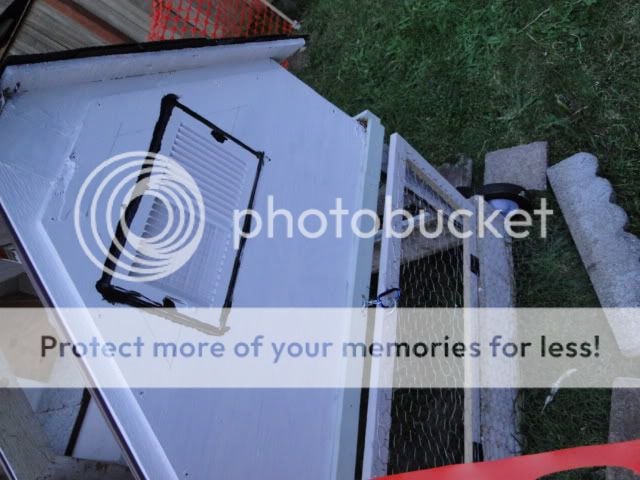
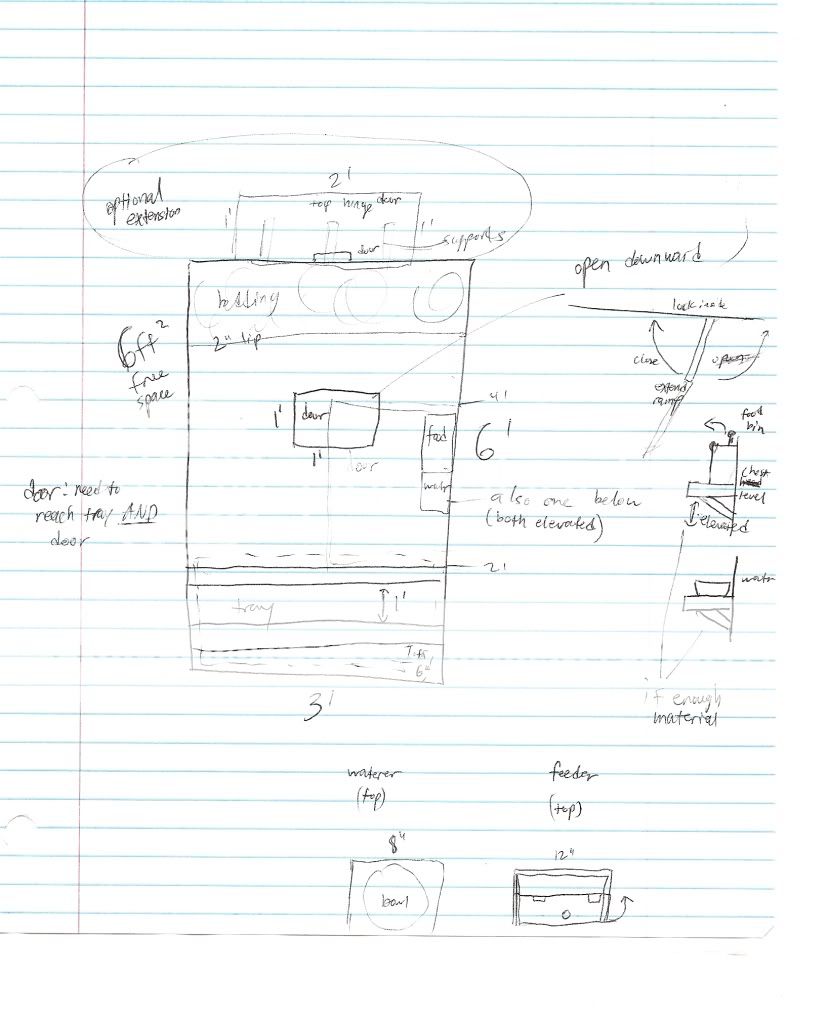
There will be a feeder/waterer under the roof access door as well as a hanging waterer in the run. The door from the run to the coop will have a ramp and will fold up to lock from the inside at night. Instead of wire apron extending out from the sides, I'll screw the vertical supports into 1x6 wood pieces so that'll make raccoon digging harder. I'll also use rocks if necessary. The run will have no wire bottom. I have the ventilation on the upper parts of the coop (both sides and ends totaling 4 sq ft). The roosts will be below the vents so they don't get too cold. 2 separate 3' roosts will make plenty of room for them. These will be 8" apart. All of this still leaves 6 sq ft of free space without the suspended nesting box. The access door on the roof will be able to rach the roosting tray to remove the poop, refill food/water along that wall, and the door to the coop

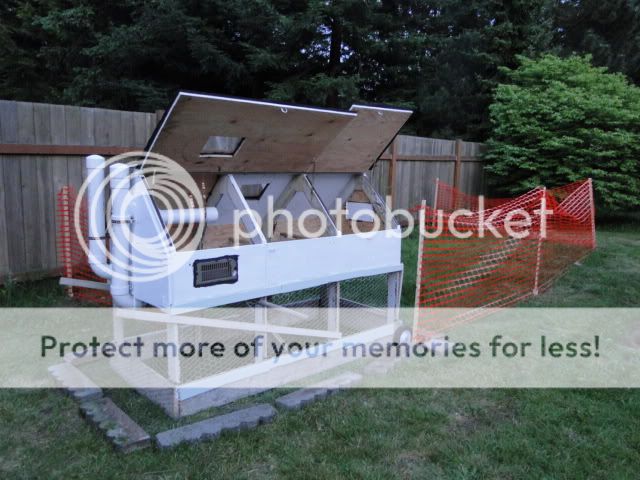
basically it's a movable barn
smile.png
.
 
it's official, spring break is on. time to build the coop. I think I'm going to put in a nipple or rabbit waterer system as well as a pvc feeder. it'll make my life easier and it's supposedly neater.
 
ok, finally posting. i've been really busy and not quite done yet, but here are some progress pics:

DSC00818.jpg


DSC00891.jpg


side view through the two top panel doors. the flooring is vinyl composite tiles. it was textured and looked better than the linoleum. The access door to the run is open in the middle.

DSC00890.jpg


There's a latch with a carabiner there. this is the side door to sweep out crap and other junk.

I've waterproofed the doors so far. Was going to waterproof then paint. If the paint doesn't stick oh well. Everything was made from free wood posted online except for the hinges and some screws. I actually found a cup of 1" screws I ended up using a lot of in my patio from the previous tenant. Cool
 
Last edited:
up next is installing a roosting pole, ventilation "windows" up on the side walls, and the chicken wire on the bottom.

The roof has a 2 inch gap of chicken wire running along the length of the coop. That's so they can have ventilation without drafts (it is covered by the roof for rain). so 2 inches x 6 feet is 1 square foot. Also, the doors overhang the walls, so a little gap allows for air to flow through, follow the door up and exit the roof, like attic ventilation.

Aside from these, I'll put in the holes with wire. Although it's still cold, do I'm thinking I may delay that until summer time.

Side note, do I need to paint the plywood or is weatherproofing it enough?
 
DSC00900.jpg


DSC00899.jpg


The other day i let them into the coop for the first time and they did not want to go down the ramp. although they did crap all over it, so that's lovely. I've also been letting them just roam the yard. It's a small problem because the dog eats the poop.

Those PVC pipes are the food and water reservoirs with outside access for refilling. The water has 2 nipples in the coop with another 2 nipples in the run. I have yet to add side ventilation and windows (can't find my plexiglass piece!), but I've painted it since then.

Also, the thing is FREAKIN HEAVY! so moving it for me is no problem, but i'm not sure about my girl friend moving it.
 
So much thought goes into building a coop! (My husband and I have been planning ours for at least a month. He is using SketchUp to draw it out.) I can see you have been laboring over it for quite awhile. I hope it all comes together for you. A good design will help keep your chickens healthy because of good ventilation and ease of keeping it clean. Have fun!
 
I've since added roofing shingles to waterproof the walls and such. I'm going to add a sliding door to cover the hole to the ramp. The walls are heavy now due to the shingles so I don't want to lift it every day to lower the ramp. Instead, I'll attach a pole to it that I can pull out from outside the coop (think of a long pizza peel).

Since it's freaking heavy, It's become a stationary coop with wheels. And now, after seeing a neighbor's coop, my girl wants me to re-make a stationary one off the ground, similar to this one
https://www.backyardchickens.com/web/viewblog.php?id=36770 without the adjustable windows. He used furring strips as the floor so poop dropped under to removable trays that slide out. Makes cleanup way easier, not to mention the living area cleaner for the birds.

I originally wanted to try the deep litter method, but since I have a tractor, I can't do it anyways since the shavings will fall through the opening. So after 2 months of labor, I may have to get rid of this one, maybe sell it.

For the new coop design, I wanted to make it de-mountable because we rent so I need to be able to disassemble it without screwing it up. So I planned on making individual panels, then latching them all together with certain latches. I have a latch I found in the house that was used for picture hanging. If I could get this on a larger scale, it'd be perfect. The two halves interlock so I could place one panel on the other and that would hold the panels together.
http://www.signaturecomponents.com/Flush-mount-interlocking-mounting-bracket-p/sc-k418z.htm

That's what I have in a sense, but it's for small projects.

Any ideas for making a detachable coop?
 
update:

roofed, feeders were tested, locks added, ramp extended, all the other fine details done....

DSC00918.jpg


DSC00919.jpg

the windows are actually 8x10 picture frames. I thought that was a nice touch

DSC00920.jpg


I used heating vents b/c they're closeable and they won't let in rain b/c the vents are angled
 

New posts New threads Active threads

Back
Top Bottom