littlecoopnextdoor
Crowing
- Nov 30, 2021
- 909
- 1,718
- 278
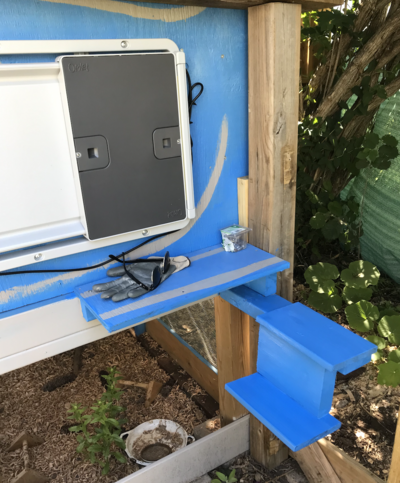
Hello from just outside Toronto, ON ") Wanted to share my coop! The photos are of the process towards the end. As I complete things I will keep adding! I started working on this in bits and pieces in the winter, far before I got chickens. It was a great way to go through scrap wood in our basement and see what paint I had to work with. I used some scrap offcuts from a shed build to get the main shape, and a super heavy duty piece of linoleum butcher block as the floor to guide the size of my coop. It's been a lot of work but so exciting to get out there and build it up. The coop is completely finished now (except for the external egg box which I will get to before they start laying) and I'm midway through constructing the attached run. I was able to find perfect condition metal roofing and drip edges from the scrapyard, free, and a lot of the wood was leftover from either our yard or my neighbours. I did purchase about $90 of lumber, hardware cloth, and the biggest expense was the automatic door from Omelet.
Wanted to share my coop! The photos are of the process towards the end. As I complete things I will keep adding! I started working on this in bits and pieces in the winter, far before I got chickens. It was a great way to go through scrap wood in our basement and see what paint I had to work with. I used some scrap offcuts from a shed build to get the main shape, and a super heavy duty piece of linoleum butcher block as the floor to guide the size of my coop. It's been a lot of work but so exciting to get out there and build it up. The coop is completely finished now (except for the external egg box which I will get to before they start laying) and I'm midway through constructing the attached run. I was able to find perfect condition metal roofing and drip edges from the scrapyard, free, and a lot of the wood was leftover from either our yard or my neighbours. I did purchase about $90 of lumber, hardware cloth, and the biggest expense was the automatic door from Omelet.
As I'm in town, my main predator concerns are dogs and raccoons - though there are definitely a lot more creatures around in the woods nearby. I covered all spaces in the coop with 6mm (1/4") hardware cloth, and the run will be covered with 12mm (1/2") hardware cloth. I have put a 2ft predator skirt around the coop and there will be around the run as well. I can't stand in the run, but in future I may add some height if I feel it's annoying. My challenge for this weekend is to figure out how to build a door on the run (for me) and start getting hardware cloth screwed in.
The ventilation is quite extensive, there is well over 1sf per bird. I have a window that has a plexiglass cover when needed (so far the girls love looking out the window from the roost) and the lower parts of the ventilation will be covered in the winter to avoid drafts.
The girls have been spending the days in the coop while I'm at work and I've been bringing them in to have heat at night. When I'm home, I let them hang out in a blocked off part of the run that is under the coop whilst I finish the rest of the run. They love it so far, both the coop and the run. Lots of places to dig, dustbath and nibble on plants.
Thanks so much for all the wonderful help I received here! I really appreciate so many folks taking the time to help out strangers.
My chicks are about 3.5 weeks old now, and hope to get them out here full time soon
Photos: don't mind the crap all around it, I don't have "done done" photos yet
Wanted to share my coop! The photos are of the process towards the end. As I complete things I will keep adding! I started working on this in bits and pieces in the winter, far before I got chickens. It was a great way to go through scrap wood in our basement and see what paint I had to work with. I used some scrap offcuts from a shed build to get the main shape, and a super heavy duty piece of linoleum butcher block as the floor to guide the size of my coop. It's been a lot of work but so exciting to get out there and build it up. The coop is completely finished now (except for the external egg box which I will get to before they start laying) and I'm midway through constructing the attached run. I was able to find perfect condition metal roofing and drip edges from the scrapyard, free, and a lot of the wood was leftover from either our yard or my neighbours. I did purchase about $90 of lumber, hardware cloth, and the biggest expense was the automatic door from Omelet.As I'm in town, my main predator concerns are dogs and raccoons - though there are definitely a lot more creatures around in the woods nearby. I covered all spaces in the coop with 6mm (1/4") hardware cloth, and the run will be covered with 12mm (1/2") hardware cloth. I have put a 2ft predator skirt around the coop and there will be around the run as well. I can't stand in the run, but in future I may add some height if I feel it's annoying. My challenge for this weekend is to figure out how to build a door on the run (for me) and start getting hardware cloth screwed in.
The ventilation is quite extensive, there is well over 1sf per bird. I have a window that has a plexiglass cover when needed (so far the girls love looking out the window from the roost) and the lower parts of the ventilation will be covered in the winter to avoid drafts.
The girls have been spending the days in the coop while I'm at work and I've been bringing them in to have heat at night. When I'm home, I let them hang out in a blocked off part of the run that is under the coop whilst I finish the rest of the run. They love it so far, both the coop and the run. Lots of places to dig, dustbath and nibble on plants.
Thanks so much for all the wonderful help I received here! I really appreciate so many folks taking the time to help out strangers.
My chicks are about 3.5 weeks old now, and hope to get them out here full time soon
Photos: don't mind the crap all around it, I don't have "done done" photos yet