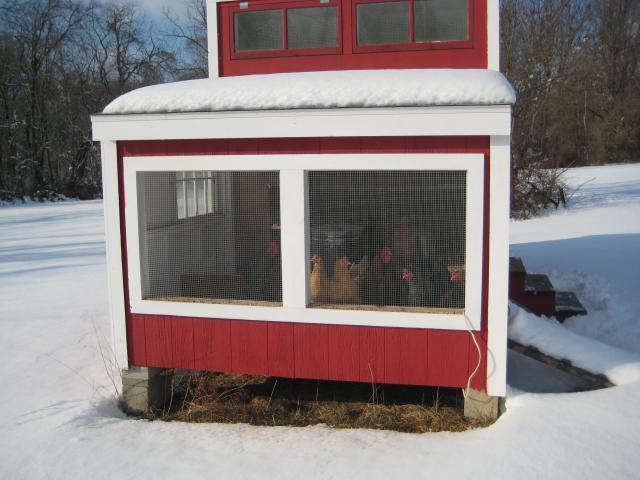
need advice on using a covering for plywood floor of coop

I bought a 4x8 sheet of vinyl from Home Depot when I built my coop. I laid it on the plywood floor and then put the stud walls on top of it. I think cost about $20. If I remember correctly, it was by the mouldings.
 
I have a plywood floor and I covered it with the foam mats that they sell for children's play areas. They fit together like puzzle pieces and come in bright colors on one side and gray on the other. You can get a big package for about $20. They are easy to cut with an exacto knife and are very durable. I can take them out and wash them, let them dry, and put them right back. They add a layer of insulation and give the chickens plenty of traction and are comfy on their feet.
 
"I'm toying with the idea of Polymax HDPE panels for mine. They are pretty pricey, but ideal for farm/animal use, can be hosed down, and will probably last forever, well maybe not forever ;)

http://www.farmtek.com/farm/supplies/ProductDisplay?catalogId=15052&storeId=10001&langId=-1&division="

************************************************​

I would think that you would still need to seal between HDFP panels and around the edges, otherwise I expect that the subflooring would get wet and mildew and/or rot.
 
Last edited:
Hi NewEgg,

I'm from Massachusetts too. When my husband and I became first time chicken keepers and built our coop in July 2011 we used Glassboard on the floor. We were going to use lino but we thought that with all the pecking chickens do they would cause a lot of damage and we would have to keep replacing it and we didn't want the chickens eating all the little pieces. We first heard of the glassboard when we were looking at prebuilt coops and one builder used it for a small coop floor. It is usually used commercially for bathroom walls and such. Kamco Supply Corp. sells it and it comes in many colors and is also available with a smooth or textured surface...We decided on the textured. The sales person suggested it because we were using it on the floor and there would be less chance of me slipping when it was time to clean it. It's been down for almost two years now and I love it. With all the scratching and pecking the chickens do they have not damaged it at all. We got a 4'X8' sheet and cut it to fit and used the remainder to put on the bottom of the nest boxes even though I use plywood boxes with plastice bins. (just some added protection) We also bought the adhesive to glue it to the plywood. (wait a couple of days for the smell to go away before bringing in the chickens) Where your coop is 4'X4' I would suggest getting a 4'X8' sheet and cutting it in half and use the extra piece for the wall behind the roost. I don't know how they manage it but every now and then my hens seem to manage to get some feces on that wall.

Lowes or HomeDepot, I can't remember which, has a similar product but not very good quality. One of the sheets they had had a broken corner. I would not recommend getting it there.

The Kamco website is Kamcom.com then click on Wall & Impact Protection and then FRP Finish.

Good luck! You'' have a lot of laughs raising your chickens. :)
 
Back in 2011 when we were new to chicken keeping I too was quite worried about the cold winter temps here in Massachusetts so I used a red heat lamp for that first winter. My husband has since convinced me that they do not need the extra heat so this past winter I didn't use the heat lamp (except on one or two extremely below freezing days and even then they really didn't need it) and they were just fine. As long as you make sure there are no drafts in their coop and close everything up at night, including the door to the run (to keep out preditors...coyotes, foxes, fisher cats,and everything else that lurks in the night) they should be ok. (I open a standard size window an inch or two during the day for a little circulation and close it up tight for the evening) They have access to their run all day and are let out to free range if they chose to do so. (mine don't seem to like the wind and the snow so they go inside the coop alot on their own. At night they all huddle up on the roost and the body heat they generate keeps them quite warm. You'll see. This winter when they're on the roost for the night just slip your hand between two of the chickens and you'll notice they are quite warm. :)

Remember, when you use any type of heater and they get use to it and you lose the power (unless you have an alternative power source) that's going to be a bit of a shock and can do more harm than not using a heater at all.

During the shortened daylight hours I use a small regular red light bulb to keep up egg production for the winter. I either increase or decrease it by 15 minutes per week to get to the 14 hours of daylight needed.
 
Last edited:
I'll agree with you that chickens don't need any added heat in the winter. But, you DO NOT want to close up the coop tight. Fresh air/ventilation is just as important, if not more so, in the winter. My coop is proof of that. The front is wide open year round, and the chickens thrive . No heat, No insulation (Except for what the birds already have), No problems.
Jack


900x900px-LL-f52d3bc5_55557_img_1349.jpeg
 
We painted/sealed our coop inside and out with an opaque fence stain/sealer and it has worked wonderfully so far. I think the product is from Behr. It comes in lots of colors; we picked a nice sage green. We got it at Home Depot. I cover the inside of the sleeping/nesting/roosting area with a couple of inches of pine shavings. I just put on a rubber glove and pick out the poo each morning with I let the chickens out into their yard. We've had the coop for two years and it's still in perfect condition.
 
My coop was 8'x16' too. I started with treated 3/4" exterior plywood, then I painted it with a rubberized paint used on mobile homes, and motorhome roofs. I painted the floor, and the foot plate of the walls. This sealed everything very well. I've used the deep liter method and have had excellent results. Also instead of wood shavings, I used wood pellets. Once they break down, they absorb and maintain humidity levels in my coop. About once a month I may add another bag to maintain about a 6" to 8" depth. Every day when I collect eggs, feed and water my birds I use a 3 pronged cultivator and turn it over. I only need to clean it out twice a year, spring and fall, and that just goes straight into my garden. Pellets break down into a fine sawdust mix and tills into the ground better than shavings. Also, by turning it over once a day, I never have a fly problem and there's no ammonia smell. The deep litter method also promotes healthy bacteria year round. I've had overall great results using this method. I'm one of those people who turn everything into a science project, so after trying several types of liters this seems to be the best I've found.
 
I use a truck bed rubber liner for my coop which it is 7 x 4, perfect size and sometimes when it gets rained in or get wet from spilled water or chicken tipping over waterer, it does not faze it. And it can take the abuse out of a metal shovel.

Lino will break down over time, something I would not recommend for constant moisture/humidity factor. Good idea to weatherize or waterproof or marine paint the floor first and then lay your rubber down.

I've had the rubber mats for almost ten years and it held up beautifully despite of rats gnawing on it! I will have to put a hardware wire wrapped around the bottom of floor and wrap it around and then top it with rubber mat.

I have a vinyl shed, no issues with wood being warped nor worry about rotting studs. Sometimes muddy chickens would fling mud all over the place or track in mud from a muddy run or area leading up to the pop door, the rubber mats keeps it at bay and after a warm dry spell, I would strip out the coop of its contents, take a water hose and have a go at it. No rotting.
 
So I tried to reply with a quote and messed up the first time. Corrected below. Can't figure out how to delete a post. Hmmm, I feel more investigation in store.
 
Last edited:

New posts New threads Active threads

Back
Top Bottom