Hello everyone!
Let me start off by saying that I've had a great starting experience to raising chickens thanks to you guys and gals!
I started researching about chicken about 8 months ago, quickly found this site and have found almost everything I've needed here. 2 months ago me and my daughter started raising 16 baby Speckled Sussex chickens I ordered from Cackle Hatchery. Today they are all alive and healthy.
Now normally I am a lurker on forums but I wanted to share my story with you because I am so thankful with all the help I've found here. My coop design was pulled at modified from several posts I've found on here. And I've avoided mistakes from advice I've read on this website.
Now on to some pictures! Before we get started I am not 100% done. But will gladly accept any advice!
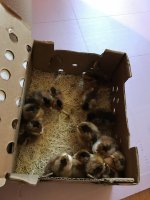
Arrival day! I took a few days off work and enjoyed watching these clumsy guys playing around. They warmed up quickly and had no issues.

Brooder kit I also ordered from Cackle, they only stayed here for about 10 days

My daughter Brooke with one of the chicks
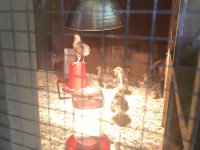
Moved the 2 week old chick to the not quiet ready coop. I thought I had more time but they started escaping from the brooder.
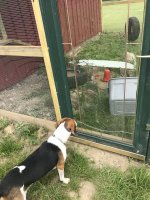
Our dog spike watching the chicks explore the run for the first time.
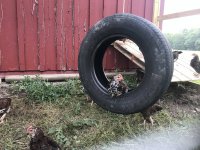
People laught at my tire swing, but the tires were free and they use it
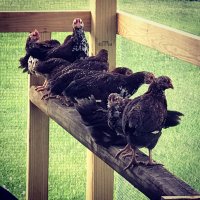
One of my favorite pictures
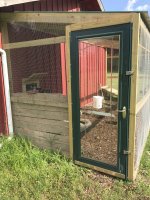
There was an existing small barn on my property. I put a 4x8 coop inside and a 8x20 run outside. I work construction so I was able to get a old screen door for free and matching color tin roofing. And yes I know, "evil" pressure treated wood.
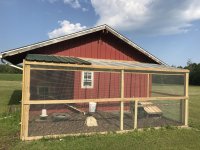
Almost finished here outside. Just have 5 feet more of wire to bury under ground. I used 1/2 by 1/2 wire on wall and roof. Also buried it about 8 inches under ground around the intire thing. Found the wire on amazon for 1/2 the price as hardware stores(thanks to you guys!)
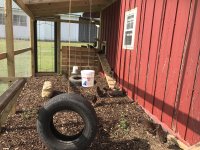
I have a neighbor who runs a tree service, so I'm able to get free wood chips. Lucky me!
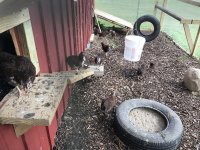
Used an old tire and filled it with mason sand, they use it so much that I think I need a bigger tire!
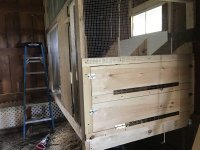
Inside the barn, I'm able to access 8 nesting boxes through these doors. I Can't wait to use them!
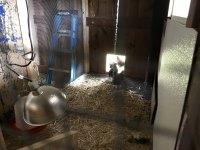
Another view inside, I'm installing insulation board and putting plastic panels over to protect it. Easy clean! Was only planing on getting 8 chickens when I built this, so an expansion will soon be needed.
If you made it this far then I give my thanks for taking the time to read my post. I can't thank you guys enough! I love watching my birds grow up, and it gives me much satisfaction seeing them grow healthy and safe.
Again any advice or things you notice I'm doing wrong PLEASE tell me.
-mike
Let me start off by saying that I've had a great starting experience to raising chickens thanks to you guys and gals!
I started researching about chicken about 8 months ago, quickly found this site and have found almost everything I've needed here. 2 months ago me and my daughter started raising 16 baby Speckled Sussex chickens I ordered from Cackle Hatchery. Today they are all alive and healthy.
Now normally I am a lurker on forums but I wanted to share my story with you because I am so thankful with all the help I've found here. My coop design was pulled at modified from several posts I've found on here. And I've avoided mistakes from advice I've read on this website.
Now on to some pictures! Before we get started I am not 100% done. But will gladly accept any advice!

Arrival day! I took a few days off work and enjoyed watching these clumsy guys playing around. They warmed up quickly and had no issues.

Brooder kit I also ordered from Cackle, they only stayed here for about 10 days

My daughter Brooke with one of the chicks

Moved the 2 week old chick to the not quiet ready coop. I thought I had more time but they started escaping from the brooder.

Our dog spike watching the chicks explore the run for the first time.

People laught at my tire swing, but the tires were free and they use it

One of my favorite pictures

There was an existing small barn on my property. I put a 4x8 coop inside and a 8x20 run outside. I work construction so I was able to get a old screen door for free and matching color tin roofing. And yes I know, "evil" pressure treated wood.

Almost finished here outside. Just have 5 feet more of wire to bury under ground. I used 1/2 by 1/2 wire on wall and roof. Also buried it about 8 inches under ground around the intire thing. Found the wire on amazon for 1/2 the price as hardware stores(thanks to you guys!)

I have a neighbor who runs a tree service, so I'm able to get free wood chips. Lucky me!

Used an old tire and filled it with mason sand, they use it so much that I think I need a bigger tire!

Inside the barn, I'm able to access 8 nesting boxes through these doors. I Can't wait to use them!

Another view inside, I'm installing insulation board and putting plastic panels over to protect it. Easy clean! Was only planing on getting 8 chickens when I built this, so an expansion will soon be needed.
If you made it this far then I give my thanks for taking the time to read my post. I can't thank you guys enough! I love watching my birds grow up, and it gives me much satisfaction seeing them grow healthy and safe.
Again any advice or things you notice I'm doing wrong PLEASE tell me.
-mike


