- May 11, 2012
- 25
- 1
- 26
Hi, I'm a new chicken guy. But I also am a bit obsessive compulsive about research and have read the HECK out of every book, blog and website I could get my face in front of over the last month and I'm officially hooked on chickens. What fabulous little weirdos! We live in a rental home and I wanted to build something that the owner nor neighbors would not find offensive. As luck would have it a friend of mine had redone a deck and fence and had a LOT of great reclaimed wood for me to pilfer.
As I am in LA county the coop had to be a set number of feet from our home and the neighbors which limited the location possibilities. The spot we decided on is good though as it is close to water, power and the back door of the kitchen for handy egg retrieval.
Rough framing begun

Coop dimensions are 9' x 4'

Painted with a light coat of exterior paint that when put on the old wood was more of a stain that paint. In other words I have little concern about them pecking paint chips off.

Modified version of this plan (http://www.constantcraftsman.com/wp-content/gallery/chicken-coops/nestboxidea03.gif). A little wider and only two boxes (for 4 birds).

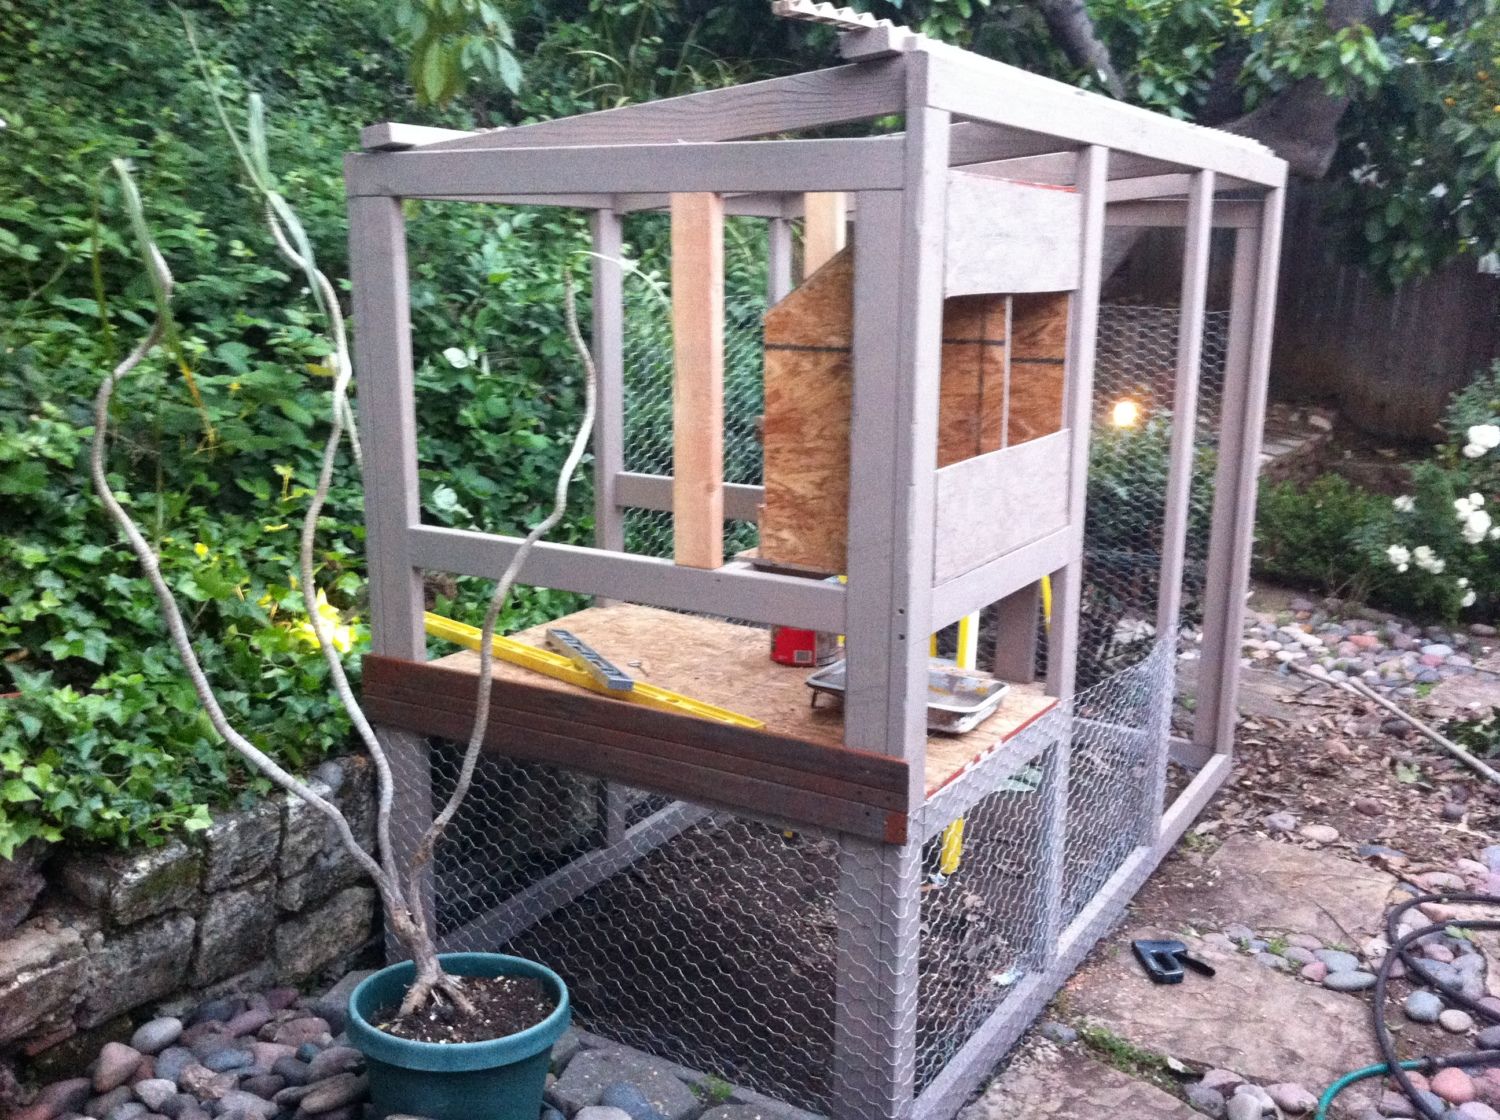
Base of the henhouse is sloped (front is 30" off the ground, back is 31") to allow drainage. Above that is the support for the nest box (12" above the deck of the henhouse). I bought a roll of stucco lathe (one of my only expenses.) The stucco lathe is the same dimensions as standard poultry wire but MUCH thicker gauge and only $50 for about 3 times more than I need!

Nest box in place. Starting to affix the old weathered redwood fence posts as siding.
Other side

Access door on left, and access door to rake the entire length of the henhouse below the nest boxes. Siding coming along nicely.


Side access door in place.

I was given a decent amount of remnant linoleum that should make clean up a good deal easier. This is looking through the access hatch under the nest box.

I had enough left over to do the bottom of the next boxes. I later drilled 1/2" holes to allow drainage if I should have to wash them out.

Getting the third wall's siding in place. Hen access door to their run.

The wire on the lower part of the walls wraps in one piece from the one side of the door all the way around the coop in one piece. I also tucked it under and then I put a sheet of it on the ground. I wanted as few seems as possible in the wire. I then layered about 4" of pine shavings on the ground and then stepped on it to compact it and the wire down. I may end up putting gravel and/or sand down if the area proves to be too wet in the winter but this is LA so what winter, right?

Before I put the pine shavings in the hen house my daughter gave it a whirl and thought it was her new playhouse. Looks like a treehouse build project is next.

Doors for the nest box and access hatch hung.

I put their roost bars on the other side of the henhouse from the next box and a bar in front of the next box. All are notched and removable to assist in cleanup. I've mounted the brooding lamp in there temporarily. The chickens are still young and supposed to be at 70* so this helps it keep up the temps at night. In a few weeks I'll remove it. The two pet feeders are there temporarily as well

At night in the red light district.

Along with the great redwood siding and most of the 2x4 lumber my friend also gave me a funky old screen door which I painted red and ripped the screen out and replaced with more of my stucco lathe. The roof is dark green corrugated plastic over the hen house and clear corrugated plastic over the run. There is a couple inches of gap between the siding and the roof which I have stapled more of the stucco lathe into to prevent varmints intruding but still allow good ventilation. I have a digital thermometer mounted to the wall outside the nest box with the wire running into their henhouse to help monitor the temperature.

The seems of the wire panels are wired together every two inches.

Two design issues: The ramp is right next to the human door, which is mildly annoying mostly from an aesthetic point of view; there's still plently of room to walk in the door without it getting in the way. I had reason to put it on that side of the henhouse however as I wanted that hen access door to go up under the nest box to deter birds from getting too comfortable under there and laying. Also, the other side is the roost area and I didn't want to have to have them walking right under roosting sister hens.
The other design issue is that while the under henhouse run area is great for additional square footage it's exactly where they like to go to escape me wrangling them up and it's tough to shoo them out. I've now employed a short broom that hangs in the coop to coax them out from under there.

They REALLY seem like happy little weirdos.

All in all with the incredible amount of reclaimed/repurposed wood and materials I was given I only had to purchase the following:
Corrugated plastic roofing and roofing screws
Roll of stucco wire
A box of drywall screws for the siding and nest box construction
2 10' 2x4s
2 4x8 sheet of CDX plywood
a few hinges and clasps
Whole shebang cost me about $200
Future plans include doors to shut the side windows in winter and auto feeder/watering feature.
Thank you BYC for all the wonderful coop design inspiration and invaluable wisdom!!
As I am in LA county the coop had to be a set number of feet from our home and the neighbors which limited the location possibilities. The spot we decided on is good though as it is close to water, power and the back door of the kitchen for handy egg retrieval.
Rough framing begun
Coop dimensions are 9' x 4'
Painted with a light coat of exterior paint that when put on the old wood was more of a stain that paint. In other words I have little concern about them pecking paint chips off.
Modified version of this plan (http://www.constantcraftsman.com/wp-content/gallery/chicken-coops/nestboxidea03.gif). A little wider and only two boxes (for 4 birds).
Base of the henhouse is sloped (front is 30" off the ground, back is 31") to allow drainage. Above that is the support for the nest box (12" above the deck of the henhouse). I bought a roll of stucco lathe (one of my only expenses.) The stucco lathe is the same dimensions as standard poultry wire but MUCH thicker gauge and only $50 for about 3 times more than I need!
Nest box in place. Starting to affix the old weathered redwood fence posts as siding.
Other side
Access door on left, and access door to rake the entire length of the henhouse below the nest boxes. Siding coming along nicely.
Side access door in place.
I was given a decent amount of remnant linoleum that should make clean up a good deal easier. This is looking through the access hatch under the nest box.
I had enough left over to do the bottom of the next boxes. I later drilled 1/2" holes to allow drainage if I should have to wash them out.
Getting the third wall's siding in place. Hen access door to their run.
The wire on the lower part of the walls wraps in one piece from the one side of the door all the way around the coop in one piece. I also tucked it under and then I put a sheet of it on the ground. I wanted as few seems as possible in the wire. I then layered about 4" of pine shavings on the ground and then stepped on it to compact it and the wire down. I may end up putting gravel and/or sand down if the area proves to be too wet in the winter but this is LA so what winter, right?
Before I put the pine shavings in the hen house my daughter gave it a whirl and thought it was her new playhouse. Looks like a treehouse build project is next.
Doors for the nest box and access hatch hung.
I put their roost bars on the other side of the henhouse from the next box and a bar in front of the next box. All are notched and removable to assist in cleanup. I've mounted the brooding lamp in there temporarily. The chickens are still young and supposed to be at 70* so this helps it keep up the temps at night. In a few weeks I'll remove it. The two pet feeders are there temporarily as well
At night in the red light district.
Along with the great redwood siding and most of the 2x4 lumber my friend also gave me a funky old screen door which I painted red and ripped the screen out and replaced with more of my stucco lathe. The roof is dark green corrugated plastic over the hen house and clear corrugated plastic over the run. There is a couple inches of gap between the siding and the roof which I have stapled more of the stucco lathe into to prevent varmints intruding but still allow good ventilation. I have a digital thermometer mounted to the wall outside the nest box with the wire running into their henhouse to help monitor the temperature.
The seems of the wire panels are wired together every two inches.
Two design issues: The ramp is right next to the human door, which is mildly annoying mostly from an aesthetic point of view; there's still plently of room to walk in the door without it getting in the way. I had reason to put it on that side of the henhouse however as I wanted that hen access door to go up under the nest box to deter birds from getting too comfortable under there and laying. Also, the other side is the roost area and I didn't want to have to have them walking right under roosting sister hens.
The other design issue is that while the under henhouse run area is great for additional square footage it's exactly where they like to go to escape me wrangling them up and it's tough to shoo them out. I've now employed a short broom that hangs in the coop to coax them out from under there.
They REALLY seem like happy little weirdos.
All in all with the incredible amount of reclaimed/repurposed wood and materials I was given I only had to purchase the following:
Corrugated plastic roofing and roofing screws
Roll of stucco wire
A box of drywall screws for the siding and nest box construction
2 10' 2x4s
2 4x8 sheet of CDX plywood
a few hinges and clasps
Whole shebang cost me about $200
Future plans include doors to shut the side windows in winter and auto feeder/watering feature.
Thank you BYC for all the wonderful coop design inspiration and invaluable wisdom!!
Last edited:

")

