Our Coop Trials & Tribulations..

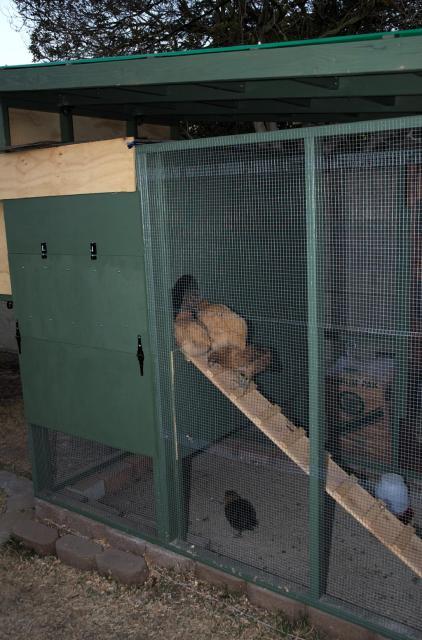
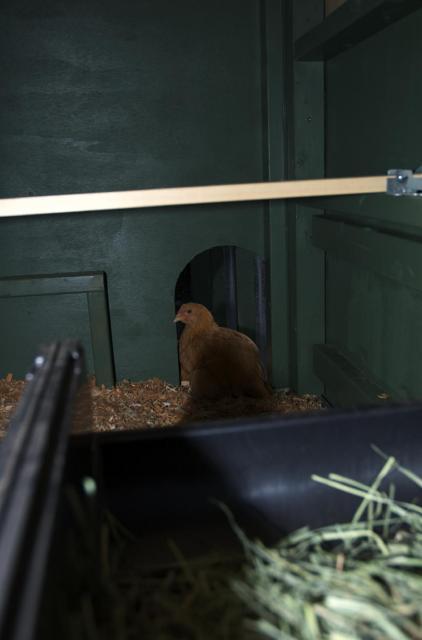
I'll see about putting some newer photos up.. When we buttoned things up yesterday it was getting pretty dark so I didn't take any photos.. The birds are in for the 2nd night.. We left the coop open for them and they walked right up the gang plank and sat at the doorway.. They've not quite figured everything out just yet.. I was impressed that they knew to come in though!

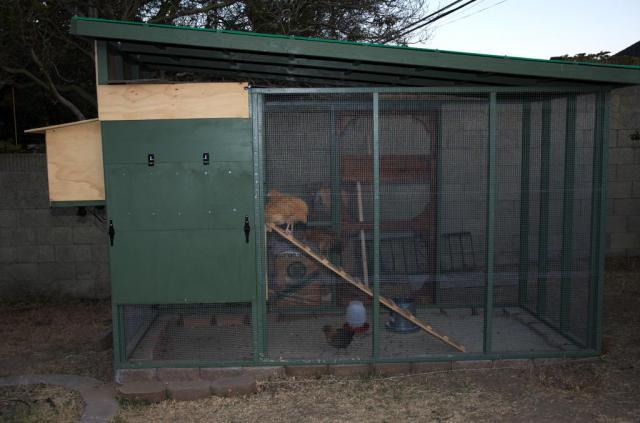
In the picture above.. the flip-down cleanout door is open near my daughters feet.. There are a set of vents at about the level of my daughters head on each side above the cleanout doors and in the photo we didn't have the plywood in place yet for the coop pop door.. Anyway, the next set of photos will make it more obvious if there's any question about what's where,etc.. Thanks!
 
Hmm.. In thinking about it.. If I put the plywood on the roof over their coop I might want to put some of the spare linoleum that I've got left over as that would probably make a pretty good water deterrent -- it won't really get any direct sun and I've got the adhesive... Hmmm... It would probably keep water out better in the times when we've got rain coming at different angles..
 
Quote:
Hello! Are the plastic roofing sheets nailed in or screwed in? How are they water tight?
 
Quote:
Hello! Are the plastic roofing sheets nailed in or screwed in? How are they water tight?

Usually it's special screws for corrugated roofing. The ones I used were coated hex screws with washer attached. When you screw them in the predrilled holes, it has to be loose to allow expansion.
 
Correct! We used the manufacterers supplied installation screws (in a variety of colors
smile.png
) and you pre-drill thru the plastic panels to be 1/8" oversized to allow for expansion/contraction. We used two tools for the installation.. A plug-in drill for getting the holes through the panels (use VERY light pressure or you'll drill into the wood too) and a battery operated drill/driver to install each of the screws -- we installed about 90 screws -- one screw for every 4 raised corrugations. Make sure you don't drive them too deep or the rubber washer will be squeezed out which I believe is not ideal. Overall it was way easier than putting sheets of plywood, felt paper and shingles which would probably have added another 75-100lb to the weight and required more than the 3 of us to install it.. I guess that's why home builders install in place..
big_smile.png
 
Quote:
Yes! I'm paranoid about mites, too. That's one of the reasons I also painted the inside of the coop...to help seal the wood. I also use plastic nestboxes: no crevices for mites to hide in, and plastic is very easy to clean and disinfect. It's simple to dump the contents of the nestbox into my composter (the nestboxes are portable), so I find that I replace bedding more frequently than I would if it were more of a production.

The undersides of roosts are also a place that mites try to hide. I use natural, smooth barked tree branches for perches and replace them often. Before I put them up, I give them a good spraying with Adams Flea and Tick and let them dry in the sun.

Lovely looking coop, by the way.
 
I thought I'd come back and see how you were making out....You're doing an awesome job! I wish I could find someone with the ability
to plan ahead and design in necessary features as well as you have when I had my construction business! Cherish your experience
here for you have done extremely well!
 
Quote:
Well.. We had some basic ideas on what we wanted after looking at some fancy coops.. Ultimately we changed the design numerous times as we went along.. It was actually good that it took multiple weekends to get done as it allowed us to look things over and think things thru to work as we wanted.. My only peeve was that the nesting box is rather high -- the kids will need a step stool to get the eggs as we didn't take into account the fact that we were going to use the deep litter method which raised the nesting box ~8" higher than the rest of the coop. The floor of the coop is already high as our coop/run is on an incline.. I'll post some more pics soon..

By the way.. I firmly believe that the average handy-man/handy-woman could have done an equal or better job on this.. You might consider that before forking out $$ for prefab coops.. If you've got sufficient ideas on what you want and can sketch it on paper that's half the battle!
 
Last edited:
Here's some more pics -- not quite done but in a usable state..

54019_dsc_3107.jpg


Here's a closer view of the coop end.. The small rectangles of plywood above the coop are vents that haven't yet been installed but will be this weekend.. Those pieces are there to keep the birds in and other critters out for now.
54019_dsc_3108.jpg


Here's the birds on the gang plank.. We need to widen up the hole going into the coop as they all seem to think it's the front porch and want to sit there looking out.. It's rather an odd sight to see 4 birds all trying to sit on each other for the "space"..
woot.gif

54019_dsc_3109.jpg


The next photo shows the nest box which hasn't yet been full completed but is functional once you put some squeeze clamps to hold pieces together..
celebrate.gif

54019_dsc_3110.jpg


Here's another pic showing the flopped down access door for the nest boxes. This will all be completed this weekend -- handles, locks and whatnot (and yes, Paint!)
54019_dsc_3113.jpg


Here's one of the birds hanging out at the coop entrance.. You can also make out the roost bar which the birds are not using quite yet..
54019_dsc_3112.jpg
 

New posts New threads Active threads

Back
Top Bottom