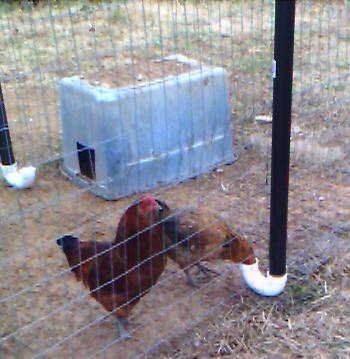
I thought it was simple at first too. At the hardware store I played around with 3 inch bends. 90 deg and 60 deg bends together looked good. I attached them to a straight piece. The feed came down nicely to the end. I thought all would be well. My chickens, however, try to thwart all my efforts, and once I installed it, they would beak the feed out onto the ground for sport. I have since revised it with the original short radius 90 deg bend plus a 90 deg bend, so now they can't (or at least don't) bill it out. They have to stick their heads down in it a little to feed, but that serves them right!
Do you have more than one in the same pen? I have around 80 birds,50 - 60 in one pen and 30 or 40 in the 2nd pen. Should I have more than one feeder/waterer?
Do you have more than one in the same pen? I have around 80 birds,50 - 60 in one pen and 30 or 40 in the 2nd pen. Should I have more than one feeder/waterer?
With that many birds to a pen you would need several feeders and waterers in each if you go with the PVC design. It's one of the design's downfalls, they can only accommodate a few birds at a time, it's fine for smaller flocks but with larger flocks it makes it more likely birds at the lower end of the pecking order will get pushed back.
If you really like the design just make sure you've got lots of feeders and waterers for each pen, but with that many birds, if you're looking for a higher capacity, lower cost feeder I'd suggest just making them out of five gallon buckets. Use a hole saw to cut holes around the bottom of a five gallon bucket, bolt a feed pan to the bottom and voila! you've got yourself a feeder.
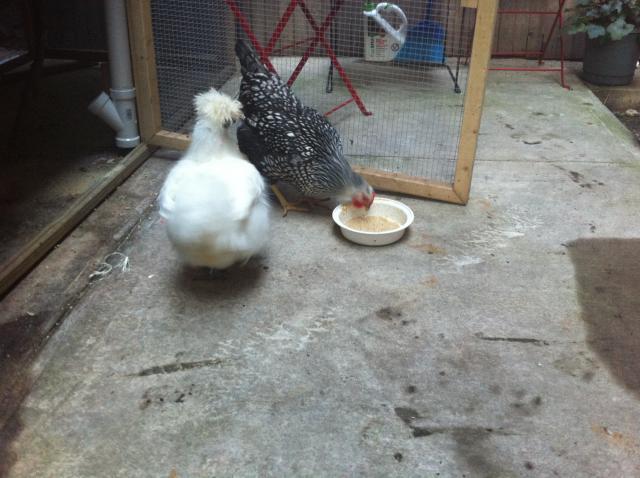
I just thought it would be easier to feed them from the outside of the pen, because in the morning when I got to open the door to feed/water them they all try and dive out the door ... if I could put feed inside from outside of their pen it would sure make feeding/watering them a ton easier for me!
My run is only 30" tall, so I had to come up with a decent feeder for four birds. I also made smaller ones for grit and oyster shell.
Parts list:
(1) 2' section of 4" PVC. Yours can be as long as you want. I only had room for 2'
(2) 4" PVC caps
(1) 1 1/2" Wye adapter
(1) 1 1/2" threaded plug
Optional:
(2) eyebolts (I had 1/4" stainless ones)
(2) washers
(2) nuts.
Tools needed:
Pencil
piece of paper or string.
Knife for cleaning up edges of holes.
Drill
~1 1/2" holesaw
1/4" bit for the eyebolts.
PVC cleaner and glue.
Lunch, or your favorite adult beverage of choice.
Now you've got all the stuff lying in front of you, time to get to work!
Step 1:
Drill the cap. But it's not going to be the cap on top. It's going to be the bottom.
Take one of the 4" caps and mark center. Or pretty close to center, it doesn't really have to be perfect. Trust me, the chickens won't notice if you're a bit off-center.
Drill a large hole with the hole saw. The idea is to make the hole the same diameter as the inside of the 1 1/2" wye, but not big enough to fit the whole fitting into. Smooth out the edges of both sides of the hole with your knife.
Step 2:
Take the Wye fitting, and clean both the top and bottom of the straight part with PVC cleaner. For further reference, let's refer to the wye as it will be in the completed project. It will end up looking like a 'Y" not like a . . . well, an upside down 'Y".
While you're at it, clean around the hole you drilled in the cap, then clean the inside ring of the cap. Also clean the 1 1/2" PVC plug. I used a threaded one because I had it.
Please don't drip PVC cleaner on your nice hardwood floor. You won't like the result. Your mate especially won't. Just trust me on this one.
Step 3:
Glue the wye to the cap. I just spread a bit of PVC glue around the top ring of the wye and set over the hole in the cap. Hold the wye in place for a bit. Once the glue dries a bit you can move on.
Put a big glop of glue around the threads on the threaded adapter. then put the whole thing in the bottom of the wye. Add another glop of glue the whole way around the edge to make sure you get a good seal. Set the whole thing aside. Again, don't get PVC glue on your floor. Please don't. Unless you're building this in the garage, barn, basement, or shed. Then a little glue adds some 'character.'
Step 4:
Put the other cap on the end of the pipe. No glue, no cleaner, just stick it on there. Make sure you can take it off again, because it will make filling the feeder much easier.
Mark a line the whole way around the pipe where the cap ends. This is a reference line, so it doesn't need to be permanent. Then take off the cap.
Take your piece of paper (string) and wrap it around the pipe. Mark where the end meets back up with the paper. Take the paper off the pipe and fold the end to the mark you just made. Now you have an exact measurement for half way around the pipe!
Drill one small hole 1/4" or so below the line you made on the pipe. Take the measurement paper and drill the hole on the other side of the pipe. Install the eye bolts, or just run your string through the holes and tie a knot on the inside.
Step 5:
Clean the bottom edge of the pipe with pvc cleaner, then glue the pipe to the bottom cap. Line up the eye bolts the way you want. My eyebolts ended up perpendicular with the wye. Depending on how you're going to hang your feeder, you may want your eyebolts to be in line with the wye.
Step 6:
Go have lunch. Or a tall, cold, frosty adult beverage. Or just sit and watch the glue dry, if that's your kinda thing. In half an hour or so, all the glue will be dry. Give the whole feeder a rinse, then let dry. Fill with food and install!
Of course I didn't take pictures while I built the feeder. But I do have one pic where you can see the one for oyster shell. The feeder is just a bigger pipe on the same fitting.