Scotters coop project

scotter

Chirping
6 Years
May 11, 2013
118
13
93
S.W. Missouri
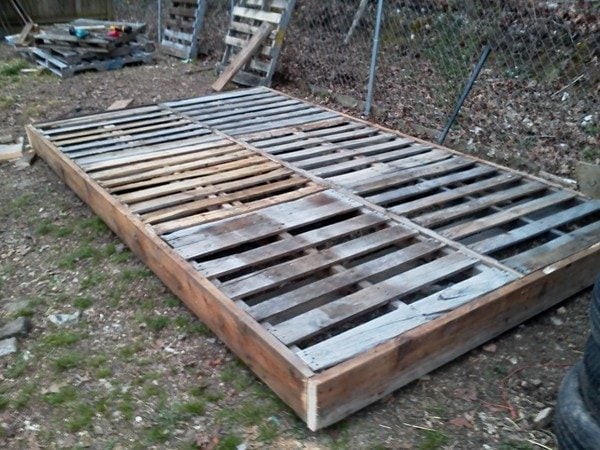
This is my first year raising chickens and I have an ongoing project with the coop. I started with scrap lumber and pallets. I framed the floor using 2x8 stringers between the pallets


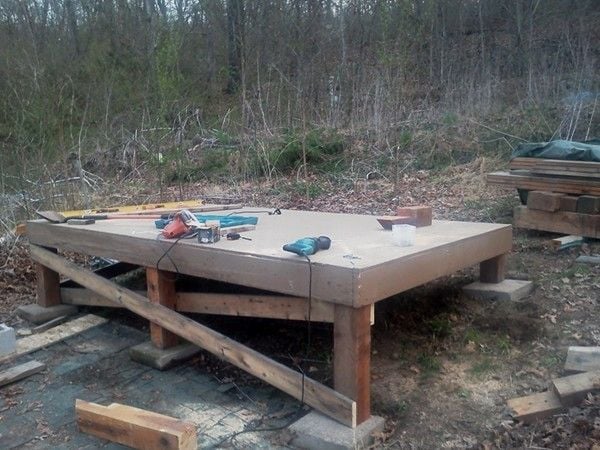
Then I sheeted it and moved it to its permanent location on a hillside with large posts and footings.


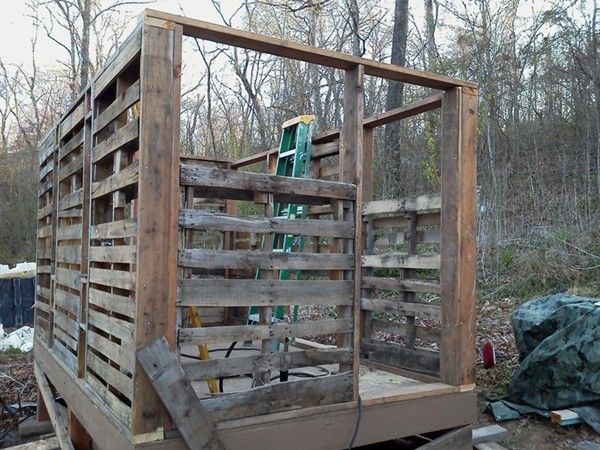
Wall framing was done similar to the floor using pallets and 2x6 lumber. I spaced the pallets in such a way that on the long sides I would have two tall narrow windows for light. the short sides have windows for light and ventilation.


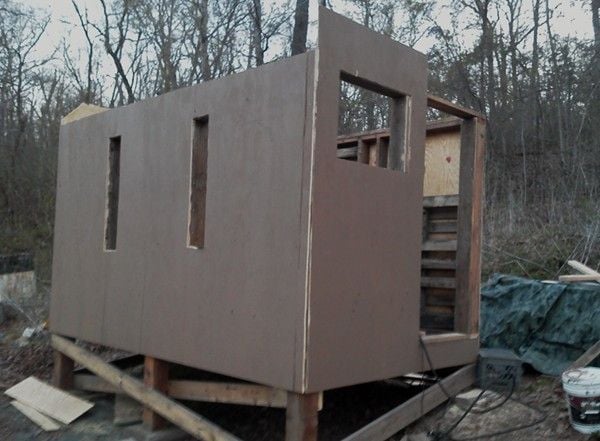
Before I had the wall framing completed I sheeted the whole coop with 3/8 cdx ply because I had a friend available to help.


I had to buy some new 2x4's for the roof framing because I couldn't locate any decent salvage material for the rafters.


Another view of the roof framing


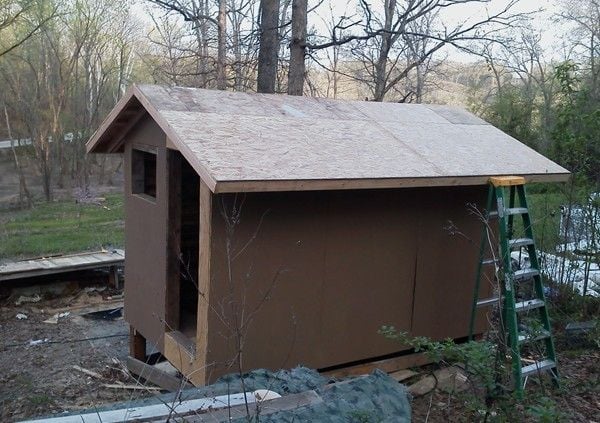
And finally sheeted.
 
At this point I installed the skinny windows which were made by cutting sections from an old plastic shipping tote (275 gallon tank). - built a door - screened the end windows - and moved the birds in. They were very happy to be out of the brooder area I had set up in the shed. I found and old curtain rod for them to roost on and they took to it quickly, except for the Faverolles.


Then I got to work on the watering system. I started by mounting tanks to the rafters with pieces from a broken tow strap. The tanks were acquired from a commercial laundry facility.


The water lines run down the wall to manifolds equipped with watering nipples. The chickens were pecking at them before I could even fill the tanks. NO MORE POOPY WATER !


Unfortunately I didn't realize that the chickens would now make a water mess, they were only catching about half of the water they released from the nipples and soon had the straw wet. I took down the piping and did a little bit of a remodel. I started by adding some cdx plywood to the walls (eventually I will cover them all). I then moved the manifolds into one corner and installed a gutter system. I am only using one tank inside now and plan in installing a watering manifold outside the coop using the second tank. I also replaced the straw with pine shavings. Much better.


I found some large worn out ATV tires for free at the tire store and mounted them to the wall for use as nest boxes and I am on the hunt for some more.


First day out to forage. Happy day for me and them. They feed themselves entirely on greens and bugs now. I still have a lot of work to do before it's finished but little by little it's getting done and the birds seem happy. The roofing membrane came from a commercial building hit by a tornado a while back.
 
Last edited:
Nice! Creative!

Did you heat bend the curved pipes, doesn't look like anything standard?

Did valving down the outfeed of the tanks take care of too much head pressure on the nipples?

Looks like you'll need a bit more roost length, about 8-12" per birds.
Flat stock 2"x2" or 2"x4" (wide side horizontal) works better than round and you'll want it higher than the nests of they'll roost in the nests and fill them with poop.

Tire nests are hilarious!! Great idea if they'll use them. 12" x 12" is usually suggested so they can get in there and turn around a bit.
 
Last edited:
The tires are 12 inches wide with a 26 inch diameter. I cut the bead and most of the sidewall off one side so they would screw flat against the wall. there's quite a bit of room in there. They are not laying yet so time will tell. If they don't like them It will only take a few minutes to remove them.

I do have two curtain rods in there now for them to roost on but they all cram onto the one (up by the ceiling). I plan on replacing them with 2x3's once I finish paneling the interior.

The pipes were heated in the oven and formed. I figured they wouldn't try to roost on about a 60 degree angle. I do get a little bit of a drip from a couple of the nipples occasionally but I haven't provided for any sort of pressure regulation they seem to be holding pretty good with about 5 foot of head pressure.

I hope the chickens will use the tires because it only takes about 5 min to cut and install one, plus they were free.

 
Thanks for the compliments, I can't hardly wait to get it done so I can start on a second coop. First I have to expand the housing for my overpopulated rabbit situation.
bun.gif
 
Fancy! I love the tires.

We where just rethinking our watering and are going to go with your gravity fed watering system for our run.
 
Go for it. I figured not only do I have clean water but a 2-3 week supply of it. My tanks are bleach or detergent tanks from a commercial laundry from a resort hotel. The bungs were already threaded for a PVC adapter. Most plastic barrel plugs are. Mounting them horizontal gives you a nice sediment trap. I have half inch PVC on the supply side and 1" on the fill. Where the pipe comes down the wall I installed an extension going down This functions as a secondary sediment trap and I plan on putting a drain valve where the cap is. The manifold has 1/2" male threaded ends for the nipples. The nipples are mounted in 1/2" caps that can be removed for cleaning / replacement if needed. I used aquarium sealant to seal the nipple to the caps and the adapter fittings / plugs on the tank. I tried to use teflon tape and it leaked, use the sealant. The whole system both tanks and manifolds with nipples ordered on ebay cost about $40 (not including the gutters I later built


You can see the nipples mounted into the caps below
 
Last edited:

New posts New threads Active threads

Back
Top Bottom