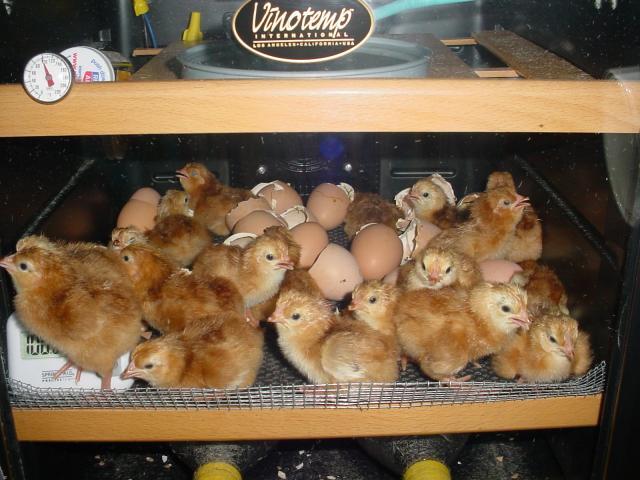
I am now in my third go with this homemade thingie of mine, and FINALLY I feel like I have ironed out a lot of wrinkles and got it working really reliably and "professionally". (Well, we'll see what my hatch rate is, two weeks from now <g>)
I would like to pass on some of the lessons I've learned the hard way, for others to learn the EASY way i.e. by reading about rather than doing

Some of my problems are undoubtedly due to my incubator being in a cool (55 F) basement, because its temperature is very stable year-round as opposed to any other part of the house; but I think most or all of the following would be equally useful for anyone.
For trouble getting temperature steady/stable:
--Experiment with different bulb wattages.
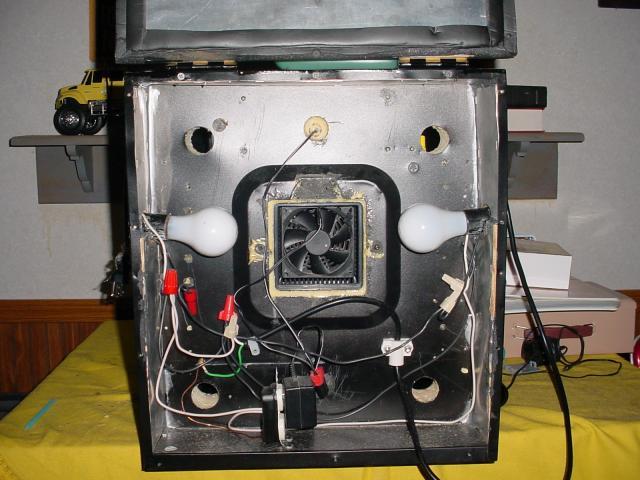
--Try a low-wattage bulb that is constantly on, with another low-wattage bulb in the thermostatically-controlled socket. I am currently using a 25w always on, and a 40w in the thermostatically-controlled position; but it will depend on your incubator size, insulation, and room temp.- for a warmer room, you would use even smaller-wattage bulbs.
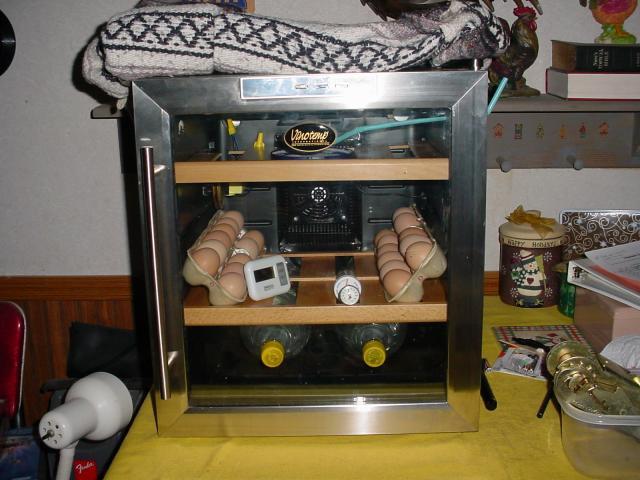
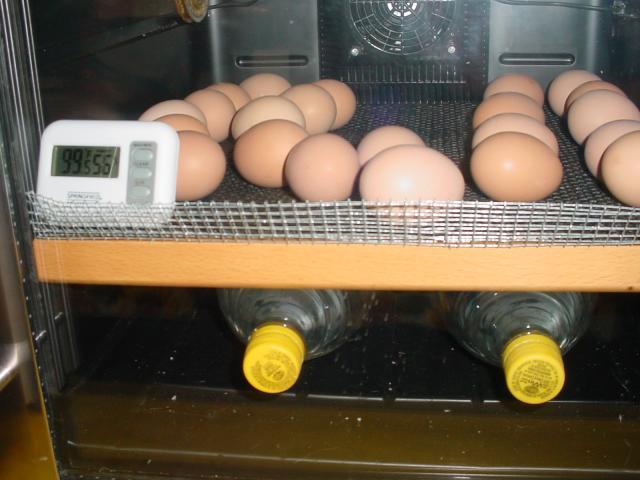
--Try adding thermal mass (I believe it was gopherboy I got this idea from?) - I use three marmalade jars full of warm water, plus one of those little blue 'cool packs' you use in packed lunches because it's thin enough to fit an awkward corner. Plus of course my dish of water for humidity.
--I had problems at one point with a *large* thermal mass (quart mason jar of water) right next to the main lightbulb -- it was causing temps to fluctuate too much. So it is possible to overdo.
--Insulate the bejeebers out of the 'bator. This also lets you use lower-wattage bulbs in it. Mine is has inch-thick styrofoam and several layers of bubblewrap, but my real breakthrough in getting it to Work Real GOod was when I broke down and tied sheets of 4" thick upholstery foam all around it with another one lying on the lid. It looks HORRIBLE - I have to get some pics so y'all can laugh at it
- but combined with all of the above, it now stays +/- 0.2 F of target temperature, woo hoo1; when I open it to manually turn the eggs, it drops to 97-98 F but bounces back to correct temperature within 10 minutes.
For trouble adjusting humidity:
--After trying a whole lotta arrangements, what works most reliably for me is a small casserole dish (the kind you would make 1 portion of mac n cheese in) filled with water with a rag or paper towel sticking out of the middle like a mountain 'island'. If you want more humidity, pull the rag to stand up higher out of the water (can prop with bamboo skewers or whatever); if you want less humidity, poke it further underwater.
I would LOVE to hear other peoples' best tips for improving the performance of a homebuilt 'bator. Because mine could still use work -- I am still not happy with my ventilation situation -- and besides I want to rebuild it totally in a new housing and can use all the good ideas I can find
Pat
I would like to pass on some of the lessons I've learned the hard way, for others to learn the EASY way i.e. by reading about rather than doing
Some of my problems are undoubtedly due to my incubator being in a cool (55 F) basement, because its temperature is very stable year-round as opposed to any other part of the house; but I think most or all of the following would be equally useful for anyone.
For trouble getting temperature steady/stable:
--Experiment with different bulb wattages.
--Try a low-wattage bulb that is constantly on, with another low-wattage bulb in the thermostatically-controlled socket. I am currently using a 25w always on, and a 40w in the thermostatically-controlled position; but it will depend on your incubator size, insulation, and room temp.- for a warmer room, you would use even smaller-wattage bulbs.
--Try adding thermal mass (I believe it was gopherboy I got this idea from?) - I use three marmalade jars full of warm water, plus one of those little blue 'cool packs' you use in packed lunches because it's thin enough to fit an awkward corner. Plus of course my dish of water for humidity.
--I had problems at one point with a *large* thermal mass (quart mason jar of water) right next to the main lightbulb -- it was causing temps to fluctuate too much. So it is possible to overdo.
--Insulate the bejeebers out of the 'bator. This also lets you use lower-wattage bulbs in it. Mine is has inch-thick styrofoam and several layers of bubblewrap, but my real breakthrough in getting it to Work Real GOod was when I broke down and tied sheets of 4" thick upholstery foam all around it with another one lying on the lid. It looks HORRIBLE - I have to get some pics so y'all can laugh at it
For trouble adjusting humidity:
--After trying a whole lotta arrangements, what works most reliably for me is a small casserole dish (the kind you would make 1 portion of mac n cheese in) filled with water with a rag or paper towel sticking out of the middle like a mountain 'island'. If you want more humidity, pull the rag to stand up higher out of the water (can prop with bamboo skewers or whatever); if you want less humidity, poke it further underwater.
I would LOVE to hear other peoples' best tips for improving the performance of a homebuilt 'bator. Because mine could still use work -- I am still not happy with my ventilation situation -- and besides I want to rebuild it totally in a new housing and can use all the good ideas I can find
Pat